YSI_Prog_E - 第157页
3-34 3 Step screen 4. Batch replacement and search 4.1 Batch replacement T his function is used to set conditions for steps being replaced, and batch replace item v alues for applicable steps with specified values. c …
3-33
3
Step screen
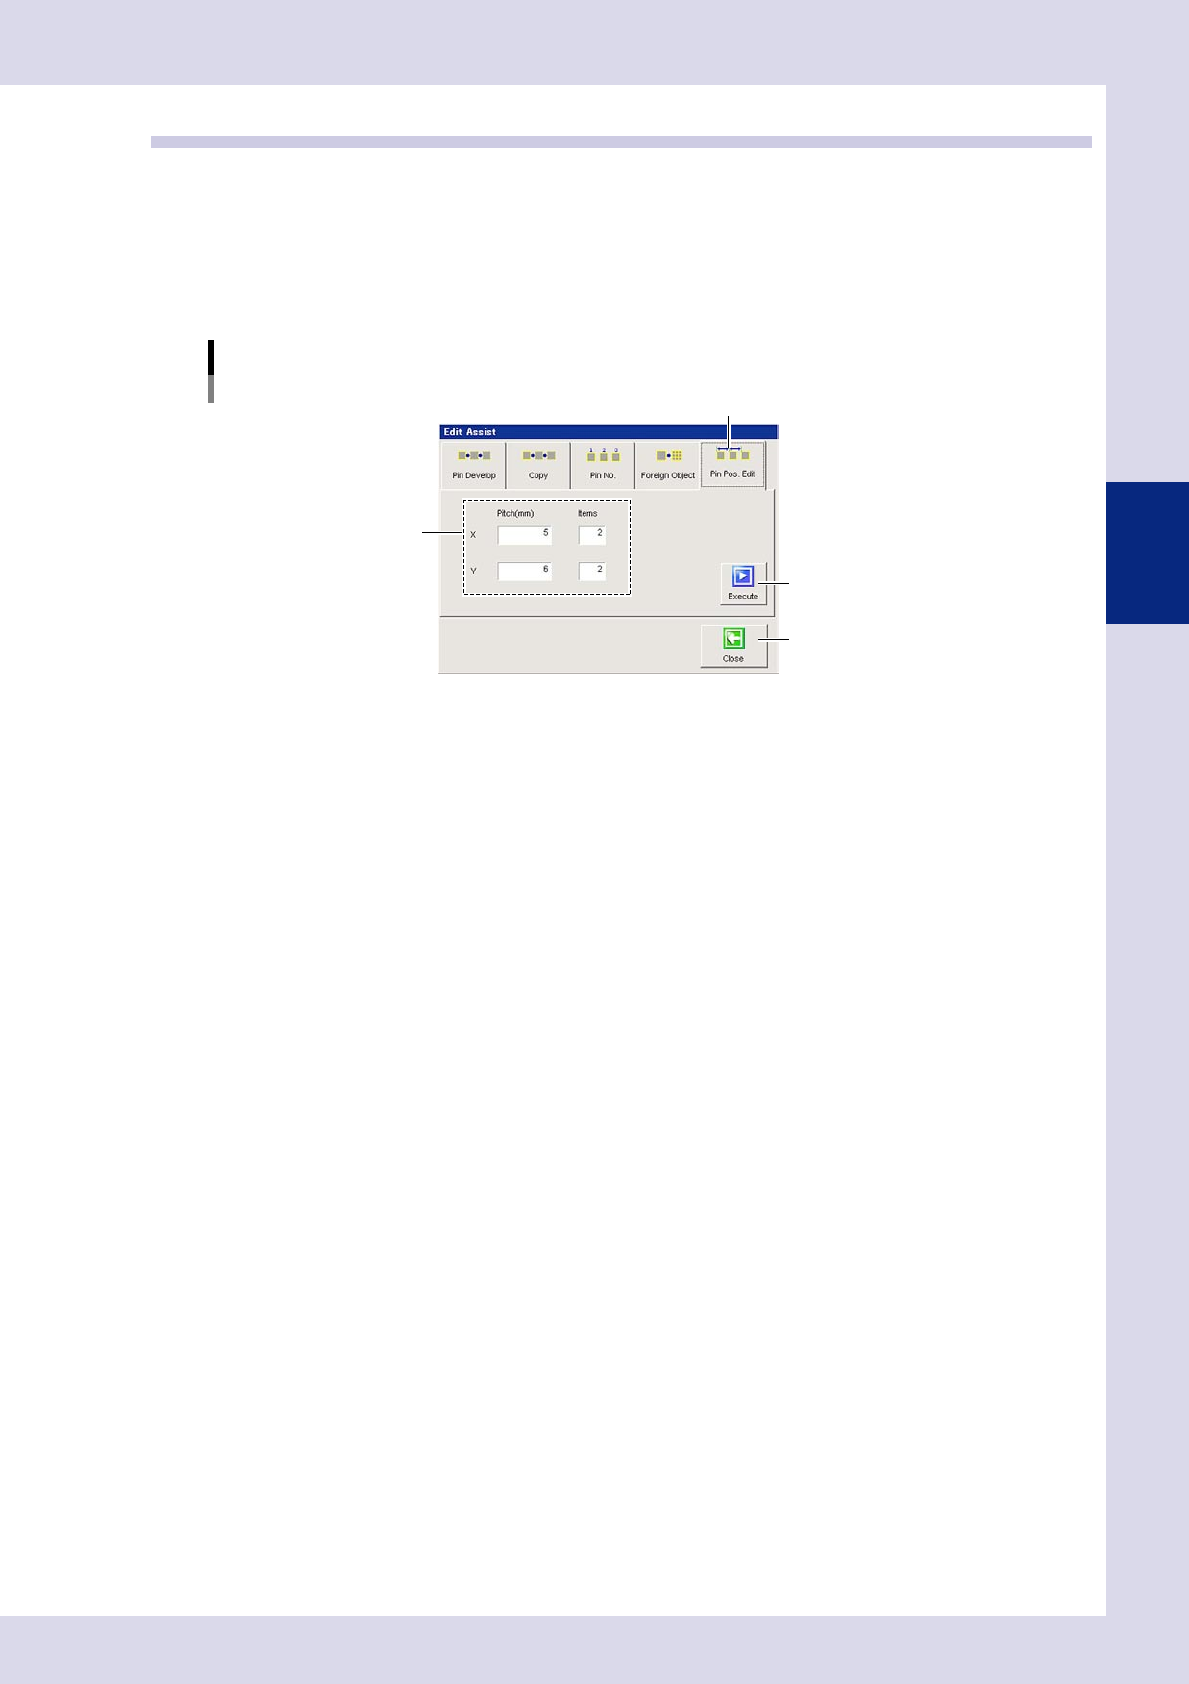
3.5 Pin position editing
This function is used when aligning multiple steps on the same line and with same pitch.
1
Select a step.
Select multiple steps to be aligned by dragging the mouse.
2
Press the [Edit Assist] button and open the "Pin Pos.Edit" tab.
A screen used to set alignment conditions appears.
Editing assistance
Pin position editing
Step 4
[Execute] button
[Close] button
"Pin Pos.Edit" tab
24338-P6-00
3
Enter the pitch.
If aligning in the X direction (horizontal)
Enter the pitch in the X pitch field. By entering a positive value, steps are aligned to the right from the
first step. By entering a negative value, steps are aligned to the left from the last step.
If aligning in the Y direction (vertical)
Enter the pitch in the Y pitch field. By entering a positive value, steps are aligned in the upward direction
from the last step. By entering a negative value, steps are aligned in the downward direction from the
first step.
4
Press the [Execute] button.
Press the [Yes] button at the confirmation dialog box that appears after checking the content.
The step selected at Step 1 is aligned based on the pitch and direction selected at Step 4.
5
Press the [Close] button to end deployment.
3-34
3
Step screen
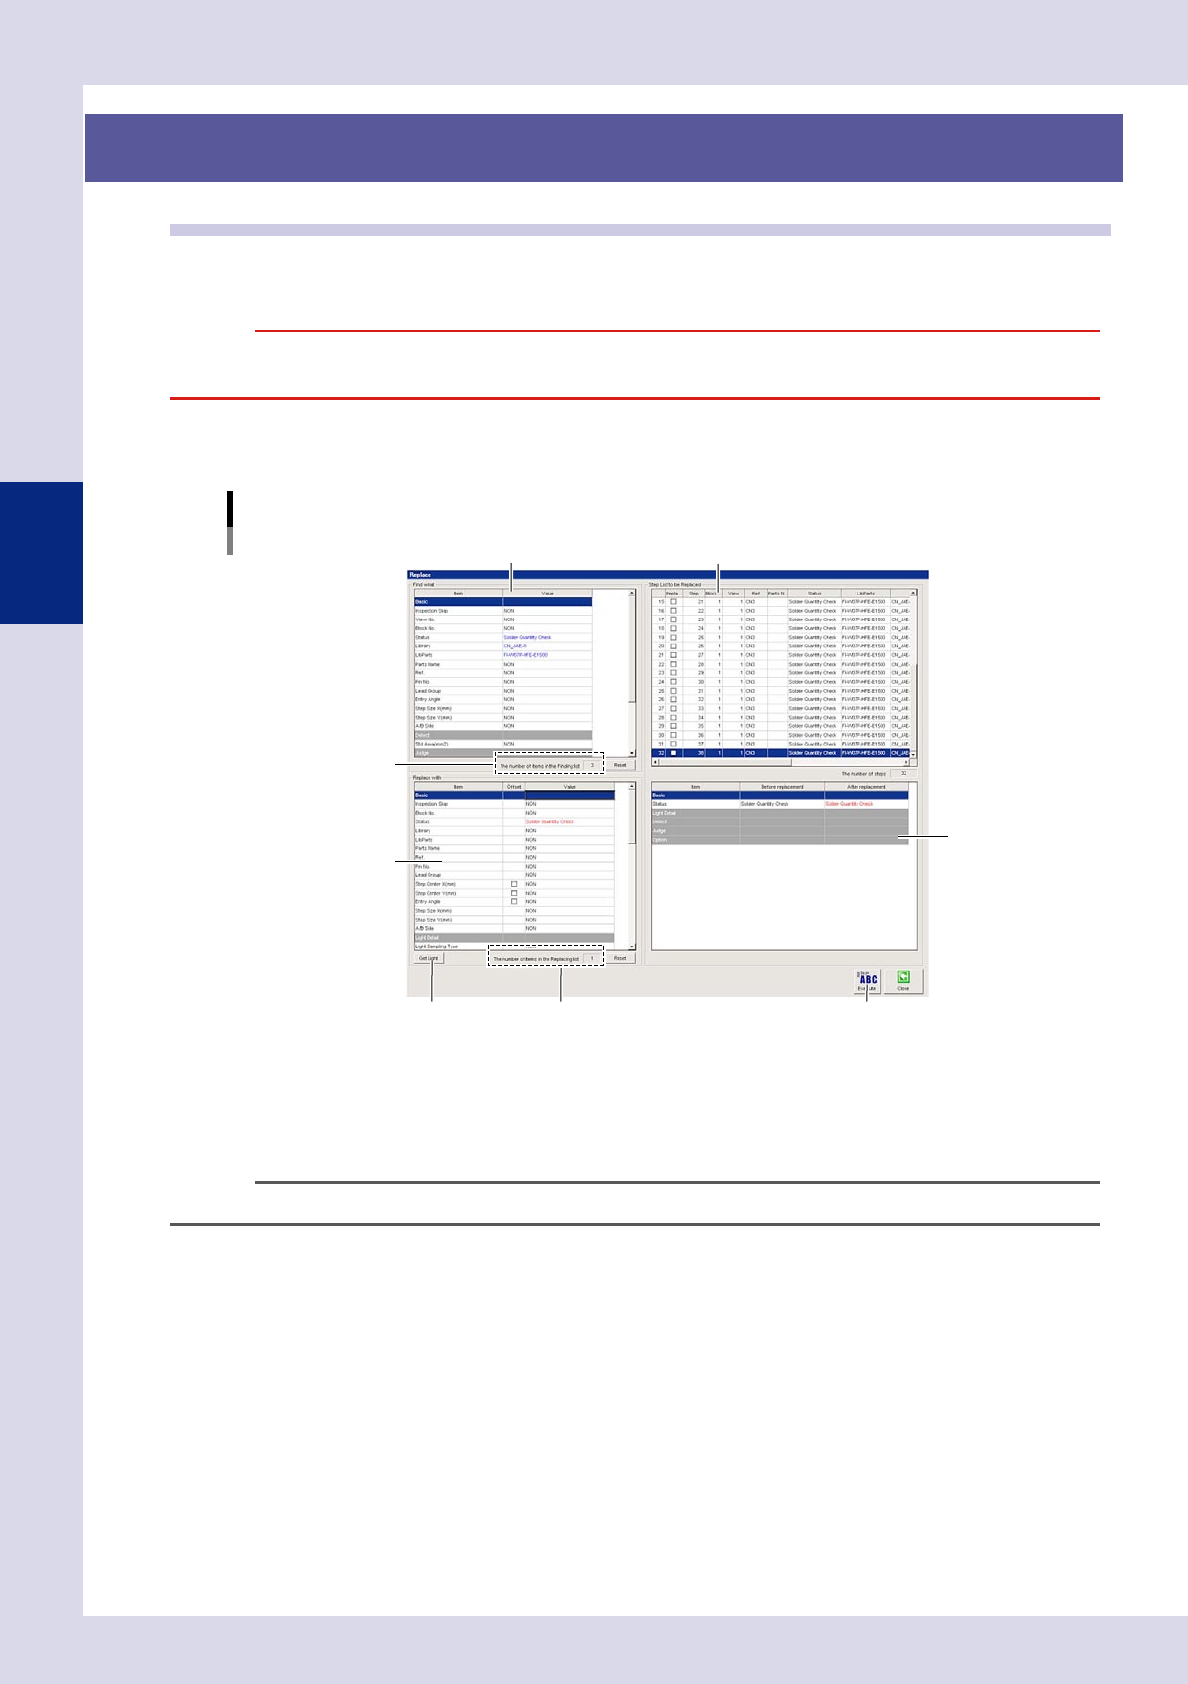
4. Batch replacement and search
4.1 Batch replacement
This function is used to set conditions for steps being replaced, and batch replace item values for applicable
steps with specified values.
c
specifying conditions and replacement settings.
1
Press the [Replace] button in the "Utility" tab.
A "Replace" screen appears.
"Replace" screen
Search items
Replacement items
Number of search items
[Get Light] button Number of replacement items
List of steps subject to replacement
[Execute] button
Replacement details list
24339-P6-00
2
Specify "Find what".
Enter conditions for view ranges and inspection statuses, etc. to be changed in the "Find what" screen in
the upper left. Select "NON" in the value fields for items that are not to be changed. Ensure that the
number displayed in "The number of items in the Finding list" matches the number of items to be found.
TIP
The content of "Find what" will differ depending on the inspection status.
3
Check the "Step List to be Replaced".
Steps to be replaced are displayed in the "Step List to be Replaced" in the upper right of the screen.
Ensure that the number displayed in "The number of steps" matches the number of items to be replaced.

3-35
3
Step screen
4
Specify "Replace with".
Enter the value following the change in the "Replace with" screen in the lower left. Select "NON" in the
value field for items that are not to be changed. If wishing to specify the selected step lighting settings
for "Replace with", press the [Get Light] button. Values are entered automatically.
Ensure that the number displayed in "The number of items in the Replacing list" matches the number of
items to be replaced.
TIP
Items displayed in the "Replace with" screen differ depending on the inspection status.
5
Check the replacement details list.
Items to be replaced are displayed in the replacement details list in the lower right of the screen. Check
whether the content set in "Before replacement" and "After replacement" is correct.
6
Press the [Execute] button.
Press the [Yes] button at the confirmation message that appears. To cancel, press the [No] button. Press
the [OK] button at the change complete message that appears.
7
Press the [Close] button to end deployment.