YSI_Prog_E - 第159页
3-36 3 Step screen 4.2 Search By pressing the [Searc h] button at the "Utility" tab, a "Search" screen appears. T his screen is used to searc h for the next step matching the set sear ch conditions. &…

3-35
3
Step screen
4
Specify "Replace with".
Enter the value following the change in the "Replace with" screen in the lower left. Select "NON" in the
value field for items that are not to be changed. If wishing to specify the selected step lighting settings
for "Replace with", press the [Get Light] button. Values are entered automatically.
Ensure that the number displayed in "The number of items in the Replacing list" matches the number of
items to be replaced.
TIP
Items displayed in the "Replace with" screen differ depending on the inspection status.
5
Check the replacement details list.
Items to be replaced are displayed in the replacement details list in the lower right of the screen. Check
whether the content set in "Before replacement" and "After replacement" is correct.
6
Press the [Execute] button.
Press the [Yes] button at the confirmation message that appears. To cancel, press the [No] button. Press
the [OK] button at the change complete message that appears.
7
Press the [Close] button to end deployment.
3-36
3
Step screen
4.2 Search
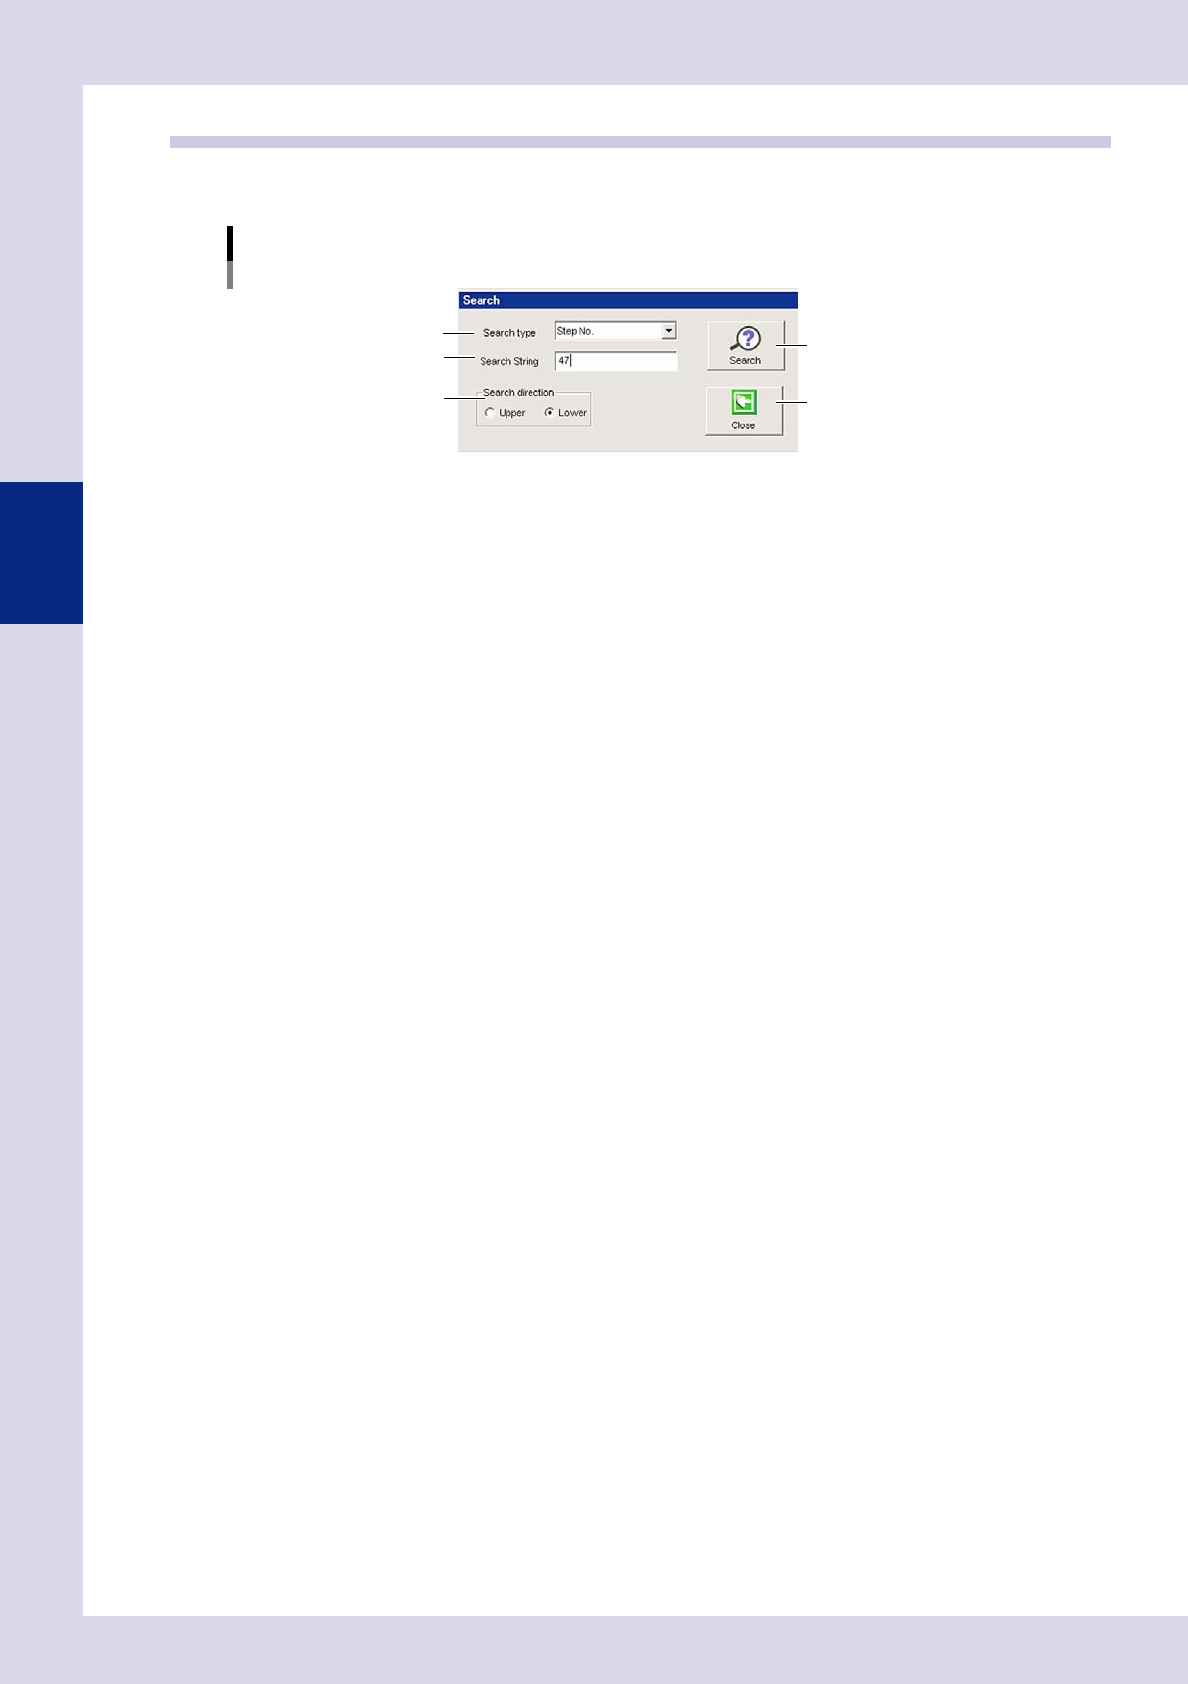
By pressing the [Search] button at the "Utility" tab, a "Search" screen appears. This screen is used to search for
the next step matching the set search conditions.
"Search" screen
Step 2
Step 3
Step 1
[Search] button
[Close] button
24340-P6-00
1
Specify the search type.
Select from "Step No.", "View step", "Ref. No.", "Status", "Parts Name", "Block No."
2
Specify the search character string.
Enter the search content details.
3
Select the search direction.
Select the direction with the radio buttons.
4
Press the [Search] button.
Each time this button is pressed, the next step matching the search conditions is displayed on the step
screen.
5
Press the [Close] button to end deployment.

Chapter 4
Inspection status
Contents
1. Inspection status 4-1
1.1 Parts Check 4-2
1.2 Electrode Check 4-5
1.3 Polarity Check 4-8
1.4 Character Recognition 4-11
1.5 Solder Quantity Check 4-14
1.6 Lead Check 4-16
1.7 Position Correction 4-19
2
1.9 Comparison 4-25
1.10 Shape Check 4-28
1.11 Code Recognition 4-31
3
6
9
2