YSI_Prog_E - 第37页
1-2 1 asic operation 1.2 Button area's functions T he functions that can be used by pressing each menu button in the "Button area" are described belo w . T he contents of the "Free area" c hang…
1-1
1
asic operation
1. Operation screen and various buttons
This section describes the basic configuration and operation of the inspection machine software screen.
Please read through this section before operating the machine.
1.1 Basic configuration of operation screen
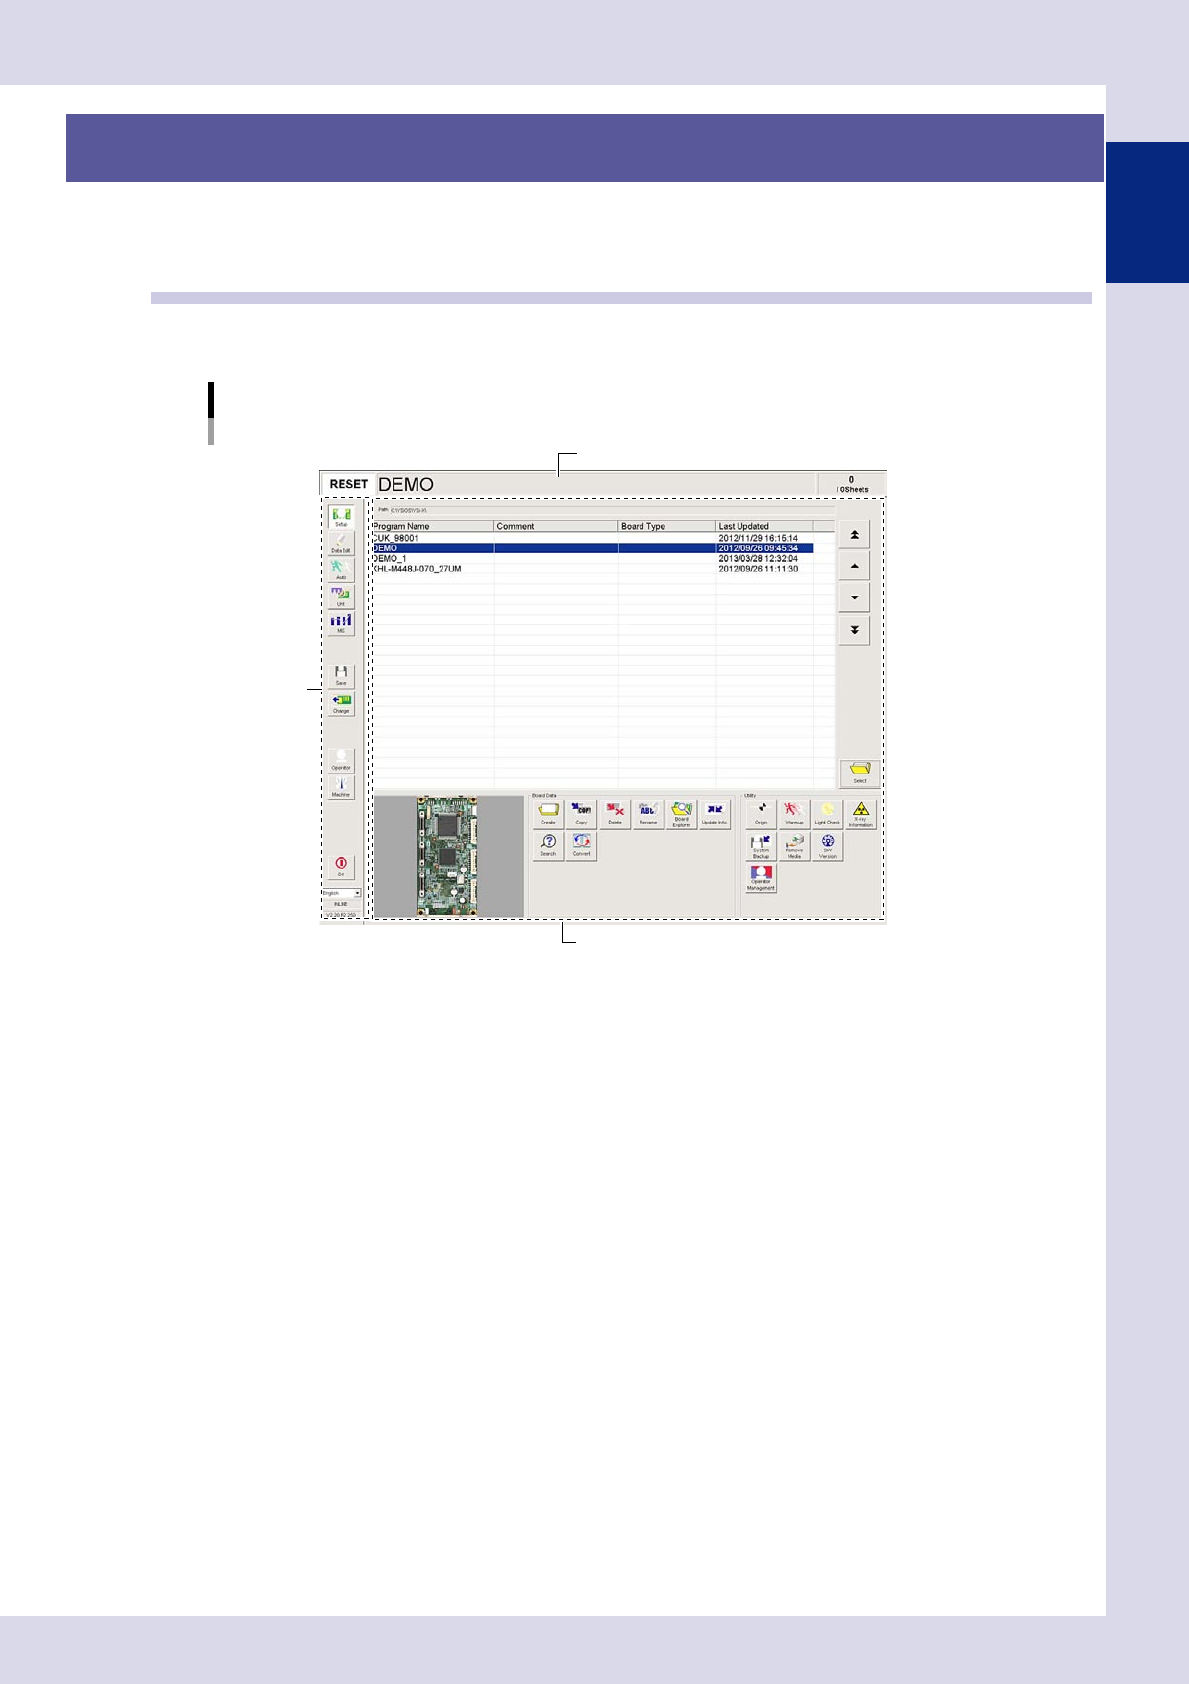
The YSi series operation screen can be divided into the "Status area", "Button area", and "Free area" as shown
below.
Operation screen basic configuration
Setup screen (YSi-X)
Button area
Status area
Free area
24101-P6-00
Status area
Displays the current machine status on the left end, the selected inspection program name in the middle, and the number of boards
that have been inspected on the right end
.
Button area
This area allows selecting the main menus for machine operation. The "Free area" screen will change according to the selected menu
button.
Free area
Displays the operation screen selected by a menu button in the "Button area".
1-2
1
asic operation
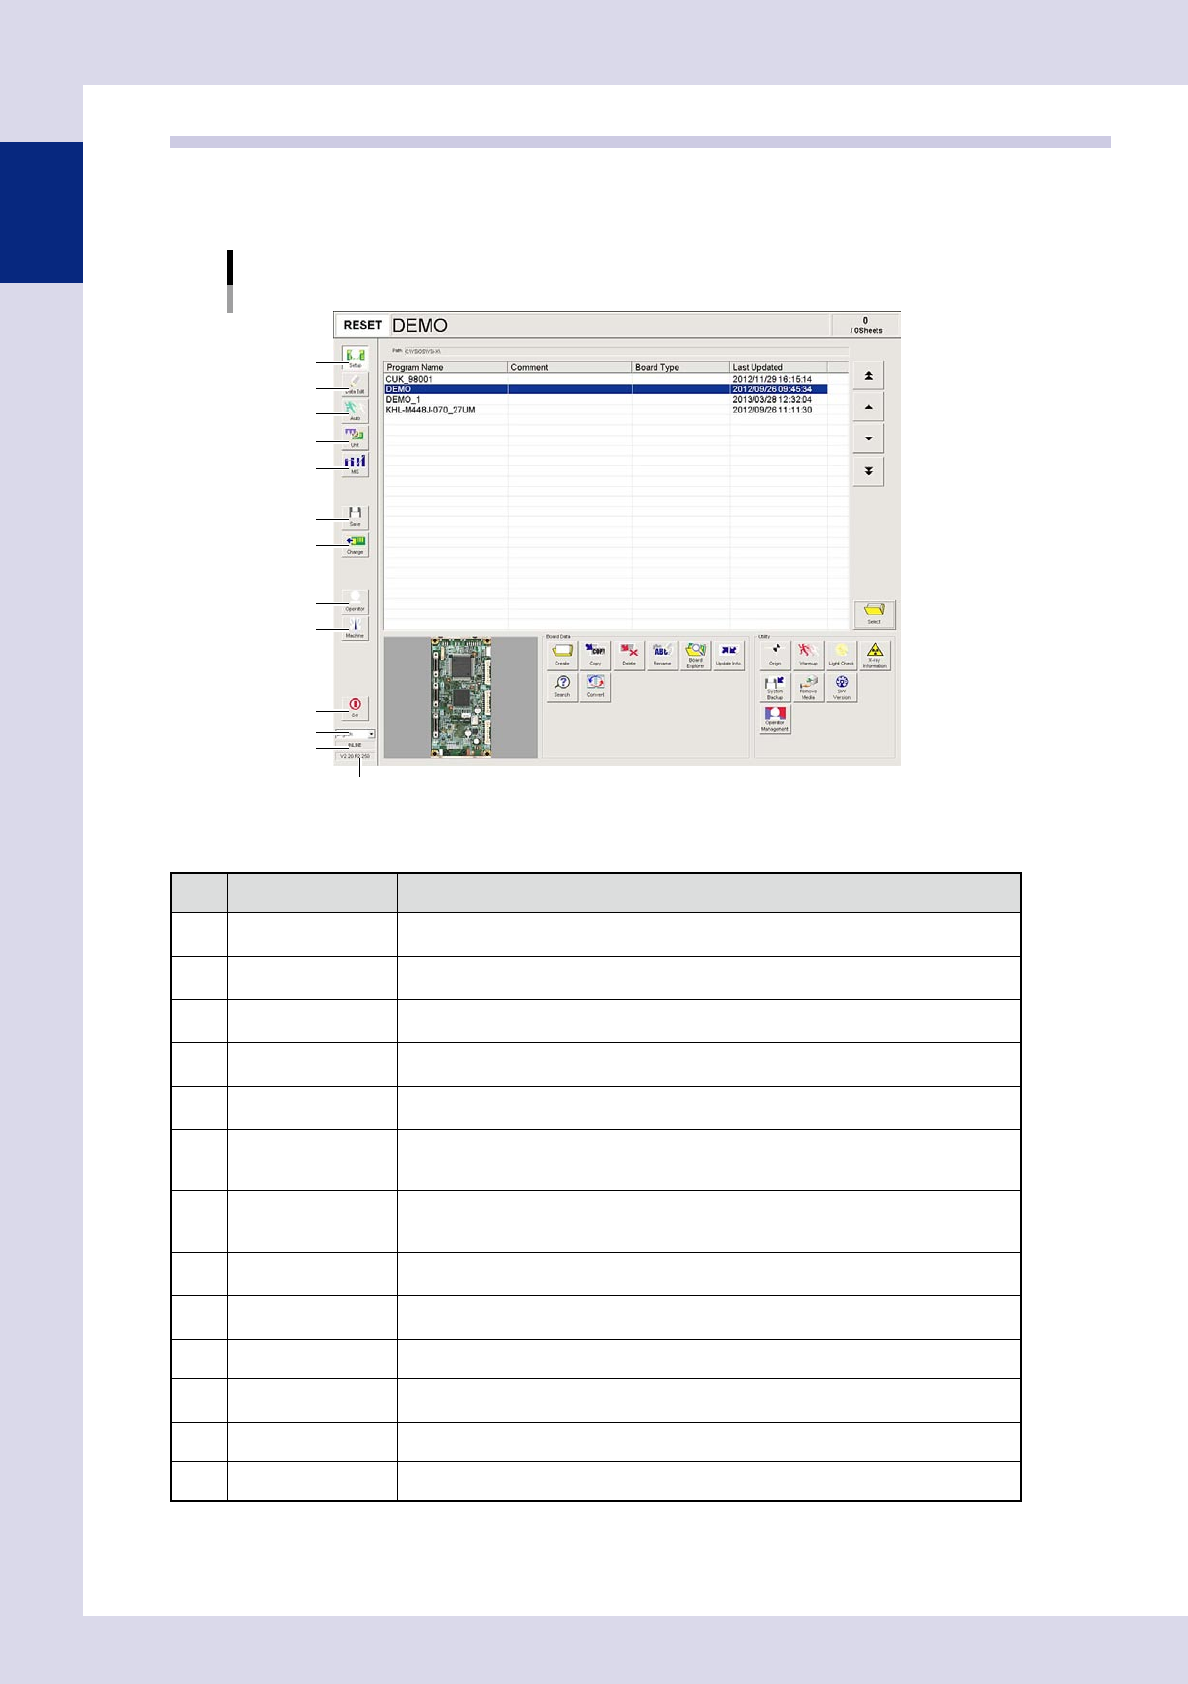
1.2 Button area's functions
The functions that can be used by pressing each menu button in the "Button area" are described below.
The contents of the "Free area" change according to the selected menu button. Each screen that opens by press-
ing a menu button is described on the following pages.
Button area
1
2
3
4
5
6
7
8
9
10
11
12
13
24102-P6-00
n
Button area
Button name Function
1 Setup
Opens the "Setup" screen used to manage programs. (See 1.3, "Setup screen", in this
chapter.)
2 Data Edit
Opens the "Data Edit" screen used to edit inspection data. (See 1.4, "Data Edit screen",
in this chapter.)
3 Auto
Opens the "Auto Inspection" screen used to perform auto board inspection.
(See 1.5, "Auto Inspection screen", in this chapter.)
4 Unit
Opens the "Unit (manual operation)" screen. (See 1.6, "Unit (manual operation) screen",
in this chapter.)
5 MIS
Displays errors that have occurred and operation history. (See 1.7, "History", in this
chapter.)
6 Save
Saves inspection programs.
After editing data on each screen, pressing this [Save] button opens a confirmation
dialog. Press the [OK] button in the confirmation dialog to save the edited data.
7 Change
Unloads the board in the inspection machine and loads another board into the machine.
Also press this button to load a board into the inspection machine where no board is
loaded.
8 Operator
Selects the operator who will be operating the inspection machine. (See Chapter 5, "1.
Operator management", in this manual.)
9 Machine
Opens a screen used to specify inspection machine settings. (See Chapter 5, "2.
Machine settings", in this manual.)
10 Off Exits the inspection machine software and Windows.
11 Language
Displays the current inspection machine application language. Select from the drop-down
list to change the language.
12 Operation method Displays INLINE/OFFLINE.
13 Version Displays the current inspection machine application version.
* This cannot be used with offline software YSi-OS (option).
1-3
1
asic operation
1.3 Setup screen
The "Setup" screen allows you to manage inspection programs and specify settings for all utilities. The items
and buttons displayed on the screen are described below.
"Setup" screen
YSi-X example
5
3
1
2
4
6
7 8 9 10
13
14
17 18
19
20
15
16
1211
24103-P6-00
Item/button name Function
1 Path Shows the path to the location where inspection programs are stored.
2 Program list Shows a list of inspection programs stored in the machine.
3 Program change
Changes the selected program in the list. Programs can also be selected by directly
clicking programs in the list.
4 Select
Loads the inspection program selected in the program list. Programs can also be loaded
by directly double-clicking programs in the list.
5 Create Press this button to create a new inspection program.
6 Copy Copies the inspection program selected in the program list.
7 Delete Deletes the inspection program selected in the program list.
8 Rename Renames the selected inspection program.
9 Board Explorer Imports or exports inspection programs.
10 Update Info. Re-creates the program list.
11 Search Searches for inspection programs.
12 Convert
Selects mount data (YGX) and converts it to an inspection program. (See Chapter 2,
"2.2 Data conversion", in this manual.)
13 Origin* Moves the inspection head, conveyor, and laser unit to their respective origin positions.
14 Warmup* Opens a dialog box for warming up the servo motor axes.
15 Light Check* Diagnoses the LED lighting intensity.
16 X-ray Information (YSi-X)* Performs an X-ray source status check and self test.
17 System Backup Backs up and restores machine settings.
18 Operator Management
Press this button to register and edit operators, and set passwords and operator levels,
etc. (See Chapter 5, "1. Operator management", in this manual.)
19 Remove Media Allows the connected media to be safely removed.
20 SW Version Displays the software version, running time, machine serial number, etc.
* This cannot be used with offline software YSi-OS (option).