YSI_Prog_E - 第59页
1-24 1 asic operation 1.7 Histor y T he inspection machine operating history can be displa yed. Error , operator , board, lot, and light chec k history can be displa yed. TIP History for each item is displayed in up to…
1-23
1
asic operation
n
YSi-12
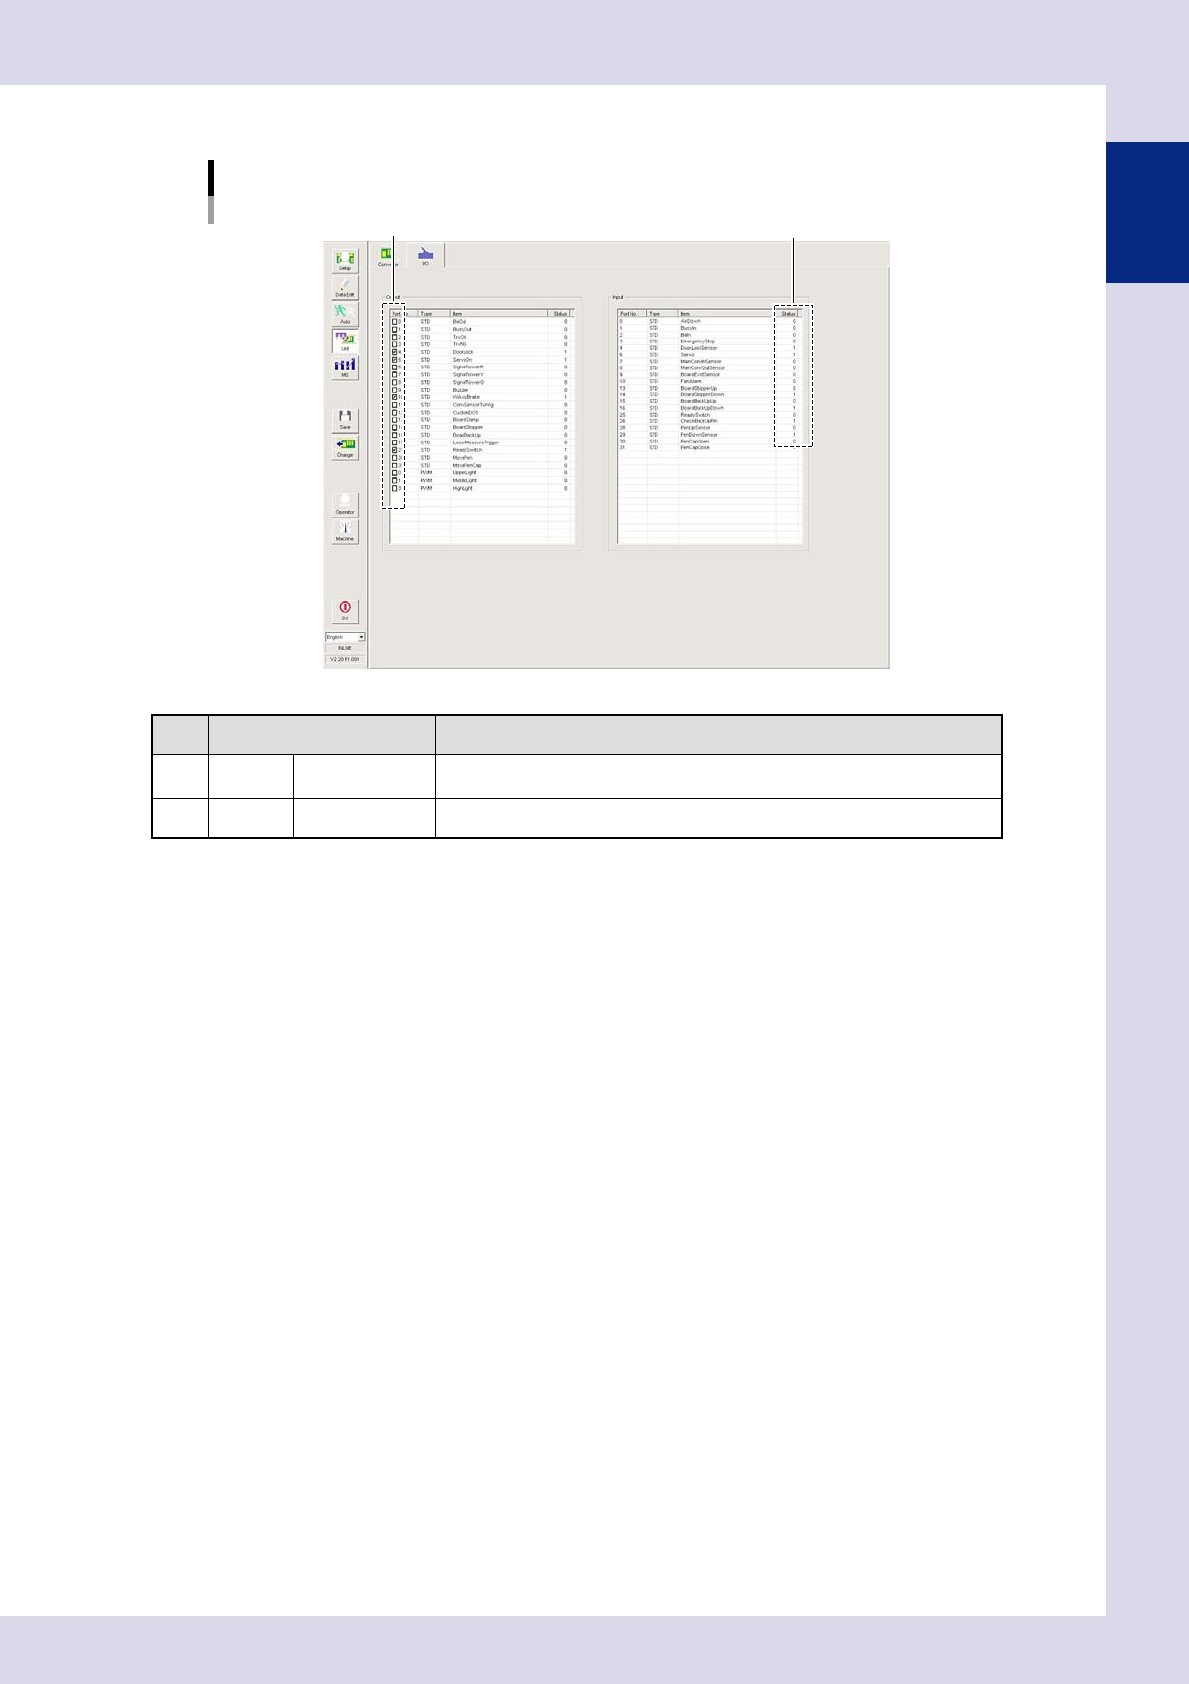
[Unit] – [I/O] screen
YSi-12
1 2
24123-P6-00
Item Function
1 Output Port No.
Clicking check boxes turns the output signal for the selected location ON and
OFF.
2 Input Status Displays the item ON and OFF status.
1-24
1
asic operation
1.7 History
The inspection machine operating history can be displayed. Error, operator, board, lot, and light check history
can be displayed.
TIP
History for each item is displayed in up to 1,000 lines in order of date, and is deleted starting with oldest line first.
Basic operation
History
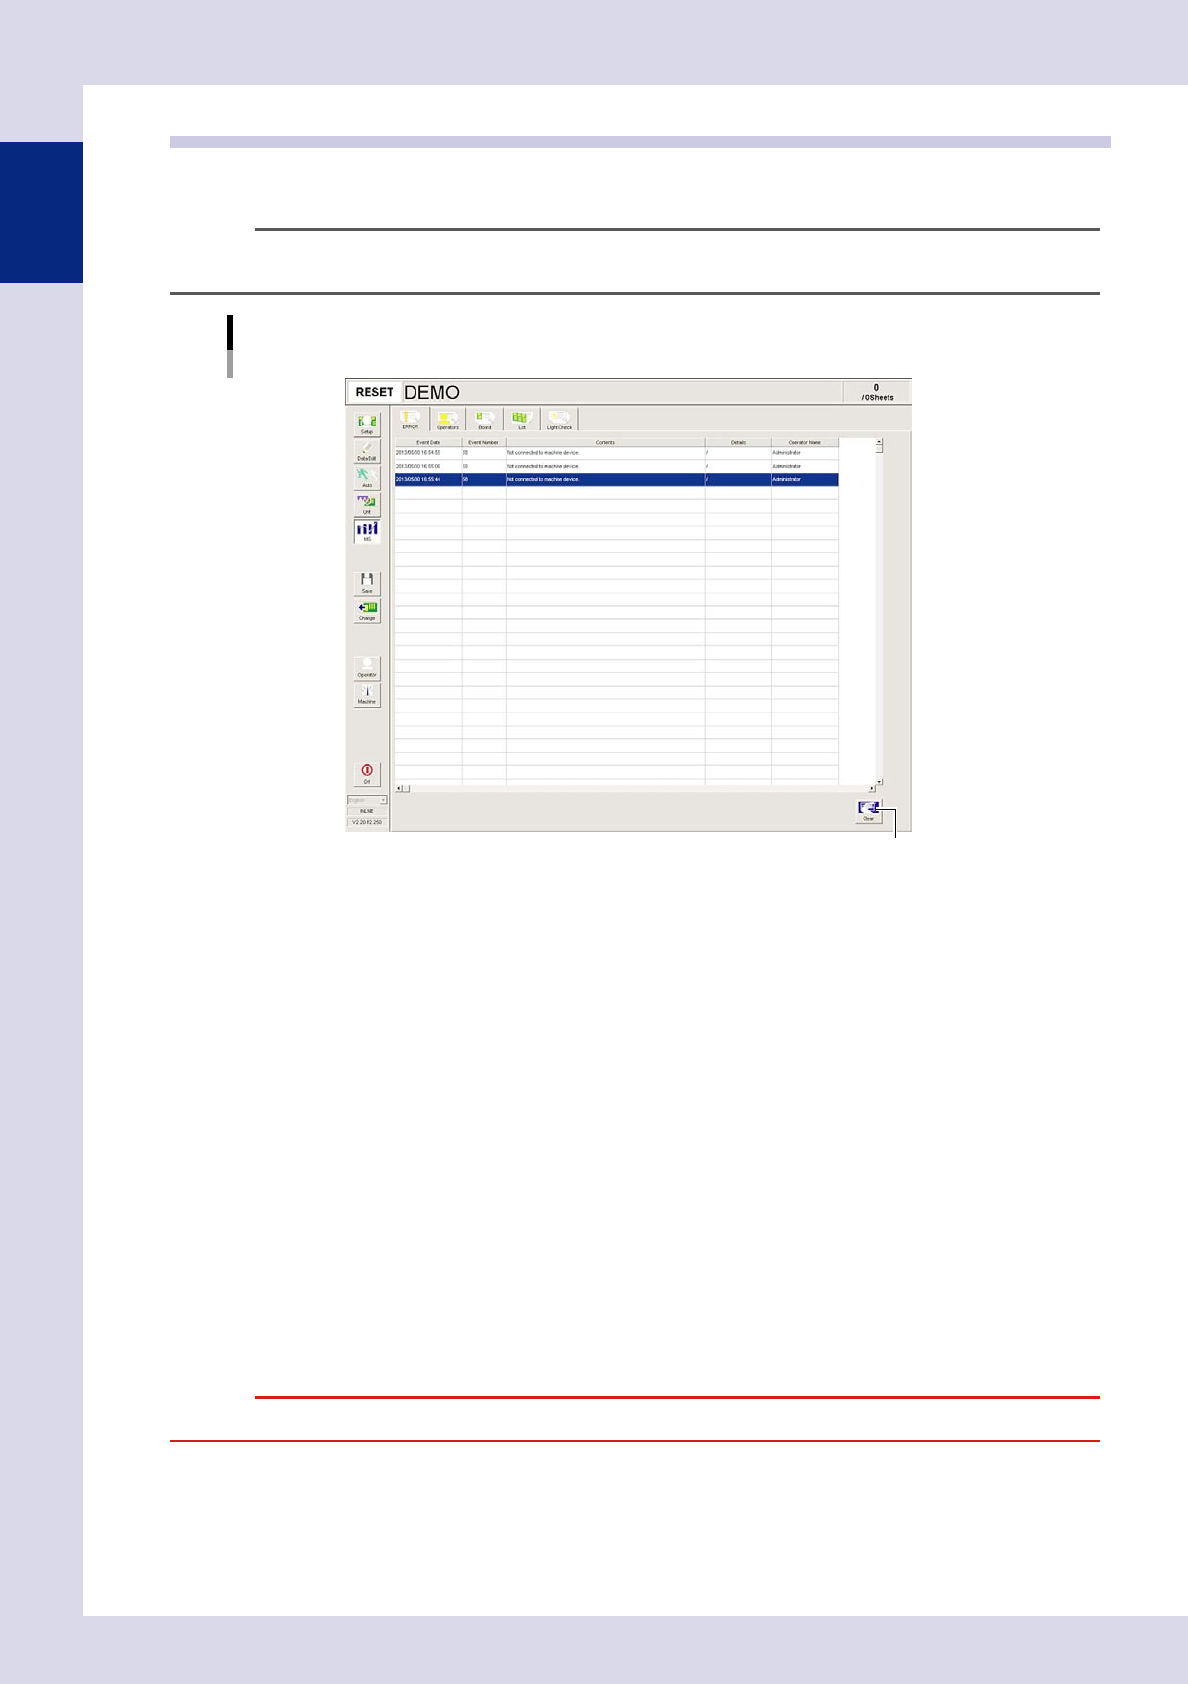
[Error] tab example
[Clear] button
24124-P6-00
Error
Displays errors that occurred at the machine or the task involved. Each error or task is displayed in a single line of data.
Operator
Displays the operator operation history. Each operation is displayed in a single line of data.
Board
Displays the inspection history. History for each board is displayed in a single line of data.
Program Log
Displays production results per lot, with one lot treaded as the interval from the loading of a program (board data) until
switching over to the next program.
One data row is used to record one lot. Up to 1000 rows can be displayed.
Light Check
The standard value is displayed in the first line, and the results when the lighting intensity check was performed are
displayed in the second line onward. Each lighting intensity check is displayed in a single line of data.
[Clear] button
Use this button to delete all log data currently displayed on the screen. Data cannot be deleted in rows.
When a confirmation dialog box appears, press the [Yes] button to delete the log data.
c
1-25
1
asic operation
1.8 Operator selection screen
Pressing the [Operators] tab opens an "ID WINDOW" screen.
The machine operator is selected at this screen.
TIP
Operation items differ depending on the selected operator level. For details on items displayed in the "ID WINDOW"
screen, refer to Chapter 5, "1. Operator management", in this manual.
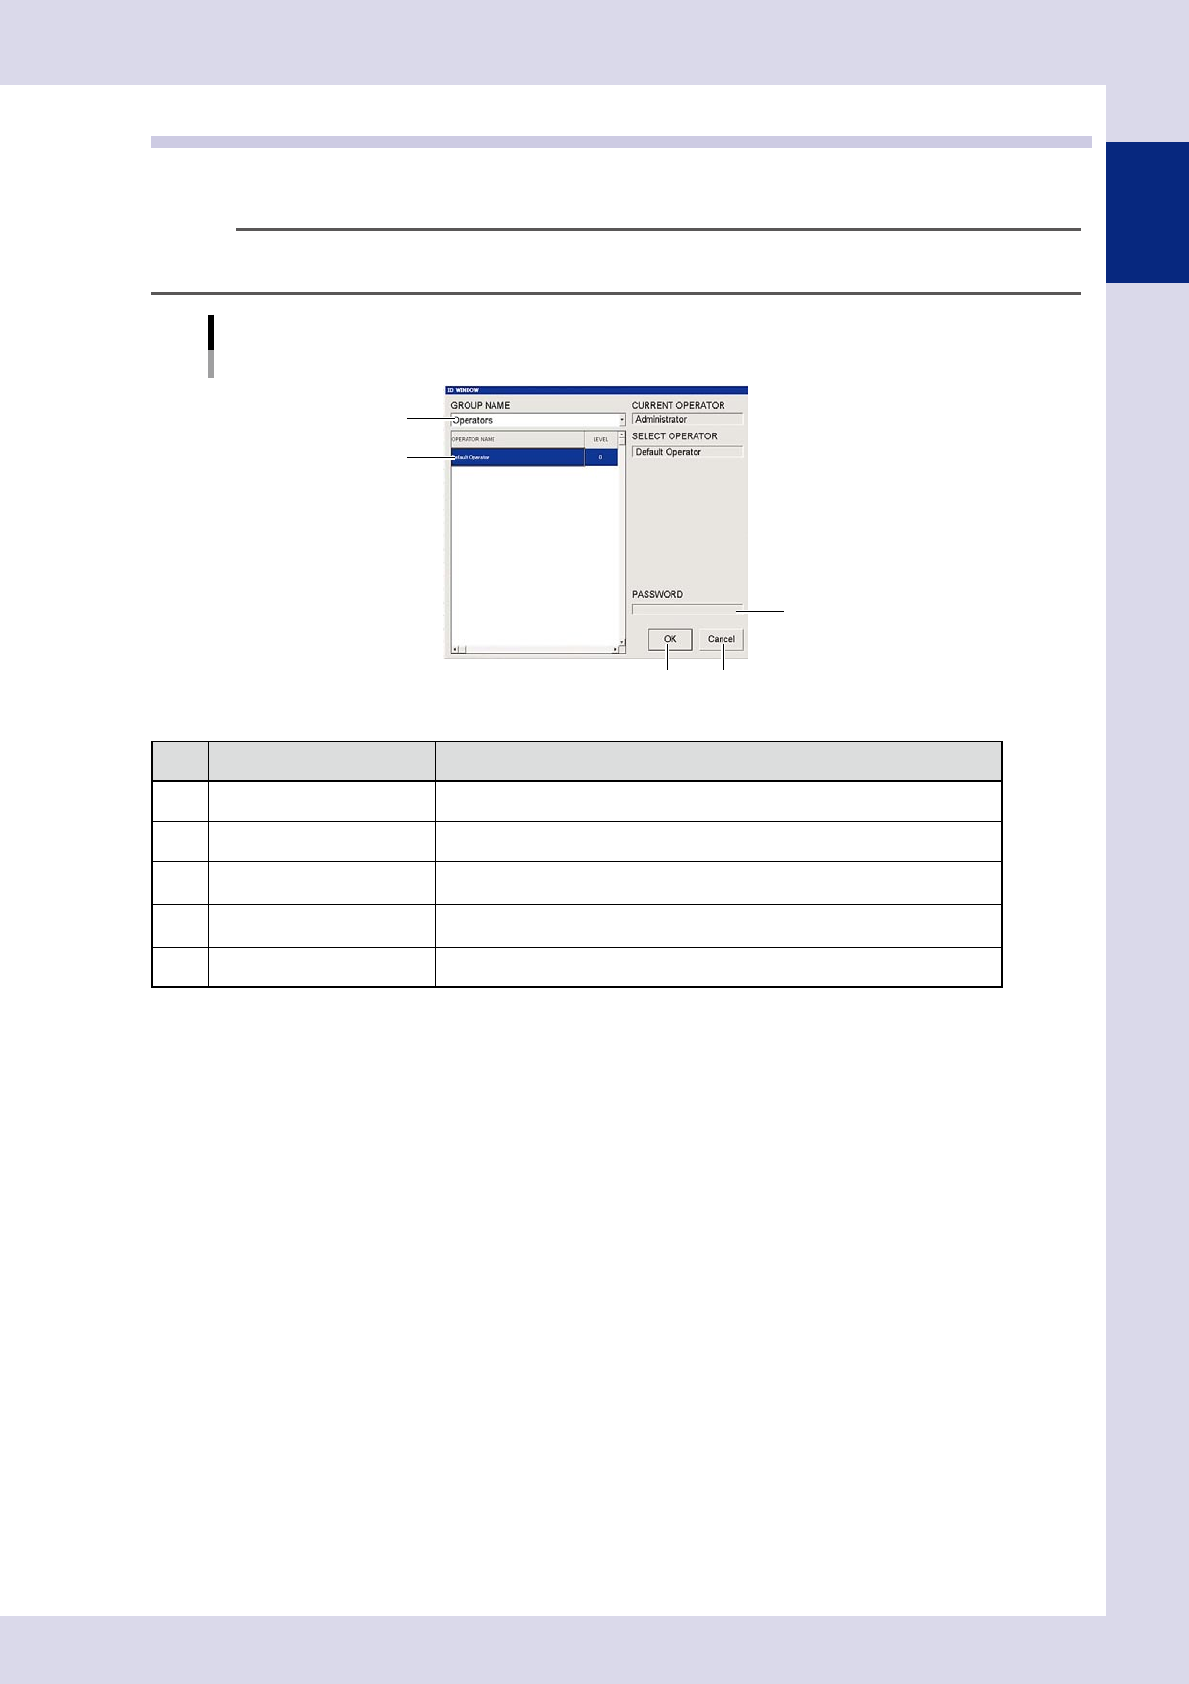
[Operator] – [ID WINDOW] screen
1
3
4 5
2
24125-P6-00
Item/button name Description
1 GROUP NAME Selects the group name for operators performing operation.
2 OPERATOR NAME Selects the name of the operator performing operation.
3 PASSWORD
Used to enter the password if one is specified for the operator performing
operation. Press the [OK] button if no password has been specified.
4 OK
The operation screen appears if the password is correct, allowing inspection
machine operation.
5 Cancel Cancels operation.