YSI_Prog_E - 第63页
1-28 1 asic operation 2.2 Star ting upside down automatic inspection (YSi-S) T he upside down automatic inspection function inv olves inspecting the upper and lower surfaces of a single board, and then automatically in…
1-27
1
asic operation
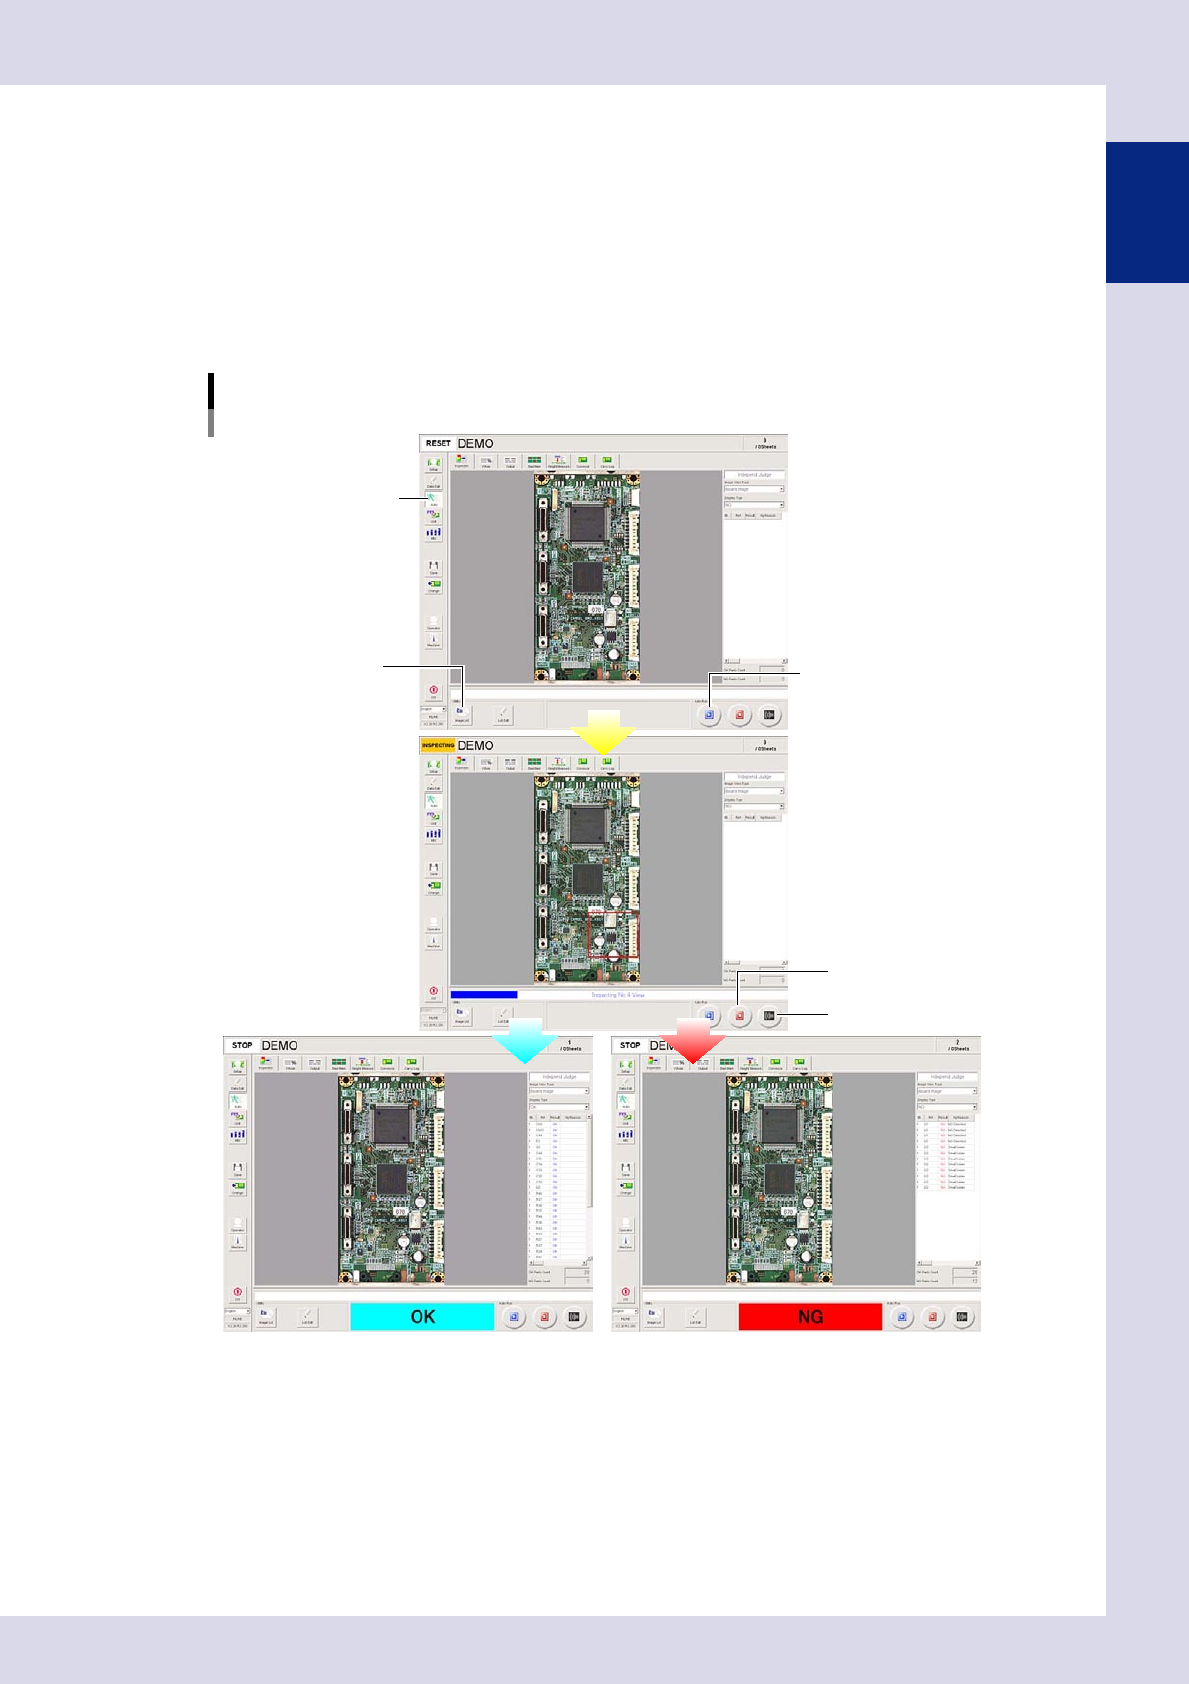
2.1.2 Starting automatic inspection
1
Check the inspection program.
Check the inspection program name displayed in the "Status" area of the screen.
2
Press the [Auto] button in the "Button" area.
The "Auto inspection" screen opens to enter automatic inspection mode.
3
Press the [Run] button to start inspection.
To stop the automatic inspection, press the [Stop] button.
Automatic inspection flow
Auto mode
Inspection
OK NG
[Auto] button
[Run] button
[Image List] button
[Stop] button
[Buzzer off] button
24117-P6-00
[Image List] button
A list of view captured images is displayed. If a board ID (image) is selected from this list, inspection can
be performed for the selected board ID (image).
[Buzzer OFF] button
Pressing the buzzer OFF button while the buzzer is sounding stops the buzzer.
1-28
1
asic operation
2.2 Starting upside down automatic inspection (YSi-S)
The upside down automatic inspection function involves inspecting the upper and lower surfaces of a single
board, and then automatically inspection the upper and lower surfaces of the next board. It is necessary to
specify upside down inspection settings to use this function. For details on settings, see section 2.2.3, "Upside
down automatic inspection settings".
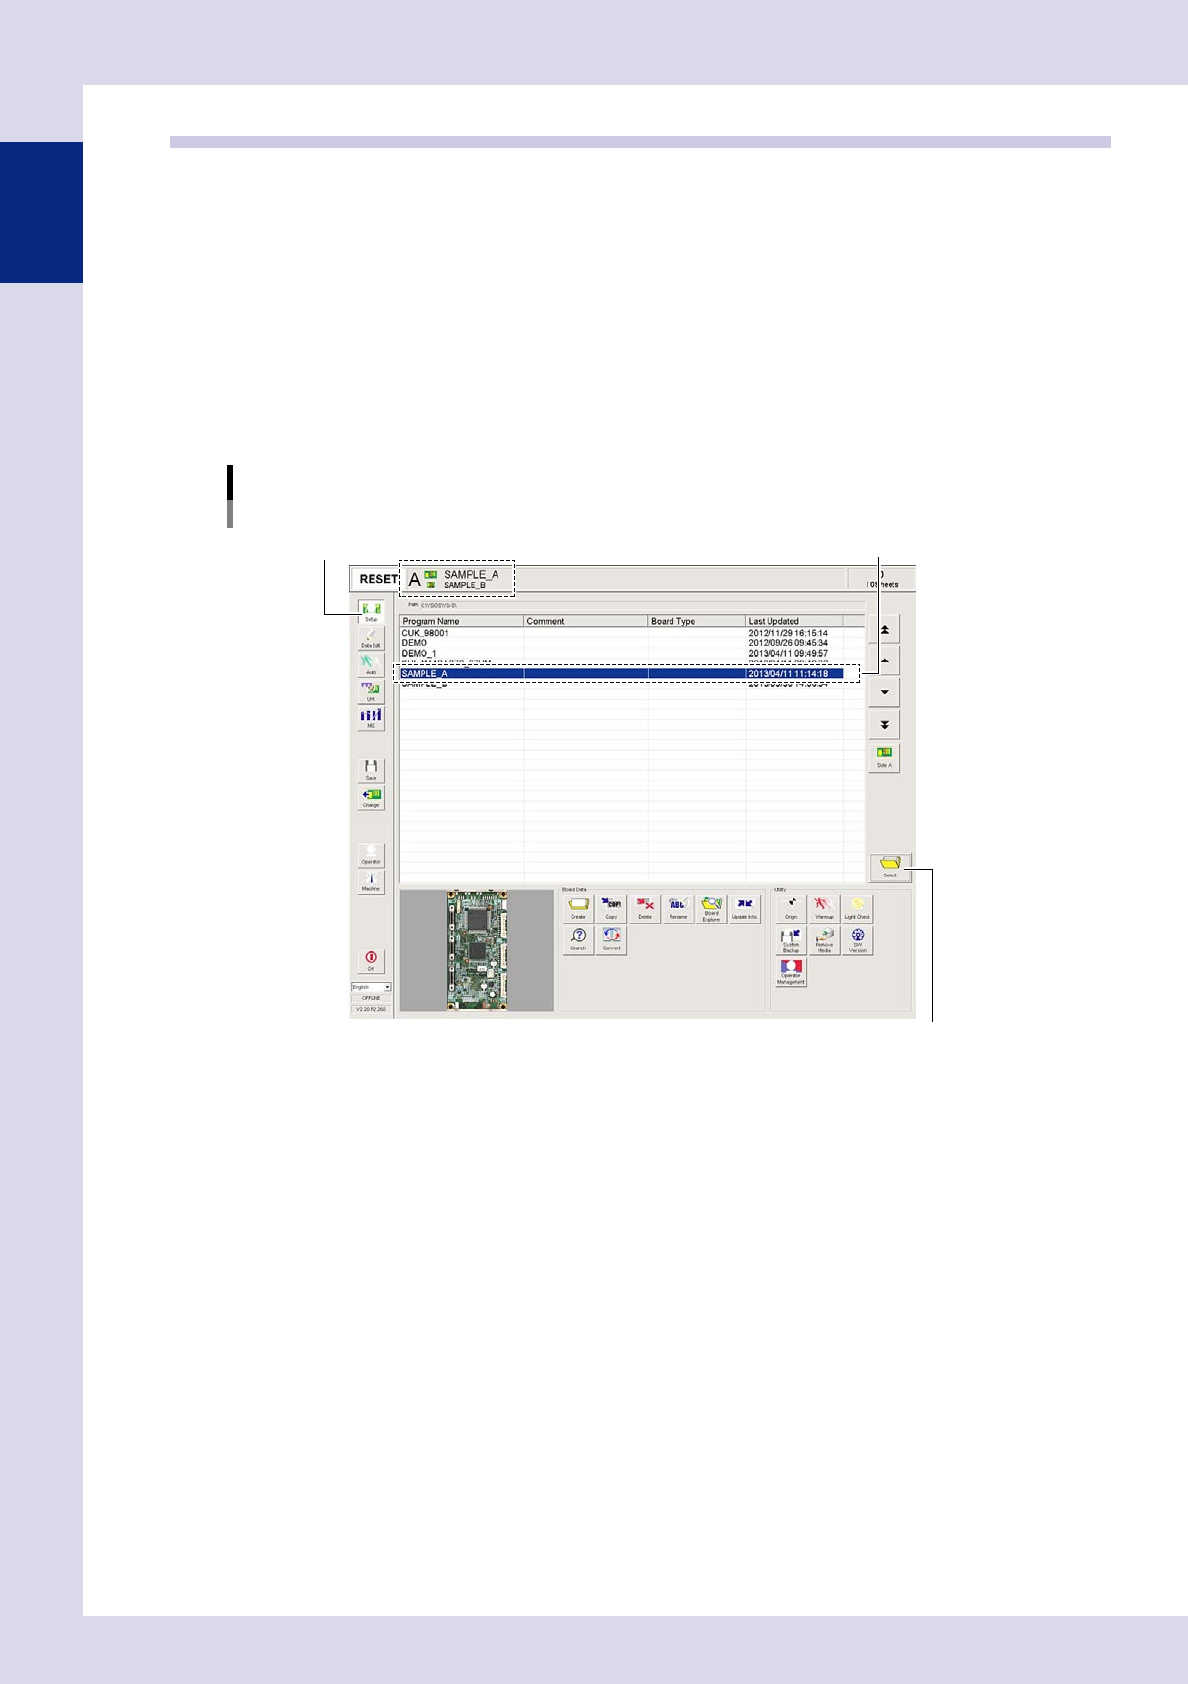
2.2.1 Selecting inspection programs
1
Press the [Setup] button.
The "Program Change" screen opens.
2
Load the program for the surface to be inspected first.
Load the program for the surface to be inspected first from the inspection program list.
Selecting inspection programs
YSi-S
[Setup] button
[Select] button
Select the program for the surface to
be inspected first.
24128-P6-00
3
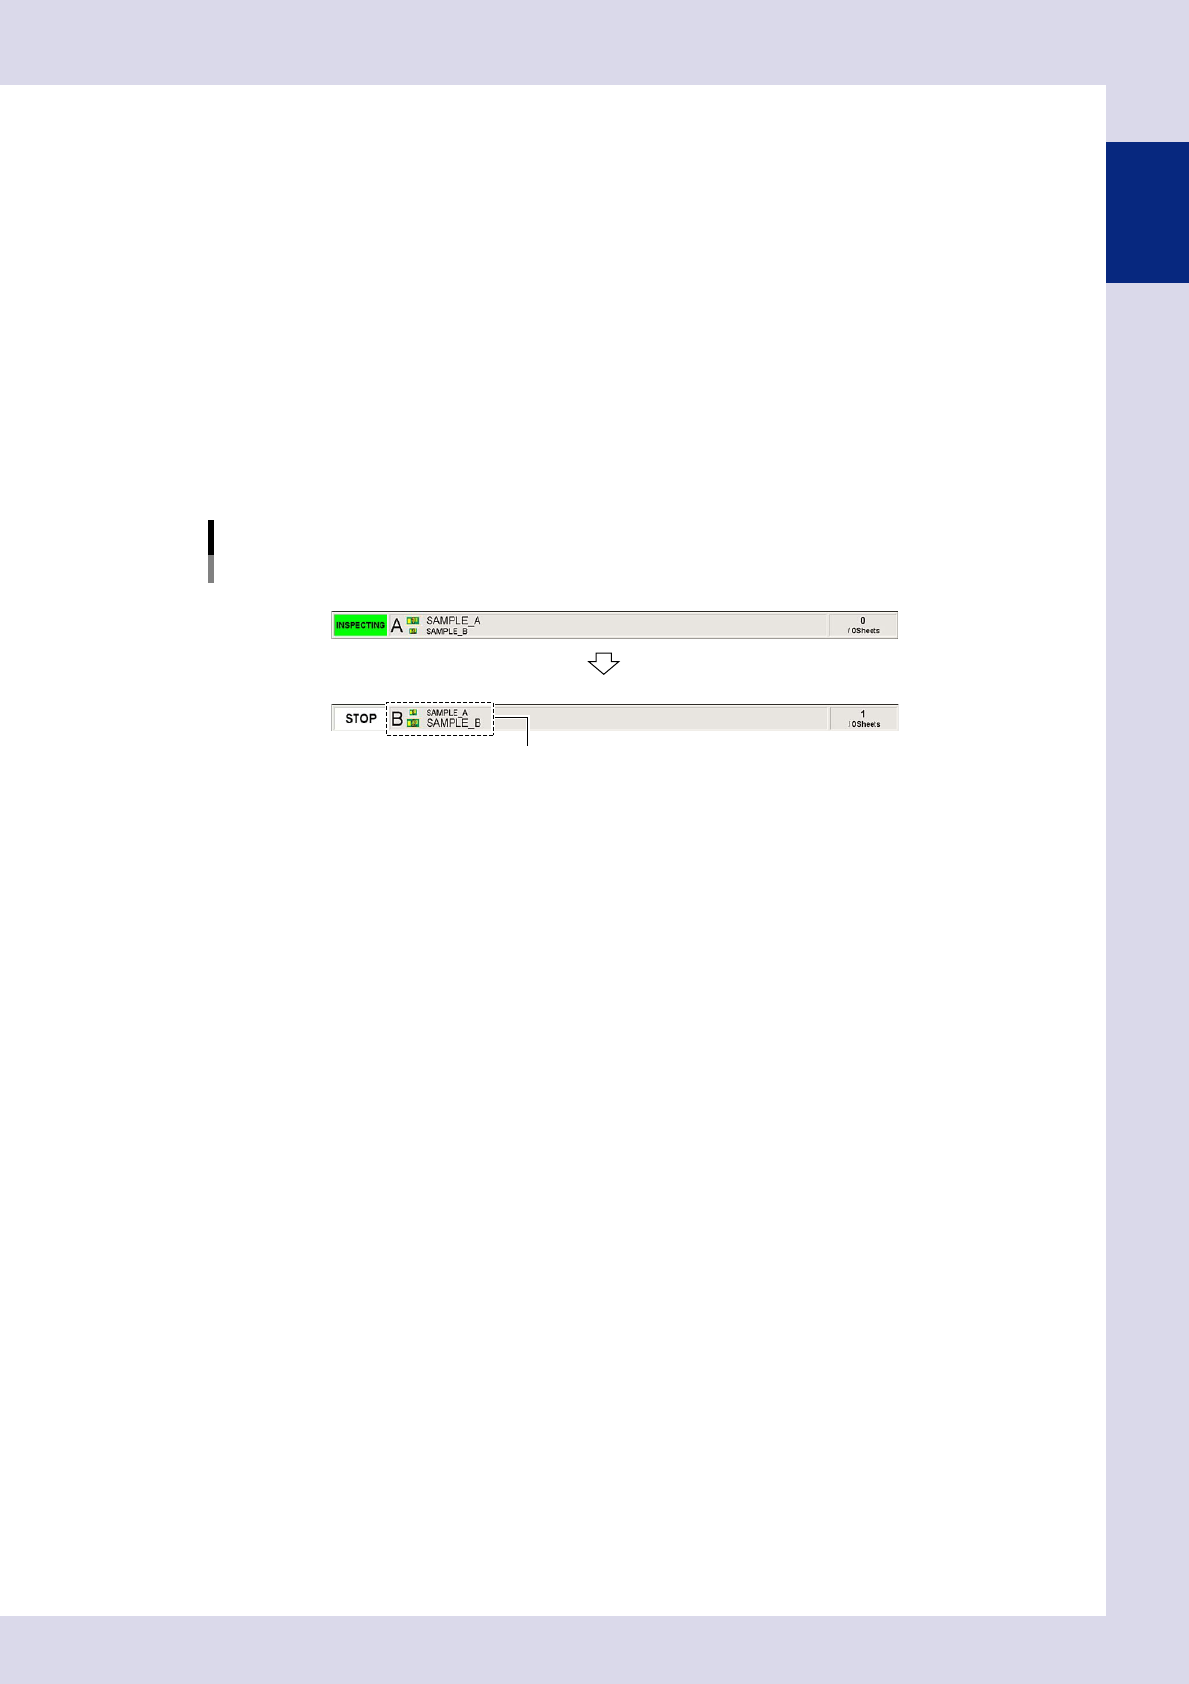
Verify the loaded inspection program.
The upper and lower surface program names display at the top and bottom in the status area. The
program name for the loaded first surface program is displayed in bold, and the subsequent program
name is displayed in small print.
1-29
1
asic operation
2.2.2 Starting automatic inspection
1
Check the inspection program.
Check the inspection program name displayed in the "Status" area of the screen.
2
Press the [Auto] button in the "Button" area.
The "Auto inspection" screen opens to enter automatic inspection mode.
3
Set the board.
1. Align the conveyor width with the board.
2. Press the [Change] button. Set the board on the conveyor with the surface to be inspected first
facing up.
4
Press the [Execute] button to start inspection.
The safety cover opens when inspection is complete, and the subsequent inspection program is auto-
matically loaded.
Inspection program switching
During first surface (A surface) inspection
After completion of first surface (A surface) inspection
Subsequent (B surface) inspection program is loaded.
24129-P6-00
5
Set the board with the upper and lower surfaces reversed.
Unload the board, and then set it on the conveyor with the completed surface facing down.
6
Press the [Execute] button to start inspection.
When the safety cover opens after inspection is complete, remove the board.
7
Inspect the next board.
Repeat the procedure in steps 3 to 6.