YSI_Prog_E - 第68页
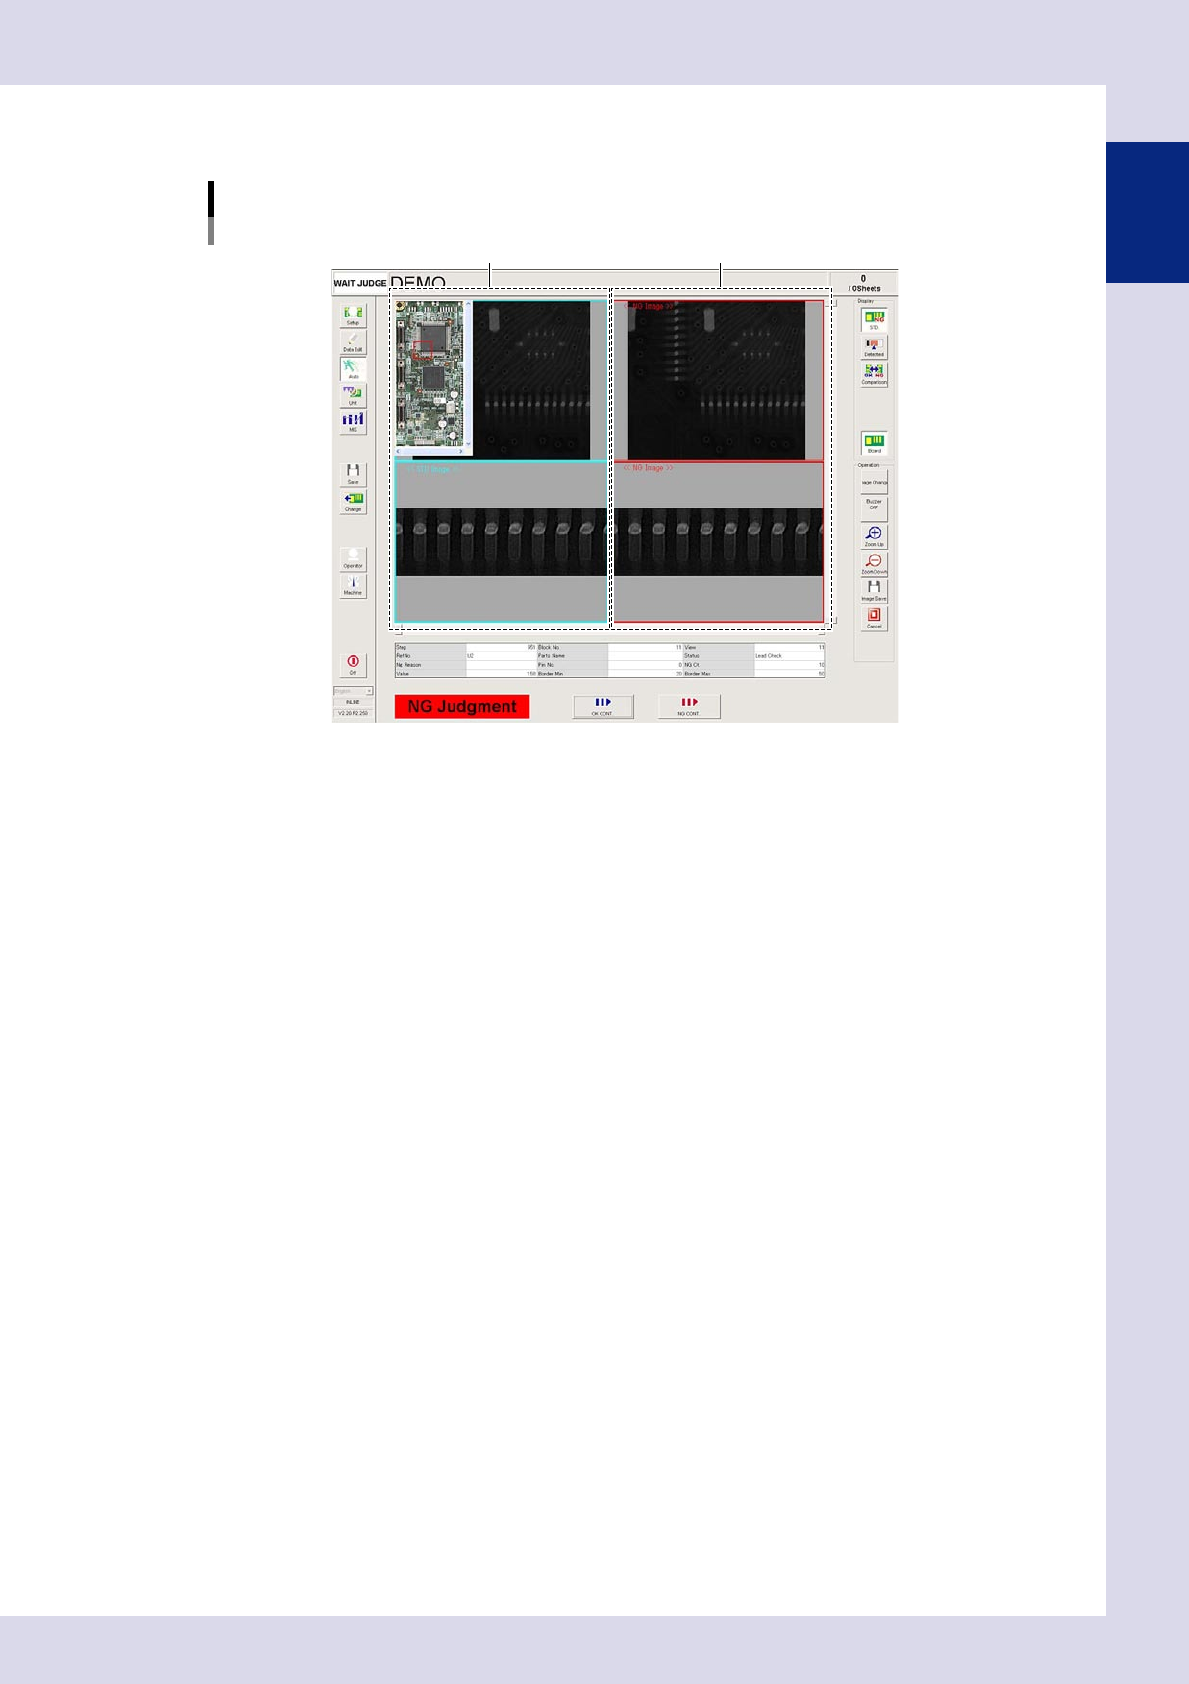
1-33 1 asic operation 3. [Comparison] button Displays standard images for steps judged as NG on the left side, and NG images on the right side. NG monitor "Comparison" screen when NG detected Standard images …
1-32
1
asic operation
2.3 When NG detection occurs
2.3.1 NG monitor
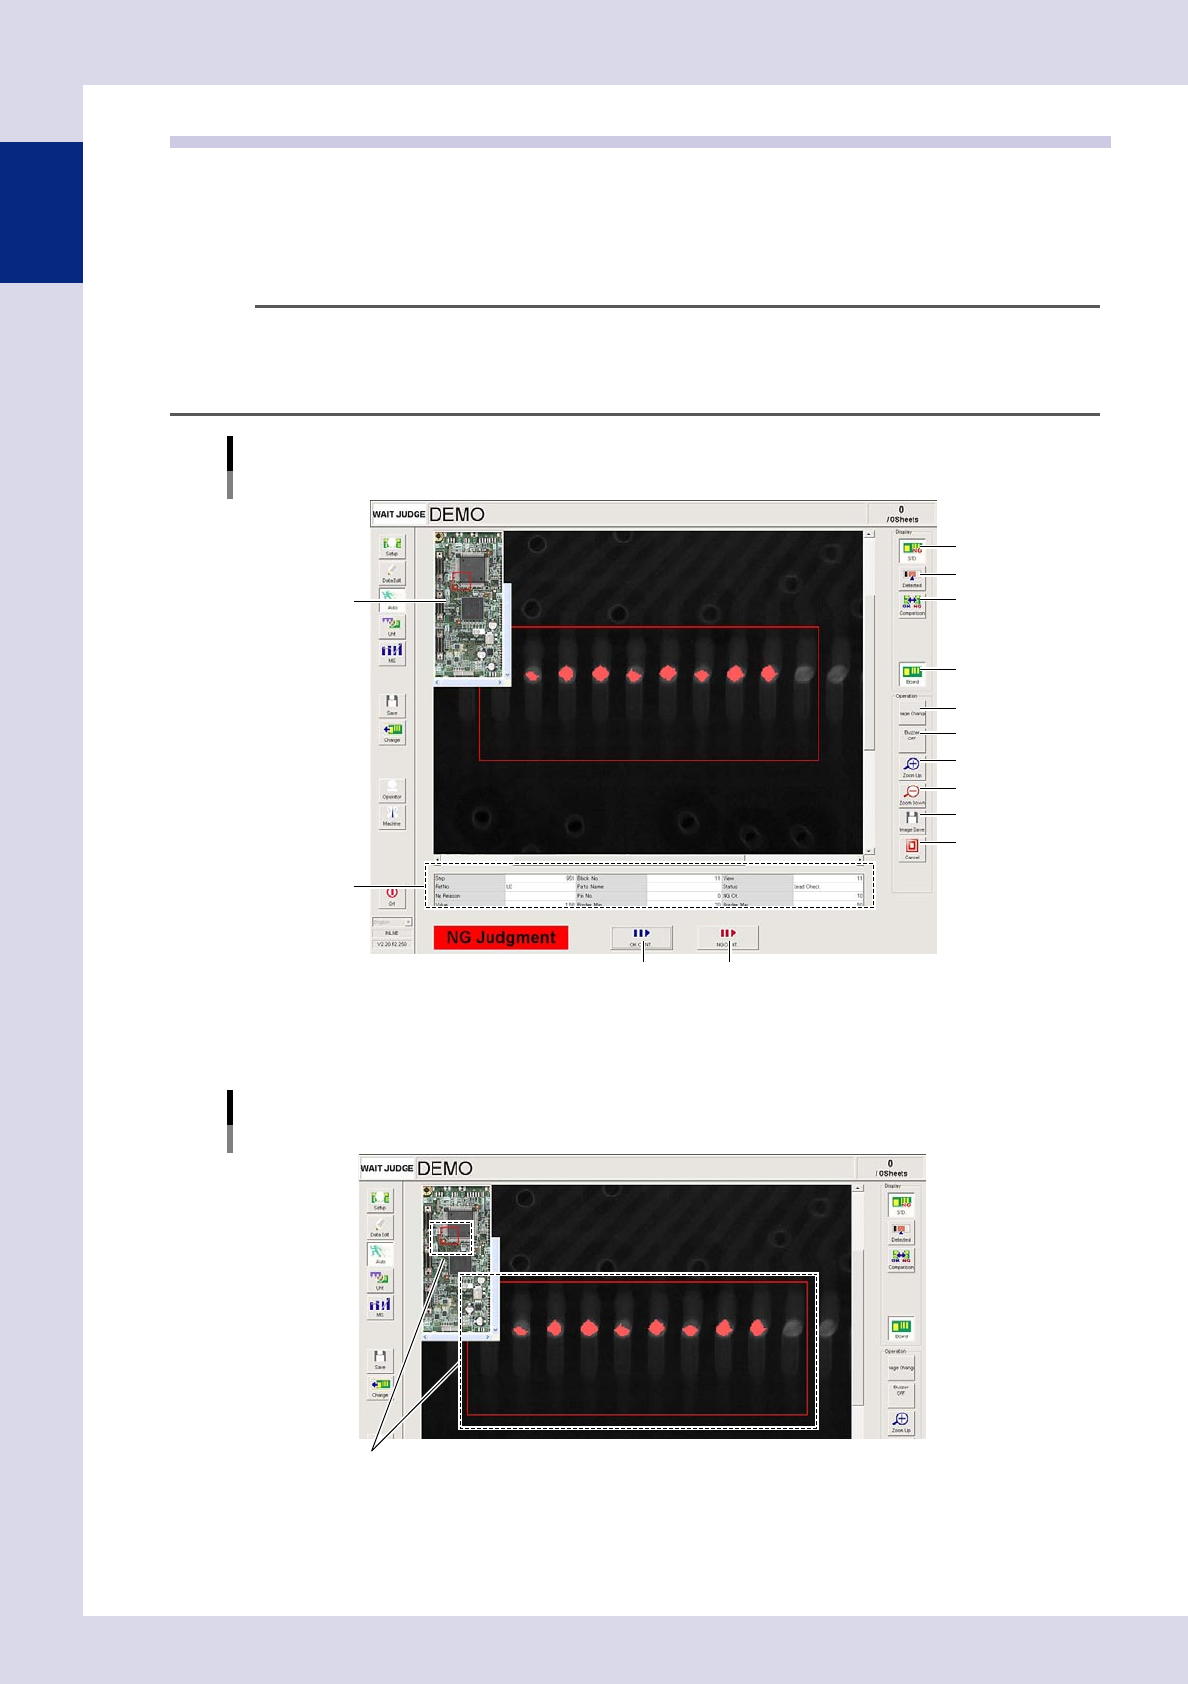
The NG image appears when an NG is detected during semi-automatic inspection. Look at the displayed image
and judge whether it is OK or NG. If OK, press the [OK CONT.] button, and if NG, press the [NG CONT.]
button. This screen describes all buttons that appear on this screen.
TIP
Semi-automatic and automatic inspection modes are set in "Machine Information"
→
"Installation Setting"
→
"Inspection Mode Setting" in the machine settings. For details on "Inspection Mode Setting", see Chapter 5, "2.1
Installation Setting", in this manual.
Basic operation
Optical inspection NG screen
Entire image
1
2
3
4
6
7
8
9
12 13
10
11
5
24132-P6-00
1. [STD.] button
Displays the inspection image.
NG monitor
Displays the screen when an NG is detected.
Step judged to be NG
24133-P6-00
2. [Detected] button
Displays the detected area in red.
1-33
1
asic operation
3. [Comparison] button
Displays standard images for steps judged as NG on the left side, and NG images on the right side.
NG monitor
"Comparison" screen when NG detected
Standard images NG images
24134-P6-00
4. [Board] button
Displays and hides the entire image in the upper left of the screen.
5. [Image Change] button (YSi-X))
By pressing this button when an X-ray image for an NG step is displayed on the screen, the display changes to an optical
image of the same location.
6. [Buzzer OFF] button
Stops the buzzer.
7. [Zoom Up] button
Pressing the [Zoom Up] button when the standard image is displayed enlarges the image.
After clicking the screen, the image can also be enlarged with the mouse wheel.
8. [Zoom Down] button
Pressing the [Zoom Down] button when the standard image or detected area is displayed reduces the image.
After clicking the screen, the image can also be reduced with the mouse wheel.
9. [Image Save] button
Saves the view screen to the program.
10. [Cancel] button
Stops the inspection.
11. NG data
Displays the NG judgment step number, block number, view number, reference number, parts name, inspection status,
NG reason, pin number, cumulative judgment standard NG count for NG judgment steps, measurement value, minimum
allowable tolerance, and maximum allowable tolerance. Set the NG reason in the "Option" parameters in the [Data Edit]
- [Step] tab. If no settings are specified, the default NG reason for each status is displayed. The cumulative NG count
displays the cumulative NG count for steps for which NGs occurred. The NG count is set to "0" when loading the
inspection program.
12 [OK CONT.] button
Check the images judged as NG, and if OK, press this button to resume inspection.
13 [NG CONT.] button
Check the images judged as NG, and if NG, press this button to resume inspection.

1-34
1
asic operation
2.4 Inspection complete screen
When board inspection is complete, the inspection result appears in the inspection result display field as "OK"
or "NG". When the "Whole" screen is displayed, inspected parts with "OK" result are indicated with blue dots,
and parts with "NG" result are indicated with red dots. By selecting the "Display Type", steps for the selected
inspection result conditions are displayed in the parts inspection results list. By selecting a parts in the parts
inspection results list, the position of the relevant parts is indicated with a cross.
Inspection complete screen
Inspection result display field
Result display type
Parts inspection results list
24135-P6-00
c