YSI_Prog_E - 第93页
2-22 2 Creating inspection pr ograms 2.4.3 Setting fiducial mark CUSTOM lighting If unable to clearly recognize fiducial marks in the "lighting list image", use "CUST OM lighting". 1 Set the "D. …
2-21
2
Creating inspection programs
0
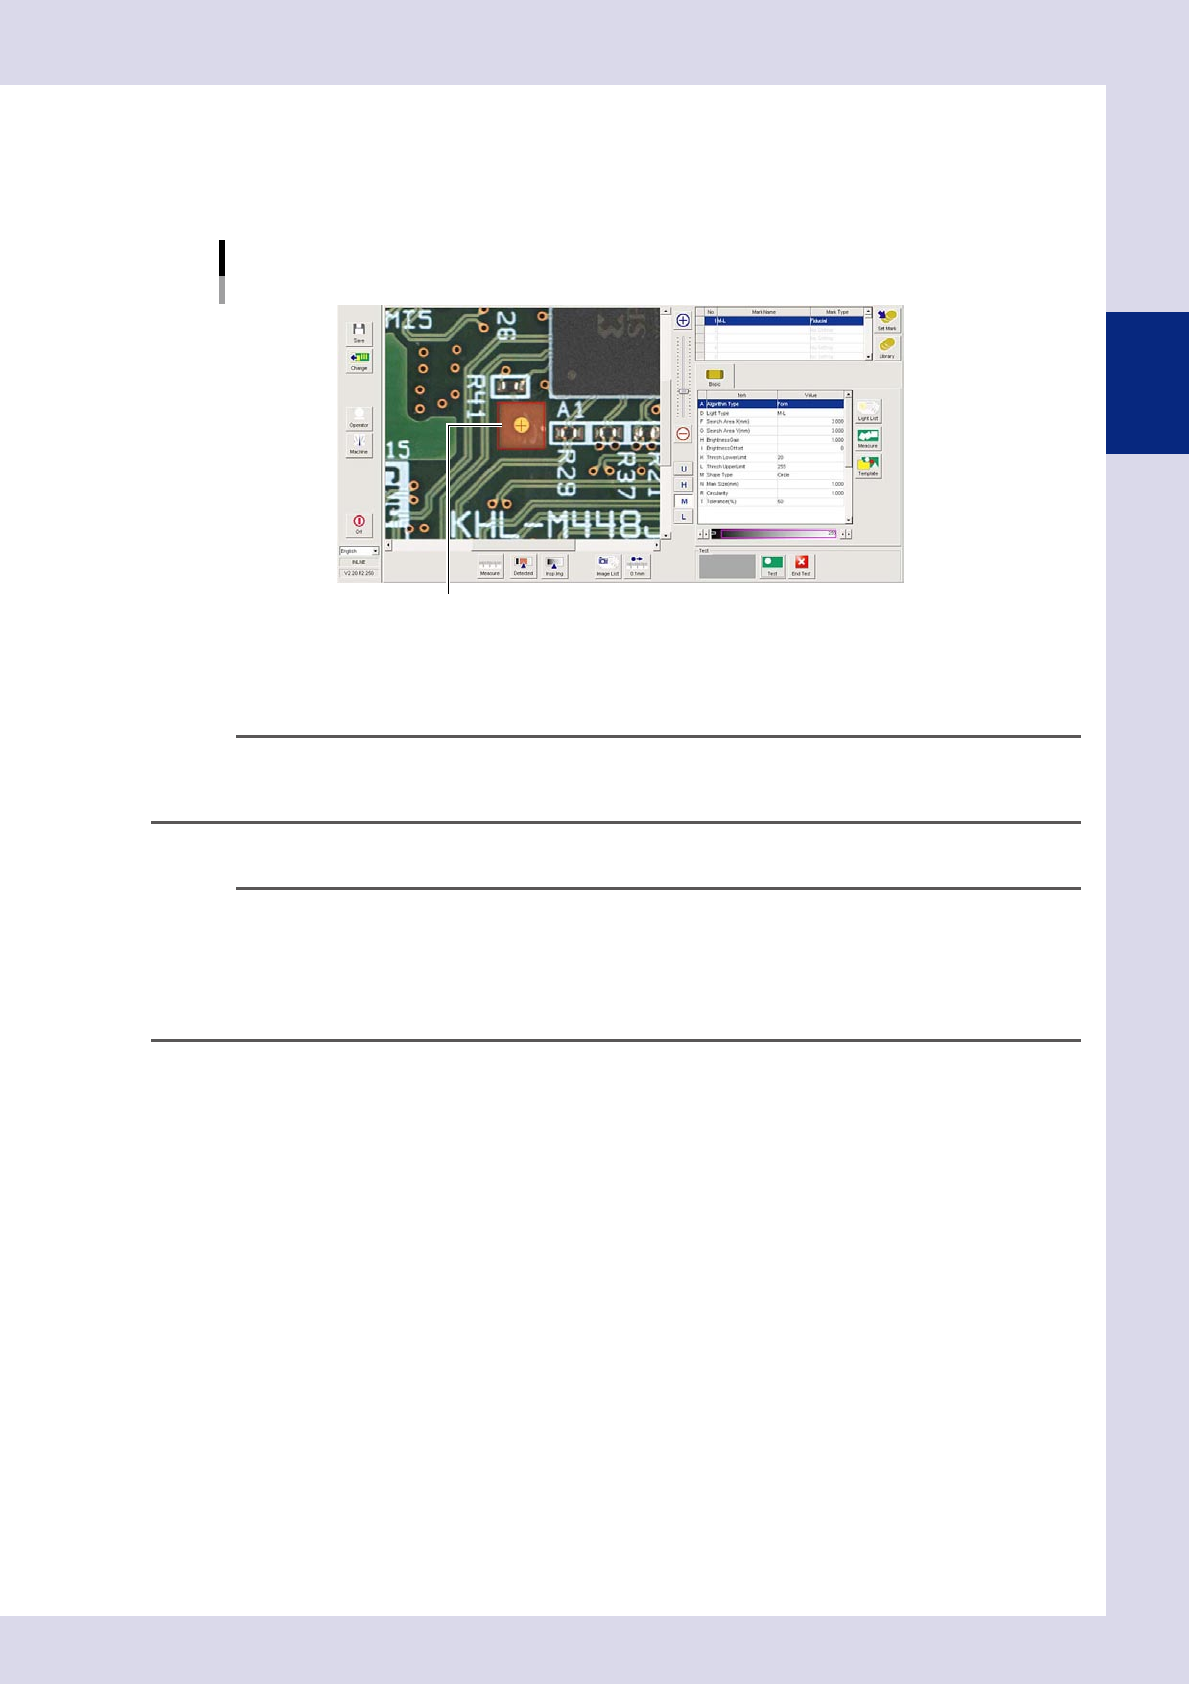
Enclose the mark by dragging the mouse.
Enclose the mark by dragging the mouse inside the mark detection range. The mark is recognized, and
"N. Mark Size (mm)", and "R. Circularity" are set for each recognition type based on the recognition
results, and a test is carried out.
Fiducial mark
Enclose by dragging the mouse.
24216-P6-00
q
Press the [End Test] button to end the detection test.
If the test result is NG, repeat the procedure from Step 7.
TIP
If the mark is successfully recognized, the center coordinates appear in the upper left of the mark screen. By pressing
the [Teach] button after the test is complete, the recognized coordinates are entered as the fiducial mark. When the
design coordinates have been entered, do not press the [Teach] button.
w
Press the [Save] button to save the inspection program.
TIP
Created marks can be registered in libraries and libraries can be set.
Registering: Select the mark to be registered from the mark data list, and press the [Set Mark] button. Press the [Yes]
button at the registration confirmation dialog box that appears.
Setting: Press the [Library] button to open the "Mark library" screen.
If setting only arbitrary marks, select the applicable mark and press the [Set] button.
If setting all marks, press the [All Set] button.
2-22
2
Creating inspection programs
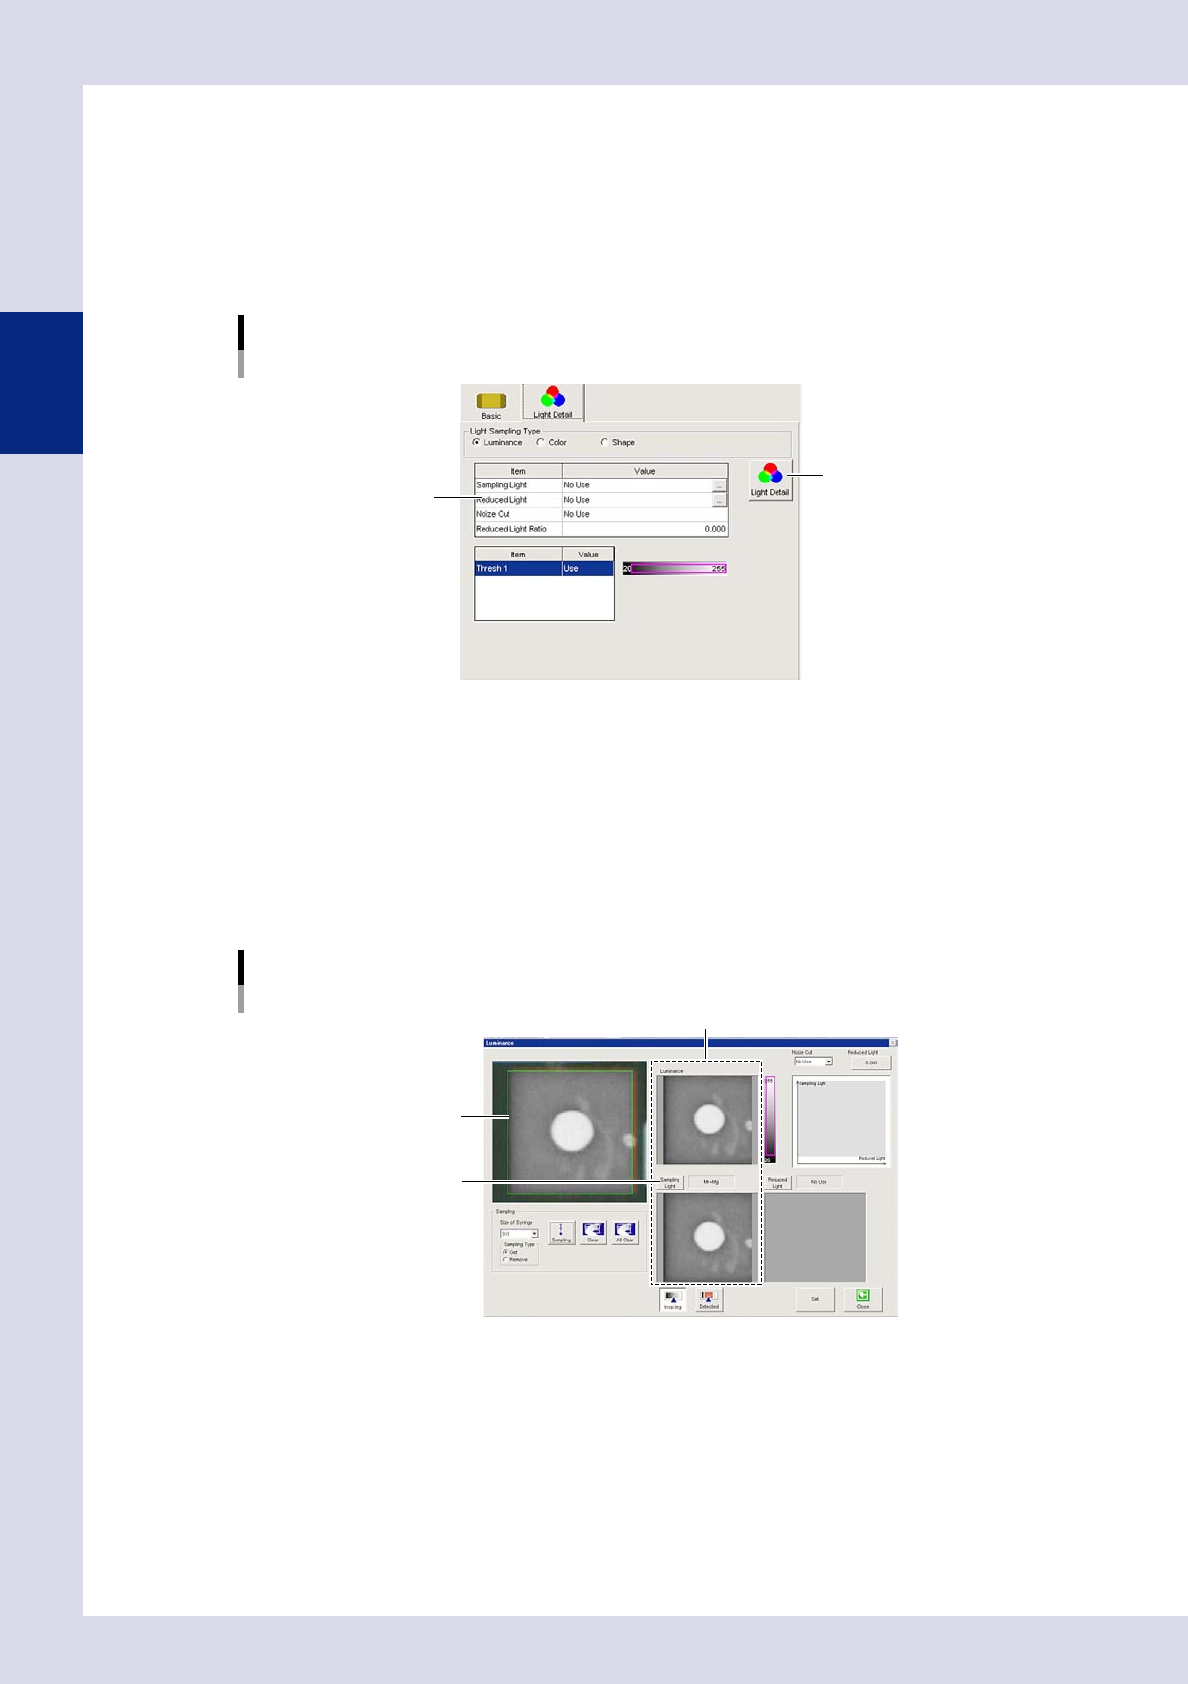
2.4.3 Setting fiducial mark CUSTOM lighting
If unable to clearly recognize fiducial marks in the "lighting list image", use "CUSTOM lighting".
1
Set the "D. Light Type" in the basic parameters to "CUSTOM".
A "Light Detail" tab is added to the screen.
2
Open the "Light Detail" tab and select "Luminance" at the "Light Sampling Type".
CUSTOM lighting
[Light Detail] tab
[Light Detail] button
Setting value list
24217-P6-00
3
Press the [Light Detail] button.
A "Luminance" screen appears.
4
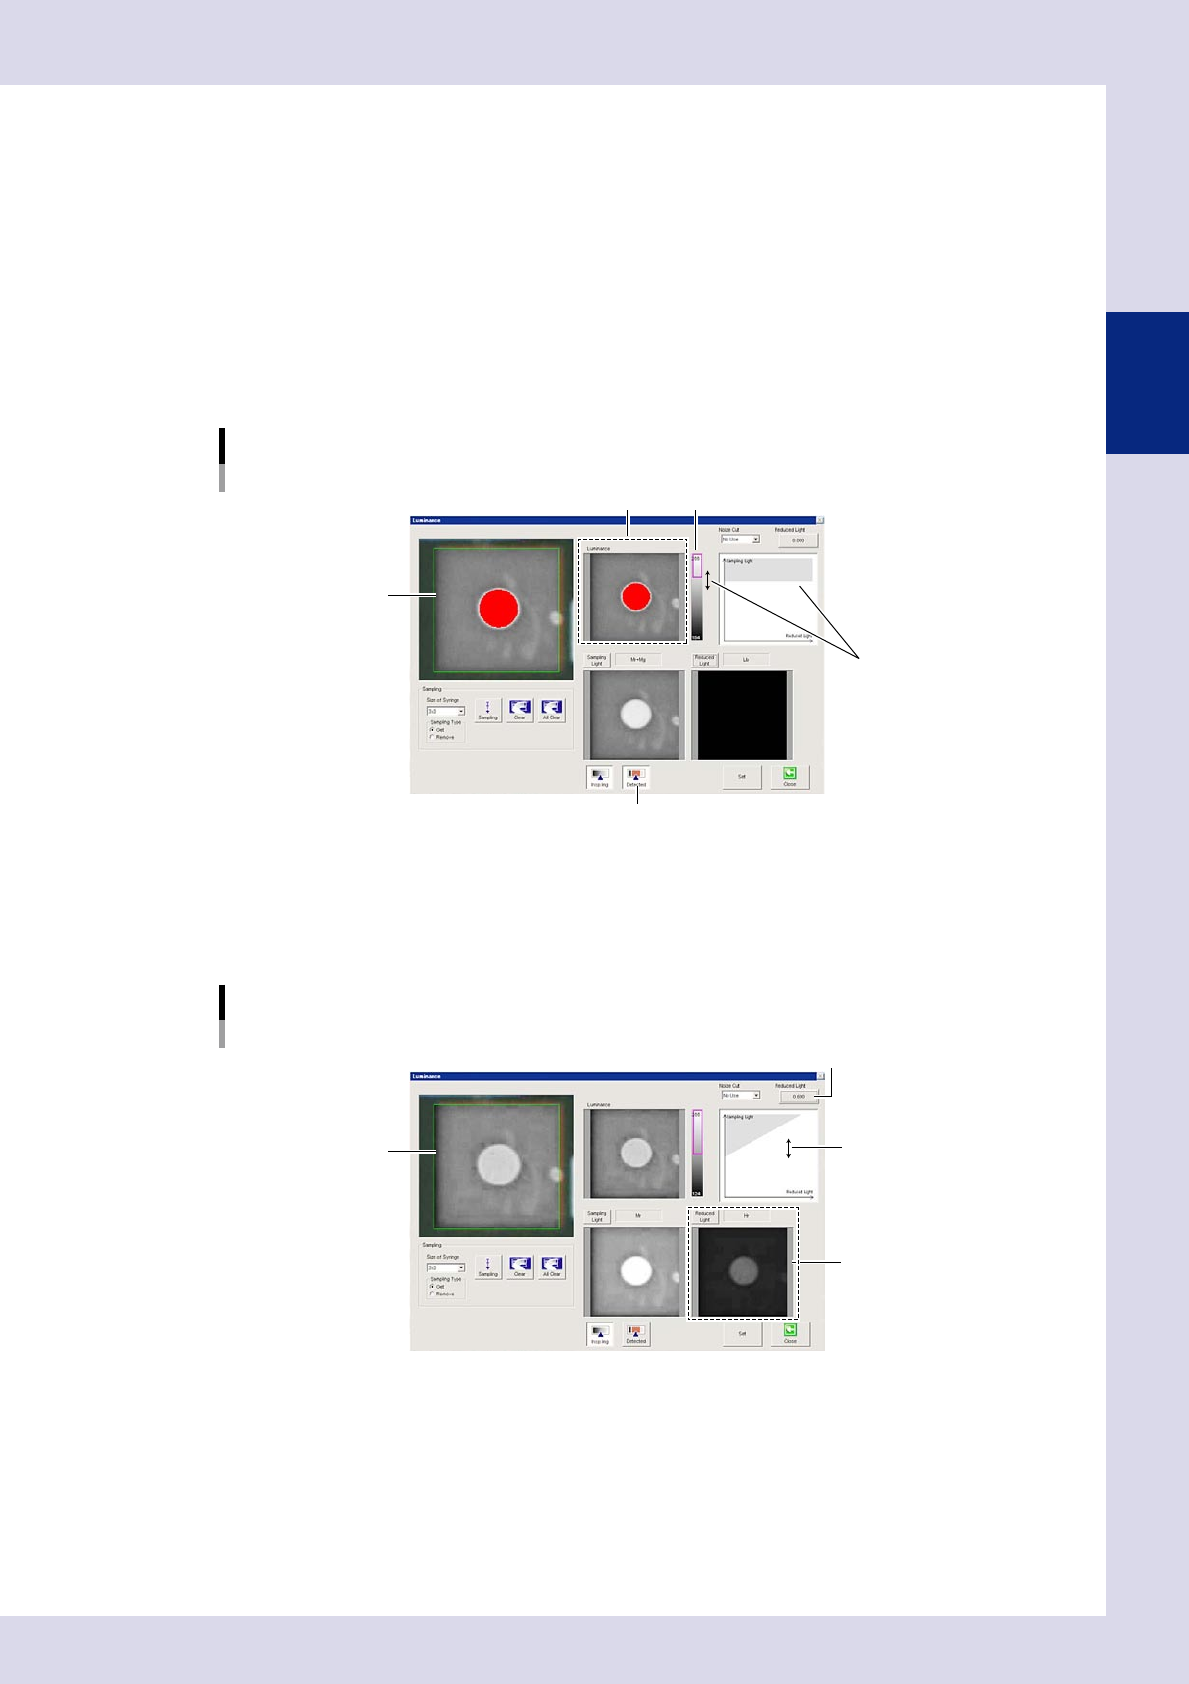
Press the [Sampling Light] button and select the sampling light.
By pressing the [Sampling Light] button, a sampling light type screen appears. Select the image in which
the fiducial mark appears clearest from the sampling light list. (Up to two images can be selected.)
Press the [OK] button when selection is complete. The display returns to the "Luminance" screen, and
the image is displayed with the selected sampling light.
Luminance setting screen
Sampling type selection
Sampling light image
[Sampling Light] button
Sampling light image
24218-P6-00
2-23
2
Creating inspection programs
5
Press the [Reduced Light] button to select the reduced light.
By pressing the [Reduced Light] button, a light sampling type screen appears. If required, select a single
image to be excluded from the reduced light list. (There is no need to make a selection.)
6
Select a noise cut filter.
This is used to eliminate noise. When noise is present, select the size to be averaged from the drop-down
list.
7
Press the [Detected] button and set the threshold value.
1. By pressing the [Detected] button, the detection range is displayed in color.
Adjust with the threshold slide bar and change the upper and lower limits to set the threshold so that
only the mark appears red.
Threshold value setting
Set by dragging the mouse.
Threshold value image
Threshold value image Threshold slide bar
[Detected] button
24219-P6-00
2. If reduced light is selected at Step 5, set the reduced light magnification. Set the magnification for
the reduced light selected when performing image processing to show only the mark in red. Press
the magnification button and enter the magnification, or drag the gray area on the monitor with the
mouse to set.
Reduced light magnification setting
Reduced light magnification setting button
Set by dragging the mouse.
Sampling light image
Reduced light image
24220-P6-00
8
End lighting setting.
To save settings, press the [Set] button followed by the [Close] button. To end without saving, press the
[Close] button. By pressing the [Close] button, the display returns to the fiducial screen.