00194994_01.pdf - 第52页
5 Error info rmation SIPLACE Software Guide Version 408.xx 5.2 Calling error information Issue 03/06 EN 52 5 Fig. 5.2 - 3 Example: Error information on the current error Meaning of the colors in th e error information di…
SIPLACE Software Guide Version 408.xx 5 Error information
Issue 03/06 EN 5.2 Calling error information
51
5.2.2 Displaying information about a selected error
5
Æ Click the icon in the toolbar in the Main view.
The user interface switches to the error display for the last error type to be active. All errors of
the current error type that have occurred are displayed in the display area.
Æ Use the appropriate button on the view toolbar to switch to the type of error you require.
The display area is switched to the selected error type (see the example in Fig. 5.2 - 2).
5
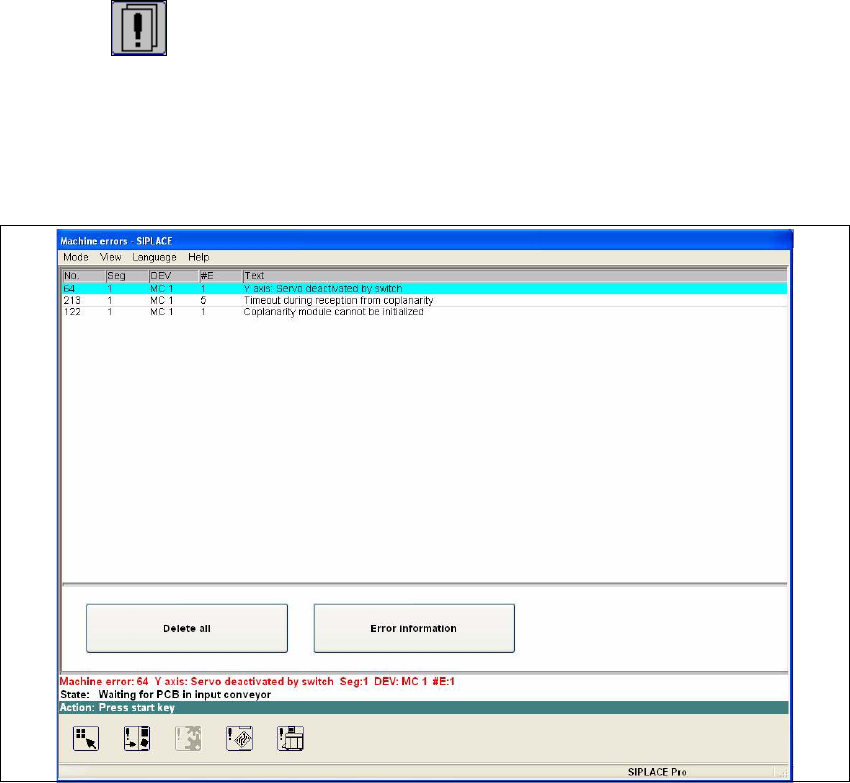
Fig. 5.2 - 2 Example: Error of type "Machine error"
Æ In the error table, select the entry for the error about which you want to be informed. The line
selected is highlighted in light blue in the table. The "Error information" button is now active.
Æ Click the Error information button.
The main Help system window is opened and displays information on the currently selected
error (see Fig. 5.2 - 3).
5 Error information SIPLACE Software Guide Version 408.xx
5.2 Calling error information Issue 03/06 EN
52
5
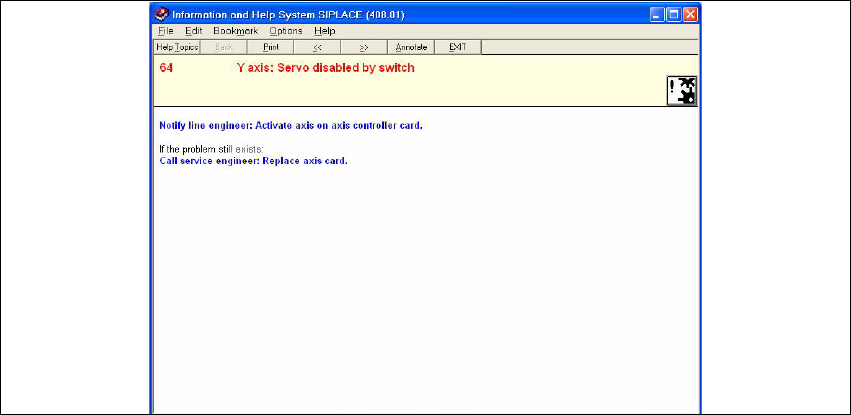
Fig. 5.2 - 3 Example: Error information on the current error
Meaning of the colors in the error information display 5
– Red text Error number and error message
– Black text Possible cause(s) of the error
– Blue text Instructions on how to eliminate the error
– Green, underlined text Click to call up additional information
5
SIPLACE Software Guide Version 408.xx 5 Error information
Issue 03/06 EN 5.2 Calling error information
53
5.2.3 Inserting or editing comments on errors
In all the error information views you are able to enter comments which you can then subsequently
edit if necessary. In this way, you can, for example, document the operations which you have per-
formed. If a comment has been created in a view, this is indicated by the presence of a paper clip
icon. 5
Inserting a comment
Æ In the online Help system click the Annotate button in the view in question.
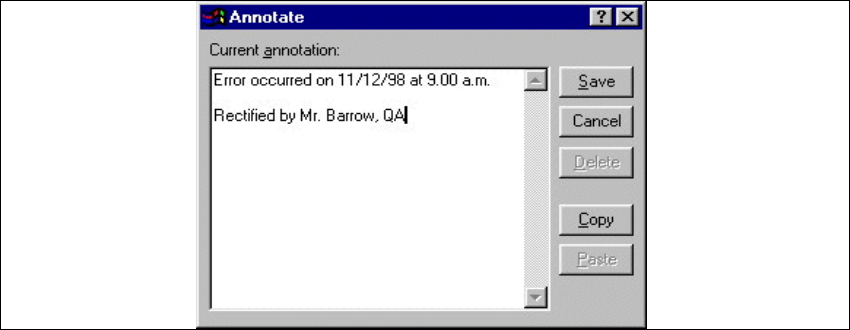
The following window is displayed.
Fig. 5.2 - 4 Inserting a comment
Æ Enter the text of your comment in the edit field.
Æ Click the Save button to confirm your input.
The dialog box is closed.
The paper clip icon is now displayed in the current help system view. Click this icon if you want
to open a window in which you can edit this comment.
Deleting a comment
Æ Click the paper clip symbol in the appropriate view.
The dialog box is opened with the stored comment.
Æ Click the Delete button.
The dialog box is closed. The paper clip icon is no longer displayed in the current view.