00196683-01 - IM Installation Manual Siplace Pro 8.0_en.pdf - 第29页
4 Installation of SIPLACE Pro and possible Setup Types Installation Manual Edition 03/2010 US SIPLACE Pro 8.0 27 After a fresh MSDE or SQL Server 2005 E xpress installation, the password is the Siemens Ser- vice default …
Installation Manual 4 Installation of SIPLACE Pro and possible Setup Types
SIPLACE Pro 8.0 Edition 03/2010 US
26
Hint
Make sure that the properties for the user account are set to "Password never expires". Otherwise,
as soon as the password has expired, the system will not be operable until the COM+ package
SIPLACE Pro has been reconfigured. This can be done using the script COM+ServerAdmin.vbs,
which is located in the Start Menu (Start -->Programs --> SIPLACE Pro-->Administration -->
COM+Server Administration). For more details please contact your system administrator. 4
After SIPLACE Pro has successfully checked the user account and its administrator rights, the
SQL Server window opens. 4
Step 4
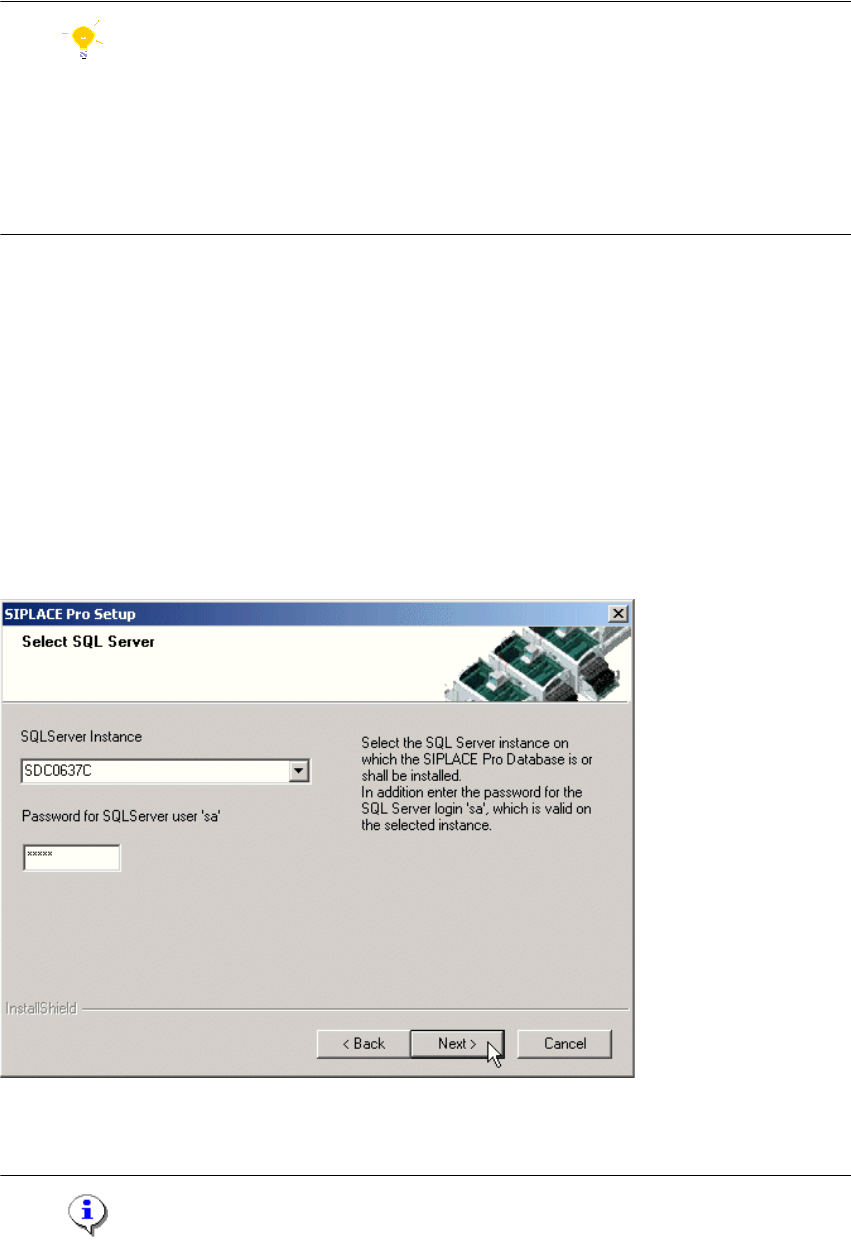
In the "Select SQL-Server" dialog box you enter the information required to connect to the SQL
Server and database. 4
In case a SIPLACE Pro database already exists, the integrity of the database will be checked now.
If the check results in error messages, these messages will be displayed and the setup cannot
continue with this database. Only after selecting another database by choosing another SQL
server instance or after restoring the database in an error-free state setup can continue. 4
4
Fig. 4 - 11 "Select SQL-Server" dialog box - in case a database exists
Æ Enter the "Password for the SQL Server user "sa", i.e. the SQL server system administrator.
Note
4 Installation of SIPLACE Pro and possible Setup Types Installation Manual
Edition 03/2010 US SIPLACE Pro 8.0
27
After a fresh MSDE or SQL Server 2005 Express installation, the password is the Siemens Ser-
vice default password. 4
Æ Choose your SQL Server Instance from the drop-down menu.
Æ Click Next
Step 5
4
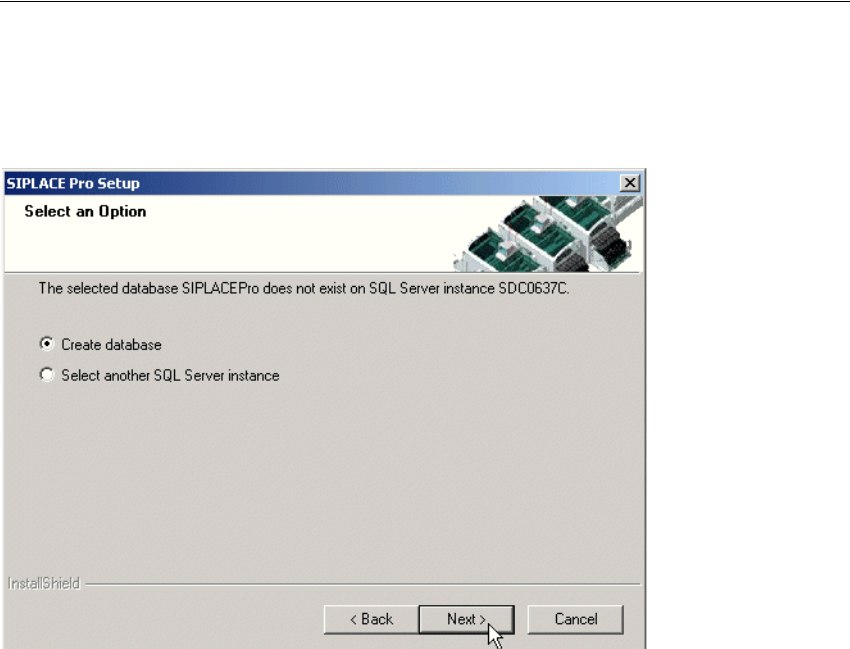
Fig. 4 - 12 "Create database" dialog box - in case no database exists
Æ If you choose Select another SQL Server instance you will be returned to the previous
dialog.
Æ Click Next to create a new database
4
Installation Manual 4 Installation of SIPLACE Pro and possible Setup Types
SIPLACE Pro 8.0 Edition 03/2010 US
28
4
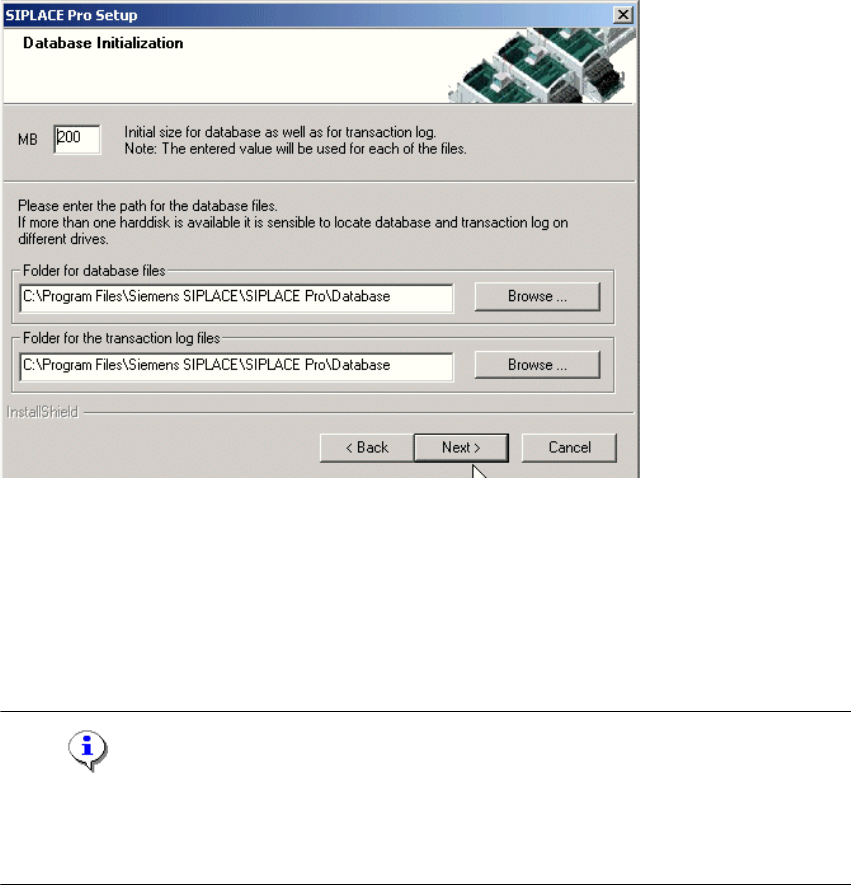
Fig. 4 - 13 "Database initialization" dialog box
The figure you enter in the MB text box defines the size of the SIPLACE Pro database files
(SIPLACE Pro Data.mdf and SIPLACE Pro Log.ldf) which are to be created during the
installation. 4
Æ Confirm the default value or
Æ enter the size you want in the MB text box.
Note
The specified size is only an initial value. The database will grow automatically as required.
However, only intervention by the database administrator is capable of freeing up unused disk
space. 4
Æ In the "database files" field, enter the directory in which the SIPLACE Pro Data.mdf file is to
be created.
Æ In the transaction log files field, enter the name of the directory in which the
SIPLACE Pro Log.ldf database file is to be created.
Æ Click Next.