SECS GEM Manual.pdf - 第166页
GEM Manual for DEK Printers Ap pendix B Issue 1.6 January 22, 2018 Page 166 of 171 11.2 Enabling GEM Classic User Interface From the Ready page: 1. Select Maintenance (F8) 2. Select Set Prefs (F5) 3. Change the value of …

GEM Manual for DEK Printers Appendix B
Issue 1.6 January 22, 2018 Page 165 of 171
11 Appendix B
Operator instructions for configuring and using GEM on DEK printers.
11.1 Network Configuration
The GEM IP Address for the machine must be set up in the DekSECSII.cfg file, this can be checked
and edited if necessary in the configuration file E:\Config\DekSECSII.cfg.
NOTE: for older versions of printer software, the location of the DekSECSII.cfg file may be
D:\Program Files\DEK\MachineControl\Printer.
Set the PASSIVE ENTITY IP ADDRESS to the printer’s IP Address.
The IP Address can be obtained by using the ipconfig command at the command prompt.
If there is more than one printer communicating with the GEM host, set the DEVICEID differently for
each printer. The default value is 0x109 (265). Alternate DEVICEID values should be chosen within
the range 0x0000 – 0x7FFF (0 – 32767).
GEM Manual for DEK Printers Appendix B
Issue 1.6 January 22, 2018 Page 166 of 171
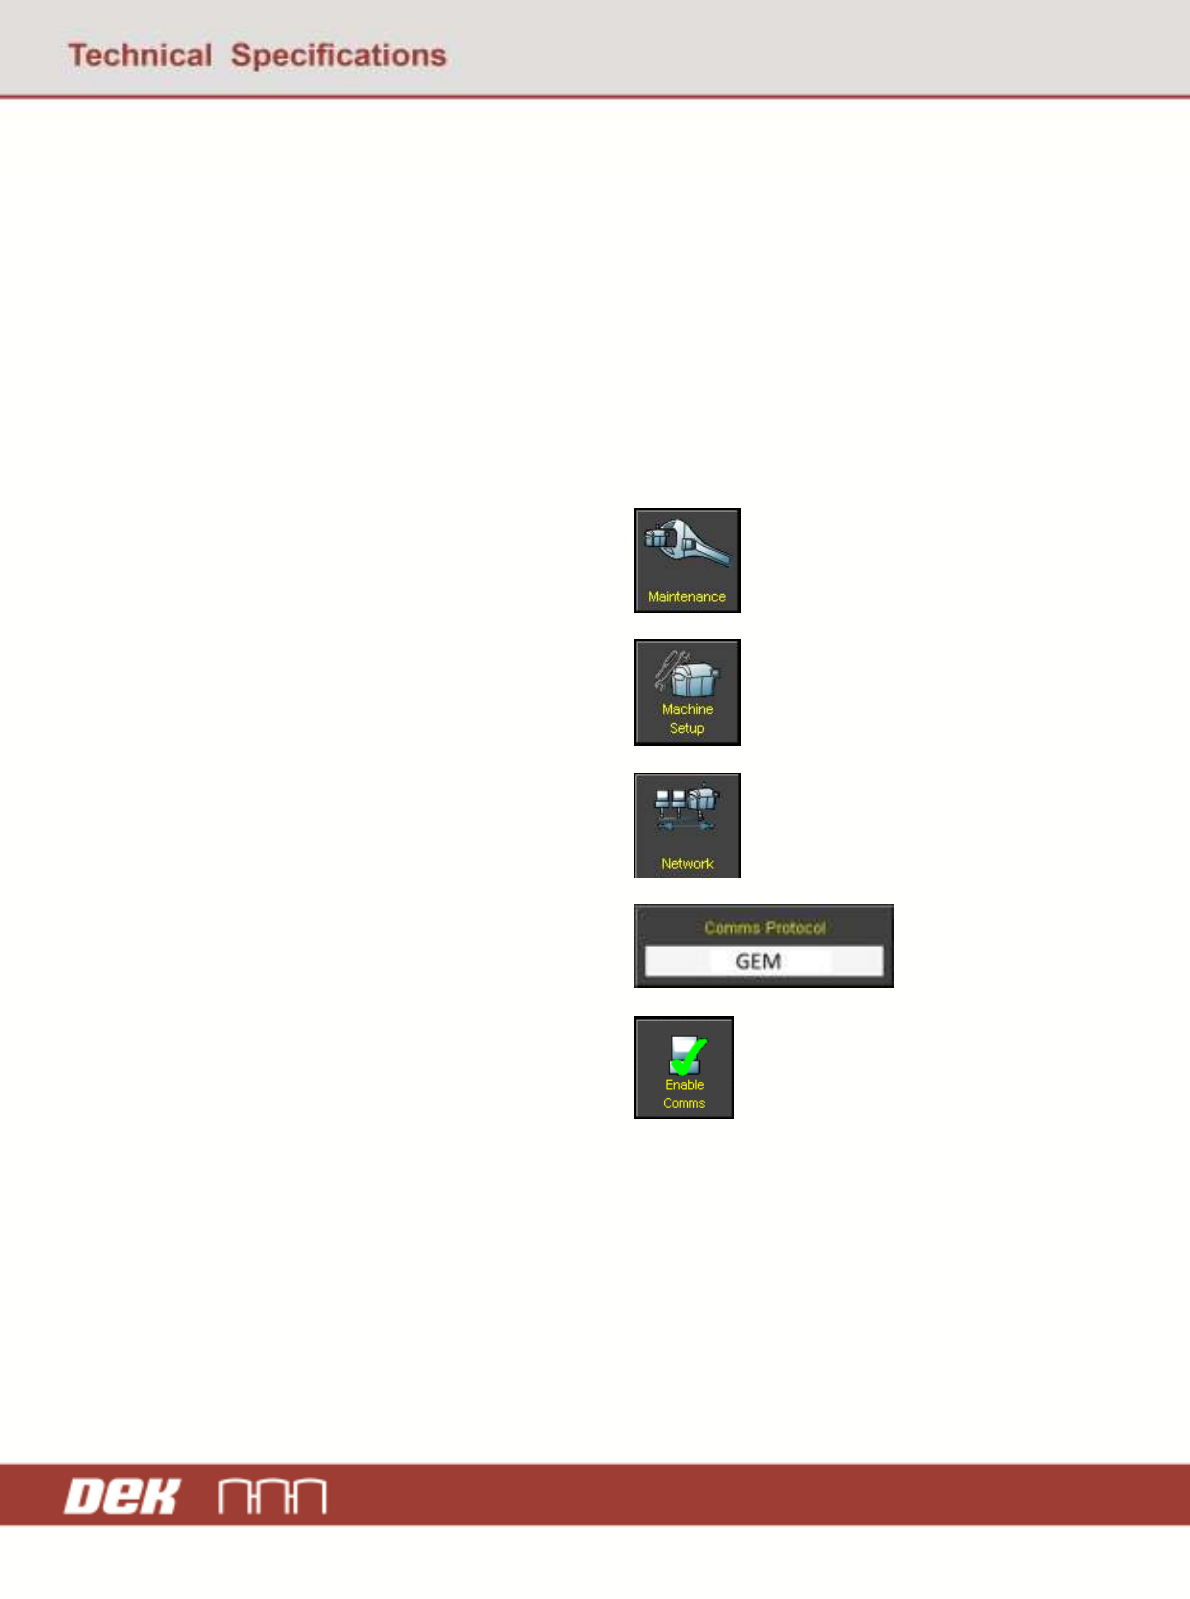
11.2 Enabling GEM
Classic User Interface
From the Ready page:
1. Select Maintenance (F8)
2. Select Set Prefs (F5)
3. Change the value of Host Comms to GEM
4. Select Enable Comms (F1).
Instinctiv User Interface
From the Ready page:
1. Select Maintenance
2. Select Machine Setup
3. Select Network
4. Change the Comms Protocol to GEM
5. Select Enable Comms
GEM Manual for DEK Printers Appendix B
Issue 1.6 January 22, 2018 Page 167 of 171
11.3 Using GEM
Once enabled and communicating with a host, the operator can perform the following functions:
1. Switch between online and online state
2. Switch between local and remote state
3. Transfer product files to and from the host
4. Terminal services
Instinctiv User Interface
From the Ready page:
1. Select Host Comms
2. To switch to the online state, select Online
3. To switch to the offline state, select
Offline
4. To switch to the remote mode, select
Remote
5. To switch to the local mode, select Local
6. To transfer a product from the printer to
the host:
a. Select Send Product
b. Navigate to the required product
c. Select Send Product
7. To transfer a product from the host to the
printer:
a. Select Receive Product
b. Enter the name of the product file
c. Select Receive Product
8. To access terminal services, select
Terminal Services