AOI_RS_v85_en - 第126页
Chap ter3 SPC User Ma nual AOI Repair Station 122 Subg roup Size (just for [Group Mode]’ s [ Mode 2]): Specif y the sampling size. This is onl y for [Mode 2] in [Group Mode]. User could set different sample size for di…

Chapter3 SPC User Manual
AOI Repair Station
121
Query Area: The interface for user to find and set the monitoring
items. The all conditions are explained as the followings.
Kind: Select the kind of inspection machine. Now 7006,
7100 and ICT machine could be selected.
Station: Set the Station ID of the machine.
Feature: To set the feature of monitoring. For TR7006, there
are V (Volume), A (Area), H (Height), PX (X shift) and PY
(Y shift), five items could be selected; for 7100 (AOI), there
are X (X shift), Y (Y shift) and Theta (rotating angle), three
items could be selected; for ICT, user only can select Measure
item.
Model: To select a model name that is monitored.
Board: To select the board that the monitored item belongs to.
If user only wants to monitor the data in a period of time, he
has to check [Start] and [End] item, and specify the start time
and end time.
Start with last sampling time: When checked, system samples
the data that is generated after the system closes last time.
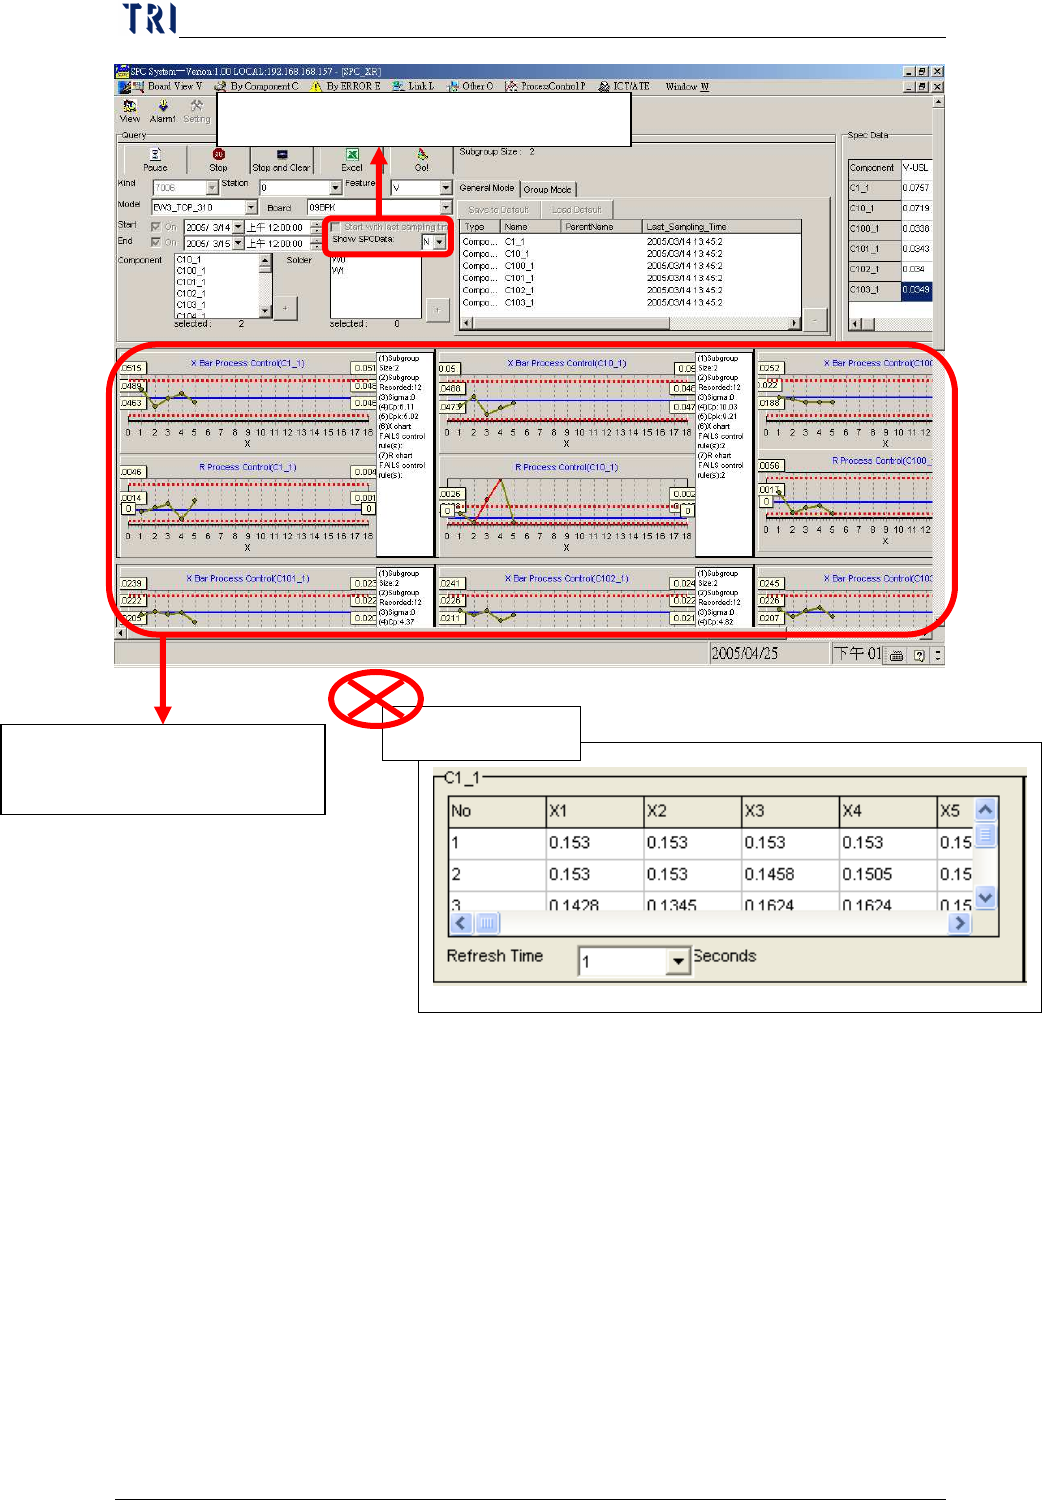
Show SPCData: When user select “N” for [Show SPCData],
system will not show the statistic data and only display the
control charts on screen. After user changes the select to
“N”, he has to start to monitor again to refresh the display.
Chapter3 SPC User Manual
AOI Repair Station
122
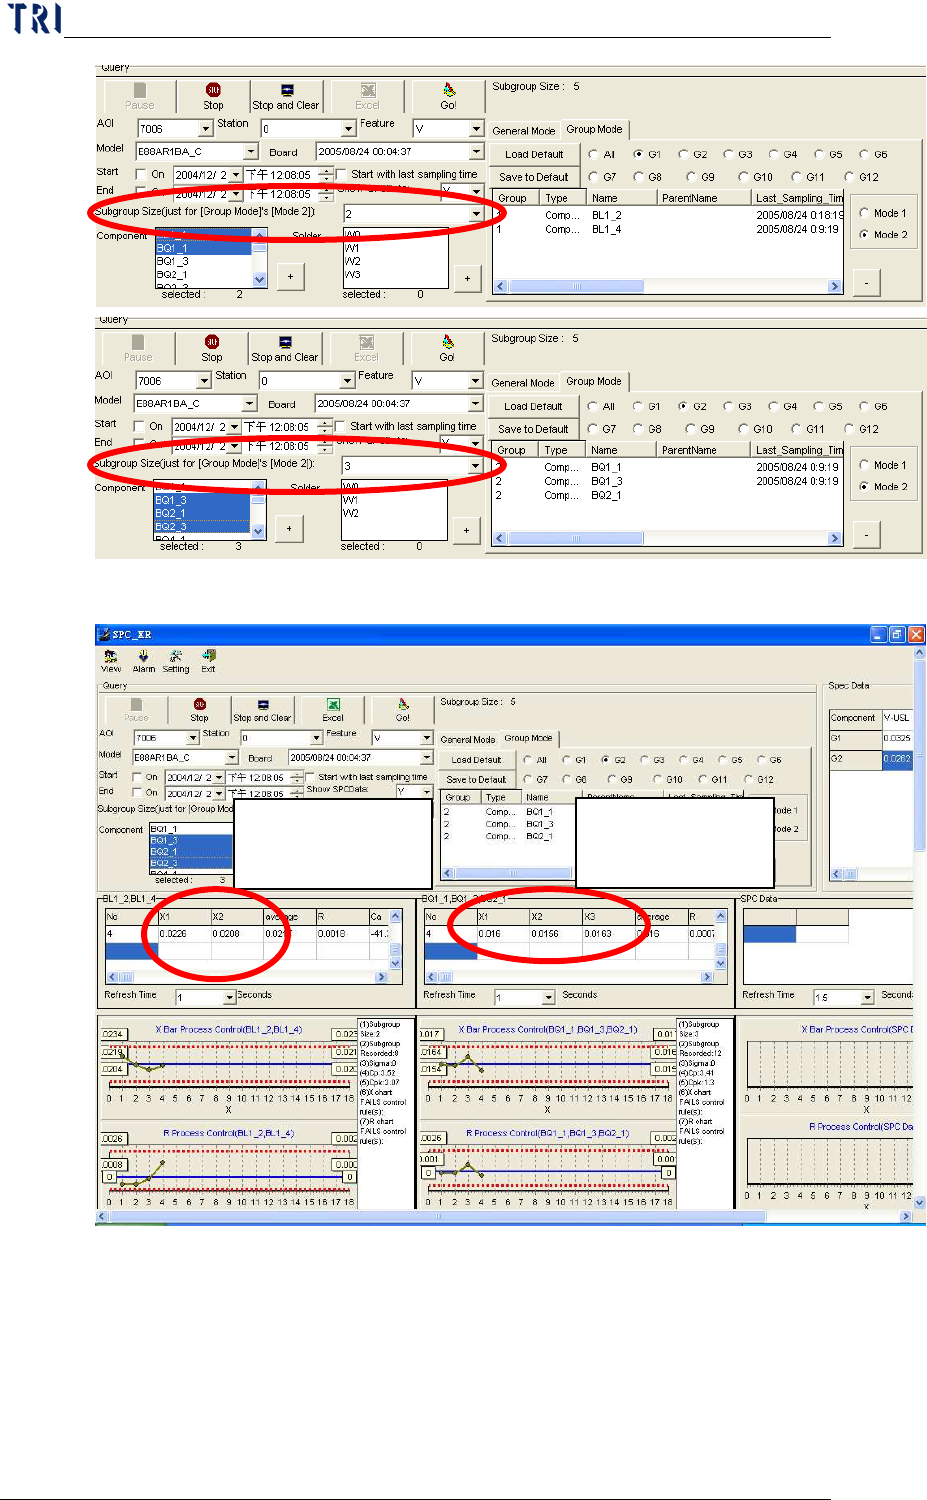
Subgroup Size (just for [Group Mode]’s [Mode 2]): Specify
the sampling size. This is only for [Mode 2] in [Group
Mode]. User could set different sample size for different
Group. Take the following two pictures for example, the
subgroup size is 2 for group [G1]; the subgroup size is 3 for
group [G2].
Select [Show SPCData] to “N”.
System only displays the
control charts.
Statistic data
Chapter3 SPC User Manual
AOI Repair Station
123
When system starts to monitor data, user will find that the
two groups are with different sample size.
Monitor Type: Select to monitor the component with which
kinds of control chart; X bar-R Chart or P Chart.
When user decides to monitor a component or a solder, he has
to press [+] button at lower right side to add the component or
solder to the monitoring list. And there are two modes for
use to select. If user wants to monitor it with [General
For this Group,
sample size is 2.
For this Group,
sample size is 3.