AOI_RS_v85_en - 第138页
Chap ter3 SPC User Ma nual AOI Repair Station 134 The setting of the monitor item list here comes from the data selected by “Monitor Setup” under “Setti ng.” This does not include the components or solders selected in …
Chapter3 SPC User Manual
AOI Repair Station
133
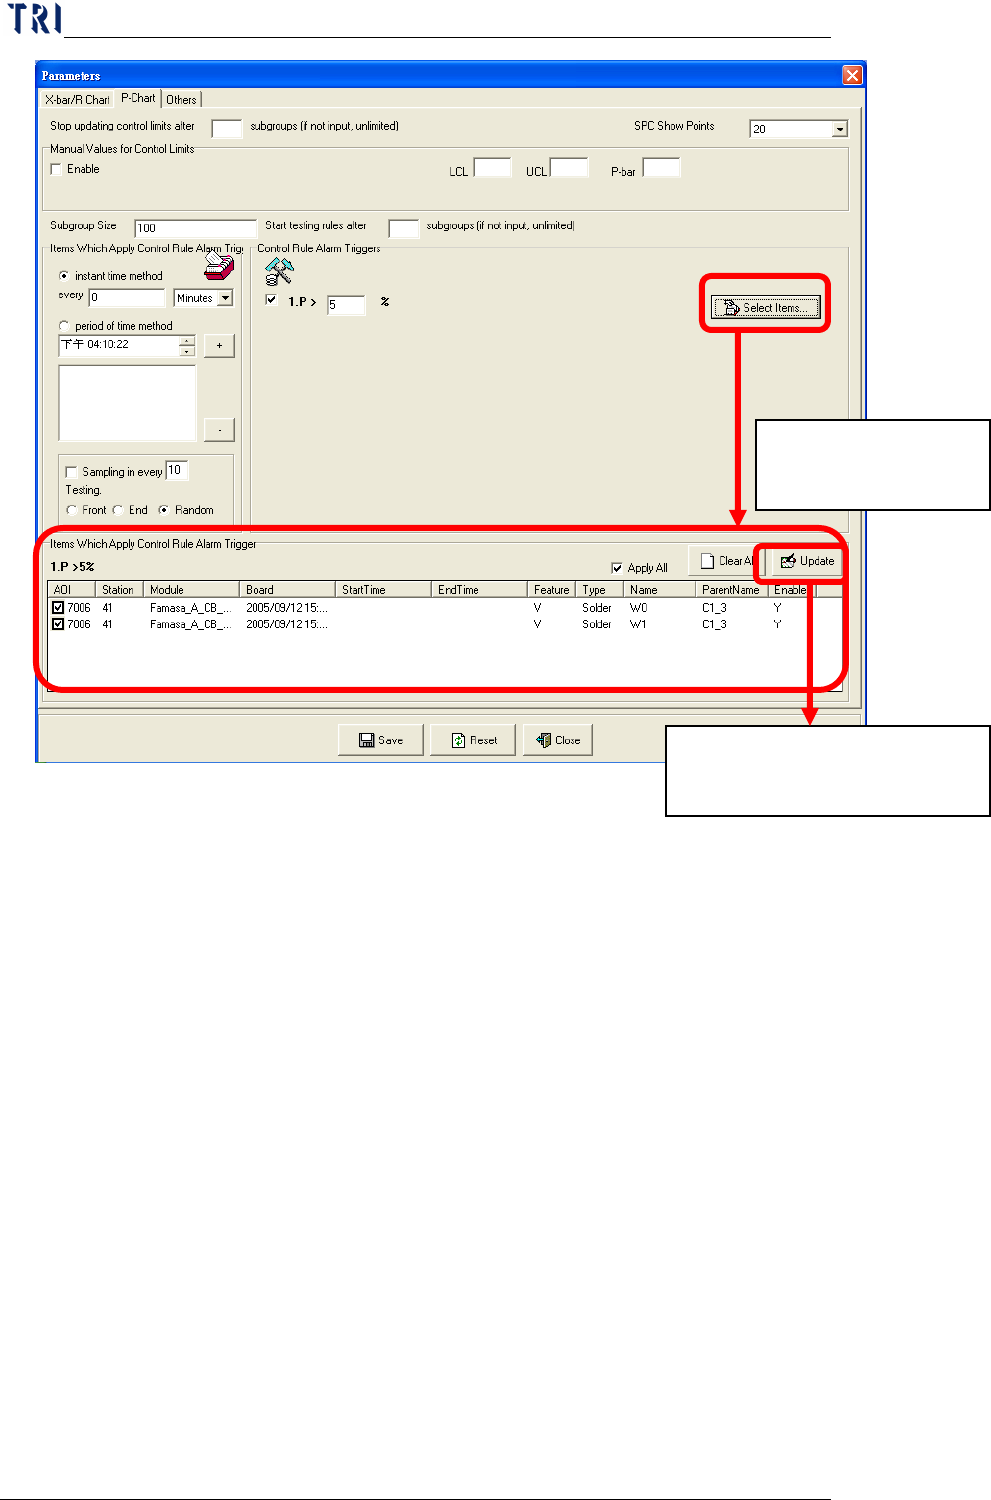
You can set the applicable monitor items for each alarm
by clicking on the “
Select Items…” button on the right
of the alarm. At this time, the lower part of the screen
displays the “Items Which Apply Control Rule Trigger”
block. You can check (
√) the items that are applicable
to this alarm or just click on the “
Apply All” button on
the upper right of the list to indicate that all monitor
items are applicable to this alarm. You can also click
on the “Clear All” button on the upper right of the list
to clear all monitor items currently selected for this
alarm. After selecting, click on the “Update” button
on the upper right corner of the list to confirm update of
this alarm. After updating all alarms, just click on the
“Save” button on the lower part of the screen to save
the updates to the setup file. If you want to reset the
settings, just click on the “
Reset” button. To exit, just
click on the “Close” button.
Click here to display
this setting block.
Click to save data. This block
disappears after saving data.
Chapter3 SPC User Manual
AOI Repair Station
134
The setting of the monitor item list here comes from the
data selected by “Monitor Setup” under “Setting.”
This does not include the components or solders
selected in the Main menu that require the display of
real-time statistical data and control charts.
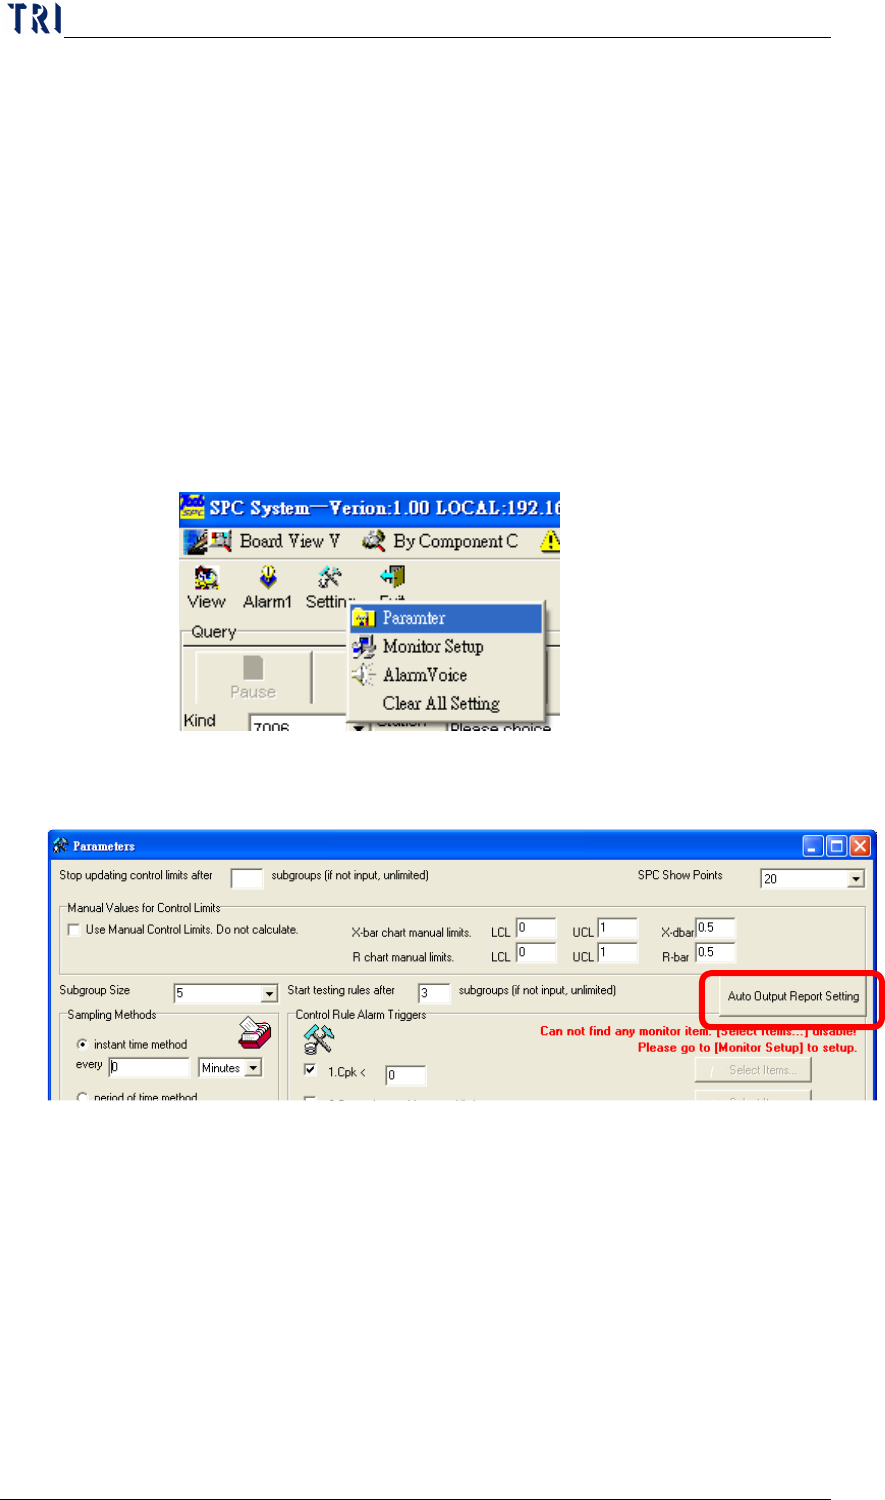
7.4.1.9 Create Style 3 Report Automatically.
Only for [Mode 2] under [Group Mode], system can output “Style
2” and “Style 3”. “Style 3” is a daily report, system could create the
Style 3 Report automatically. User can set parameters of the Style 3
Report here.
The setting frame is a shown below. Pressing [Auto Output
Report Setting] is to enter the setting window of the Style 3 Report.
Chapter3 SPC User Manual
AOI Repair Station
135
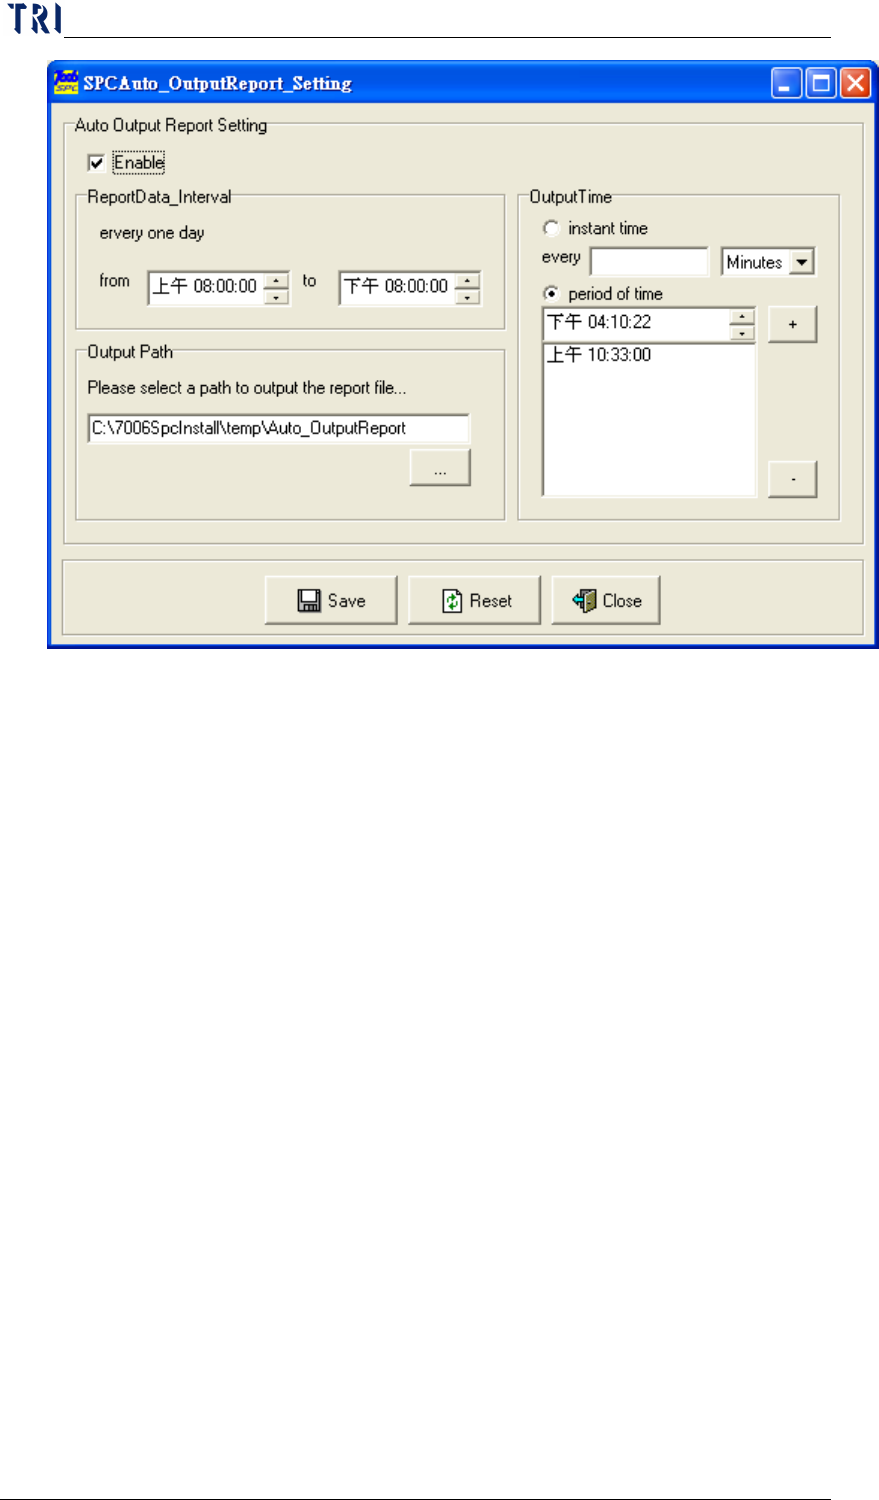
When user checks [Enable], the Style 3 Report will be created
automatically. [ReportData_Interval] Area is to set the time
interval; because the report is a daily report, the report will contain
the data collected in this interval everyday. Take the figure for
example, system will export the data collected form 8 a.m. to 8p.m.
[Output Path] is to set the output path of the report. Take the
figure for example, the report will be saved in
[C:\7006SpcInstall\temp\Auto_OutputReport] automatically. The
report is named by the date, for example, [2005.11.03.xls] is
created at 3
rd
, November, 2005. There are 2 kinds of output time
could be selected in [Output Time] Area.
Instant time method: Sets the time interval for sampling. The unit
for time interval can be in Minutes or Hours. For example, if you
set “5 Minutes”, this indicates that sampling will be performed
once every 5 minutes. If you set “0 Minutes” or “0 Hours”, this
indicates that there is no need to pause, the sampling is performed
non-stop.
Period of time method: Sets the time zone for sampling everyday.
For example, if you set “Morning 09:00:00”, this indicates that
sampling will be performed once at 9:00 a.m. everyday.