AOI_RS_v85_en - 第37页
Chapter 2 Repair Station Main Progr am AOI Repair Station 33 W indow] area does not nec essar y to enter anything if the confirmation was selected by [Component]. Using the Mouse Step5. The [Defect Component (the yello…

Chapter 2 Repair Station Main Program
AOI Repair Station
32
Step1. Select [ON LINE] or [OFF LINE]
ON LINE-PLEASE double click on [Model] (YELLOW
BOX), select a model name.
OFF LINE-Scan a barcode to identify a PCB.
Step2. During [OFF LINE], [ALL] is the default setting for [STATUS],
but the users may decide the board status, decide to look for a
particular status while searching the data by using barcode.
The [STATUS] of the board:
FAIL-A condition has not been confirmed by user
while [DEFECT] has been detected by AOI.
PASS-AOI detected as [Pass].
REPAIR-The board has been detected as failed by
AOI, and also confirmed as a defect board by the
operator.
UNTEST-MARK POINT has been shifted
SKIP-Disregard the board, or been confirmed by the
operator that the board is not being calculated.
RPASS-The board has been detected as failed by AOI,
but confirmed as a pass board by the operator.
ALL-All Condition
Step3. Select [AOI STATION]. (The station will NOT be under search
condition if the [Disable] is being checked on the figure).
Step4. Press [QUERY] to search, and there are 2 different ways to confirm
data, using keyboard or using mouse
Using the Keyboard
Step5. The [DEFECT COMPONENT (the yellow area)] or the [DEFECT
WINDOWS], (The program will decide where to land the yellow
area when you select [Confirm Kind] during the log in. The yellow
area will fall onto [Defect Component] when [Component] is
selected. The yellow area will fall onto [Defect Windows] when
[Window] is selected); this is to confirm the problem component.
(The way to confirm a failed component is to press the number key
that represents a kind of a defect.)
There is no need to enter [Defect Type] for false detection.
Only need to confirm the problem component. Press down
arrow key when finished checking a problem till the last one
and press [ENTER] to show the next data. The [Defect
Chapter 2 Repair Station Main Program
AOI Repair Station
33
Window] area does not necessary to enter anything if the
confirmation was selected by [Component].
Using the Mouse
Step5. The [Defect Component (the yellow area)] or the [Defect Window],
((The program will decide where to land the yellow area when you
select [Confirm Kind] during the log in. The yellow area will fall
onto [Defect Component] when [Component] is selected. The
yellow area will fall onto [Defect Windows] when [Window] is
selected); this is to confirm the problem component. (The way to
confirm is to click on the [Defect Type] of Defect AREA directly).
Do not enter any [Error Type if there is a false detection, only
need to confirm the problem component. However, select
[RPASS] in the [STATUS] of SN working area when there is
a false detection for the entire board. The [Defect Window]
area does not necessary to enter anything if the confirmation
was selected by [Component].
After the confirmation, press [Save]. Press [OnlineConfirm]
if it is [ONLINE] mode.
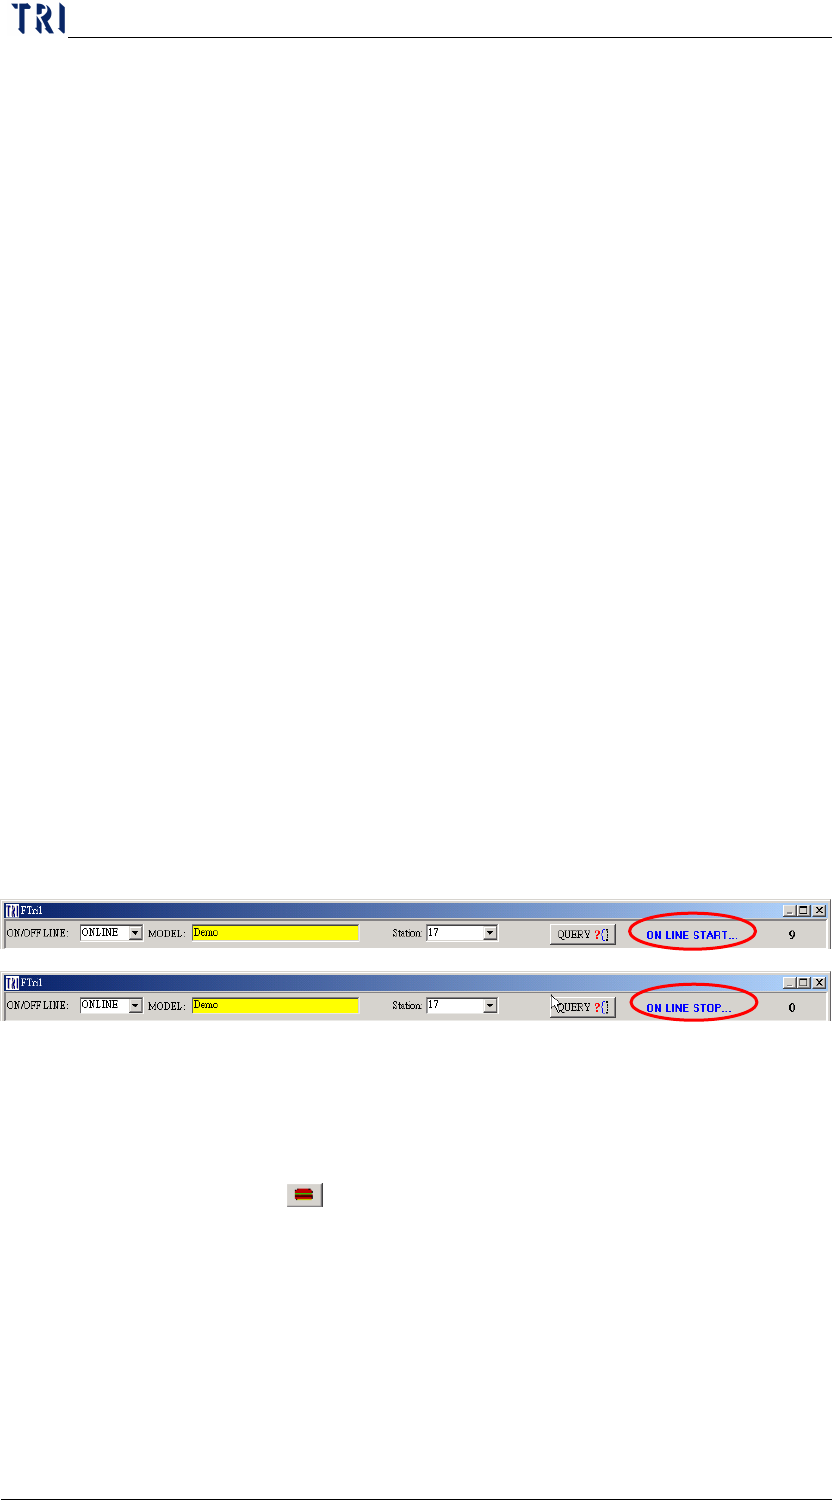
Step6. Move the mouse to [ON LINE START], left click will switch to
[ON LINE STOP] whenever the MODEL switching is being
carried out while it’s [ONLINE].
6.3 Hotkey Functions
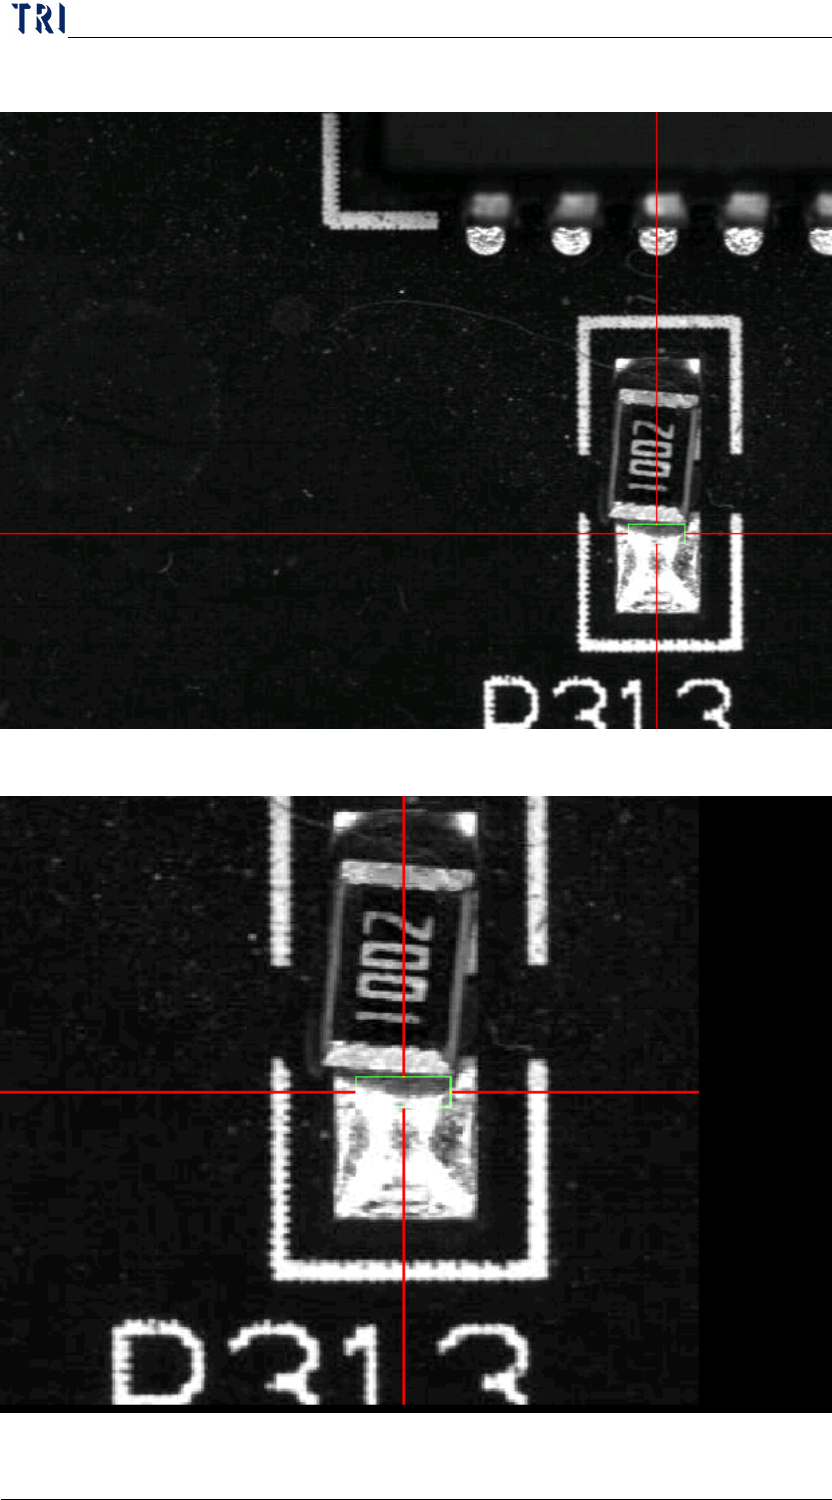
6.3.1 [PageUp] Key-Press to enlarge and center the FOV image near the
fail component and press once again to return the original state. When
you select the
(Defect Located in the Center) button and press
this key at the same time, the fail image will be shown at the center
with original image size.
Chapter 2 Repair Station Main Program
AOI Repair Station
34
Original image
Enlarged image