00197469-02_SM_Twin_Kunde_EN.pdf - 第42页
4 Pneumatic and pressure control valve (PRV) 4.5 Replacing the vacuum distributor (Twin VHF only) 42 Service Manual SIPLACE TwinStar (Twin, Twin HF, Twin VHF) 07/2020 4.5 Replacing the vacuum distributor (Twin VHF only) …
4 Pneumatic and pressure control valve (PRV)
4.4 Replace hoses
Service Manual SIPLACE TwinStar (Twin, Twin HF, Twin VHF) 07/2020 41
4.4.1.3 Dismantling the pipe clamp for version 2
Removal
► Dismantle the buffer on the return unit.
3.1 "Replacing the return unit buffer" [}17]
► Dismantle the control cable.
5.5 "Replacing the control cable" [}76]
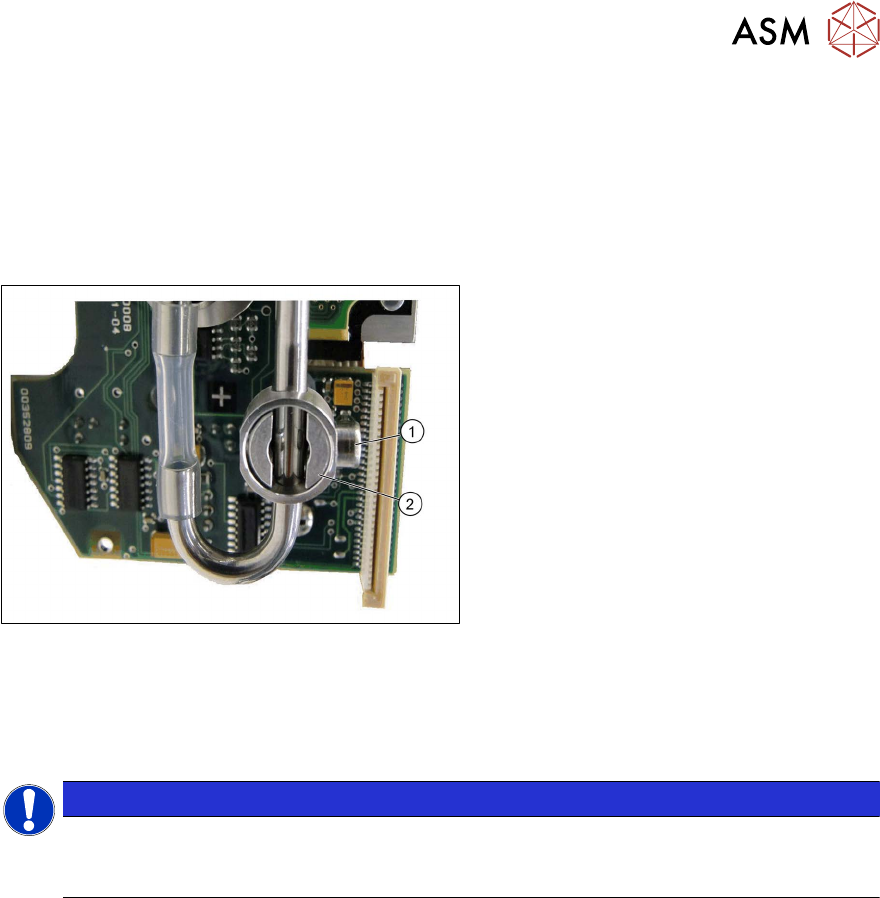
Fig.59: Removing the pipe clamp
► Remove the screw(1) fastening the
pipe clamp(2)
and then remove the
pipe clamp.
Installation
► For assembly, refit the pipe clamp and fix into place with the fastening screw. Lift the pipe
clamp slightly so that the elbow can still be moved freely and is not clamped tight.
NOTICE
Hose
During assembly, also observe section 4.4.1 "Replacing the silicone hose
4.5x2.5x26" [}37] where necessary.
► Fit the control cable.
5.5 "Replacing the control cable" [}76]
► Fit the buffer on the return unit.
3.1 "Replacing the return unit buffer" [}17]
See also
2 4.4.1.2 "Replacement of elbow version 2" [}40]
4 Pneumatic and pressure control valve (PRV)
4.5 Replacing the vacuum distributor (Twin VHF only)
42 Service Manual SIPLACE TwinStar (Twin, Twin HF, Twin VHF) 07/2020
4.5 Replacing the vacuum distributor (Twin VHF only)
Parts
●
Vacuum distributor Twin VHF [03103843Sxx] (incl. fastening screw)
Overview
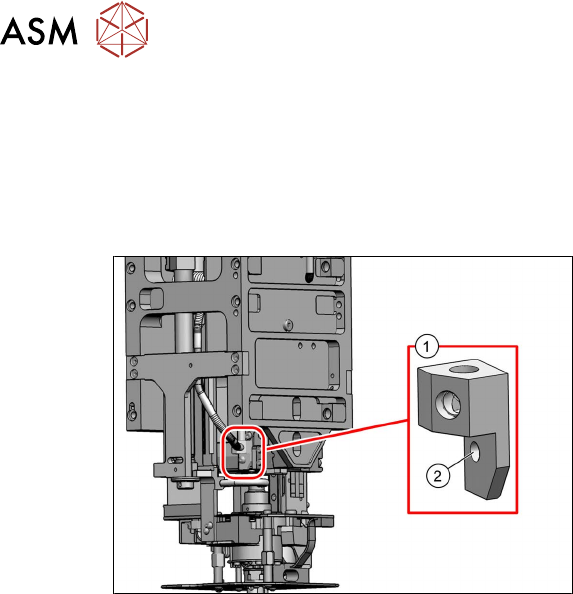
Fig.60: Vacuum distributor Twin VHF
1. Vacuum distributor Twin VHF
[03103843‑xx]
2. Flat-headed Phillips screw, type H (DIN
7985)
Preparation
► Remove the head from the machine. For details about removing and fitting the placement
head, refer to the service manual for your machine.
Removal
► Pull both hoses of the vacuum distributor.
► Remove the screw fastening the vacuum distributor and take the vacuum distributor out of the
head.
Installation
Follow the removal instructions in reverse order for installation.
4 Pneumatic and pressure control valve (PRV)
4.6 Replacing the sleeve with ball fixing/seal
Service Manual SIPLACE TwinStar (Twin, Twin HF, Twin VHF) 07/2020 43
4.6 Replacing the sleeve with ball fixing/seal
Parts
●
Sleeve with ball fixing P&P module [03020695‑xx] (suitable for all Twin types)
●
Seal for sleeve with ball fixing P&P module [03020698‑xx] (suitable for all Twin types)
Overview
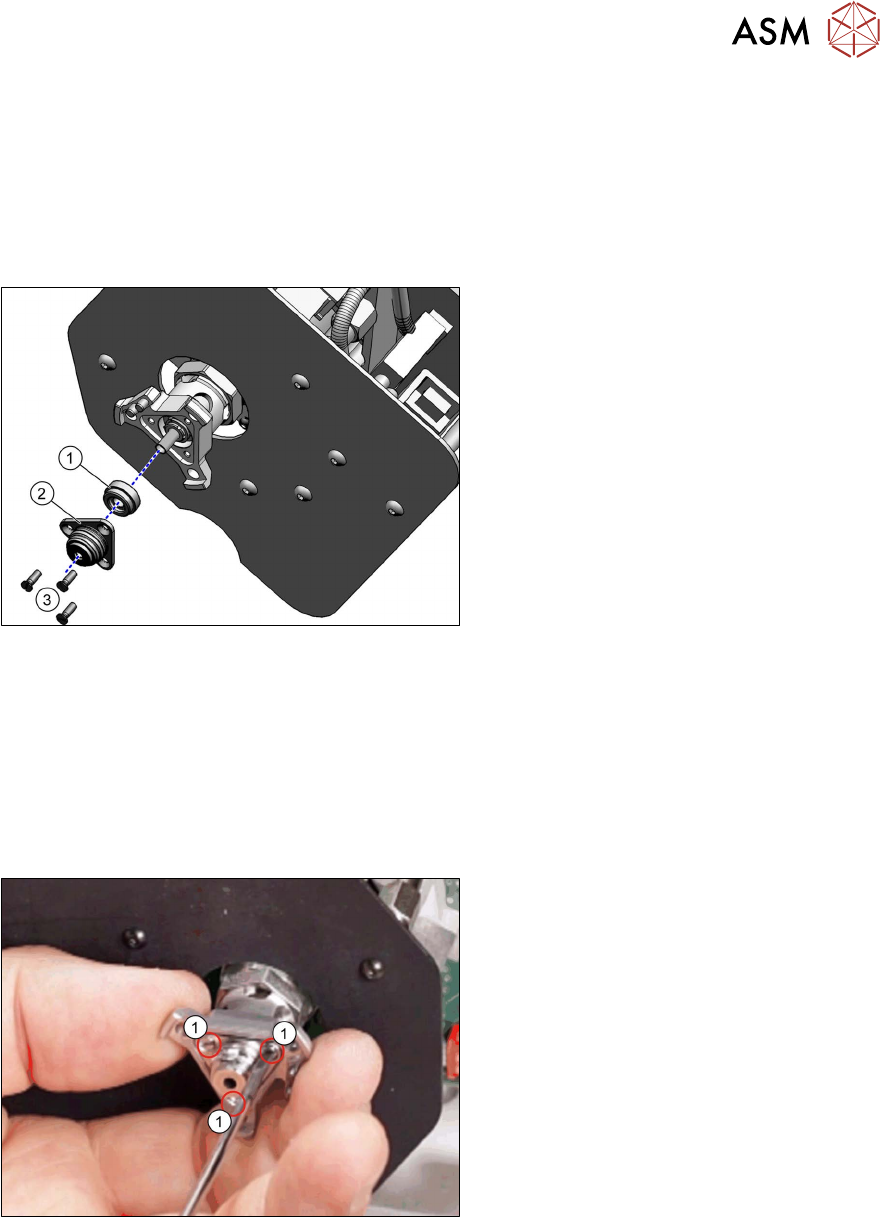
Fig.61: Sleeve with ball fixing and seal
1. Seal for sleeve with ball fixing, P&P
module [03020698‑xx]
2. Sleeve with ball fixing, P&P module
[03020695‑xx]
3. Three fastening screws [03022436‑xx]
for sleeve with ball fixing (slotted coun-
tersunk screws ISO2009-M1.6x5-
A2-50)
Preparation
► Remove the head from the machine. For details about removing and fitting the placement
head, refer to the service manual for your machine.
Removal
► Dismantle the buffer.
3.1 "Replacing the return unit buffer" [}17]
Fig.62: Removing the fastening screws (example of Twin /
Twin HF shown)
► Remove the three screws(1) fastening
the sleeve with ball fixing.