00197469-02_SM_Twin_Kunde_EN.pdf - 第29页
4 Pneumatic and pressure control valve (PRV) 4.2 Replacing the pressure control valve (PRV) Service Manual SIPLACE TwinStar (Twin, Twin HF, Twin VHF) 07/2020 29 Fig.30: Pull off the hose (example of Twin / Twin HF shown…
4 Pneumatic and pressure control valve (PRV)
4.2 Replacing the pressure control valve (PRV)
28 Service Manual SIPLACE TwinStar (Twin, Twin HF, Twin VHF) 07/2020
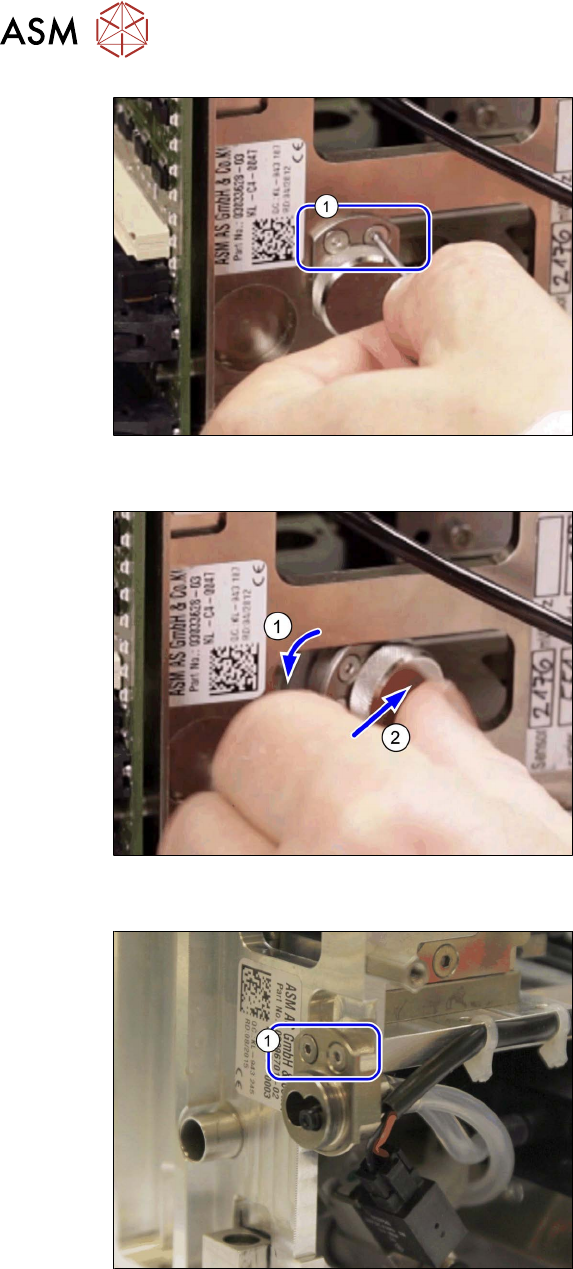
Fig.27: Screws fastening the air filter (example of Twin /
Twin HF shown)
► Only for Twin / Twin HF:
Loosen the two screws(1) fastening
the air filter, so that the air filter can be
moved easily but the screws can not
fall out.
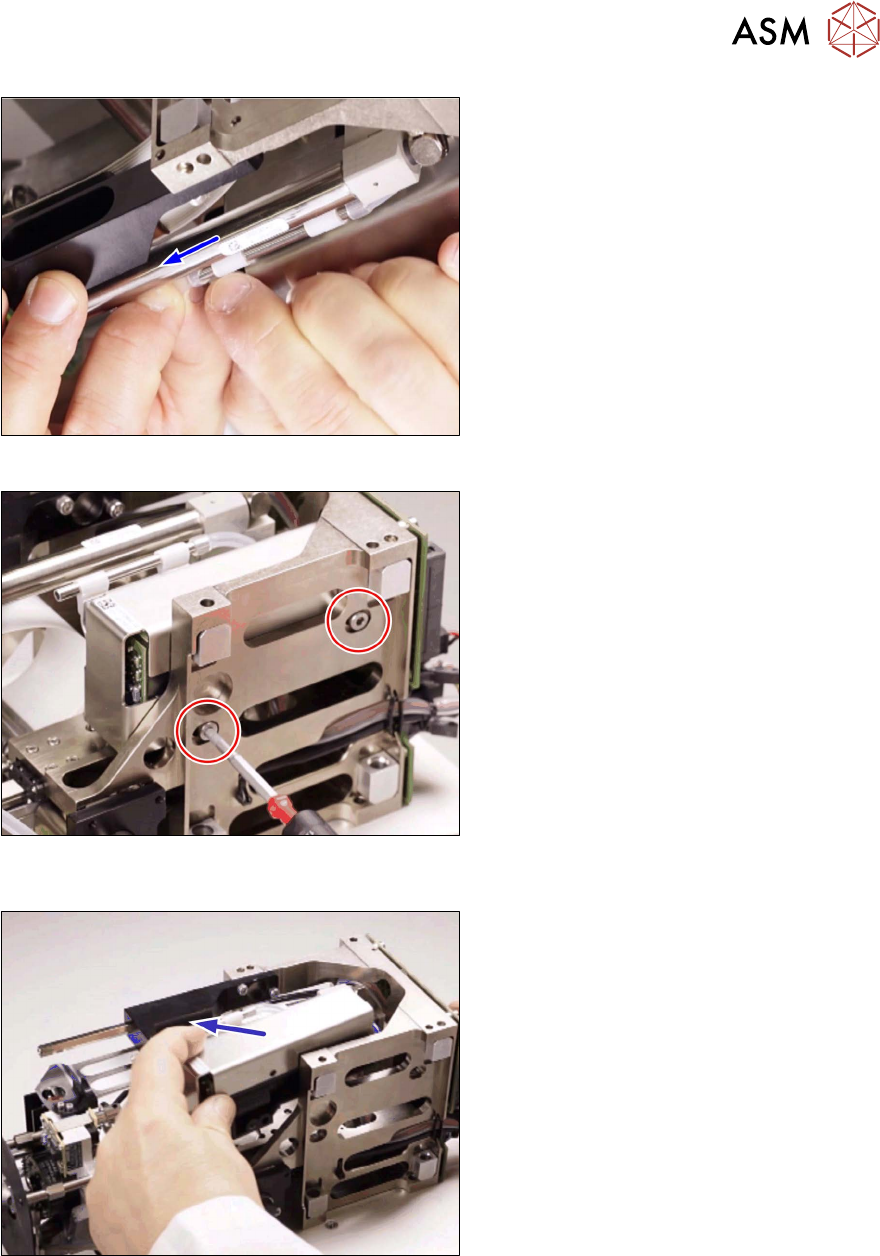
Fig.28: Push the air filter into the head (example of Twin /
Twin HF shown)
► Only for Twin / Twin HF:
Turn the air filter onto its side(1) and
push it through the opening(2)
into the
inside of the head.
Fig.29: Screws fastening the air filter (Twin VHF)
► Only for Twin VHF:
Take off the filter cap and remove the
two screws(1)
fastening the air filter,
so that the air filter can move freely.
4 Pneumatic and pressure control valve (PRV)
4.2 Replacing the pressure control valve (PRV)
Service Manual SIPLACE TwinStar (Twin, Twin HF, Twin VHF) 07/2020 29
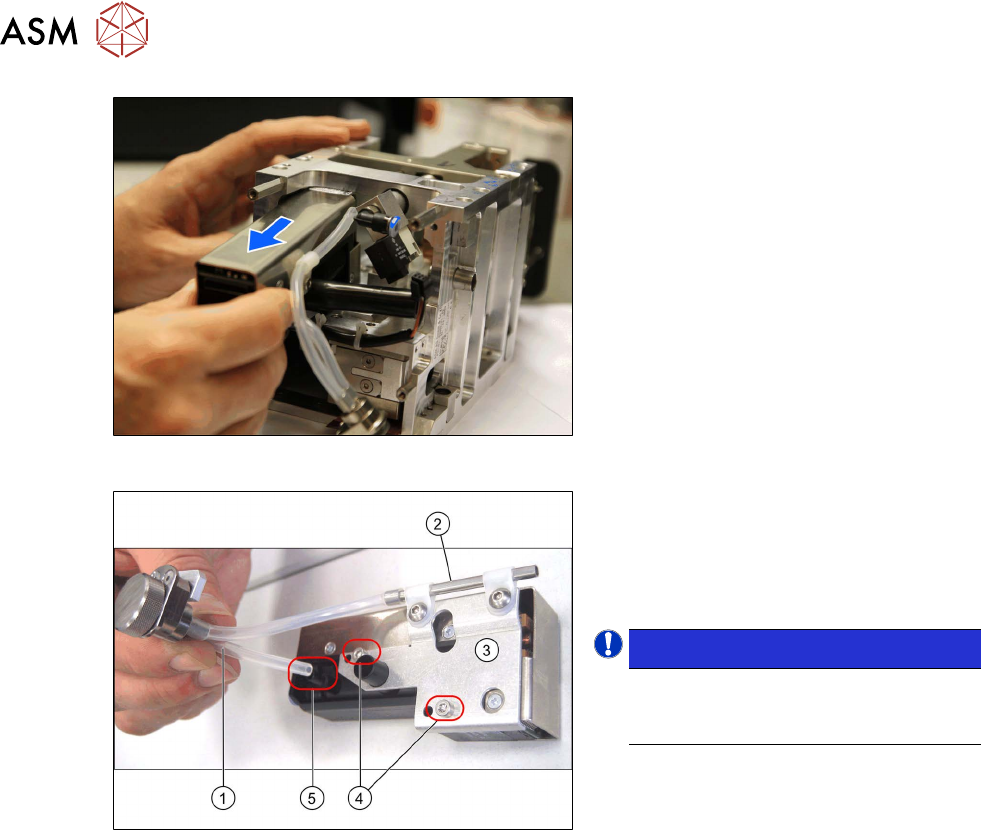
Fig.30: Pull off the hose (example of Twin / Twin HF shown)
► Pull the bottom hose off the precision
tube.
Fig.31: Screws fastening the PRV (example of Twin / Twin
HF shown)
► Remove the two screws fastening the
PRV.
► Only for Twin / Twin HF:
Pull the PRV downwards, to unplug it
from the head main board.
Fig.32: Remove the PRV (example of Twin / Twin HF
shown)
► Only for Twin / Twin HF:
Pull the PRV and air filter sideways out
of the head together.
4 Pneumatic and pressure control valve (PRV)
4.2 Replacing the pressure control valve (PRV)
30 Service Manual SIPLACE TwinStar (Twin, Twin HF, Twin VHF) 07/2020
Fig.33: Removing the PRV (Twin VHF)
► Only for Twin / Twin HF:
Pull the PRV and air filter upwards out
of the head together.
Fig.34: PRV mount and air filter
► Pull the silicon hose (1) off the vacuum
connection (5)
on the PRV.
► Remove the two screws(4) fastening
the mount(3)
for the PRV precision
pipe(2)
.
NOTICE!
This holder for the digital PRV has four
fixture holes, of which the two lower
ones (4)
are used.
.
Installation
Installation is performed by following the above instructions in the reverse order. Also observe the
following instructions:
► Fix the two screws fastening the mount to the PRV with a torque of 0.6Nm.
► Fix the two screws fastening the PRV to the head with an Loctite 243 and tighten these with a
torque of 0.6Nm
.
► Make sure that the air filter hoses are not crossed over one another.
► Tighten the cover and the two air filter fastening screws hand-tight.
► Observe the installation instructions in the following sections:
5.1 "Replacing the head main board" [}65]
3.1 "Replacing the return unit buffer" [}17]
► Perform "zero correction" for the pressure control valve.
See also
2 4.1 "Replacing the air filter" [}25]