00197469-02_SM_Twin_Kunde_EN.pdf - 第43页
4 Pneumatic and pressure control valve (PRV) 4.6 Replacing the sleeve with ball fixing/seal Service Manual SIPLACE TwinStar (Twin, Twin HF, Twin VHF) 07/2020 43 4.6 Replacing the sleeve with ball fixing/seal Parts ● Slee…
4 Pneumatic and pressure control valve (PRV)
4.5 Replacing the vacuum distributor (Twin VHF only)
42 Service Manual SIPLACE TwinStar (Twin, Twin HF, Twin VHF) 07/2020
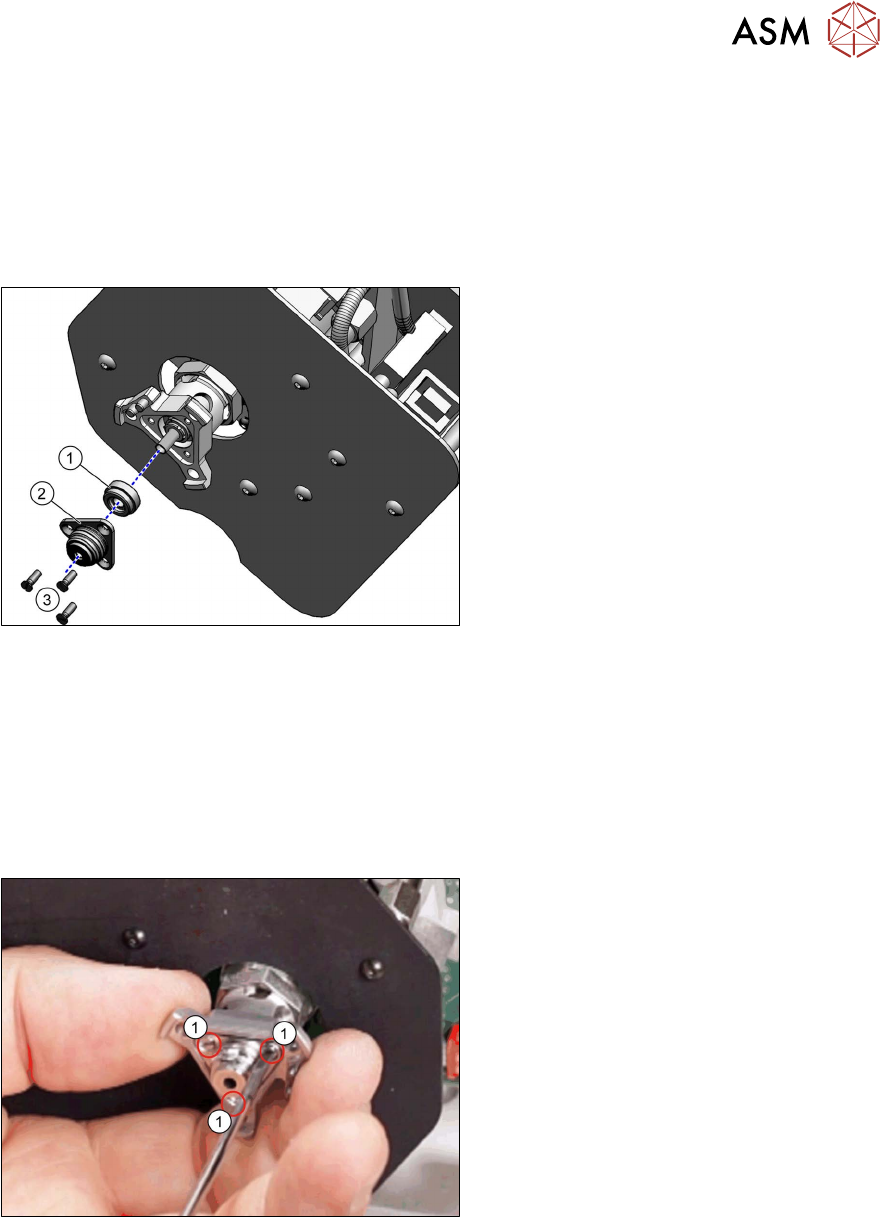
4.5 Replacing the vacuum distributor (Twin VHF only)
Parts
●
Vacuum distributor Twin VHF [03103843Sxx] (incl. fastening screw)
Overview
Fig.60: Vacuum distributor Twin VHF
1. Vacuum distributor Twin VHF
[03103843‑xx]
2. Flat-headed Phillips screw, type H (DIN
7985)
Preparation
► Remove the head from the machine. For details about removing and fitting the placement
head, refer to the service manual for your machine.
Removal
► Pull both hoses of the vacuum distributor.
► Remove the screw fastening the vacuum distributor and take the vacuum distributor out of the
head.
Installation
Follow the removal instructions in reverse order for installation.
4 Pneumatic and pressure control valve (PRV)
4.6 Replacing the sleeve with ball fixing/seal
Service Manual SIPLACE TwinStar (Twin, Twin HF, Twin VHF) 07/2020 43
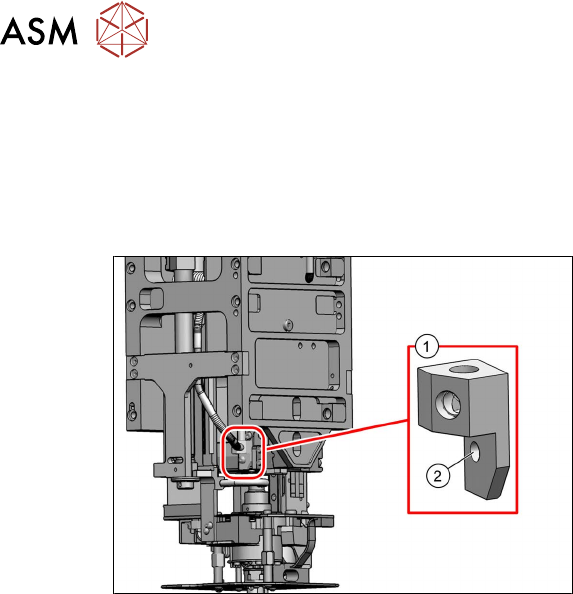
4.6 Replacing the sleeve with ball fixing/seal
Parts
●
Sleeve with ball fixing P&P module [03020695‑xx] (suitable for all Twin types)
●
Seal for sleeve with ball fixing P&P module [03020698‑xx] (suitable for all Twin types)
Overview
Fig.61: Sleeve with ball fixing and seal
1. Seal for sleeve with ball fixing, P&P
module [03020698‑xx]
2. Sleeve with ball fixing, P&P module
[03020695‑xx]
3. Three fastening screws [03022436‑xx]
for sleeve with ball fixing (slotted coun-
tersunk screws ISO2009-M1.6x5-
A2-50)
Preparation
► Remove the head from the machine. For details about removing and fitting the placement
head, refer to the service manual for your machine.
Removal
► Dismantle the buffer.
3.1 "Replacing the return unit buffer" [}17]
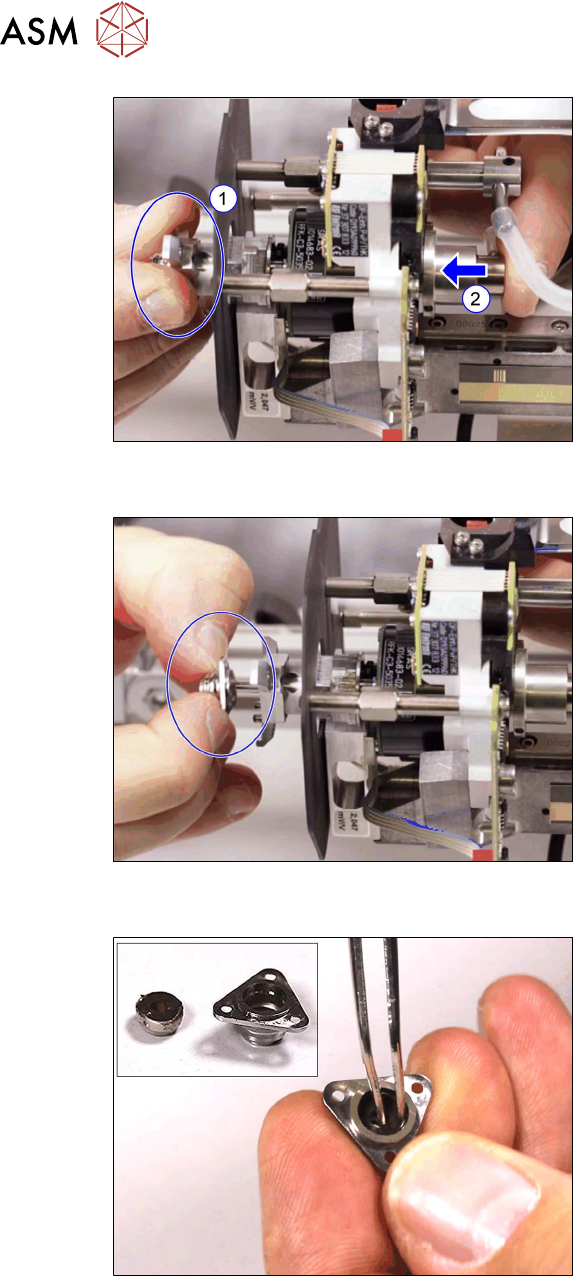
Fig.62: Removing the fastening screws (example of Twin /
Twin HF shown)
► Remove the three screws(1) fastening
the sleeve with ball fixing.
4 Pneumatic and pressure control valve (PRV)
4.6 Replacing the sleeve with ball fixing/seal
44 Service Manual SIPLACE TwinStar (Twin, Twin HF, Twin VHF) 07/2020
Fig.63: Unlocking the sleeve with ball fixing (example of
Twin / Twin HF shown)
To unlock the sleeve with ball fixing, pro-
ceed as follows:
► Hold the nozzle interface in position (1)
while pressing against the pneumatic
rotary supply (2)
.
Fig.64: Removing the sleeve with ball fixing (example of
Twin / Twin HF shown)
► Pull the sleeve with ball fixing off the
pipe of the pneumatic rotary supply.
Fig.65: Remove the seal
► Remove the seal from the sleeve with
ball fixing.