00194329-03.pdf - 第195页
Replacement instructions - Gantry c able and hose carrier SIPLACE HS / S / F 01/2007 Edition 195 : Run the ribbon cab les neatly to the ga ntry conversio n board. Be careful not to damage the cables on sharp edges. 2 2 :…
Replacement instructions - Gantry cable and hose carrier SIPLACE HS / S / F
01/2007 Edition
194
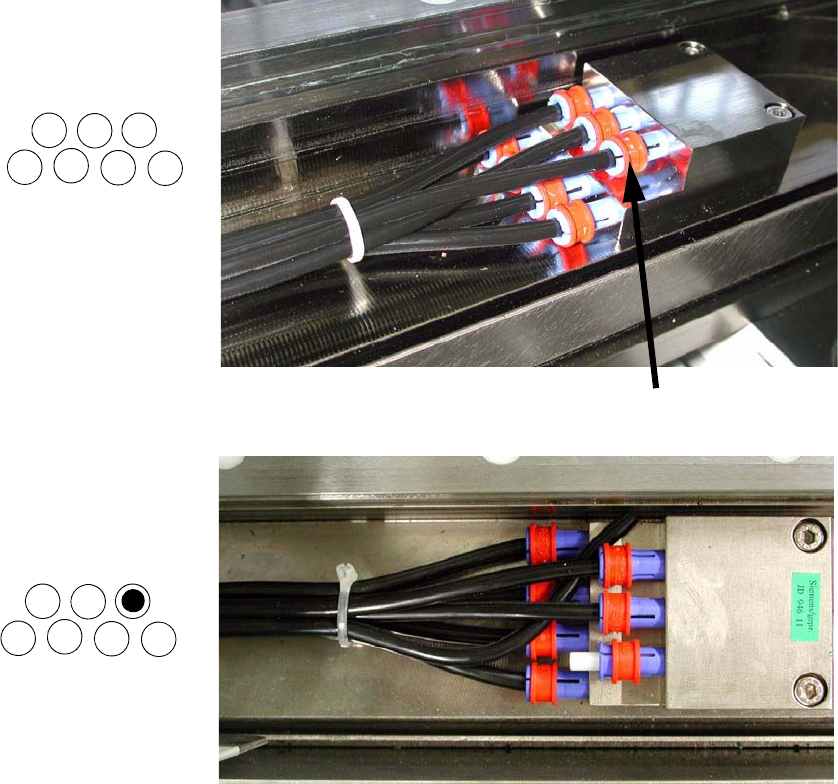
: Cut the compressed air hoses to the correct length so that they can be inserted firmly into the
connectors and are not under tension (see photograph).
: Attach the hoses in the following order:
2
2
2
2
2
2
2
2
2
1
3
7
65
4
F machine:
Connection 2
1
3
7
65
4
S machine:
free
4
Replacement instructions - Gantry cable and hose carrier SIPLACE HS / S / F
01/2007 Edition
195
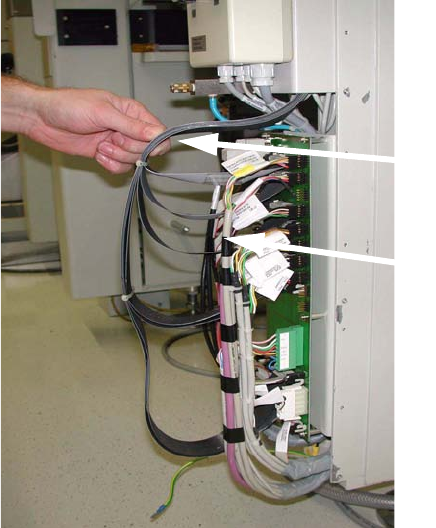
: Run the ribbon cables neatly to the gantry conversion board.
Be careful not to damage the cables on sharp edges.
2
2
: Fix all ribbon cables and hoses with cable ties at suitable points so that they are unobstructed
at all points and cannot rub against anything.
: Fit the plate with the interface box.
: Move the gantry in the X and Y directions.
Check that the cable and hose carrier is fitted correctly.
2
: Fit the protective covers onto the placement machines.
: Screw on the stops for the protective covers (2 screws on each).
: Fix and align the Schmersal switches.
: Fit the stopper.
: Fit the uprights and swivel doors.
: Connect the grounding cable to the U-shaped profile and fit it to the placement machine.
: Screw on the design panels once more (loosen just one screw in each arched cross-piece).
Plug in all cables
Cable tray
Replacement instructions - Gantry cable and hose carrier SIPLACE HS / S / F
01/2007 Edition
196
: Switch on the placement machine.
: Start the SITEST program.
: Start a continuous run of the X or Y axis.
: Check again that the components of the cable and hose carrier are laid correctly and are par-
allel.
Make sure that no component of the cable and hose carrier is in contact with other parts
of the machine.
: Correct if necessary.
2
2