00196658-01 - IM SIPLACE Pro 7.1_en.pdf - 第37页
4 Installation of SIPLACE Pro and possible Setup Types Installation Manual Edition 11/2009 US SIPLACE Pro 7.1 35 4.2.5 Setup T ype – SIPLACE Pro Line Control Server This setup type cont ains all component s of the SIPLAC…
Installation Manual 4 Installation of SIPLACE Pro and possible Setup Types
SIPLACE Pro 7.1 Edition 11/2009 US
34
Step 3
The "Start Copying Files" dialog box gives you a last chance to check the information you have
entered during the previous steps. 4
Æ Click Next if you accept all the information entered so far.
Æ If you want to alter one or more details, click the Back button until you get to the dialog box in
question.
Æ There, input your changes and click Next to continue as usual.
– The installation routine is now started.
– The "Setup Complete" window confirms that the installation has been completed successfully.
4 Installation of SIPLACE Pro and possible Setup Types Installation Manual
Edition 11/2009 US SIPLACE Pro 7.1
35
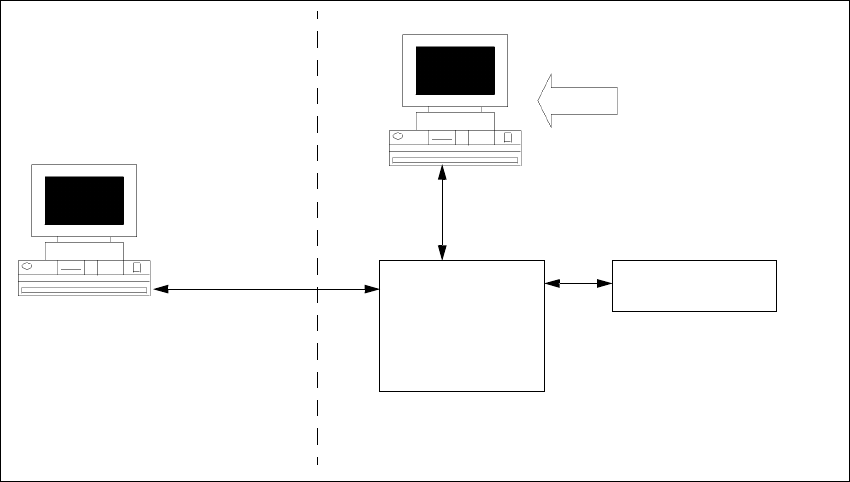
4.2.5 Setup Type – SIPLACE Pro Line Control Server
This setup type contains all components of the SIPLACE Pro Line Control Server. This setup type
is designed to be used if a separate computer is used as Line Control Server in order to increase
performance. 4
4
Fig. 4 - 21 Components – SIPLACE Pro Line Control Server
Step 1
Æ Run through the steps in ”Starting installation – first steps” from page 13.
Æ Select the SIPLACE Pro Line Control Server setup type.
Æ Click Next.
Line Control
Server
SIPLACE Pro
Interface
MS SQL Server with
SIPLACE Pro Server and
Database pre-installed
Setup
Resource
Manager
COM+
COM+
Installation Manual 4 Installation of SIPLACE Pro and possible Setup Types
SIPLACE Pro 7.1 Edition 11/2009 US
36
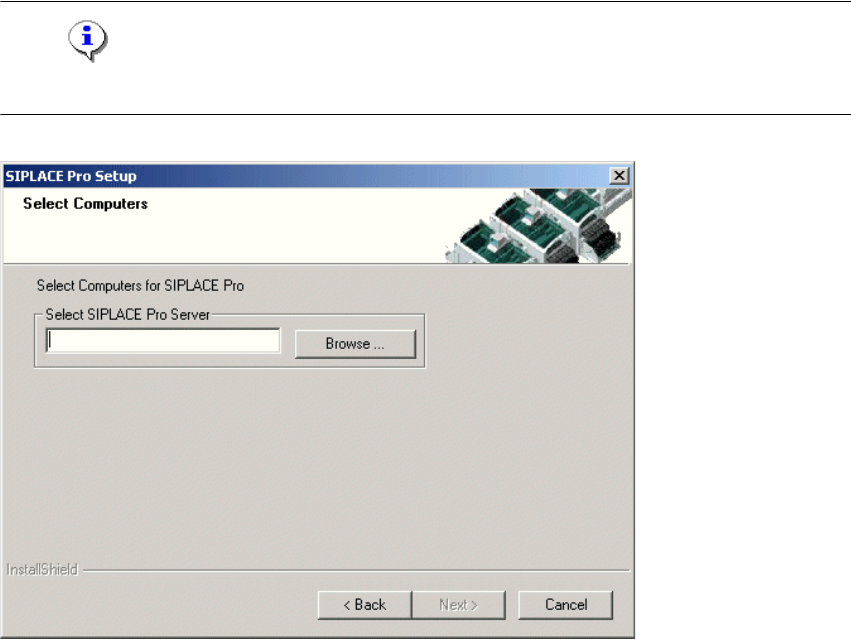
Step 2
– You are prompted to enter the name of the computer which is running SIPLACE Pro Server.
Æ You can type in a name or click the Browse button to open a dialog box in which you can select
another computer name.
Note
SIPLACE Pro Server must already be installed on the remote computer! 4
4
Fig. 4 - 22 "Select Computers" dialog box
Step 3
The "Start Copying Files" dialog box gives you a last chance to check the information you have
entered during the previous steps. 4
Æ Click Next if you accept all the information entered so far.
Æ If you want to alter one or more details, click the Back button until you get to the dialog box in
question.
Æ There, input your changes and click Next to continue as usual
– The installation routine is now started.
– The "Setup Complete" window confirms that the installation has been completed successfully.