cp45头部故障判断.pdf - 第30页
1. Head Module Ver. Date CP45 CP45NEO 00 2004/11 O O 1-1 1-15. Vacuum Level Check *T o o l s a) *P a r t a) 1) Vacuum Check Procedure 1-1) Check at Diagnosis => Vacuum(F5) 1-2) Install Nozzle(CN040, TN040) at Nozzle H…
1. Head Module
Ver. Date CP45
CP45NEO
00 2004/11 O O
1-1
Fig.1-14-3 Blow Setting
Blow Adjust Valve
Blow flow direction
Sol-vave
Air Distributor
Module
Fitting
DIsassemble
Hose
1. Head Module
Ver. Date CP45
CP45NEO
00 2004/11 O O
1-1
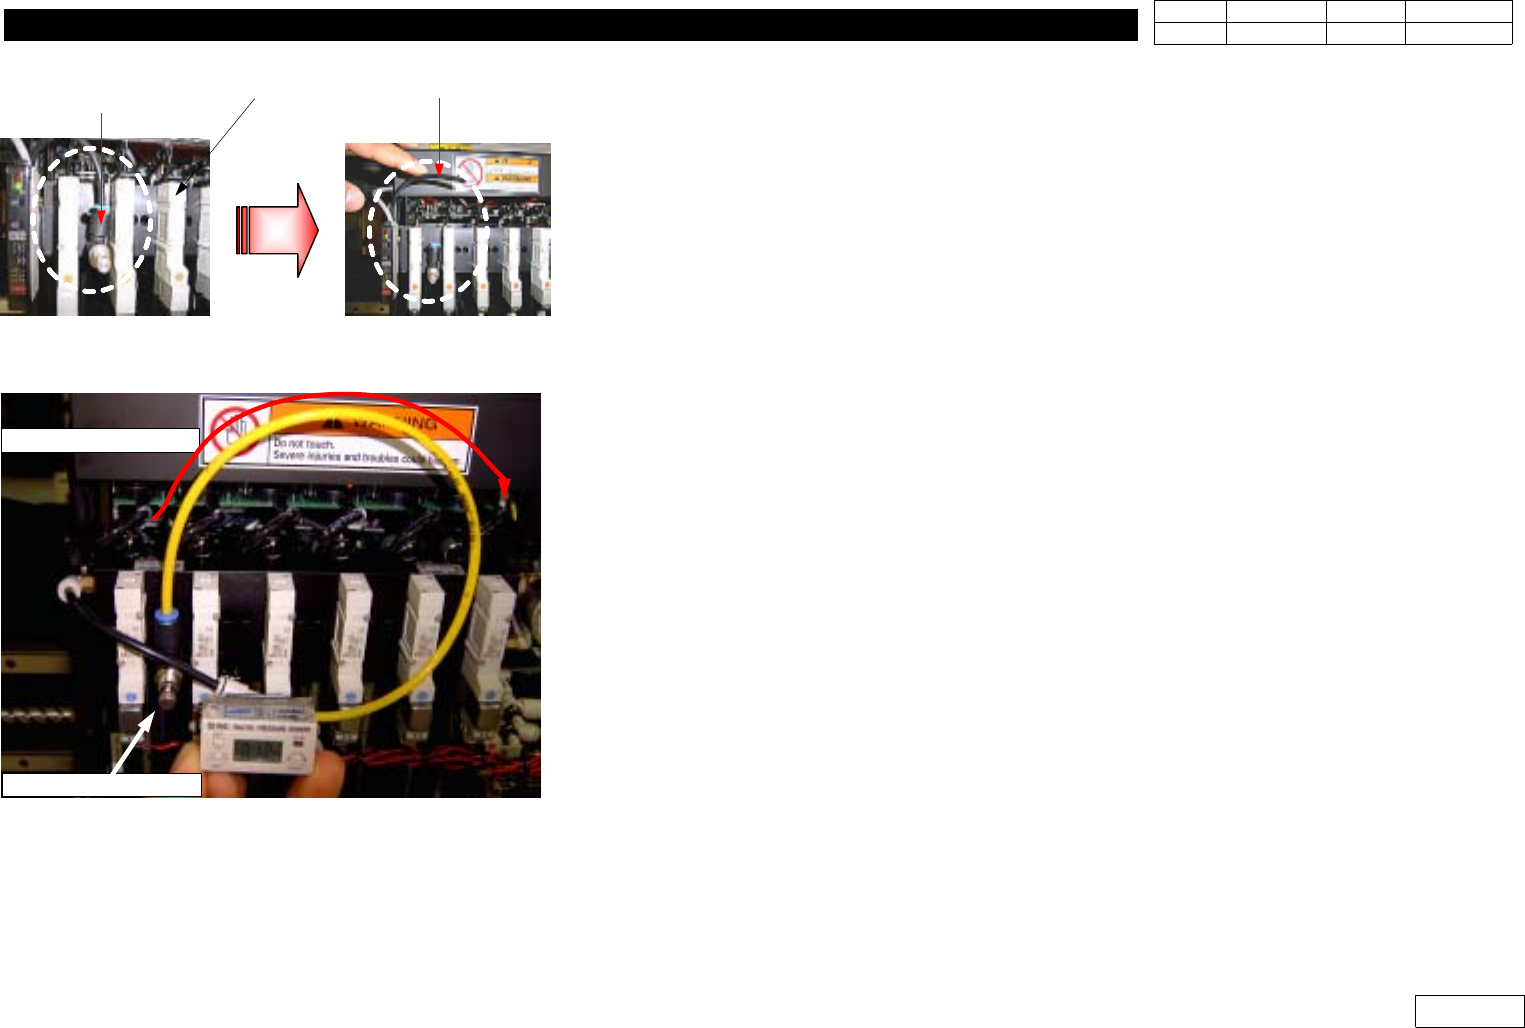
1-15. Vacuum Level Check
*Tools
a)
*Part
a)
1) Vacuum Check Procedure
1-1) Check at Diagnosis => Vacuum(F5)
1-2) Install Nozzle(CN040, TN040) at Nozzle Holder and Measure with Only Measuring Head
Vacuum On
1-3) Specification : over 600mmHg
2) Check Procedure in Case Vacuul Level is Entirely Unsatisfactory for the Standard
2-1) Check Main Air Pressure : 4.5 ~5.5 kgf/cm^2
- Check if Air Filter(Main) is Contaminated and Replace if Necessary
2-2) Vacuum pump
- Separate Filter(Vacuum Pump) to Clean and Replace if Necessary
- If Foreign Substance and Contamination are Serious, Replace Vacuum Pump
Especially, be Careful not to Apply Excessive Load when Fastening or Separating Fitting
(Look Out Damage)
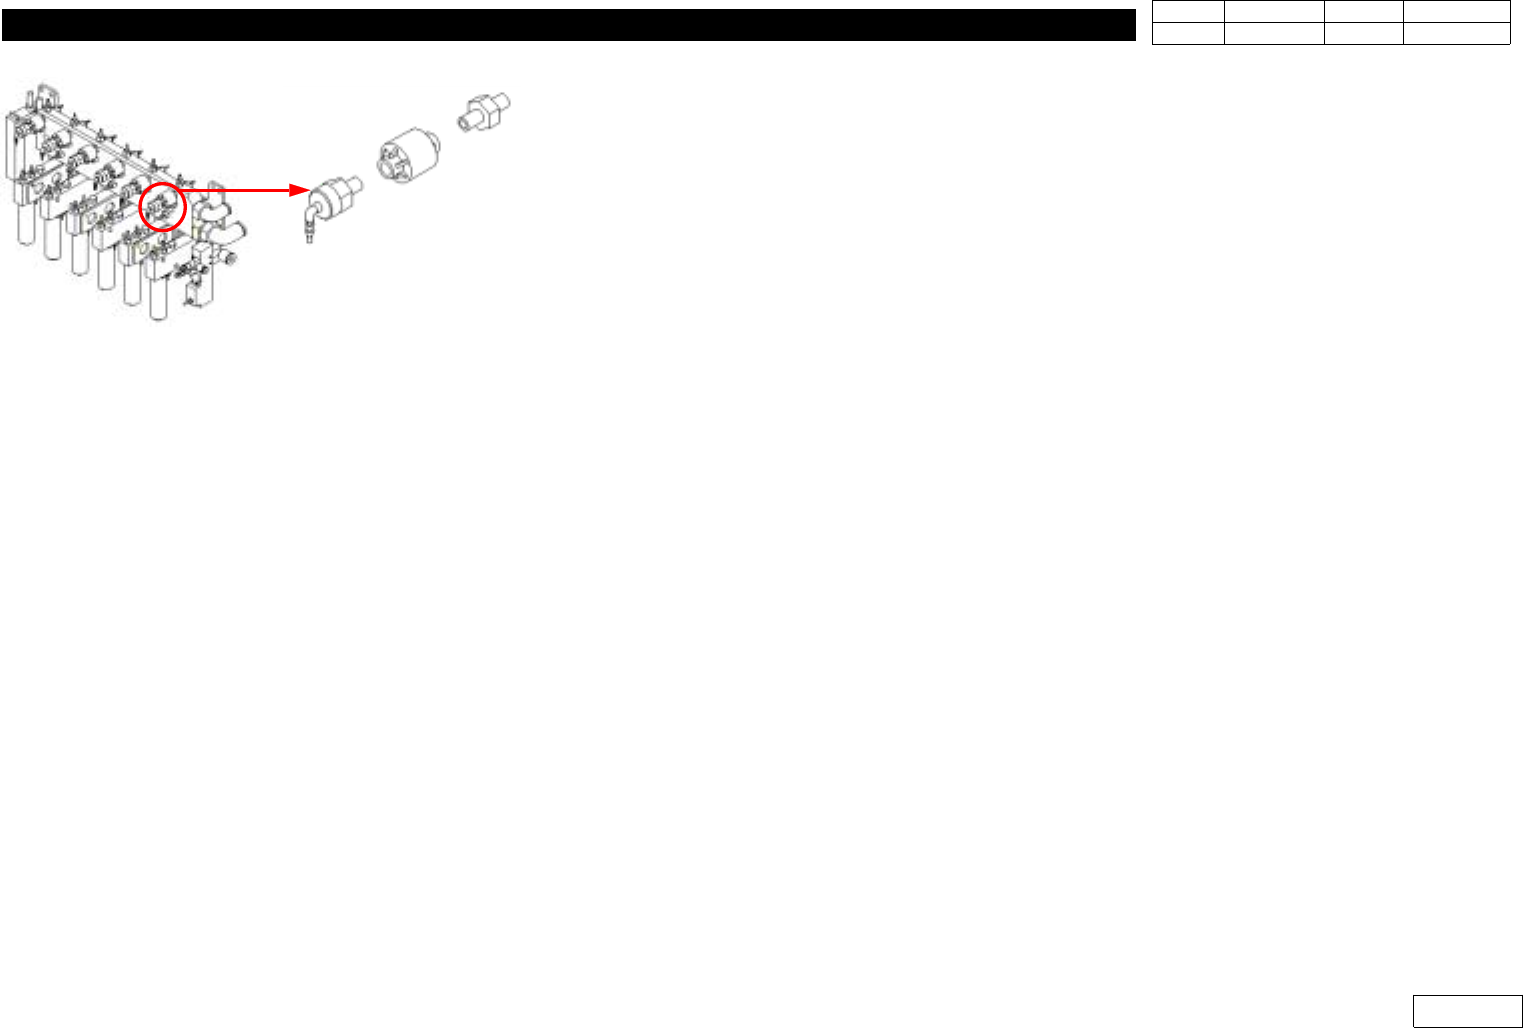
3) Check Procedure in Case Vacuul Level by Head is Unsatisfactory for Standard
3-1) Separate Solenoid Valve(Air distributor Module) to Clean and Replace if Necessary
3-2) Separate Filter(Air distributor Module) to Clean and Replace if Necessary
=> There are Two Sorts of Filters:External and Internal Filters
Refer Cleaning Procedure of Manual for External One and Next Page for Internal One.
Fig.1-15-1 Vacuum Filter in Air Distributor
1. Head Module
Ver. Date CP45
CP45NEO
00 2004/11 O O
1-1
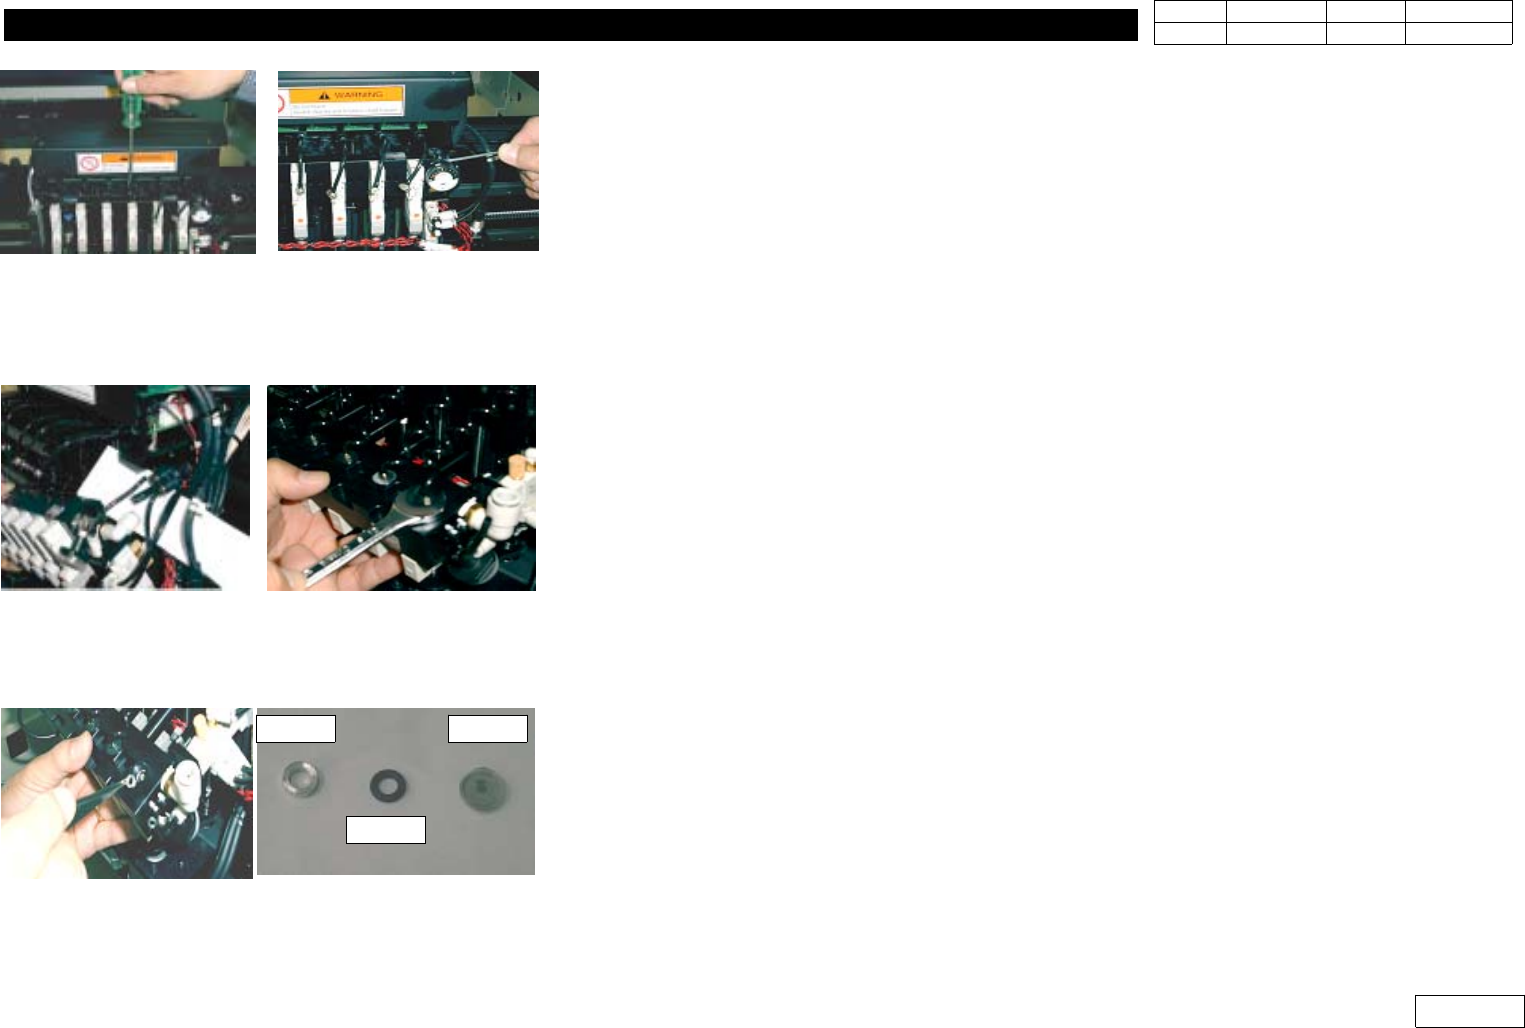
4) Air Disrtibutor Module Internal Filter Replacement Procedure
4-1) Prepare Tools:Flat-tip Screwdriver, 2.5mm Wrench, 12mm Spanner, Tweezer
4-2) Loosen the Plug of Upper Module with Flat-tip Screwdriver(Fig 1-15-3)
4-3) Loosen Bolt 4EA of the Both Sides of Module with 2.5mm Wrench(Fig 1-15-3)
4-4) Separate the Hose of 2 Fitting Part to Ease the Work(Fig 1-15-4)
4-5) Carefully Loosen Filter Ass'y with 12mm Spanner(Fig 1-15-4)
4-6) Loosen Filter Ass'y and Separate Lock Nut, Oil Ring, Filter with Tweezer(Fig 1-15-5) from
Module for Maintenance like Cleaning or Replacement
4-7) When Assembling, Proceed in the Opposite Order of Diassembly.(10 Minutes Required)
When Assembling, Make the Bulging Part of Filter Look Down and Insert it with Tweezer
4-8) Specification of Filter Element
-. Material : SUS304
-. Filtration : 43 micron
-. Pitch : 0.05mm(Mesh:508)
Fig.1-15-3 Disassemble air distributor module
Fig.1-15-4 Disassemble hose, Filter ass'y
Fig.1-15-5 Disassemble Lock-Nut, Oil-Ring,Filter
Lock Nut
Oil Ring
Filter