AX501最新3.6x版英文操作手册 - 第36页
4022 593 51894 Operatin g Man ual 09.01 AX-301/501, AX-3/5 36 8 8.6 T o olbit check Check if th e toolbit s, n eeded for pr oduction, are av ailable in th e toolbit exc ha nge u n it . 1 Place th e missing t oolbit(s). N…
4022 593 51894 Operating Manual
09.01 AX-301/501, AX-3/5 35
8
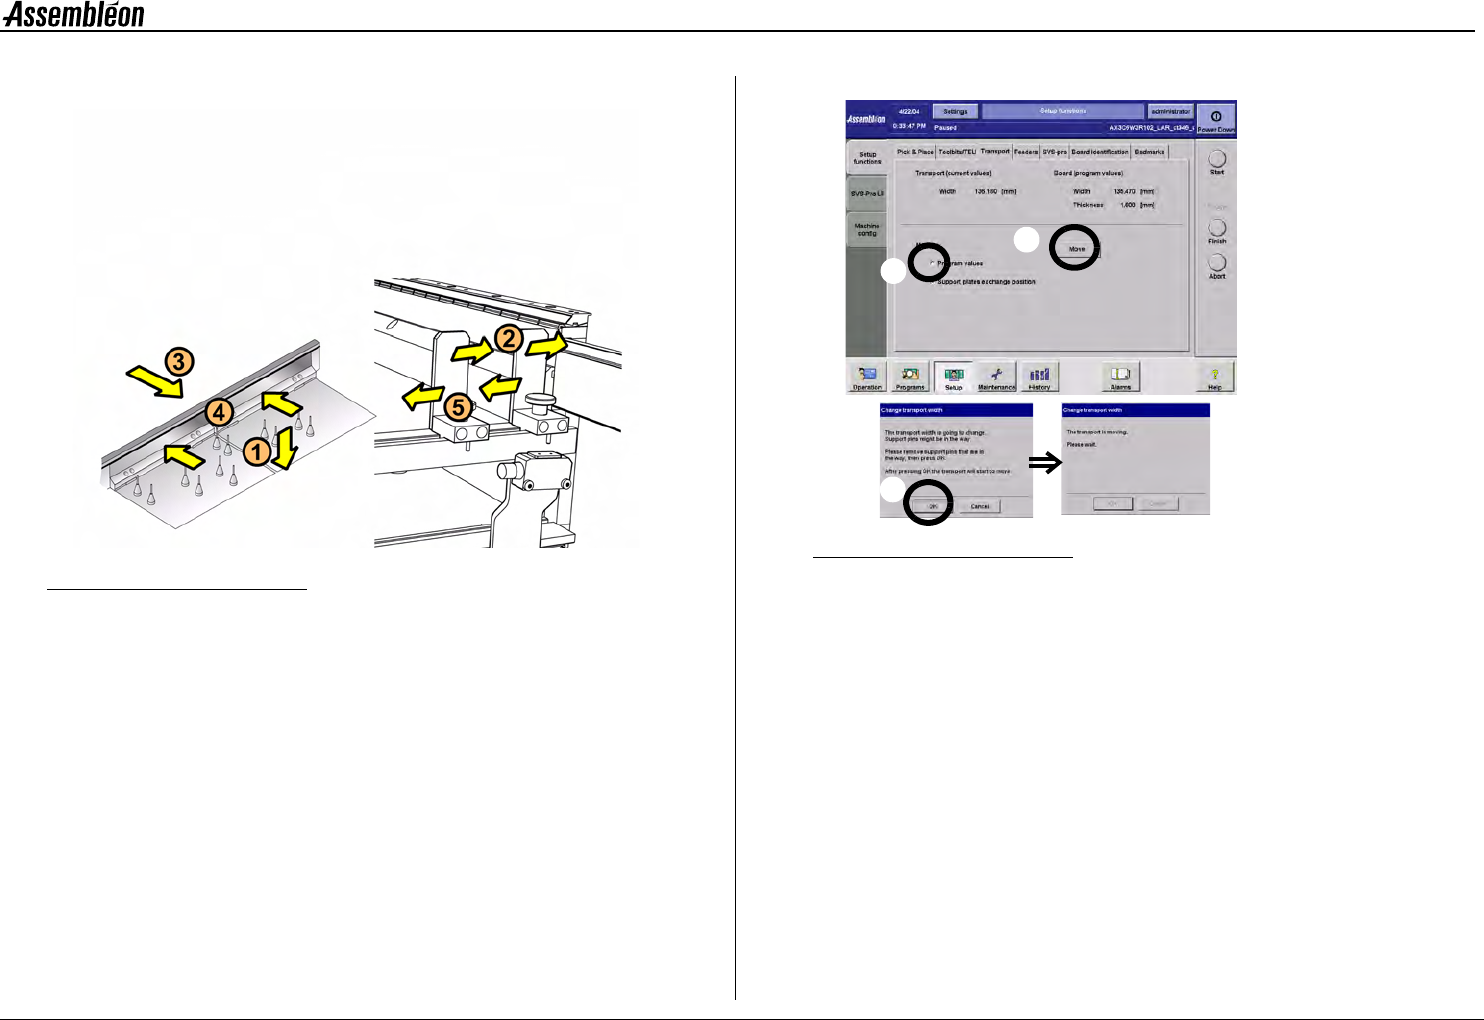
8.5 Install the support plates
Figure 42 Install the board support plates
NOTE: Use, when necessary, the stepstool to prevent an unsafe
work load.
1 Mount the prepared support plates on the transport beam in the
right order.
NOTE: Avoid shifting of the pins on the support plates
2 Loosen the stoppers and slide them against the front transport rail.
3 Move the rear transport rail to the ’board width’ position.
Figure 43 Board width settings
•
Select ’program values’ (a), and select ’move’ (b).
• Check if the transport is free to move and confirm (c).
• Wait until the rear transport rail has finished its movement.
4 Always re-place the board support strips and push them against
the rear transport rail.
5 Push a ’new’ board into the run-in to check the transport width
and position the stoppers equally along the board.
6 Check the position of the low speed sensor.
c
b
a

4022 593 51894 Operating Manual
09.01 AX-301/501, AX-3/5 36
8
8.6 Toolbit check
Check if the toolbits, needed for production, are available in the toolbit
exchange unit.
1 Place the missing toolbit(s).
NOTE: Use, when necessary, the stepstool to prevent an unsafe
work load.
Figure 44 Placing a toolbit in the toolbit exchange unit
2 Close the run-in and run-out covers and lower the robots.
3 Place the feeder trolleys.
Figure 45 Placing the feeder trolleys
4022 593 51894 Operating Manual
09.01 AX-301/501, AX-3/5 37
9
CHAPTER 9 Production
In case of an error, see chapter 10. Error Handling.
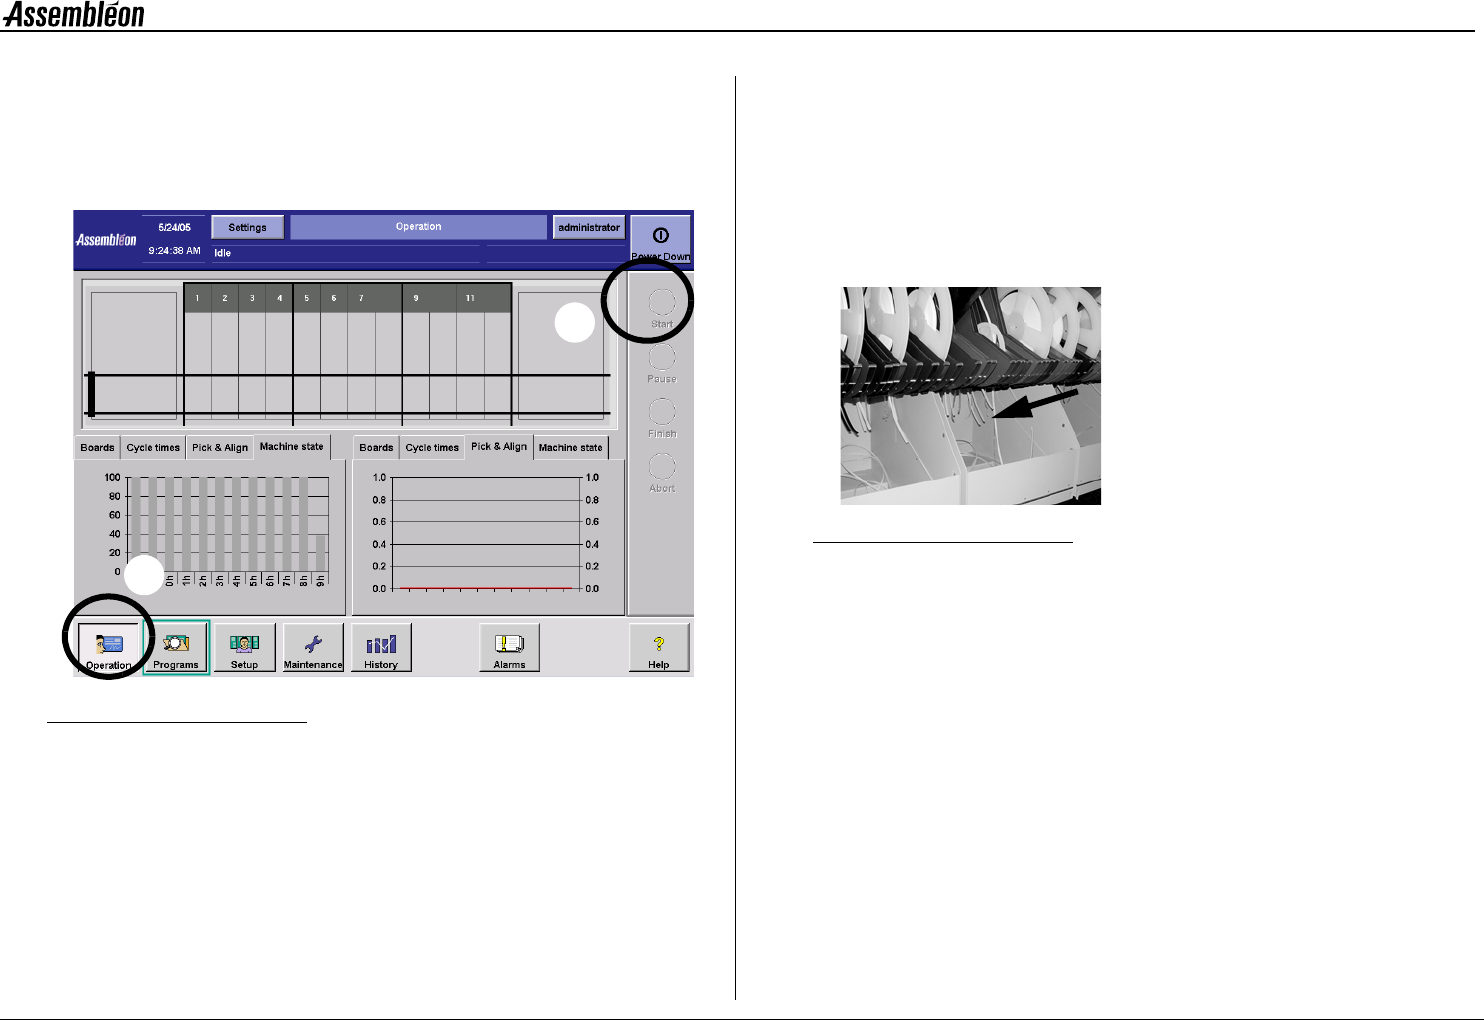
9.1 Start production
Figure 46 Start production
To start production:
• Select ’Operation’ button (1).
• Select ’Start’ button (2).
If no error message appears, the machine starts production.
If an error message does appear, see chapter 10. Error Handling.
9.2 Maintain production
9.2.1 Tape splicing
See Appendix.
9.2.2 Tape cutting on the feeders
Cut and remove carrier tape and top foil regularly.
Figure 47 Tape cutting
1
2
"