00198521-01_UM_LDU_E_EN.pdf - 第40页
4 Operation 4.4 Starting a reference run 40 User Manual SIPLACE Linear Dipping Unit E 12/2018 4.4 Starting a reference run After logging on, it is mandatory to perform a reference run so that the LDU can be set up and us…
4 Operation
4.2 Handling
User Manual SIPLACE Linear Dipping Unit E 12/2018 39
4.2 Handling
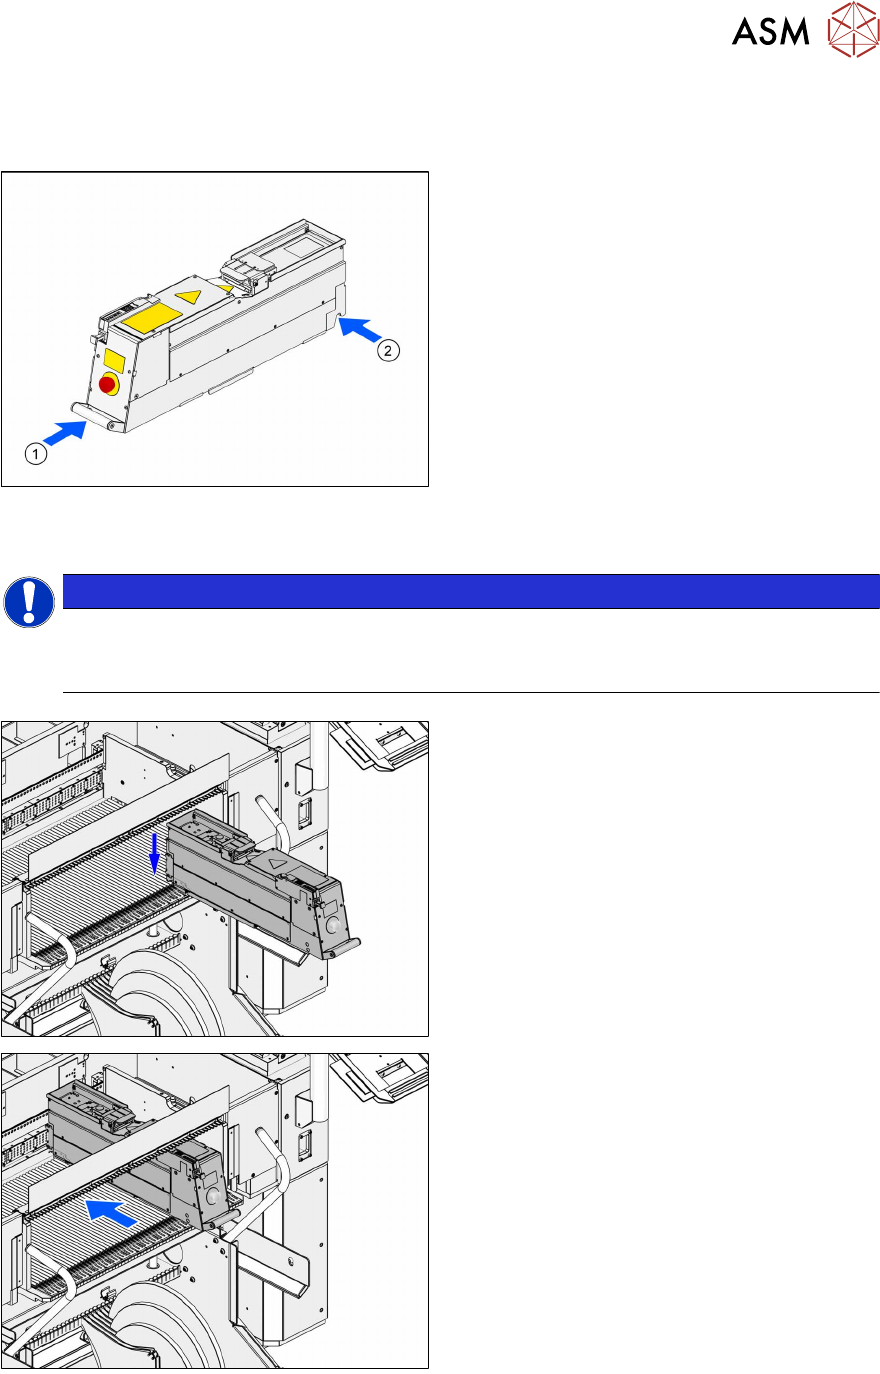
Always carry the LDUE with both hands holding it as upright and horizontal as possible.
► Take the handle(1) of the LDU E with one
hand and support the housing with the
other hand(2).
4.3 Positioning the LDU and logging on
NOTICE
Positioning the LDU on the correct track
► Position the LDU on the track of the changeover table which you defined during setup
(see chapter 4.1.1 "Setting up the LDU" [}33]).
► Place the LDU E horizontally in the track of
the changeover table.
.
► Push the LDU E forward against the fixed
stop of the track.
The LDU E will be automatically locked,
switched on and logged on at the machine.
4 Operation
4.4 Starting a reference run
40 User Manual SIPLACE Linear Dipping Unit E 12/2018
4.4 Starting a reference run
After logging on, it is mandatory to perform a reference run so that the LDU can be set up and
used. During the reference run the axes are initialized. In the process, the end positions of the axes
are determined and moved to a defined position.
Requirements:
●
The squeegee must be positioned over the park plate at the rear fixed stop.
► If required, push the squeegee manually over the park plate to the rear fixed stop.
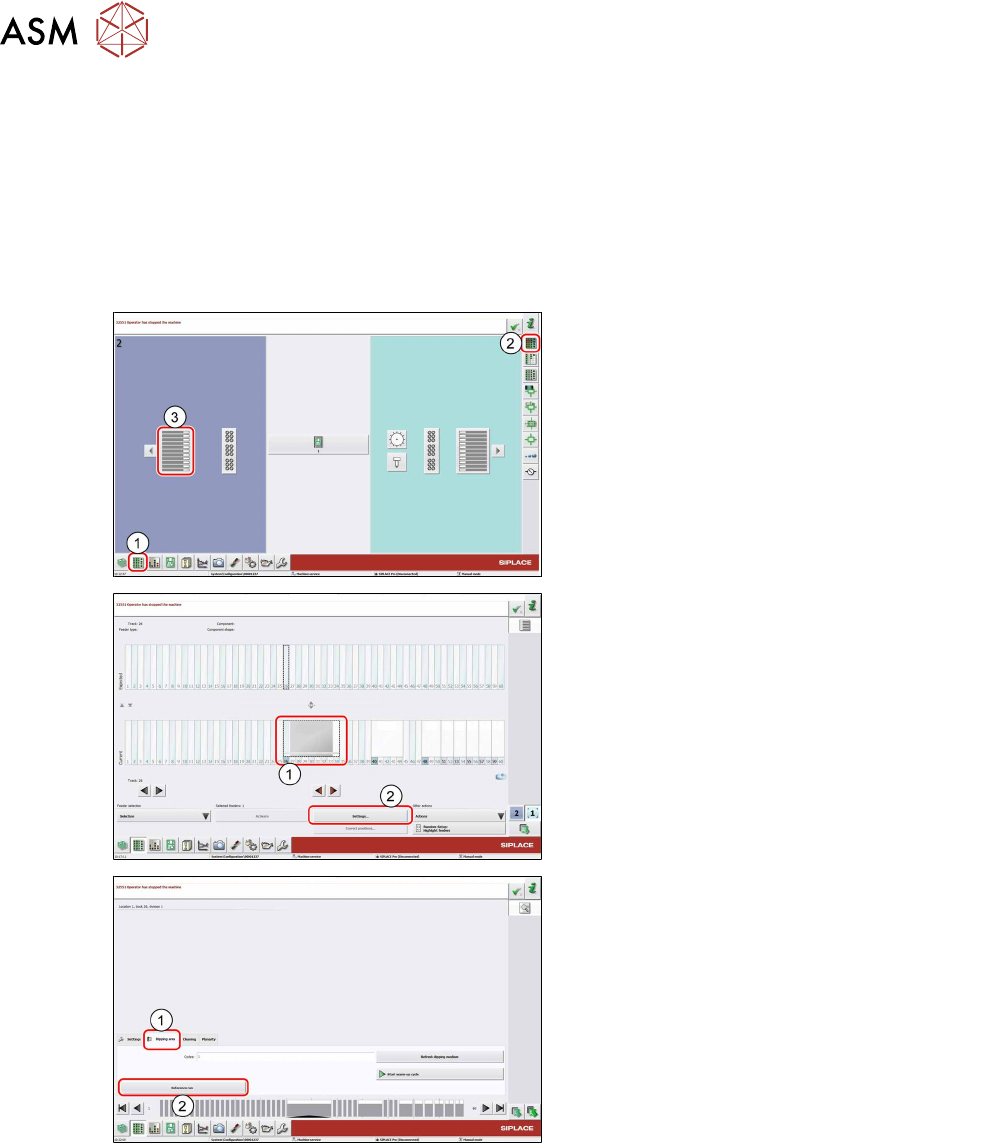
► In the station software, select the Setup
view(1) and then the Locations area (2).
► Select the Table (3) on which the LDU is
set up.
► Select the icon of the LDU(1).
► Click on the Settings... button (2).
► Select the Dipping area tab (1).
► Click on the Reference run button (2).
The LDU performs a reference run.
4 Operation
4.5 Fitting
User Manual SIPLACE Linear Dipping Unit E 12/2018 41
4.5 Fitting
Before filling in the flux, you have to fit all the parts of the LDU. You will be guided through this pro-
cess by the station software.
NOTICE
Observe the exact order
It is important to perform the steps for fitting the parts in the order described here.
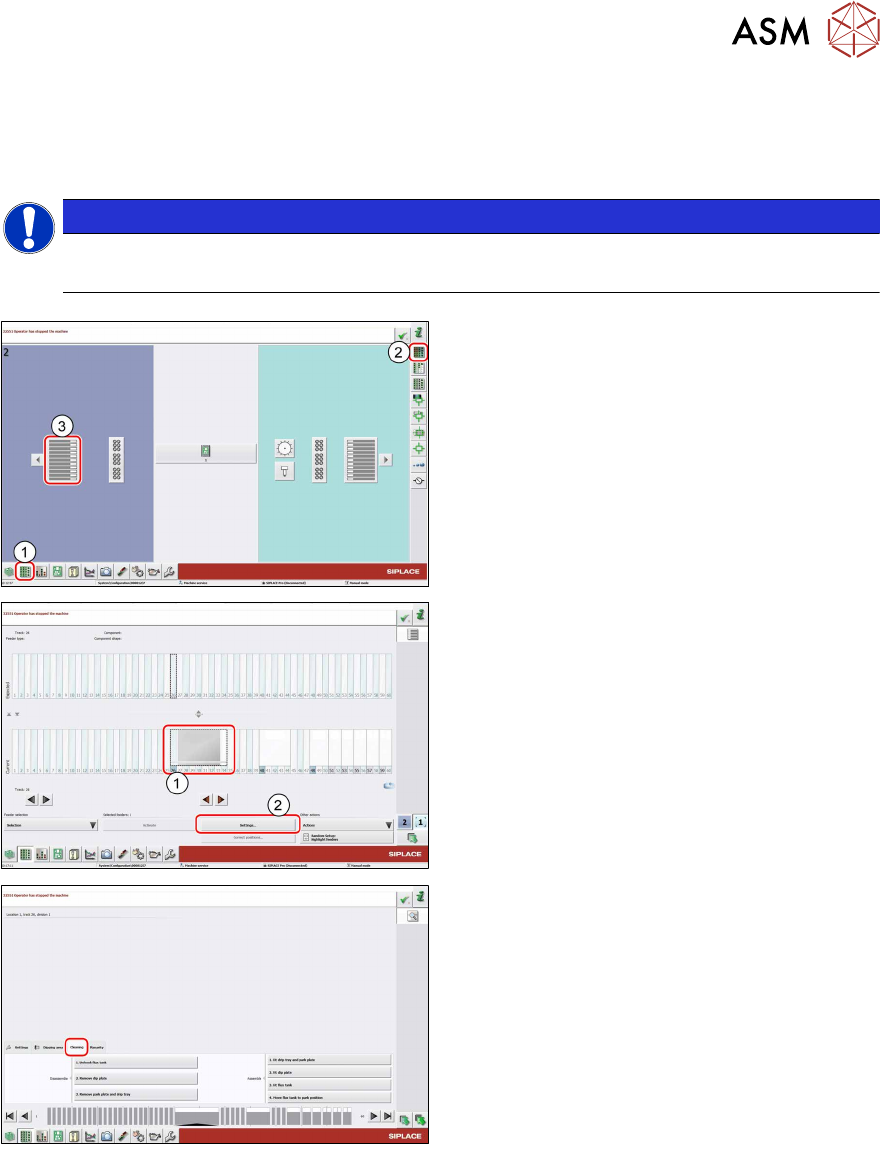
► In the station software, select the Setup
view(1) and then the Locations area (2).
► Select the Table (3) on which the LDU is
set up.
► Select the icon of the LDU(1).
► Click on the Settings... button (2).
► Select the Cleaning tab.