00198521-01_UM_LDU_E_EN.pdf - 第57页
4 Operation 4.17 Operating the control unit User Manual SIPLACE Linear Dipping Unit E 12/2018 57 Adjusting the squeegee speed ► Use the Up (1) or Down key (2) to select the operating mode P2 . ► Press and hold the Up key…
4 Operation
4.17 Operating the control unit
56 User Manual SIPLACE Linear Dipping Unit E 12/2018
4.17 Operating the control unit
Logging off
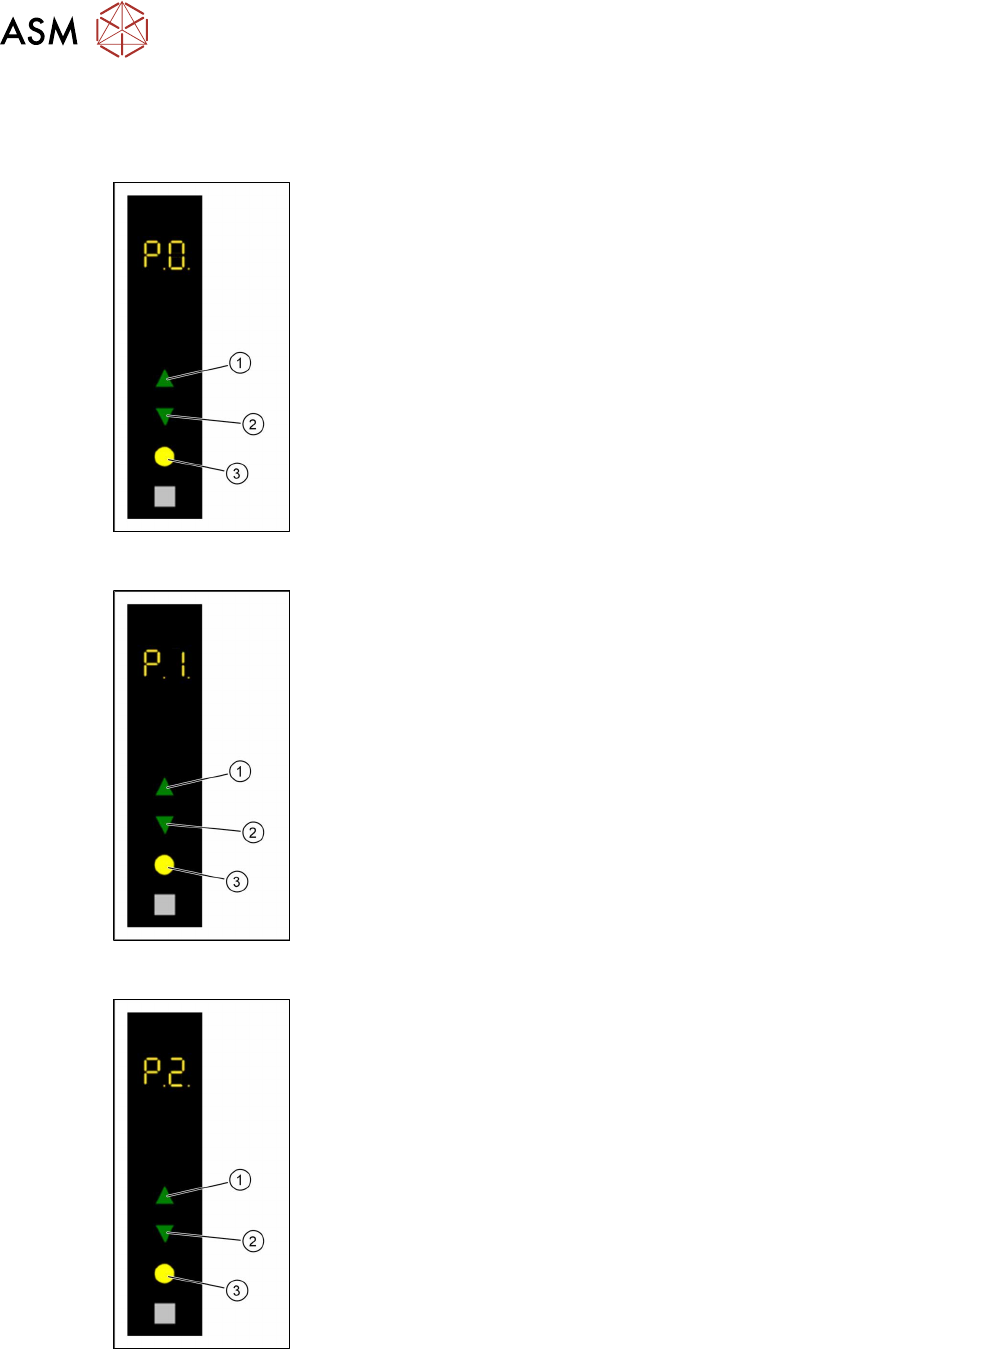
► Use the Up (1) or Down key (2) to select the operating mode P0.
► Press the Select key (3).
The LDU will be logged off and unlocked from the placement machine.
► Remove the LDU from the changeover table.
Starting a reference run
► Use the Up (1) or Down key (2) to select the operating mode P1.
► Press the Select key (3).
The LDU performs a reference run.
Refreshing the dipping medium
► Select with the Up (1) or Down key (2) the operating mode P2.
► Press the Select key (3).
The LDU performs a squeegee movement.
4 Operation
4.17 Operating the control unit
User Manual SIPLACE Linear Dipping Unit E 12/2018 57
Adjusting the squeegee speed
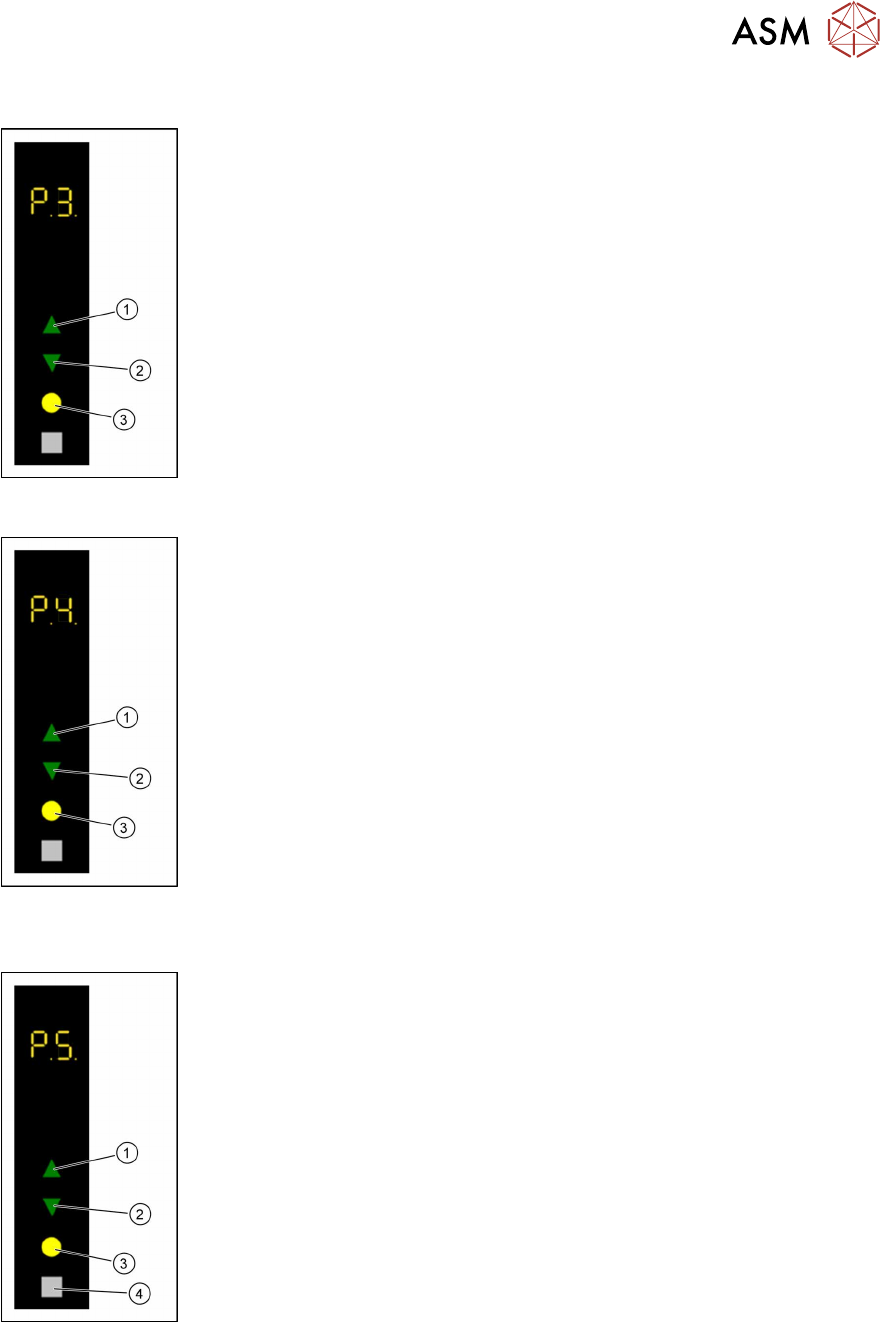
► Use the Up (1) or Down key (2) to select the operating mode P2.
► Press and hold the Up key(1), to switch to the Advanced production
activity level.
► Use the Up (1) or Down key (2) to select the operating mode P3.
► Press the Select key (3).
► Press the Up (1) or Down key (2) to increase or decrease the value of
the squeegee speed.
The squeegee speed in mm / s is shown in the 7 segment display 3/4.
► Press the Select key (3) to save the value.
Starting a warm-up cycle
► Use the Up (1) or Down key (2) to select the operating mode P2.
► Press and hold the Up key(1), to switch to the Advanced production
activity level.
► Use the Up (1) or Down key (2) to select the operating mode P4.
► Press the Select key (3).
► Use the Up(1) or Down key(2) to select the desired number of squee-
gee cycles (1 – 50).
The number of squeegee cycles is shown in the 7 segment display 3/4.
► Press the Select key (3).
The LDU performs a corresponding number of squeegee cycles. The num-
ber of remaining squeegee cycles is shown in the 7 segment display 3/4.
► Press the Adjust key (4) to stop the process.
The number of remaining squeegee cycles is set to zero and the process will
be stopped after finishing the running squeegee cycle.
Setting the zero position of the dip plate
► Use the Up (1) or Down key (2) to select the operating mode P1.
► Press and hold theSelect(3) and Adjust (4) keys simultaneously to
switch to the Service activity level.
► Use the Up (1) or Down key (2) to select the operating mode P5.
► Press the Select button (3) to start the calibration.
► Use the Up (1) and Down keys (2) to move the dip plate until the park
plate and the dip plate are exactly level.
► Press the Select button (3) to save the zero position.
4 Operation
4.17 Operating the control unit
58 User Manual SIPLACE Linear Dipping Unit E 12/2018
Performing a self-test
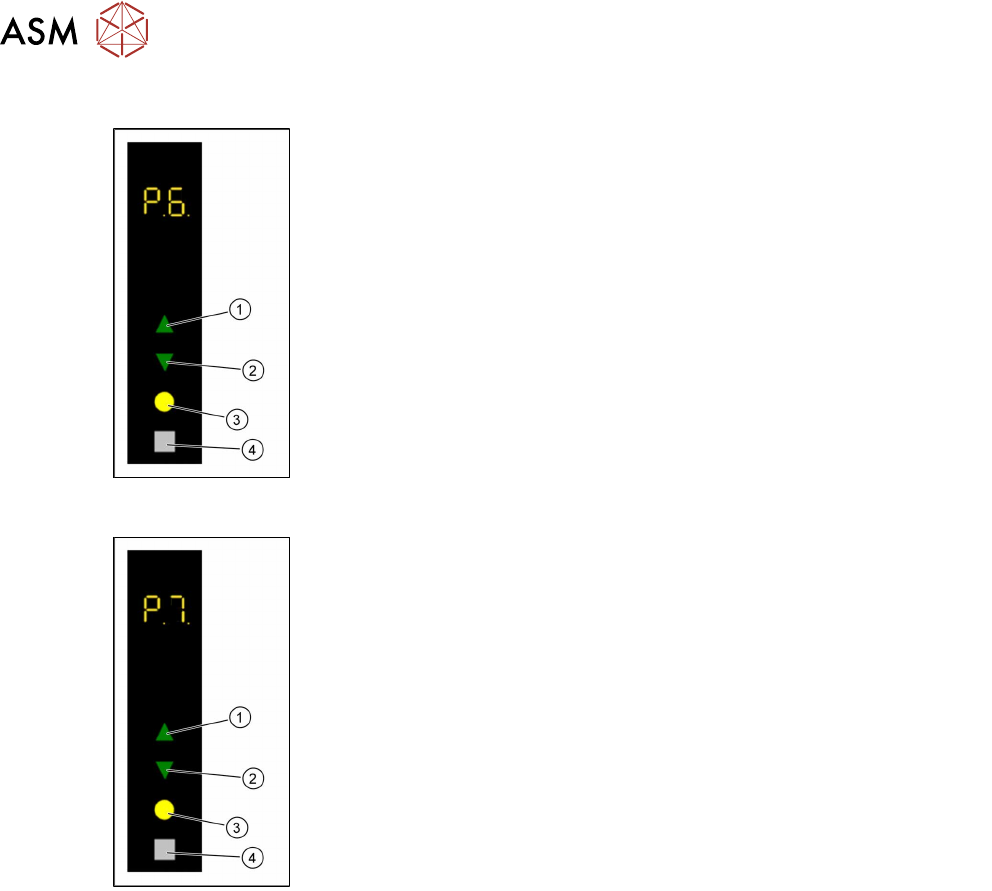
► Use the Up (1) or Down key (2) to select the operating mode P1.
► Press and hold theSelect(3) and Adjust (4) keys simultaneously to
switch to the Service activity level.
► Use the Up (1) or Down key (2) to select the operating mode P6.
► Press the Select key (3).
The LDU performs a self-test.
Calibrating the axes
► Use the Up (1) or Down key (2) to select the operating mode P1.
► Press and hold theSelect(3) and Adjust (4) keys simultaneously to
switch to the Service activity level.
► Use the Up (1) or Down key (2) to select the operating mode P7.
► Press and hold the Adjust key(4) until the digits 01 are shown in the 7
segment display 3/4.
► Press the Select key (3).
The LDU performs an axis calibration.