SG_FSE_SiplaceHF_HF3_00193901-05_eng.pdf - 第513页
1 - 39 S tudent Guide SIPLACE HF/HF3 Edition 09/2005 1 1 MTC 2 39 1 1.3.2.2 Feed axes Notes for calibration the zero point correction and transfer position into the machine. 11 1a. Calibration of zero point correction: 1…
1 - 38
Student Guide SIPLACE HF/HF3
11 MTC 2 Edition 09/2005
38
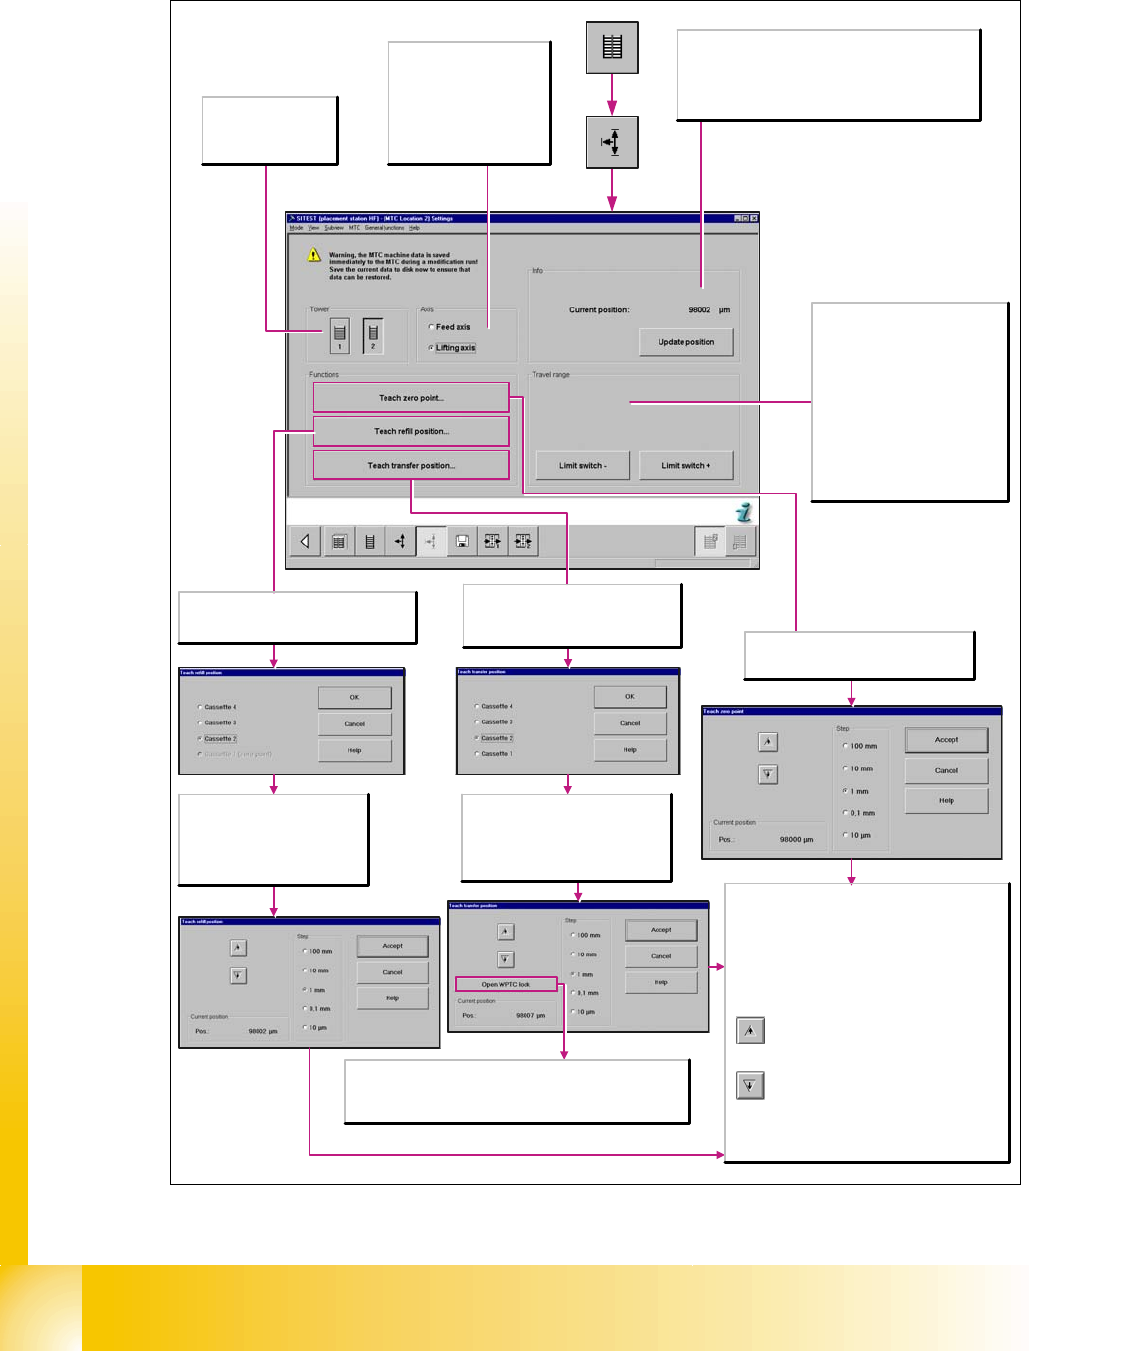
11.3.2 Sitest calibration flow charts
11.3.2.1 Lifting axes
Fig. 11.3 - 2 Overview "Calibration Lifting axes"
Axis
Feed axis
The selected functions are
executed for the feed axis.
Lifting axis
The selected functions are
executed for the lifting axis.
Tower
1/2
Activates the functions
for tower 1 or tower 2.
Info
Current position:
Shows the current position of the activated axis in µm.
Update position
Updates the display for the position of the activated axis.
Travel range
Limit switch +
Moves the selected axis to the limit
switch in order to re-determine the
maximum position which can be
reached. A reference run is then
performed with the axis.
Limit switch -
Moves the selected axis to the limit
switch in order to re-determine the
minimum position which can be
reached. A reference run is then
performed with the axis.
Opens the Teach zero point dialog box
where you can correct the zero point and
then transfers this information.
Every time the button is clicked, the lifting
axis is moved vertically one step downwards
using the increment that you have selected.
Step
Select the desired step size with which to move the
lifting axis.
Current position
Pos.
Displays the position to which the lifting axis moved
during the teaching process.
Apply
Closes this dialog box and accepts the current
position. A reference run is then started.
Every time the button is clicked, the lifting
axis is moved one step upwards using the
increment that you have selected.
Opens the Teach transfer position
dialog box where you can select the
cassette for which the transfer position
is to be taught.
Select the cassette for which the
transfer position is to be taught.
OK
Transfers the selection and opens the
Teach transfer position dialog box.
Open WPTC lock
To check whether the transfer position has been set correctly, the
waffle pack tray carrier is unlocked. It is now possible to push the
waffle pack tray carrier onto the slide rail.
Opens the Teach refill position dialog box
where you can select the cassette for which
the refill position is to be taught.
Select the cassette for which the
refill position is to be taught.
OK
Transfers the data and opens the
Teach refill position dialog box.

1 - 39
Student Guide SIPLACE HF/HF3
Edition 09/2005 11 MTC 2
39
11.3.2.2 Feed axes
Notes for calibration the zeropoint correction and transfer position into the machine. 11
1a. Calibration of zero point correction: 11
➠ Carry out the relevant preparatory measures (see section 5.2.2 "Preparatory measures").
➠ Select SITEST --> MTC --> Settings
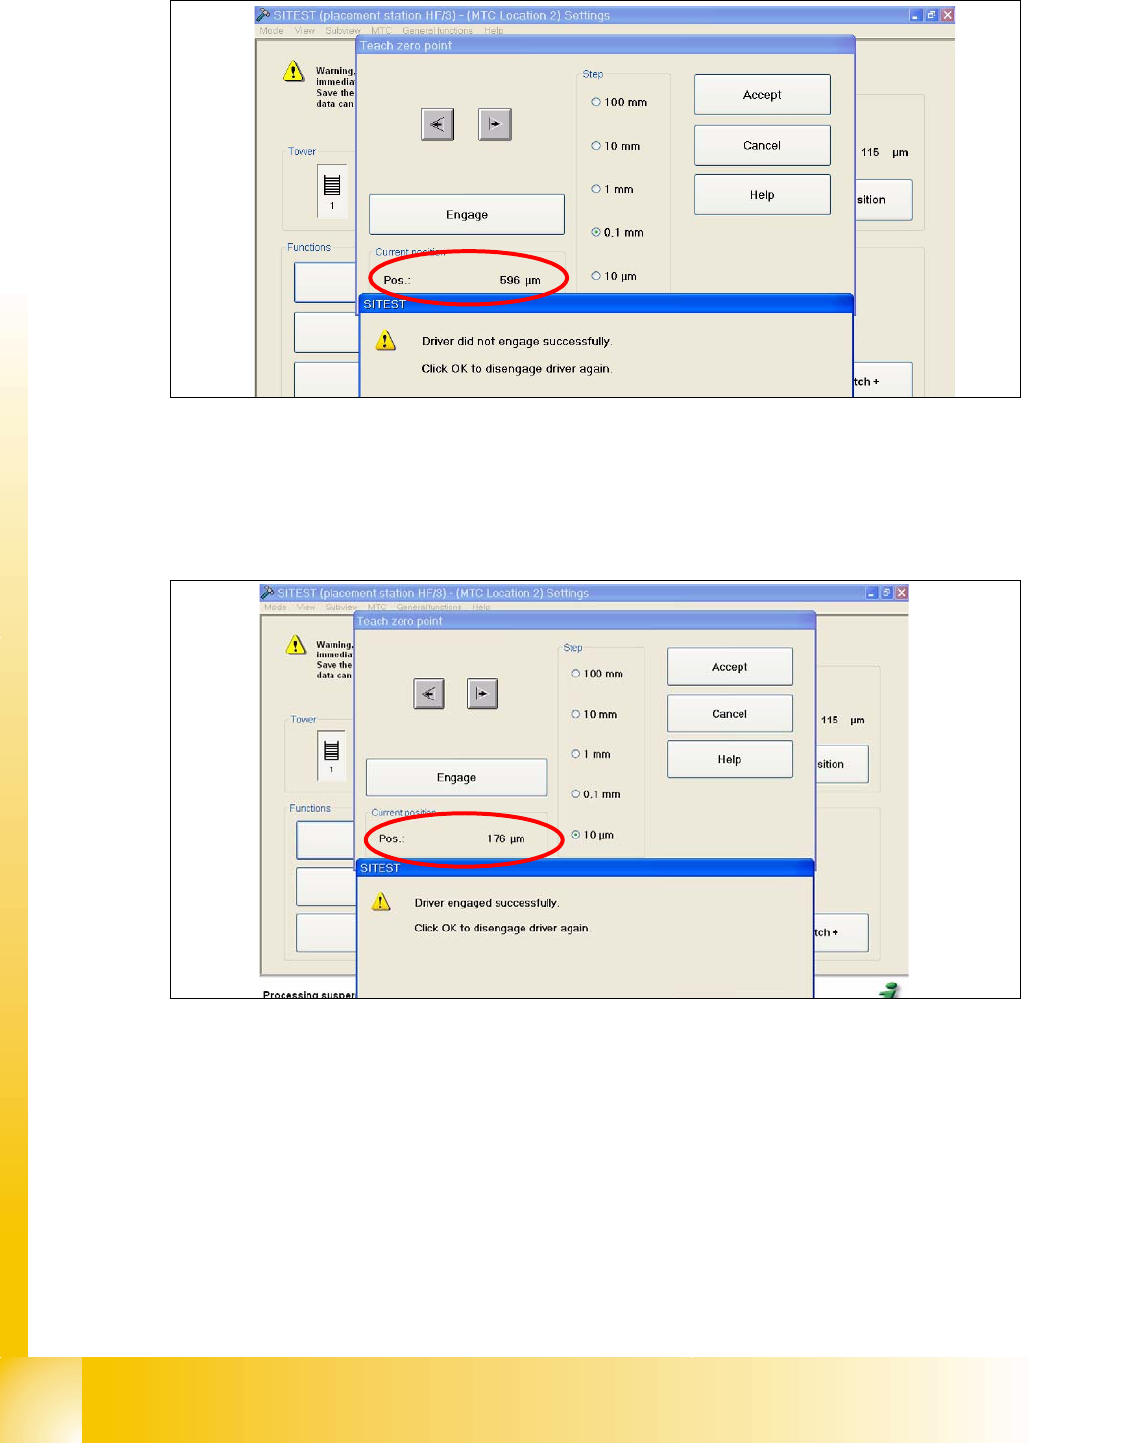
➠ Press the button "Teach zero point"
➠ Check the position of the driver with the button "ENGAGE". In case the driver did not engaged
successfully you must determine the middle of the notch of the waffel pack tray.
The accurate adjustment is described below:
➠ Determine the minimum position of the notch Fig. 11.3 - 3.
Fig. 11.3 - 3 Minimum position
➠ Determine the maximum position of the notch Fig. 11.3 - 4. at which the driver just engages no
more.
1 - 40
Student Guide SIPLACE HF/HF3
11 MTC 2 Edition 09/2005
40
Fig. 11.3 - 4 Maximum position
➠ Now calculate the middle position at which the driver will always engage.
e.g. |-257| + 596 = 853 divided 2 = 426µm
426 + the minimum pos. or maximum pos. - 426 = approx.169µm
Fig. 11.3 - 5 Correct position for the driver
➠ Check the driver position. The driver now should be correctly in the middle position of the notch
of the WTC.
➠ Press the button "ACCEPT"
➠ Check the position of the driver for the other cassettes.