ET8383-說明書(英文) - 第31页
27 4.2 Main menu (with teach pendant cord) ● Connect the pow er cord to the pow er supply . ● Connect teach pendant line from operation panel. ● Display version a nd communi cation informat ion, see picture 4.3 Main menu…
26
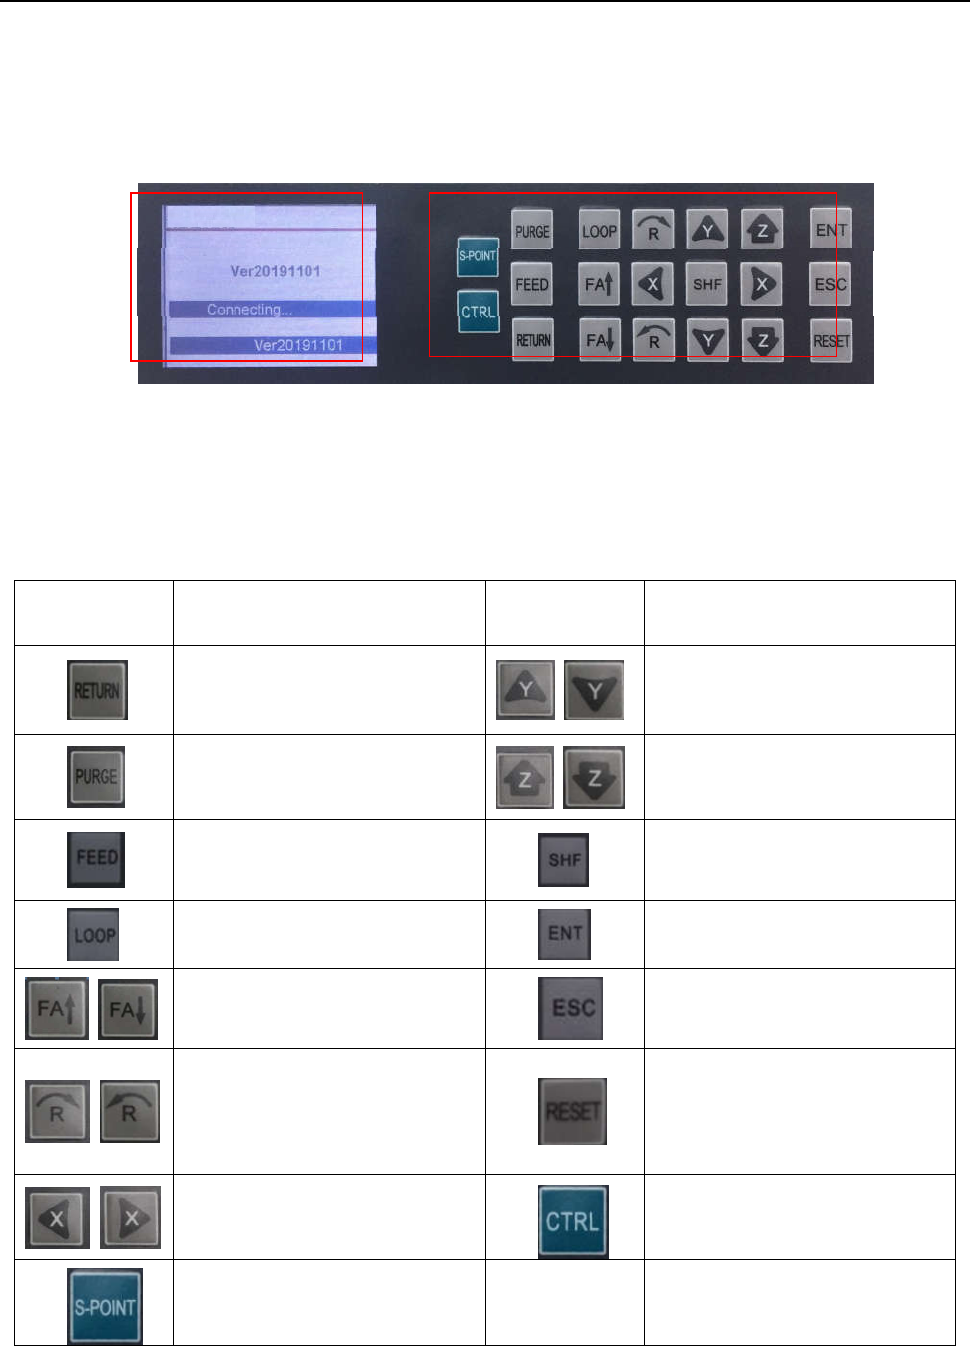
Ⅳ. Operation Panel Instruction
4.1 Introdu
ction
① Display
area
Display communication\version information.
② Operation button
Operation button functions list:
ITEM FUNCTION ITEM FUNCTION
Wir
e back button
Y a
xis position (+)/(-)
Nozzle
purge button
Z axi
s position (+)/(-)
Wir
e feeder button(used in
soldering robot)
Speed control button
Pro
duct cycle processing mode
Enter butt
on
Cyl
inder open / close switch (used
for screw robot)
Back butt
on
R a
xis motor rotating direction
(counter clockwise/ clockwise).
Reset
button(movement go to
machine default position)
X axis posi
tion (+)/(-)
Heating
controller ON/OFF
switch
Sta
rt point button
① ②
27
4.2 Main
menu (with teach pendant cord)
●
Connect the power cord to the power supply.
● Connect teach pendant line from operation panel.
● Display version and communication information, see picture
4.3 Main
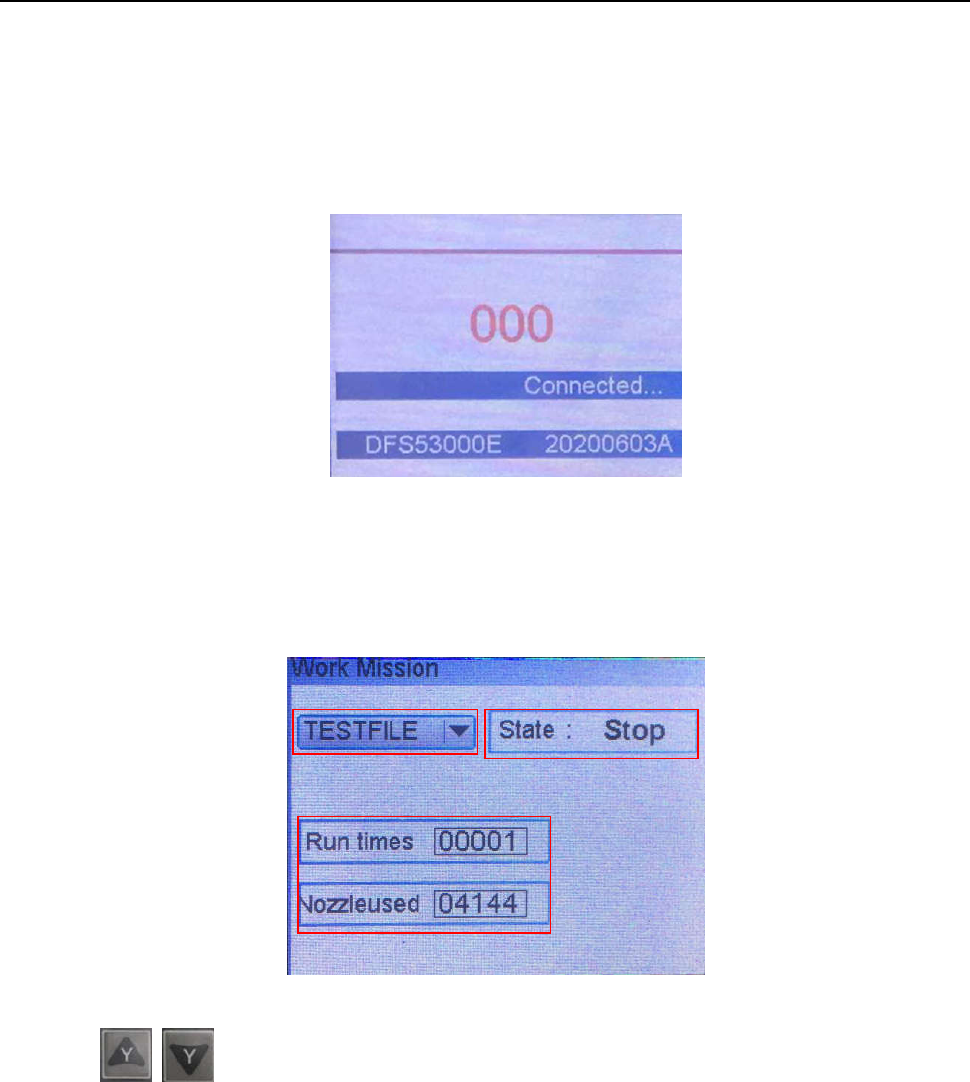
menu (disconnect teach pendant cord)
Disconne
ct teach pendant cord from operation panel and it will automatic enter into Work Mission menu, see
following picture:
① T
he current work process file name.
Press
butt
on to change the file.
② State.
Show machine current state.
③ Run times
Display machine operation totalizer.
Nozzle used
Display nozzle operation totalizer, press “ENT” button to reset.
①
②
③
28
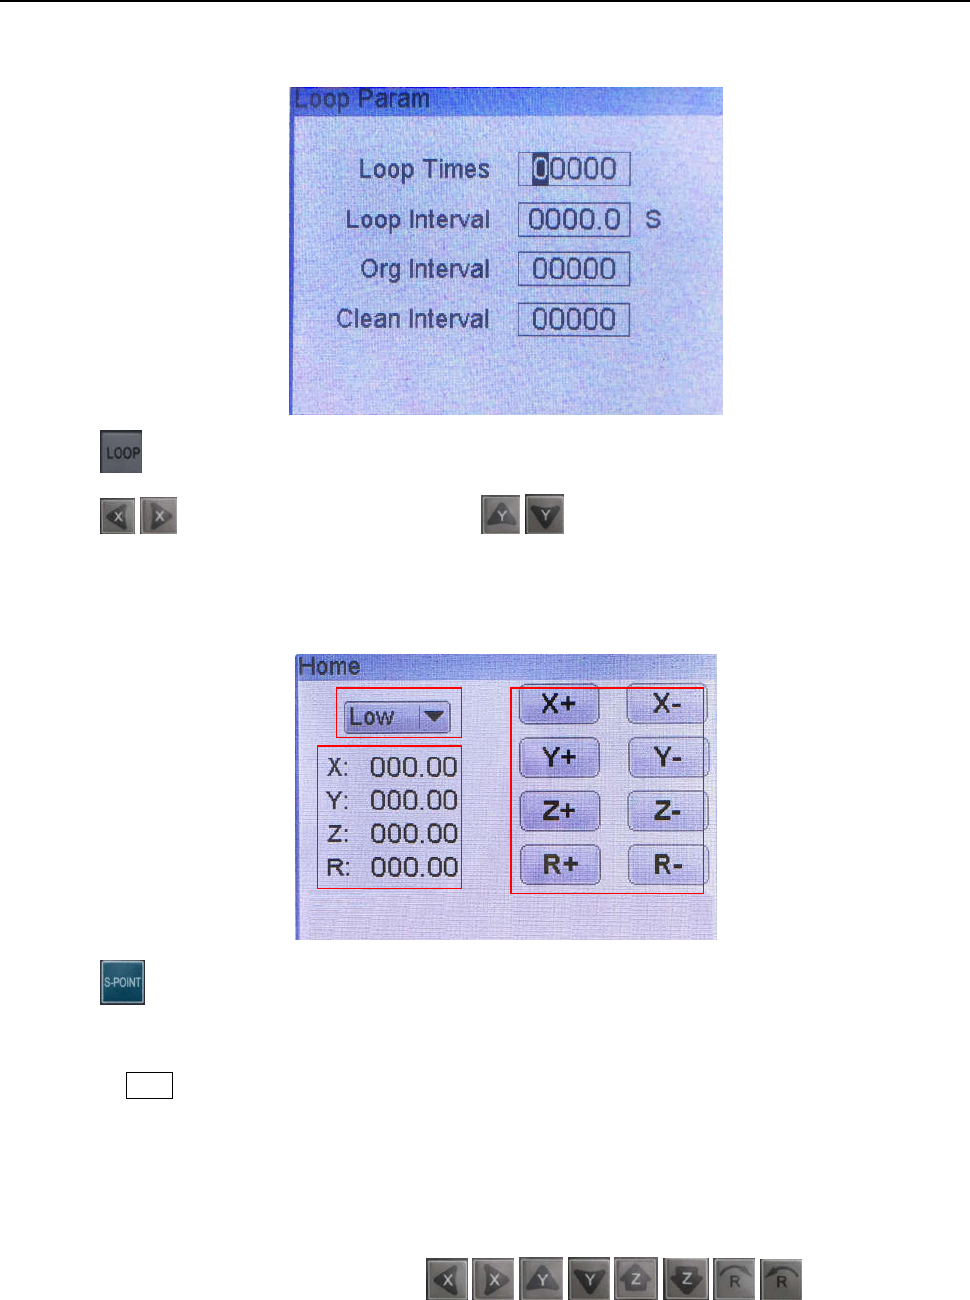
4.3.1 Loop menu
P
ress
butt
on to enter into Loop menu.
Press
\ butt
on to change the digital; press
\ butt
on to change the number.
4.3.2 S-point menu
Pres
s
butt
on to enter into Home calibration menu.
① Speed smbol
Press the SHIF button to select Low/High/Medium speed.
② Displ
ay area
Display the current position of the nozzle.
③ Jog mode
All axis can be moved manually by clicking
\ , \ , \ , \ .
①
③
②