00196416-01_IM_OIS_SIS 7.0_DE EN.pdf - 第21页
OIS Client, OIS Server, SIS Server Version 7.0 Installationsanleitung Installation manual 3.2.5 Finishing the installation Once the installation process has b een comple ted, the following dialog box app ears. ¾ Click Fi…
Installationsanleitung OIS Client, OIS Server, SIS Server Version 7.0
Installation Manual
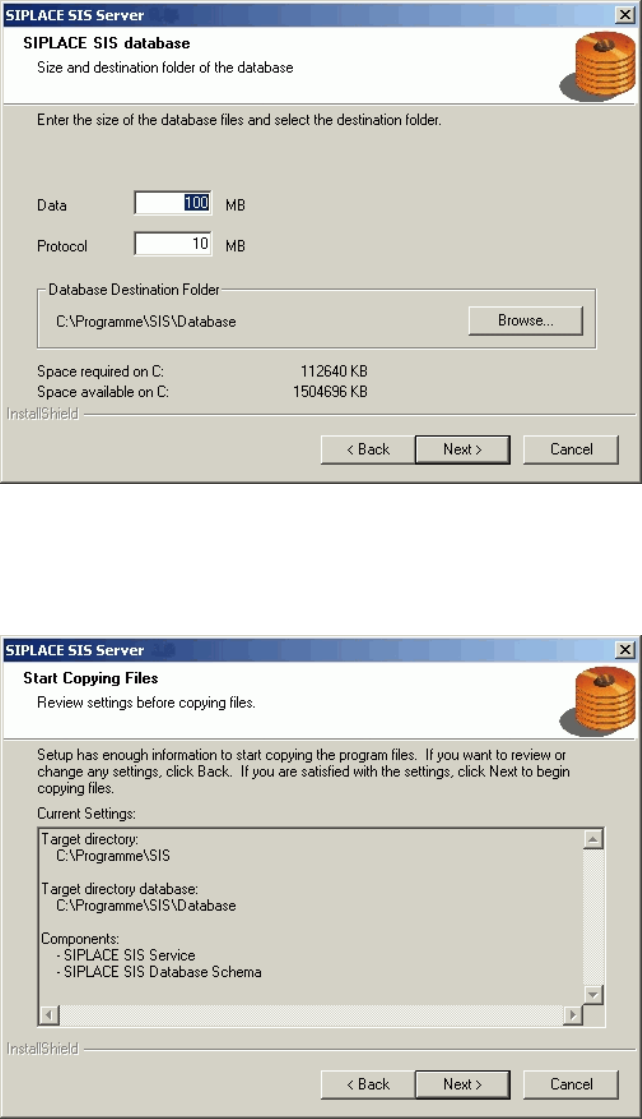
¾ Click Browse... if you want to choose another installation directory for the database.
¾ Enter the starting file size for the database files. The default values are generally acceptable, and the
files are allowed to grow as your database expands.
¾ Continue by clicking the Next> button.
This shows a summary of the settings and entries you have made so far.
¾ Check the settings.
¾ Click Next > to start the actual installation process.
¾ If you wish to change your entries, click < Back to return to the appropriate dialog.
The software is then installed.
¾ Continue with section
3.2.5 on page 21.
20 von 50

OIS Client, OIS Server, SIS Server Version 7.0 Installationsanleitung
Installation manual
3.2.5 Finishing the installation
Once the installation process has been completed, the following dialog box appears.
¾ Click Finish to close the setup.
Note:
If this dialog box suggests rebooting the computer, you should do so, as the installation is only
completed after a reboot.
21 von 50
Installationsanleitung OIS Client, OIS Server, SIS Server Version 7.0
Installation Manual
3.3 Modifying the installation
The Modify function allows you to change the installation entries made to date. This allows you, for instance,
to add or remove a language.
3.4 Repairing the installation
This function is used to repair an existing installation. The program is restored using the specifications and
entries originally specified.
22 von 50