CM602all_EJM8AESM_Service Manual.pdf - 第1079页
EJ M8A-E- 090101-A01- 00 Page 9- 1- 1-4 Sof twar e Sof twar e Inst allation 2.5 If the c urr ent v er si on is the sam e as the new v er si on, the k ernel cannot b e i nstall ed. (F ig . 2.3) If the cur r ent ker nel v …
EJM8A-E-090101-A01-00
Page 9-1-1-3
Software Software Installation
2. CM602-L Kernel Version Upgrade
2.1 Power down the machine.
2.2 Insert the kernel version upgrade install disk into the floppy disk drive (FDD).
Note. The kernel cannot be installed if its type is not matched with the machine model.
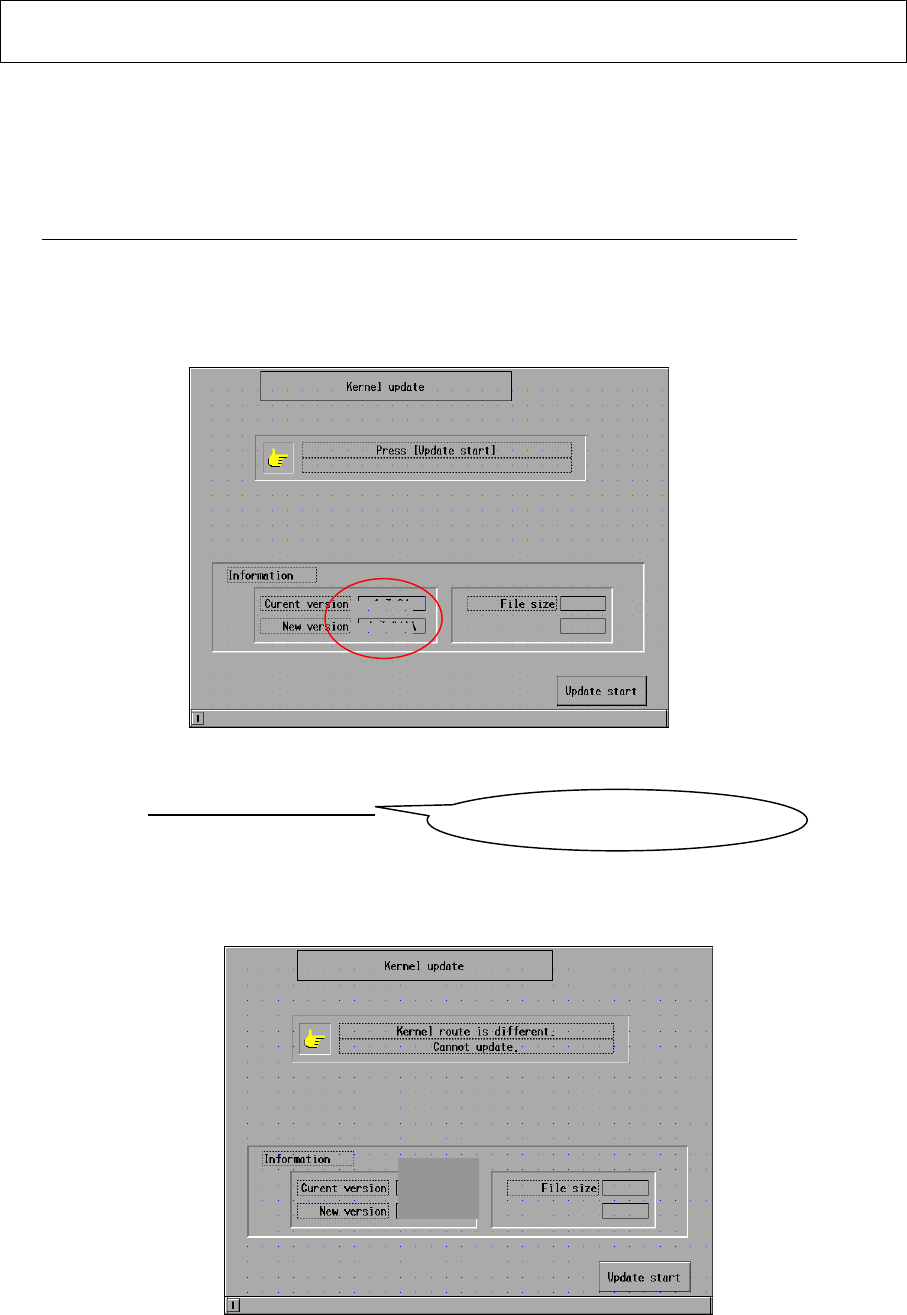
2.3 Power up the machine. After the machine is booted up, the initial screen is displayed.
(Fig. 2.1)
【Time: 100 sec. Approx.】
Fig. 2.1 Initial screen CM602-L
2.4 The current and the new kernel versions are displayed. Check that the new kernel
version is CM602-L:V2. 02. 00GJ.
If the kernel type is not matched with the machine model, the kernel cannot be installed.
(Fig. 2.2) Remove the floppy disk, power down the machine and use the correct
floppy disk.
Fig. 2.2 Initial screen CM602-L
2.01.00GA
2.01.00GB
1.3.24AA
2.01.00GA
2.01.00GB
1.3.24AA
2.01.00GB
Check the last letter is J.
EJM8A-E-090101-A01-00
Page 9-1-1-4
Software Software Installation
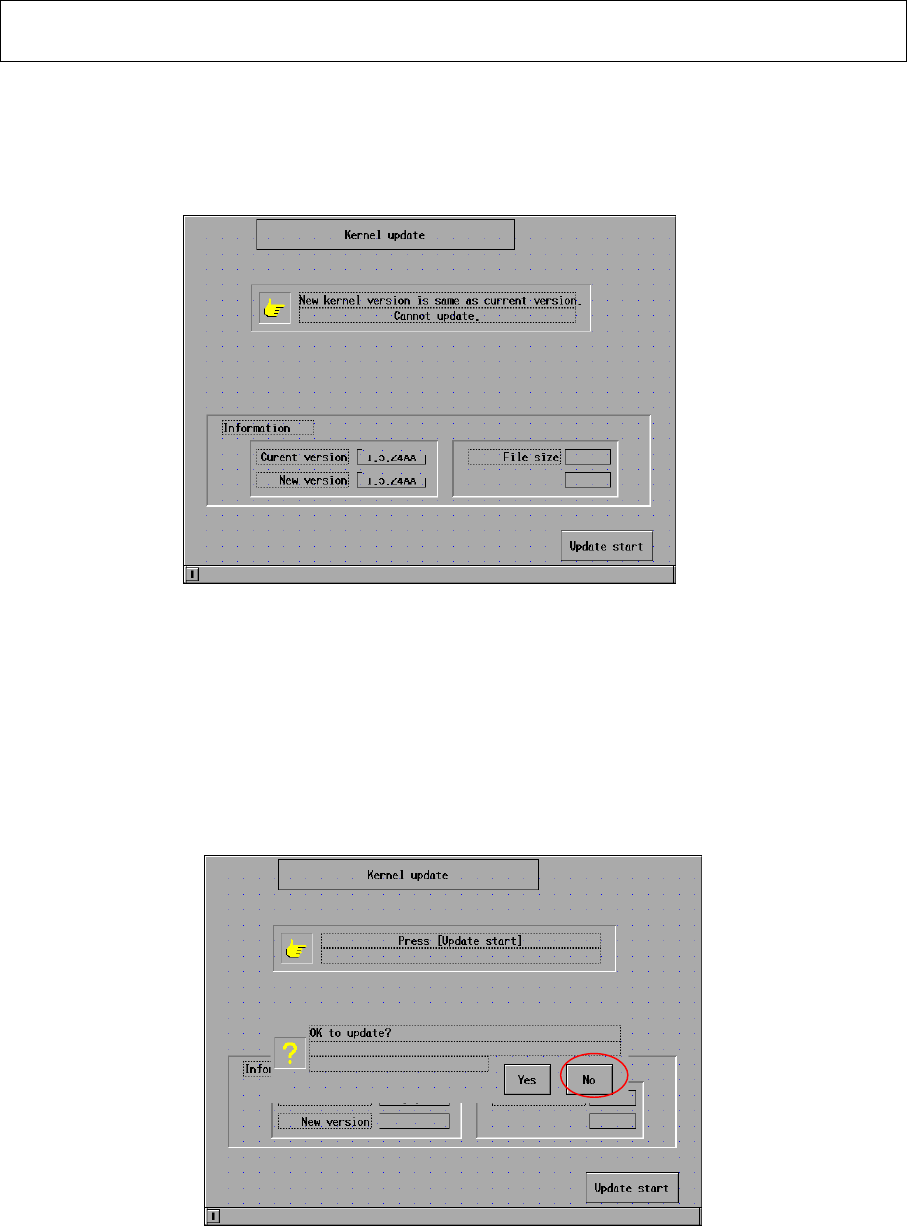
2.5 If the current version is the same as the new version, the kernel cannot be installed.
(Fig. 2.3) If the current kernel version is 2.02.00GJ, that kernel has been
already upgraded. It is not necessary to update the kernel.
Fig. 2.3 Initial screen CM602-L
2.6 Press [Update start]. The message “OK to update?” is displayed. (Fig. 2.4) Press
[Yes] so that installation is started.
【Time: 120 sec. Approx.】
Fig. 2.4 Installation screen CM602-L
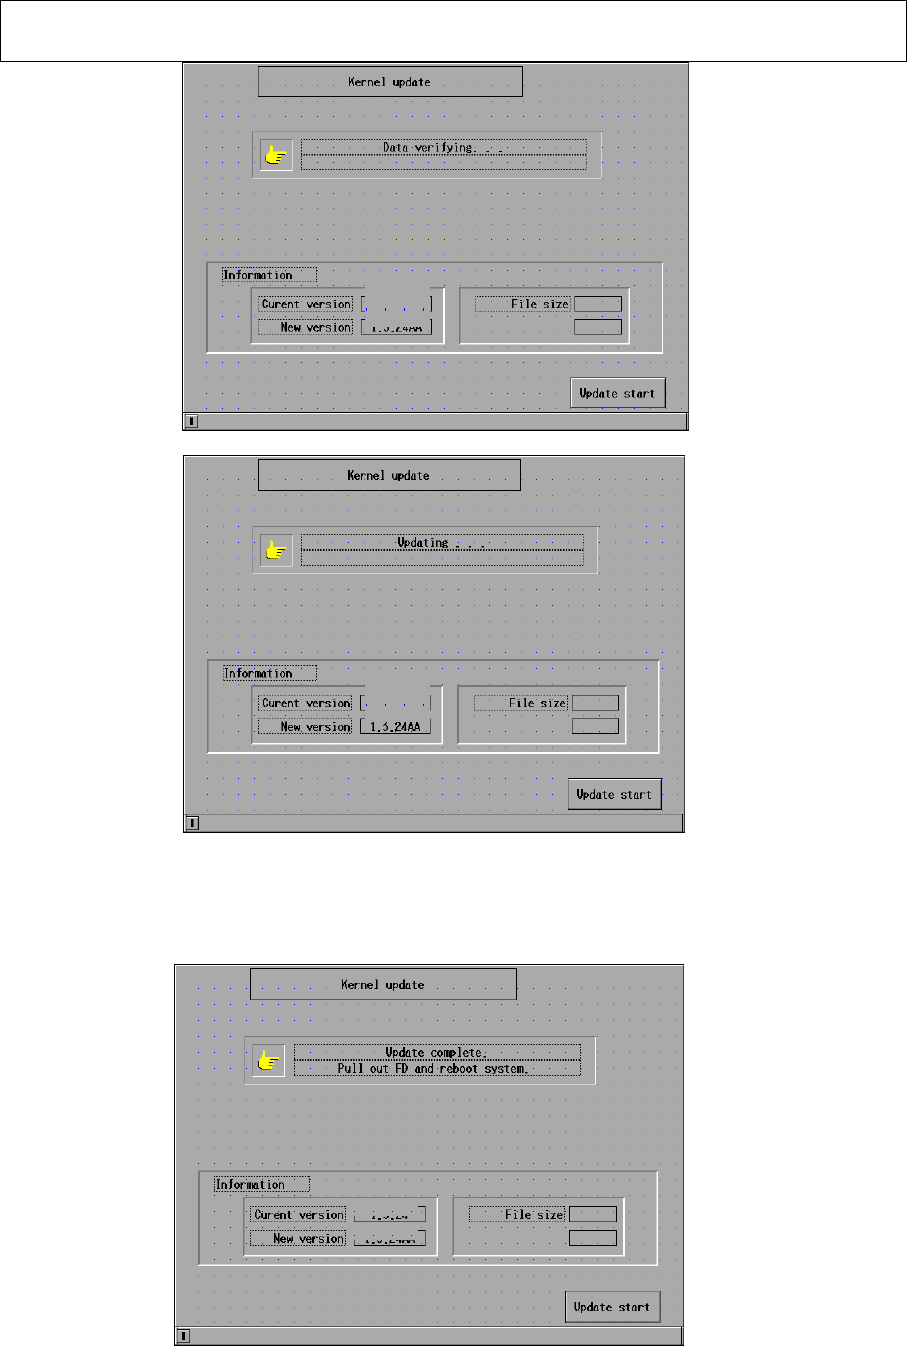
The “Installation” screen is displayed on the M/C touch panel. (Figs. 25 and 26)
2.01.00GB
2.01.00GB
2.01.00GB
2.01.00GB
2.01.00GB
EJM8A-E-090101-A01-00
Page 9-1-1-5
Software Software Installation
Fig. 2.5 Installation screen CM602-L
↓
Fig. 2.6 Installation screen CM602-L
When the installation is finished, the message in the “installation” box, which is
located at the upper portion of the screen, is changed. (Fig. 2.7)
Fig. 2.7 Installation screen CM602-L
2.01.00GA
2.01.00GB
2.01.00GA
2.01.00GB
2.01.00GA
2.01.00GB