CM602all_EJM8AESM_Service Manual.pdf - 第1083页
EJ M8A-E- 090101-A01- 00 Page 9- 1- 1-8 Sof twar e Sof twar e Inst allation 3.3 Boot up the CM20X/ 301/602 system i nstall er . Selec t [Nex t] f r om the “ CM 20X/301/602 s ystem i nstall er” w indow dis p layed on the …
EJM8A-E-090101-A01-00
Page 9-1-1-7
Software Software Installation
3. CM602-L System Upgrade
Upgrade the CM602-L system, following the procedures below:
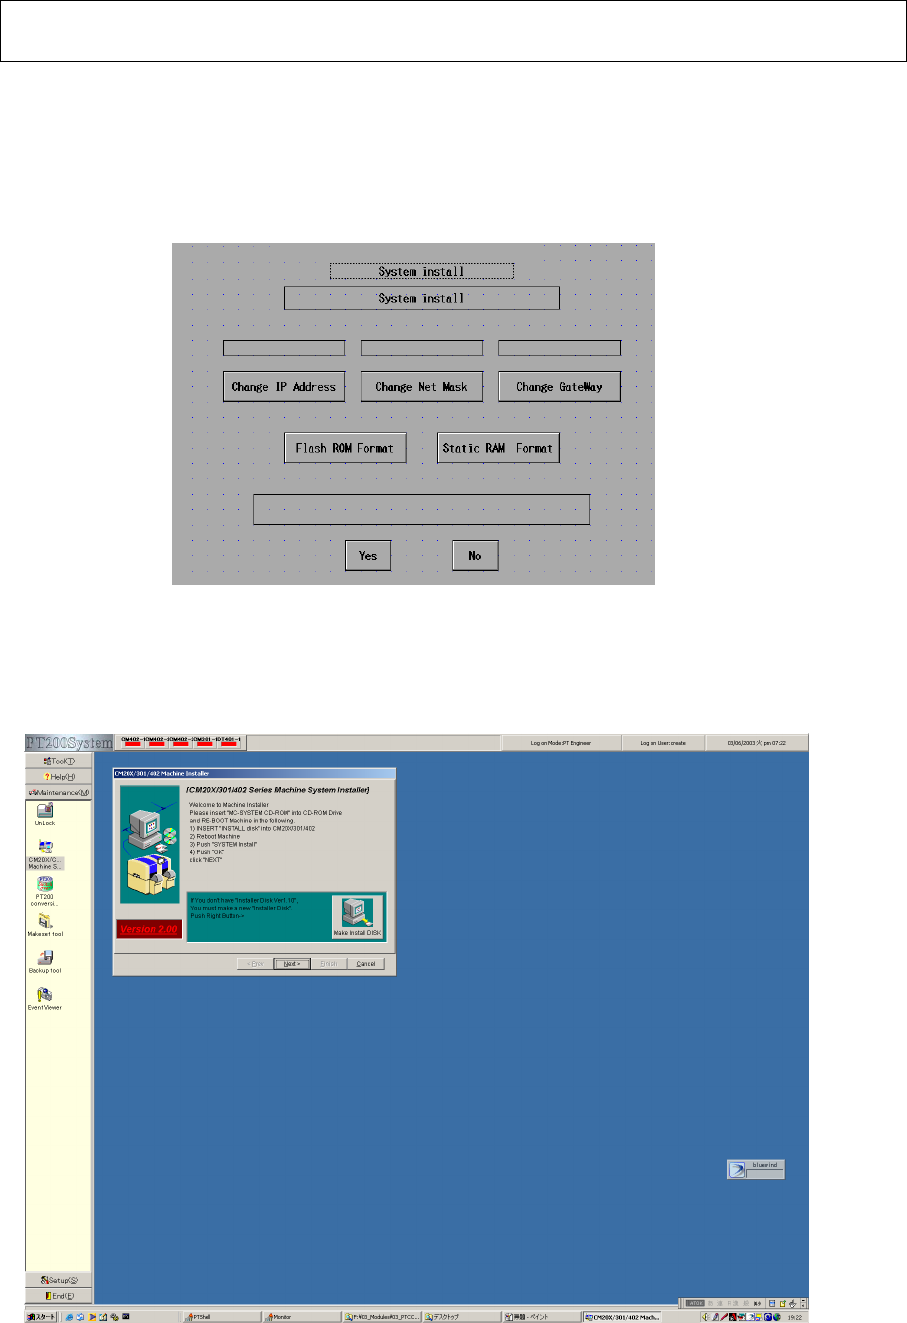
3.1 Put the “system install” disk into the floppy disk drive. Power down and then power up
the machine so that the “System install” screen is displayed. (Fig. 3.1)
The install disk to use should be V7.10 or later.
Fig. System install screen CM602-L
3.2 Once the “System install” screen is displayed on the CM602-L touch panel, follow the
procedures below with the PT200: (Fig. 3.2)
Press [Maintenance]. Double-click [CM20X/301/402-L System Installer].
Fig. 3.2 Maintenance screen PT200
EJM8A-E-090101-A01-00
Page 9-1-1-8
Software Software Installation
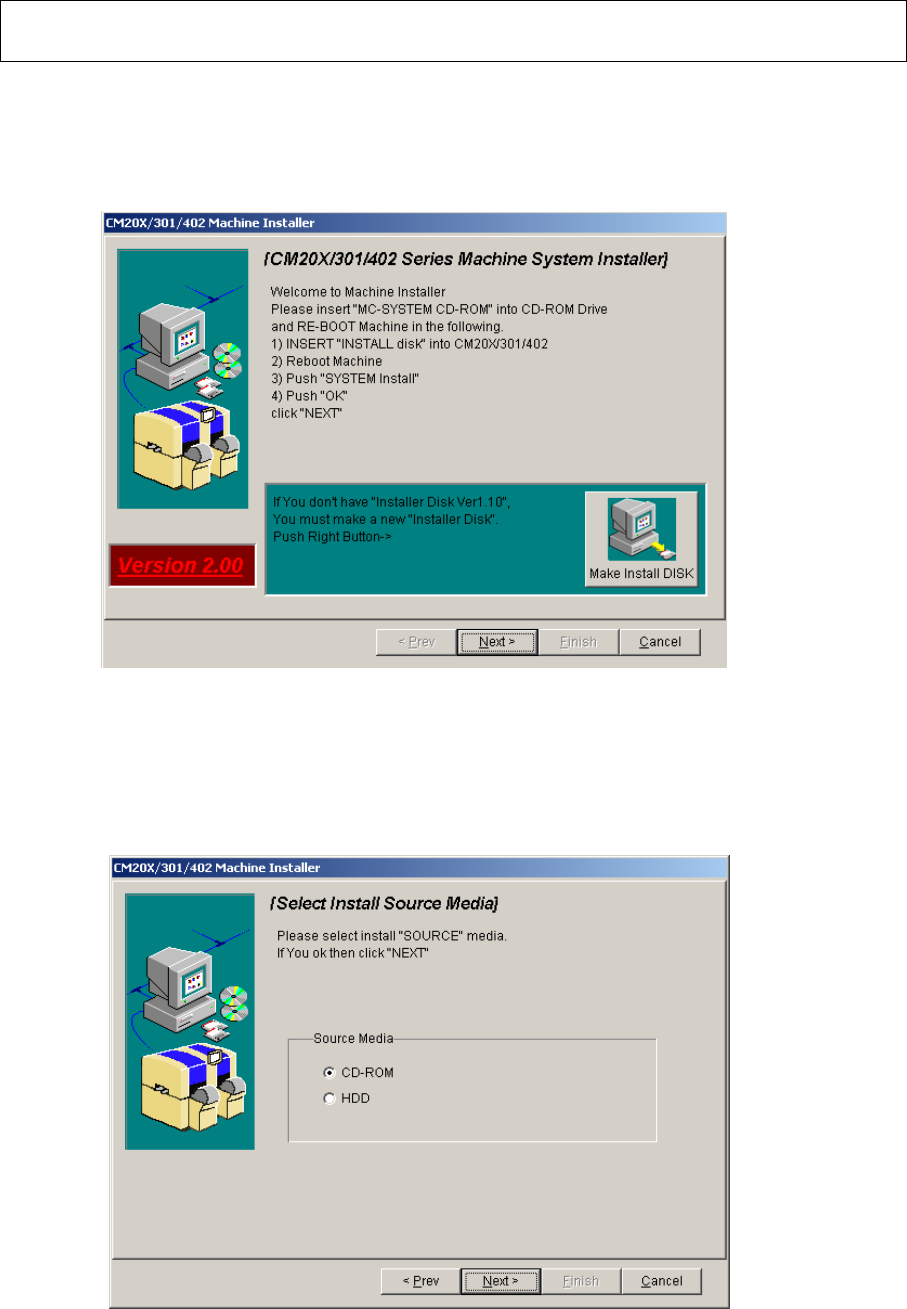
3.3 Boot up the CM20X/301/602 system installer.
Select [Next] from the “CM20X/301/602 system installer” window displayed on the
PT200. (Fig. 3.3.)
Fig. 3.3 CM20X/301/402 system installer screen PT200
3.4 After ”Select Install Source Media” screen is displayed (Fig. 3.4), insert the CM602-L
system CD-ROM into the PT200 CD-ROM drive.
Select “CD-ROM” from “Source Media.” Press [Next].
Fig. 3.4 Select Install Source Media PT200
EJM8A-E-090101-A01-00
Page 9-1-1-9
Software Software Installation
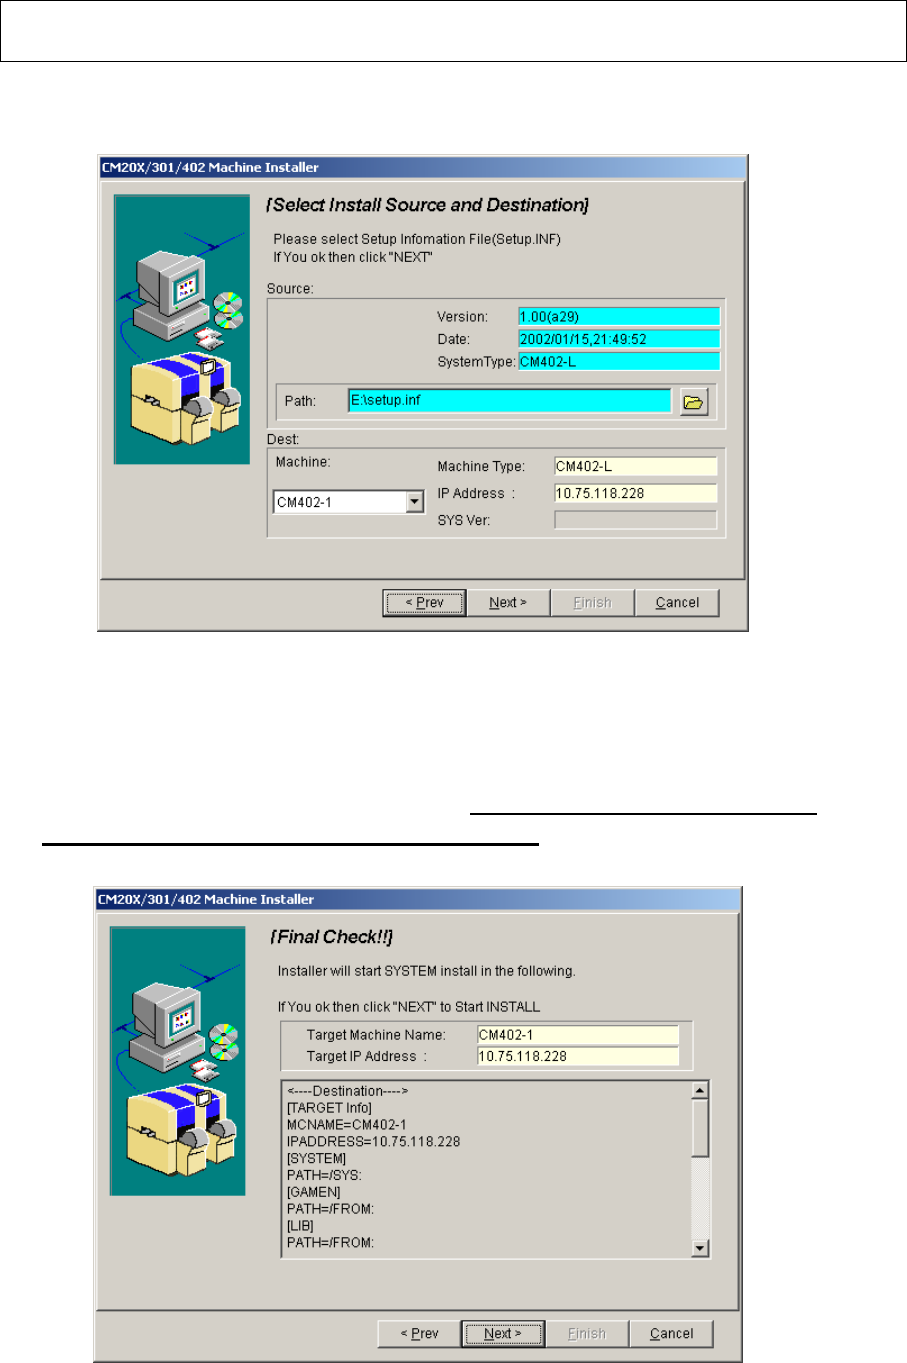
3.5 The “Select Install Source and Destination” window is displayed. (Fig. 3.5)
Select the machine from “Dest Machine.” Press [Next].
s
Fig. 3.5 Select Install Source and Destination PT200
Installation options:
- Full installation
- Difference installation
3.6 The “Final Check” window is displayed. (Fig. 3.6) Check that the IP address displayed
on this window is the same as that on the CM602-L. When the IP address is correct,
press [Next].
;
.6l:「インストール最終確認」画面_PT200
Fig.3.6 Final Check PT200