CM602all_EJM8AESM_Service Manual.pdf - 第1090页
EJ M8A-E- 090101-A01- 00 Page 9- 1- 1-15 Sof twar e Sof twar e Inst allation Once the m achi ne param eter s hav e b een l oaded, the m es sag e of “D o you read a syst em param eter, too?” i s dis p layed. Be sur e to s…
EJM8A-E-090101-A01-00
Page 9-1-1-14
Software Software Installation
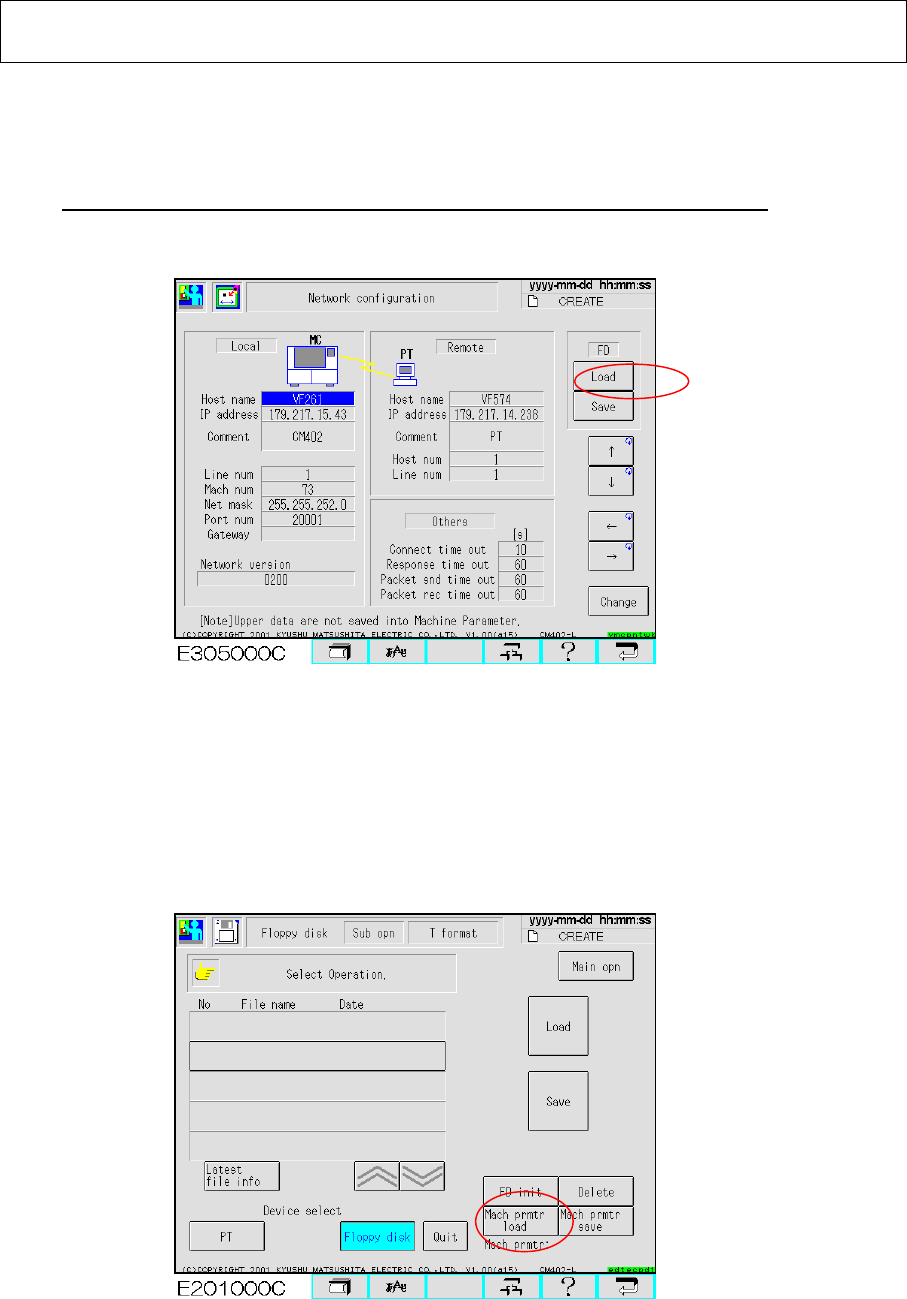
4.2 Insert the floppy disk containing the machine parameters and the network configuration
into the CM602-L floppy disk drive. Select [Machine parameter], and [Network]. Display
the “Network configuration” screen. (Fig. 4.3)
Press [Load] so that the network parameters are restored on the CM602-L.
【Time: 3 sec. Approx.】
Fig. 4.3 Network configuration CM602-L
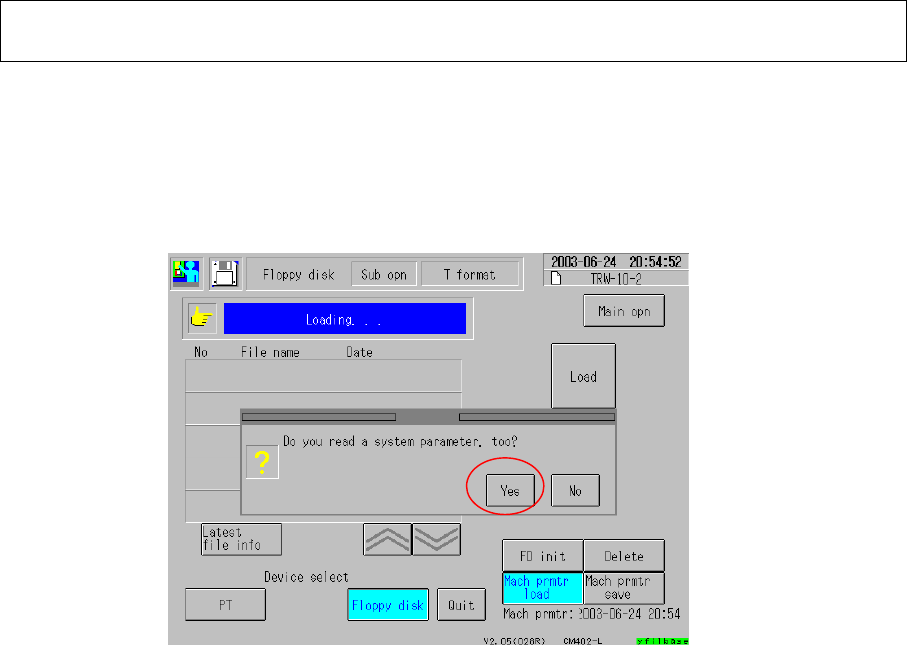
4.3 Select [File management] from the main menu. Insert the floppy disk containing the
machine parameters into the CM602-L floppy disk drive. Press the “Floppy disk” icon.
Press [Sub operation] so that the “Machine prmtr load” button is displayed. (Fig. 4.4)
Press that button so that the machine parameters are restored on the CM602-L.
Fig. 4.4 File management screen CM602-L
EJM8A-E-090101-A01-00
Page 9-1-1-15
Software Software Installation
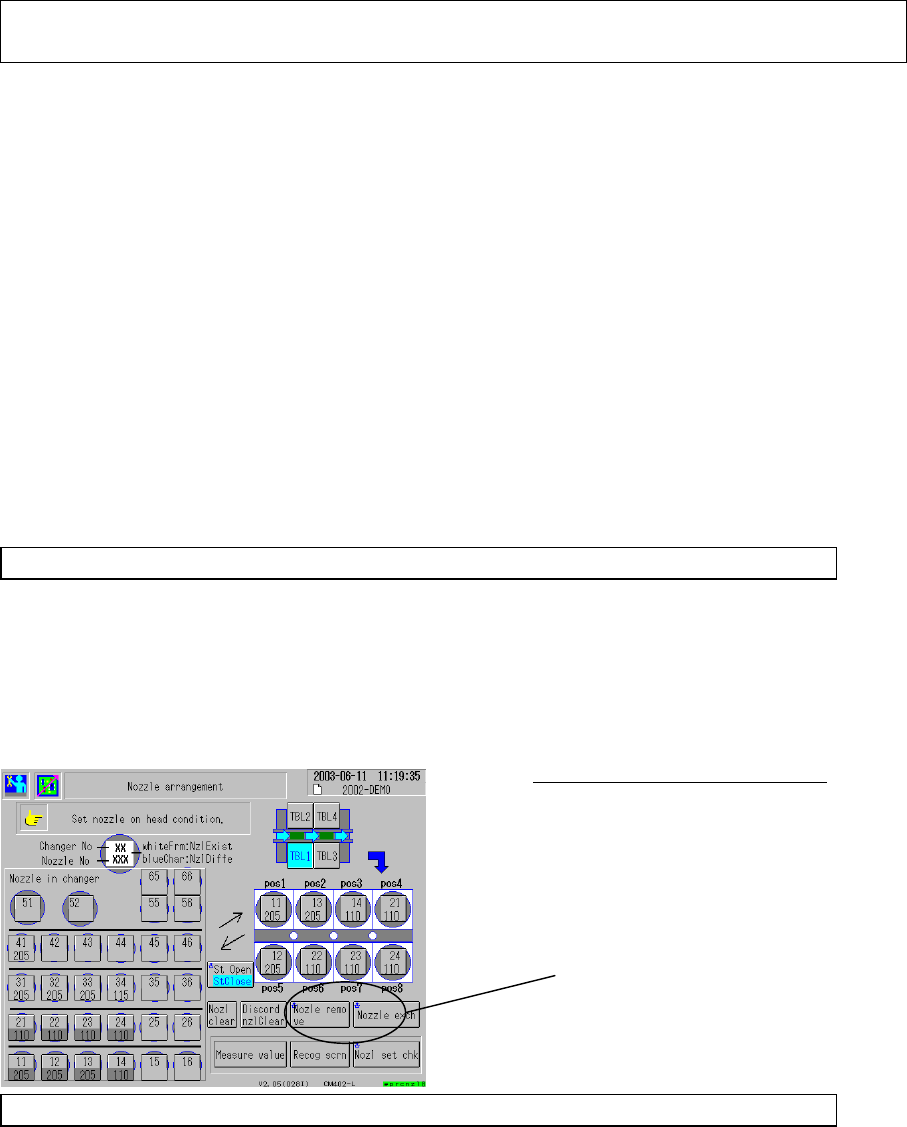
Once the machine parameters have been loaded, the message of “Do you read a system
parameter, too?” is displayed. Be sure to select [Yes] so that the system parameters are
loaded. (Fig. 4.5)
【Time: 1 min. approx.】
Fig. 4.5 File management CM602-L
Once the machine parameters and the system parameters have been restored, the message
of “Restart up the system.” is displayed. Power down and then power up the CM602-L.
EJM8A-E-090101-A01-00
Page 9-1-1-16
Software Software Installation
CM602-L Supplementary Procedures for Upgrading the System
If the version is different when the CM602 system is installed, the SRAM is cleared
automatically; the following machine information is cleared.
(1) Machine data
(2) Production information
(3) Error record
(4) Vacuum sensor error record
(5) Nozzle setting information
(6) Information on boards being produced
(7) Pickup position learning information
(8) Tray counter, Tray palette information (Tray-connecting machine only)
(9) Shuttle setting information (Tray-connecting machine only)
* Before upgrading the version, prepare for system installation, following the procedures
below:
1. Finishing all production.
When SRAM is cleared, production information such as “board condition”, “being picked
up” are cleared. If a board is being produced in the machine, finish that production completely,
and check that no boards exist in the machine.
For a shuttle machine, check that no components exist in the shuttle pickup and transfer
section.
2. Printing out the necessary information.
Print out the images of the necessary information before system installation; they will be
cleared. It is advisable to print out the following windows so that post-installation work can be
carried out easily.
(1) Production configuration – Nozzle arrangement
(2) Production configuration – Feeder arrangement (Window for Tray)
(3) Machine setting – Pickup position learning
After installing the system, check machine condition, following the procedures below:
High-speed, Nozzle Changer Machine:
It is advisable to place the head
nozzles on the nozzle changer
beforehand; procedures after system
installation are carried out easier.
Remove the nozzles from each
head separately.