CM602all_EJM8AESM_Service Manual.pdf - 第284页
Light Transfer-Head Assembly(3 nozzles) Maintenance Adjustment 23 Select the desired stage. Press [Production] 24 (Accuracy Verification) Remove the QFP jigs, rotating them to avoid breaking the QFP jigs. After removing …
治具基板挿入?
PTデータ無し
ヘッドパス
Maintenance Adjustment
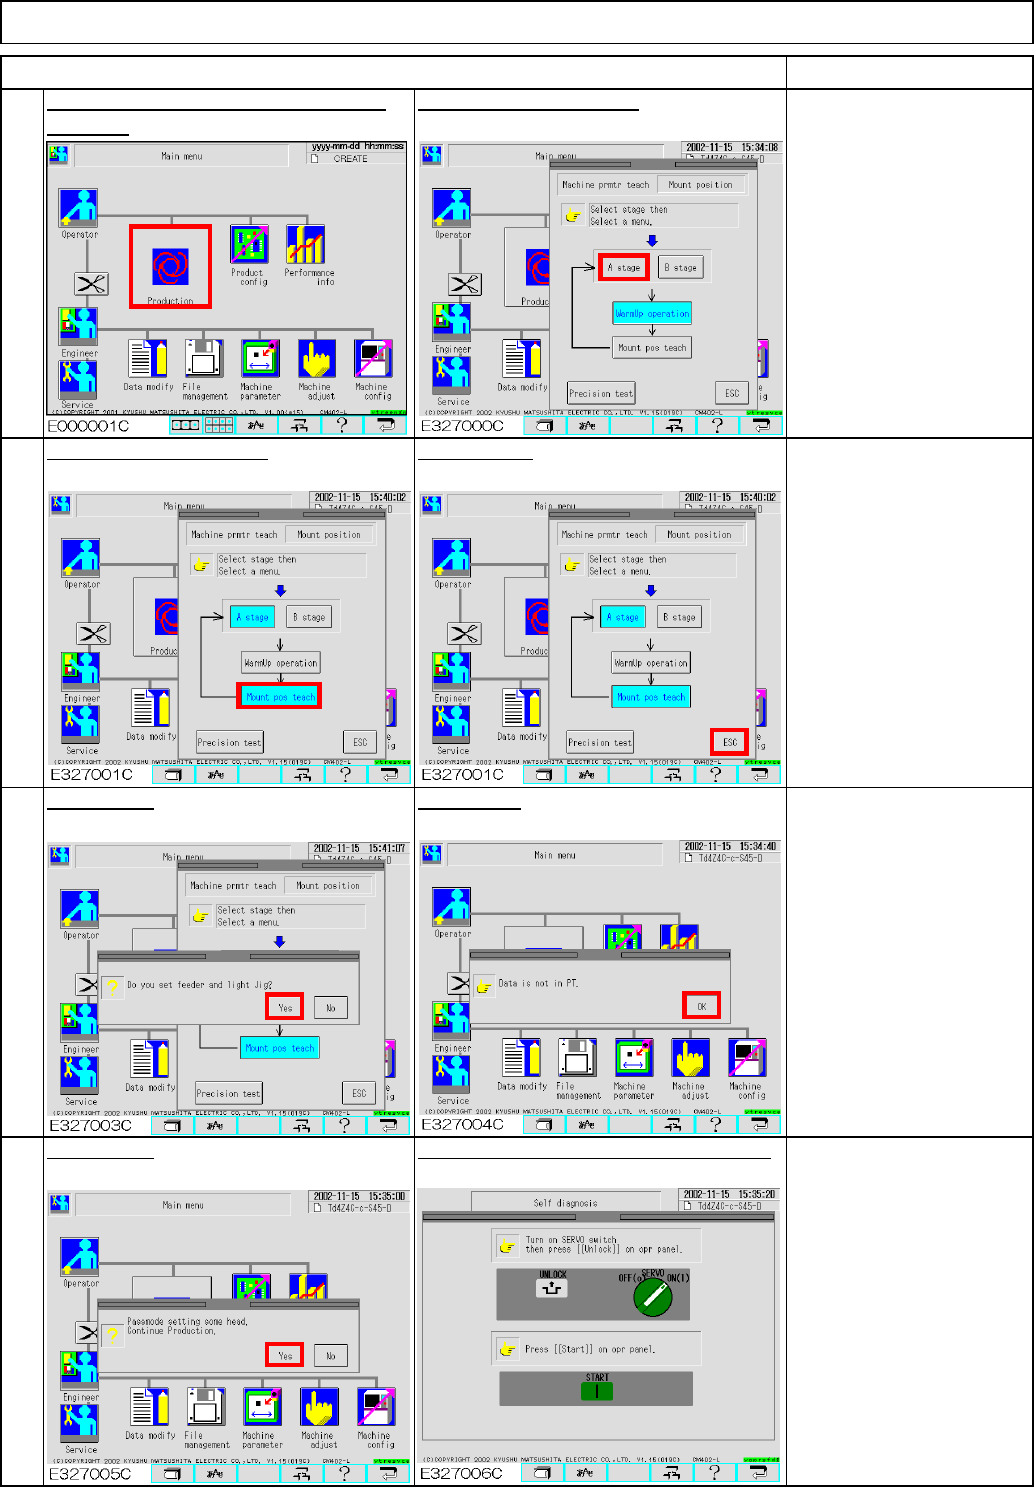
Press [Mount pos teach].
20
18
19
Press [Yes].
Press [OK].
Press [ESC].
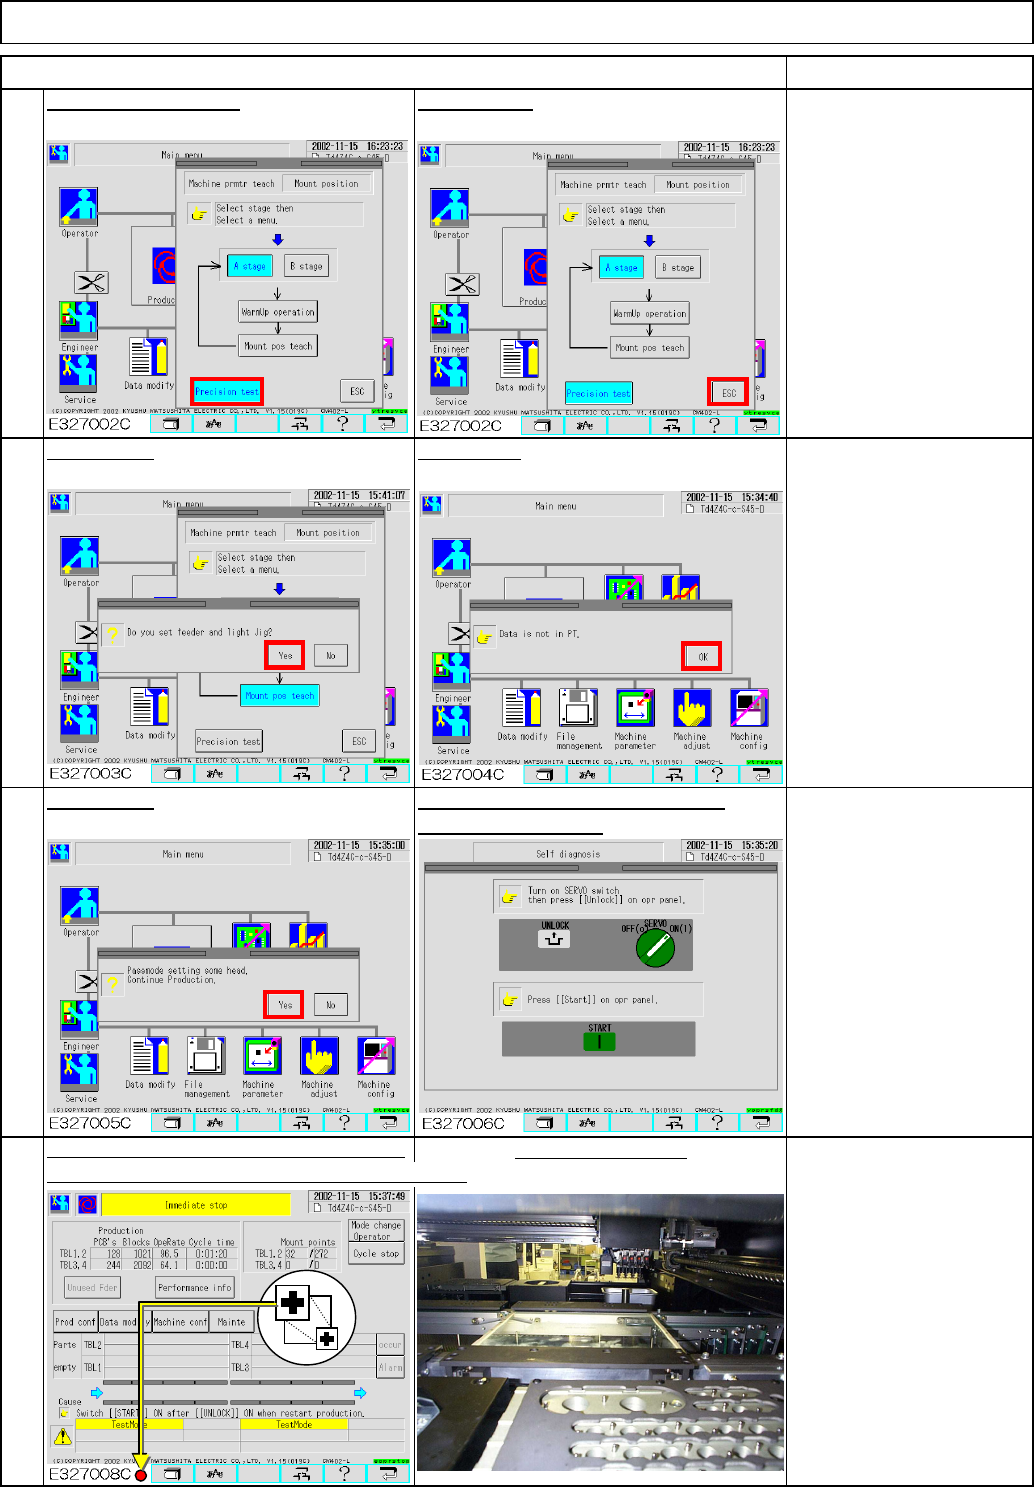
Press [Yes]. Press the "Unlock" and the "Start" keys.
Press [Production]. (Mounting position Select the desired stage.
teaching)
ITEM REMARKS
Light Transfer-Head Assembly(3 nozzles)
17
EJM8A-E-SMA040307-A01-00
Page 4-3-7-7
Light Transfer-Head Assembly(3 nozzles)Maintenance Adjustment
23
Select the desired stage.
Press [Production]
24
(Accuracy Verification)
Remove the QFP jigs,
rotating them to avoid
breaking the QFP jigs.
After removing QFP jigs,
clean the double-sided
tape (Solvent can be
used.).
22
"Return" key.
After teaching is finished:
If cycle stop is carried out:
teaching is complete.
In case of immediate stop,
a head camera recognition
error has occurred and the
machine stopped; it is
necessary to teach again.
In case of half-way stop,
press "Unlock" and "Start"
to finish teaching, and re-
teach.
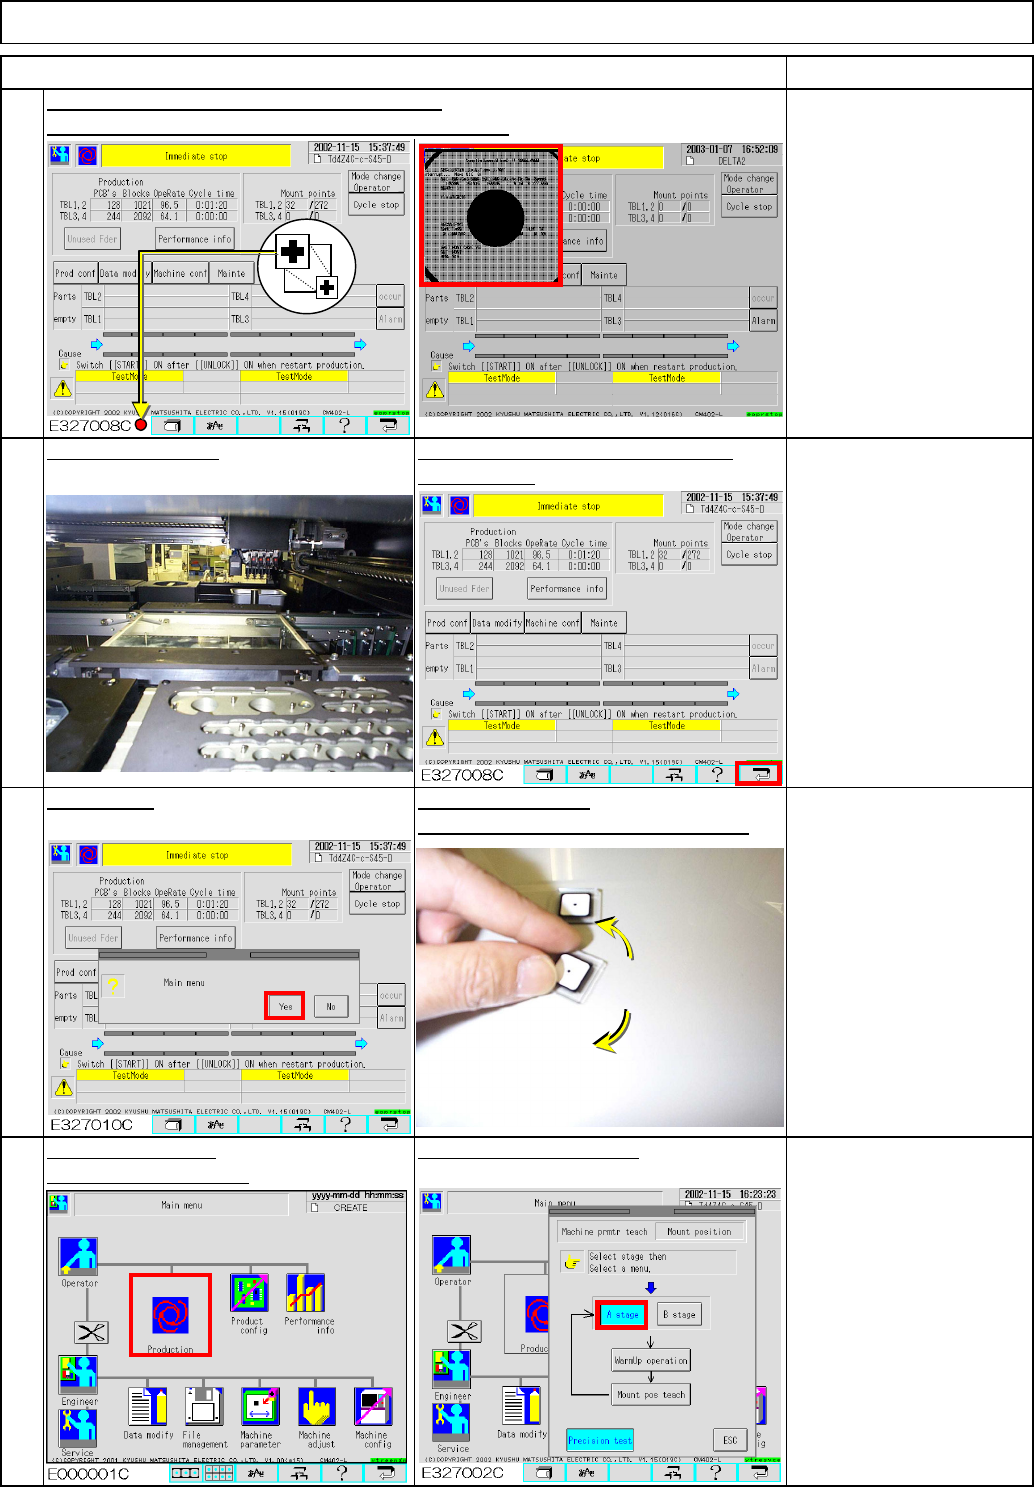
Remove the board.
Remove the chip jigs from the board.
Press [Yes].
Place the board jig. Once the machine stops, press the
ITEM REMARKS
21
"Immediate stop" and display the recognition screen
After waiting for the previous process, select
EJM8A-E-SMA040307-A01-00
Page 4-3-7-8
ヘッドパス
Press the "Unlock" and the "Start"
Light Transfer-Head Assembly(3 nozzles)Maintenance Adjustment
Place the board jig.
27
Press [Yes].
25
keys simultaneously.
ITEM REMARKS
Press [ESC].
Press [Precision test].
26
Press [Yes].
Press [OK].
28
"Immediate stop" and display the recognition screen
After waiting for the previous process, select
EJM8A-E-SMA040307-A01-00
Page 4-3-7-9