CM602all_EJM8AESM_Service Manual.pdf - 第323页
Item Remarks 17 Put the feeder cover back on. Machine Part Replacement Main Body EJM8A-E-SMA050101-A01-00 Page 5-1-1-6
Put 16 bolts into the part.
Machine Part Replacement Main Body
14
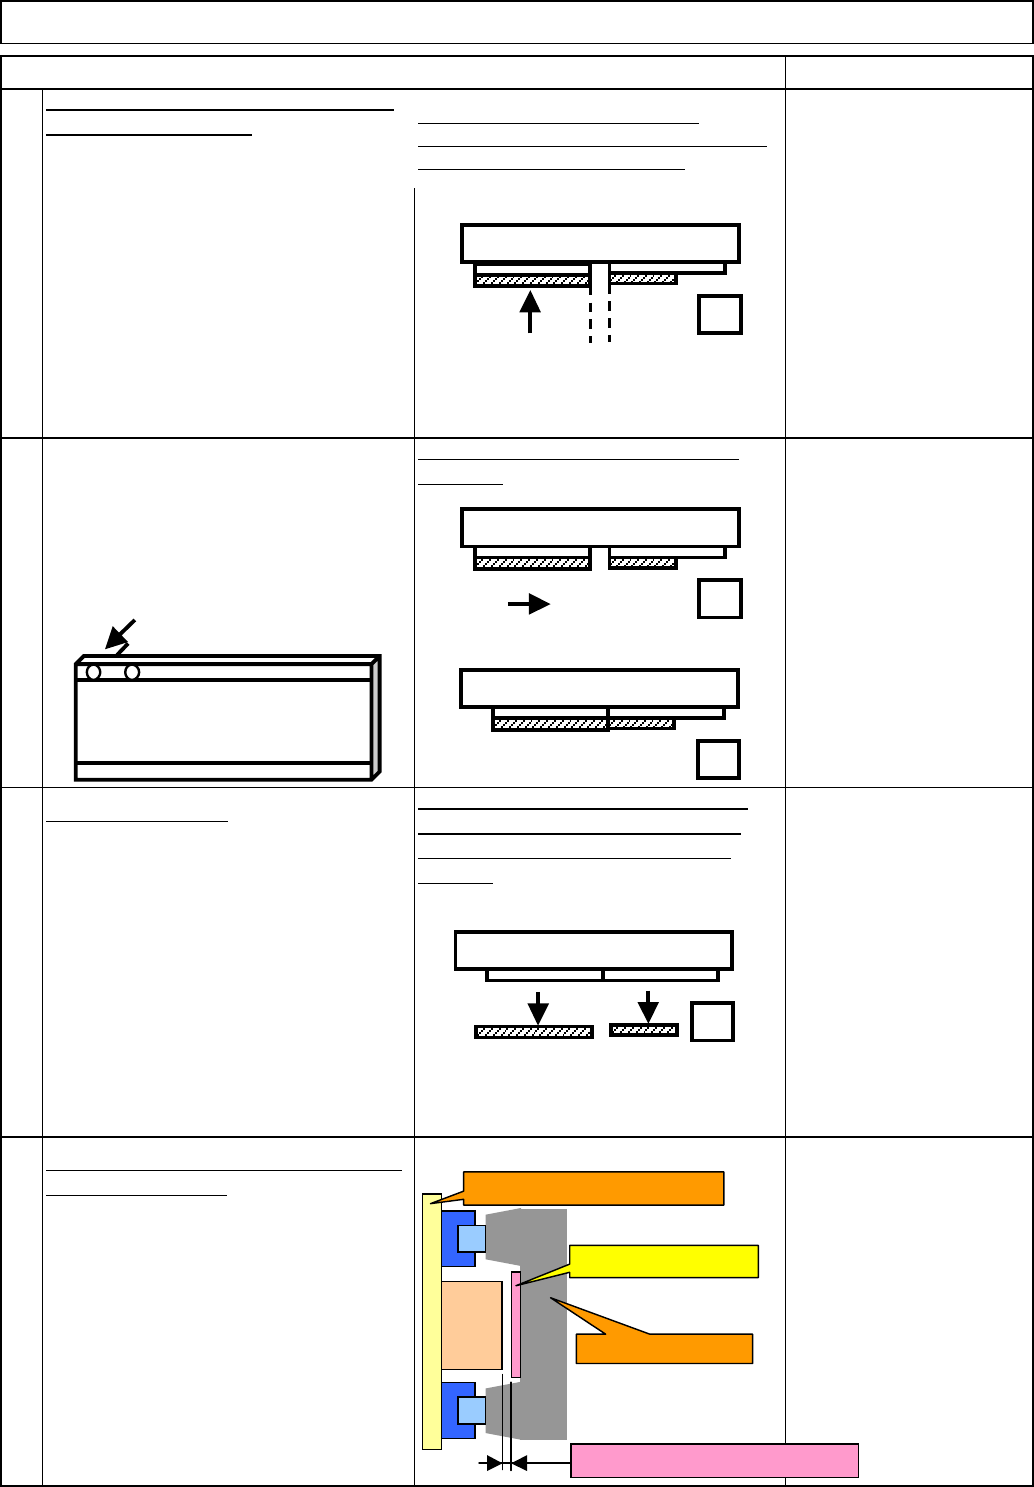
Slide the left part until it touches the
right part.
Check the gap with a non-
magnetic material.
Gap: 0.3 mm
Check the gap between the primary and
the secondary parts.
15
16
Tighten the 16 bolts.
Remove the covers (large and small)
from the right and the left secondary
parts. Secondary-part installation is
finished.
Loosen the bolts that were
securely tightened with a
non-magnetic Allen key.
Do not securely tighten.
(The Allen key is Not
sufficiently strong.)
Put the removed cover (large) over the
new part. (See Step 4.)
Securing the gap between the right
secondary part and the new part, install the
new one on the wall of the beam.
Item Remarks
13
Do not put a bolt through the
secondary part excessively; the bolt
should not come out of the rear
surface of the part. Otherwise, it will
go into the bolt hole of the beam, and
the secondary part cannot slide.
Left secondary part
Be careful not to get your finger
caught!
Bolt
Secondary part
Gap should be 0.3 mm.
X-axis beam
Head installing plate
Primary
part
EJM8A-E-SMA050101-A01-00
Page 5-1-1-5

Item Remarks
17
Put the feeder cover back on.
Machine Part Replacement Main Body
EJM8A-E-SMA050101-A01-00
Page 5-1-1-6
Machinery Part Replacement Main Body
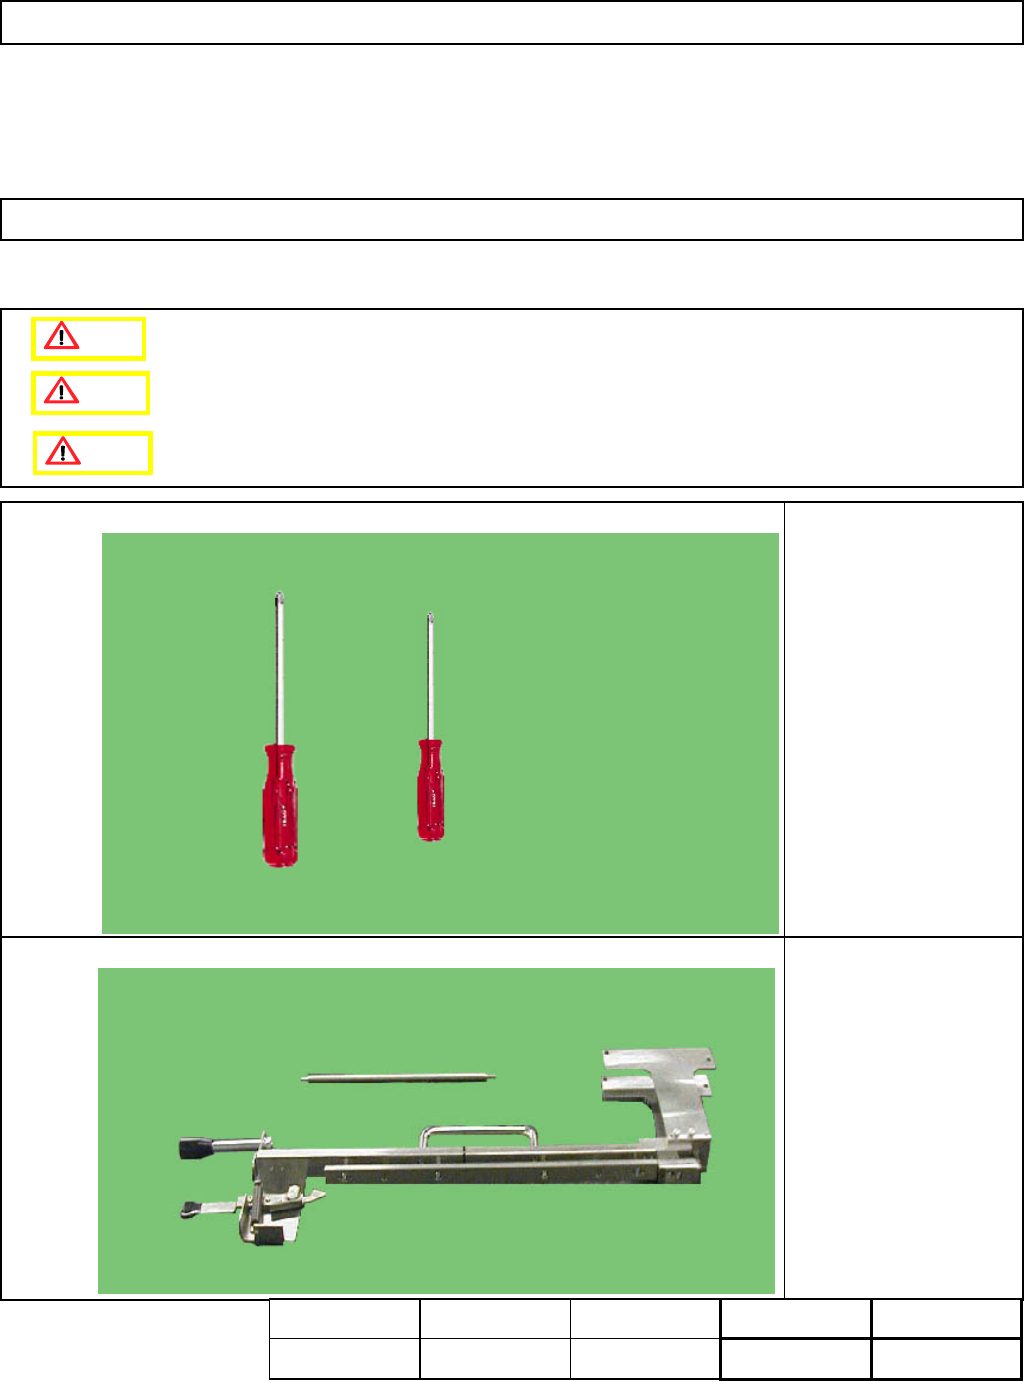
Tools
Phillips screwdriver #2
Phillips screwdriver #1
Tape
Jig
FM-1055
Tape Float Sensor
Adjusting Jig
5-1-2 Tape Float Sensor Replacement
This section describes the procedures for replacing the tape float sensor.
Assembly
Adjustment
10min.
Teaching
min.
Total Time Weight of
Part
Removal
Disassembly
13min.
23min. kgs
Caution
Dange
r
Warning
EJM8A-E-SMA050102-A01-00
Page 5-1-2-1