CM602all_EJM8AESM_Service Manual.pdf - 第333页
Machinery Part Replacement Main Body This section describes the procedures for replacing the vacuum pump. Tools Phillips screwdriver #2 Allen key 6 mm Torch Wrench 22 mm Wrench 19 mm Wrench 14 mm Jig None 5-1-4 Vacuum Pu…
Machinery Part Replacement Main Body
Remarks
Item
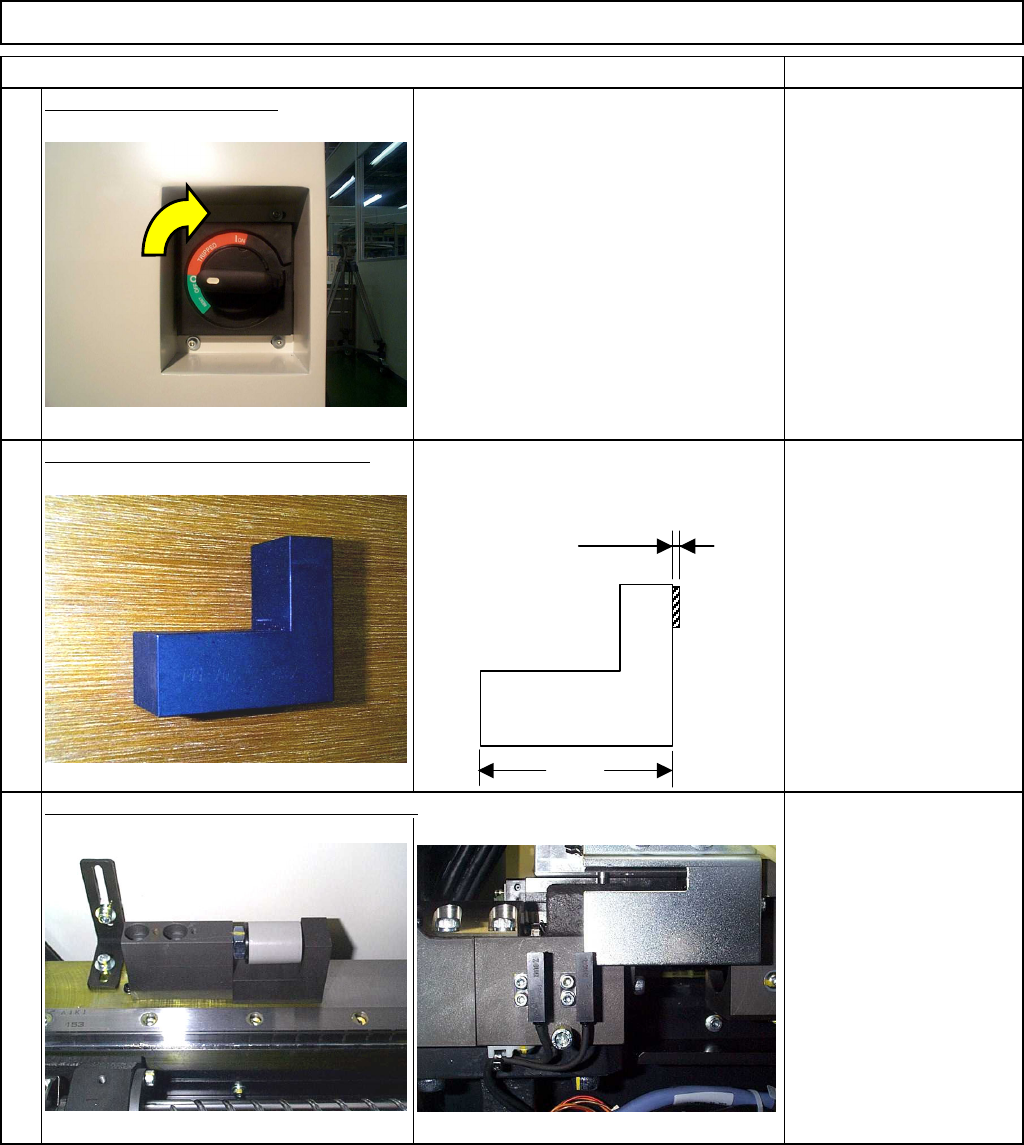
Switch on the main power.
Put the 2-mm block gauge on the jig.
Put the 2-mm block gauge on the jig as
shown below:
Precisely position the Y-axis origin sensor.
8-000045、000046
Set the jig as shown in the
picture at left.
Move the head assembly
to the stopper next to the
jig, and keep it there.
Lock the sensor when the
dog blocks the sensor
light.
11
10
9
55 mm
2 mm
EJM8A-E-SMA050103-A01-00
Page 5-1-3-4
Machinery Part Replacement Main Body
This section describes the procedures for replacing the vacuum pump.
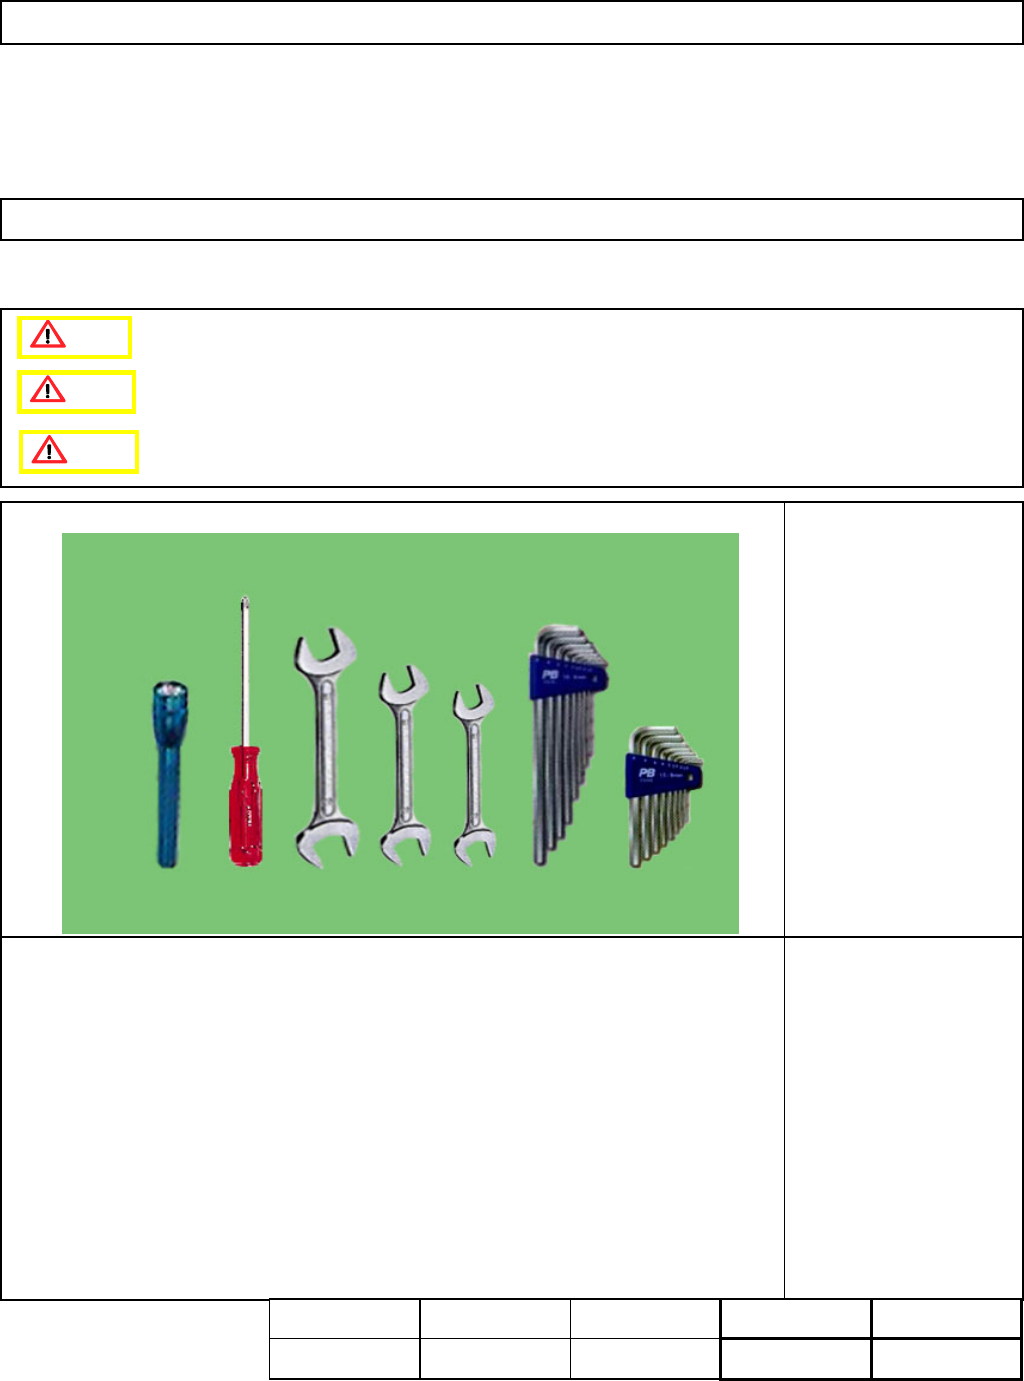
Tools
Phillips screwdriver #2
Allen key 6 mm
Torch
Wrench 22 mm
Wrench 19 mm
Wrench 14 mm
Jig
None
5-1-4 Vacuum Pump Replacement
Assembly
Adjustment
15min.
Teaching
min.
Total Time Weight of
Part
Removal
Disassembly
15min.
30min. 25kgs
Caution
Dange
r
Warning
EJM8A-E-SMA050104-A01-00
Page 5-1-4-1
Machinery Part Replacement Main Body
Remarks
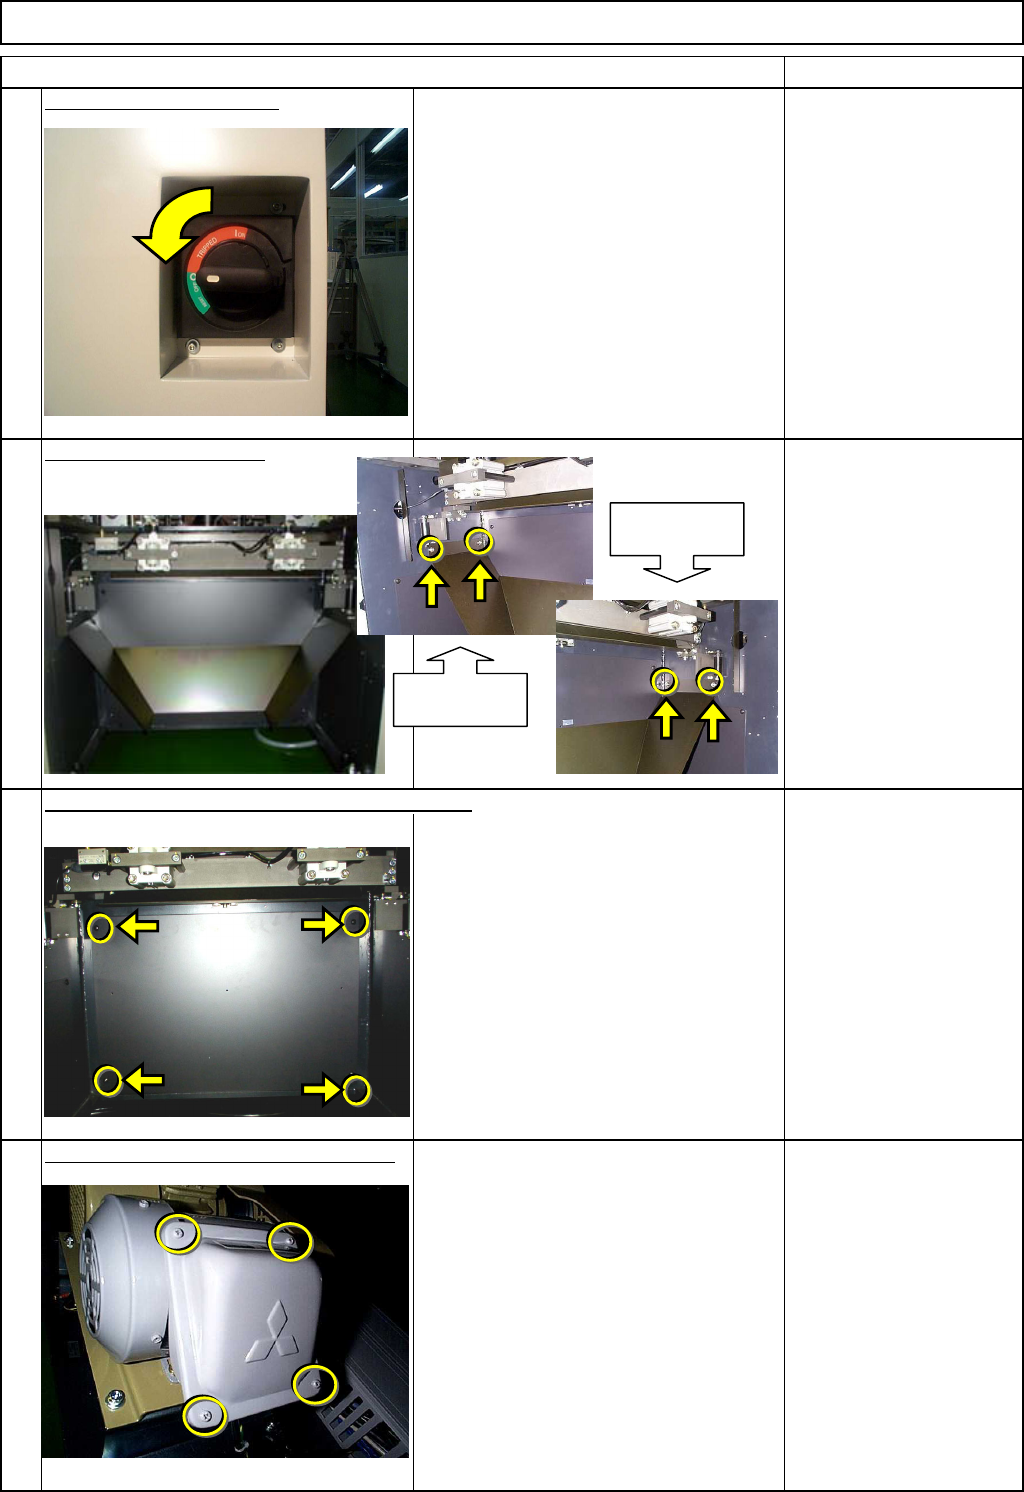
Switch off the main power.
Turn the switch to the left.
Remove the lower chute.
Allen key 4 mm
Screw M5x 12mm 4 pcs.
Thick washer 4 pcs.
Phillips screwdriver #2
Round cross-cut screw
M5 4 pcs.
Open the vacuum pump terminal cover.
Phillips screwdriver #2
Screw M4 4 pcs.
3
4
1
Item
2
Remove the bottom cover from Stage AR or BR.
Chute holding
section (left)
Chute holding
section (right)
EJM8A-E-SMA050104-A01-00
Page 5-1-4-2