CM602all_EJM8AESM_Service Manual.pdf - 第421页
Machinery Part Replacement Remarks L ight Transfer-Head Assembly (8-nozzle type ) Item Fit the new valves. 1-000308 Precision screwdriver Valve holding screws 2 pcs. Connect the connectors and the air tubes to the valves…
Machinery Part Replacement
Remarks
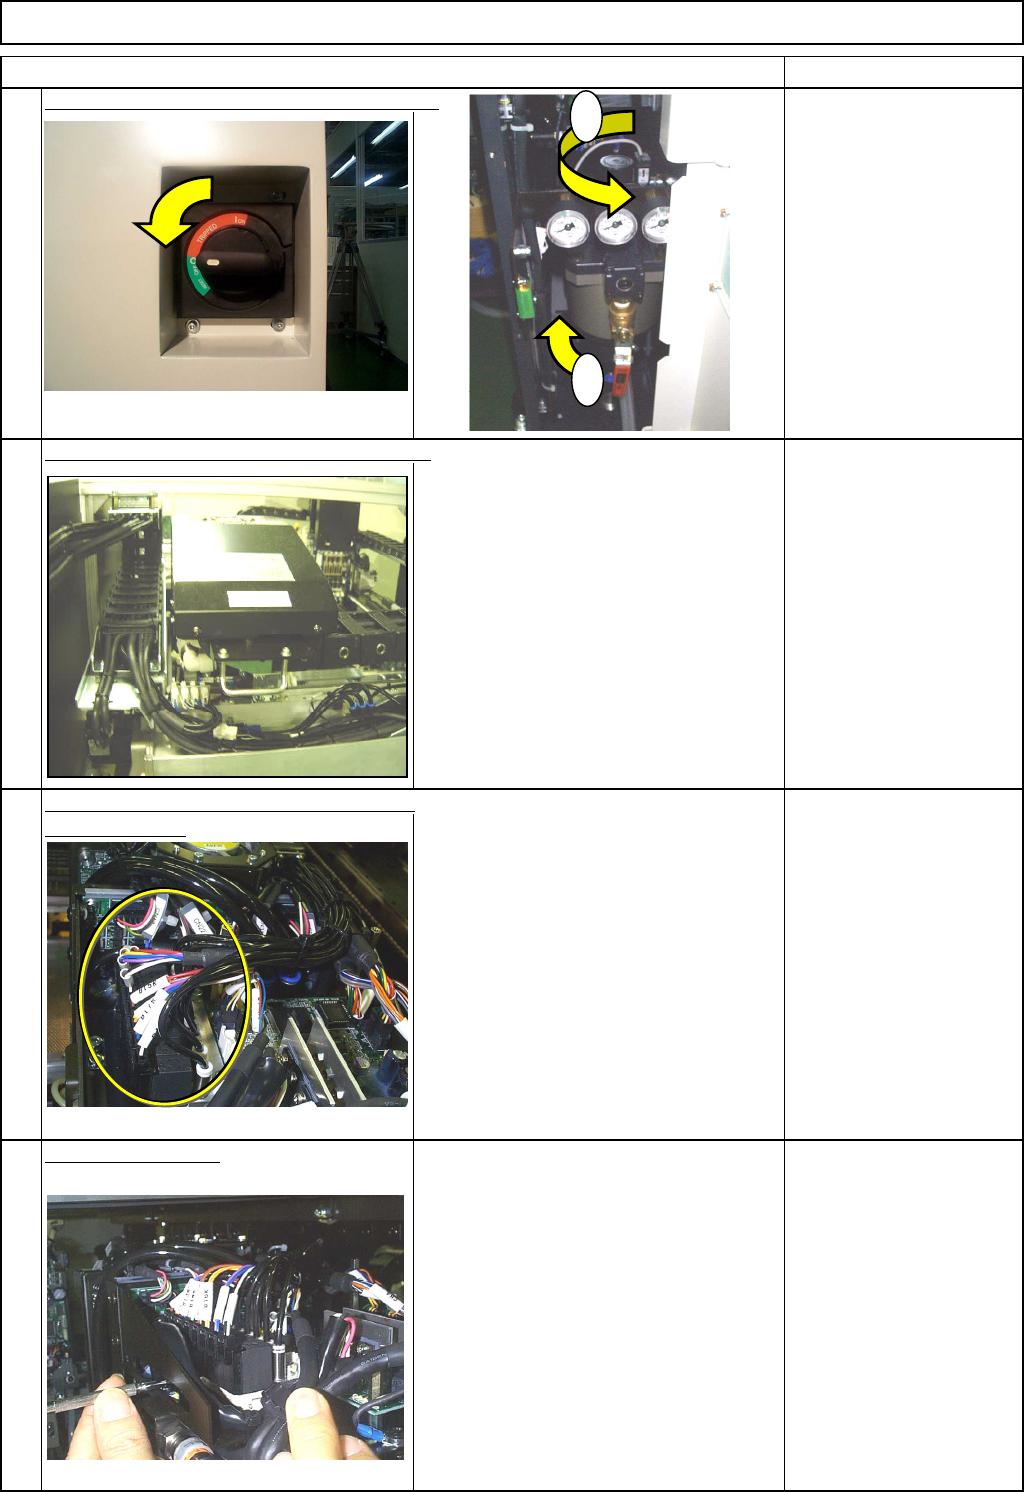
Switch off the main power and power supply.
Remove the cover from the head assembly.
Phillips screwdriver #2
Screw M4 4 pcs.
Remove the connectors and the air tubes
from the valves. Put a mark on each air tubes so that they
can be re-connected in the correct
position.
Magic marker
Remove the valves.
1-000308
Precision screwdriver
Valve holding screws
2 pcs.
3
4
1
2
L
ight Transfer-Head Assembly (8-nozzle type
)
Item
1
2
EJM8A-E-SMA050304-A01-00
Page 5-3-4-2
Machinery Part Replacement
Remarks
L
ight Transfer-Head Assembly (8-nozzle type
)
Item
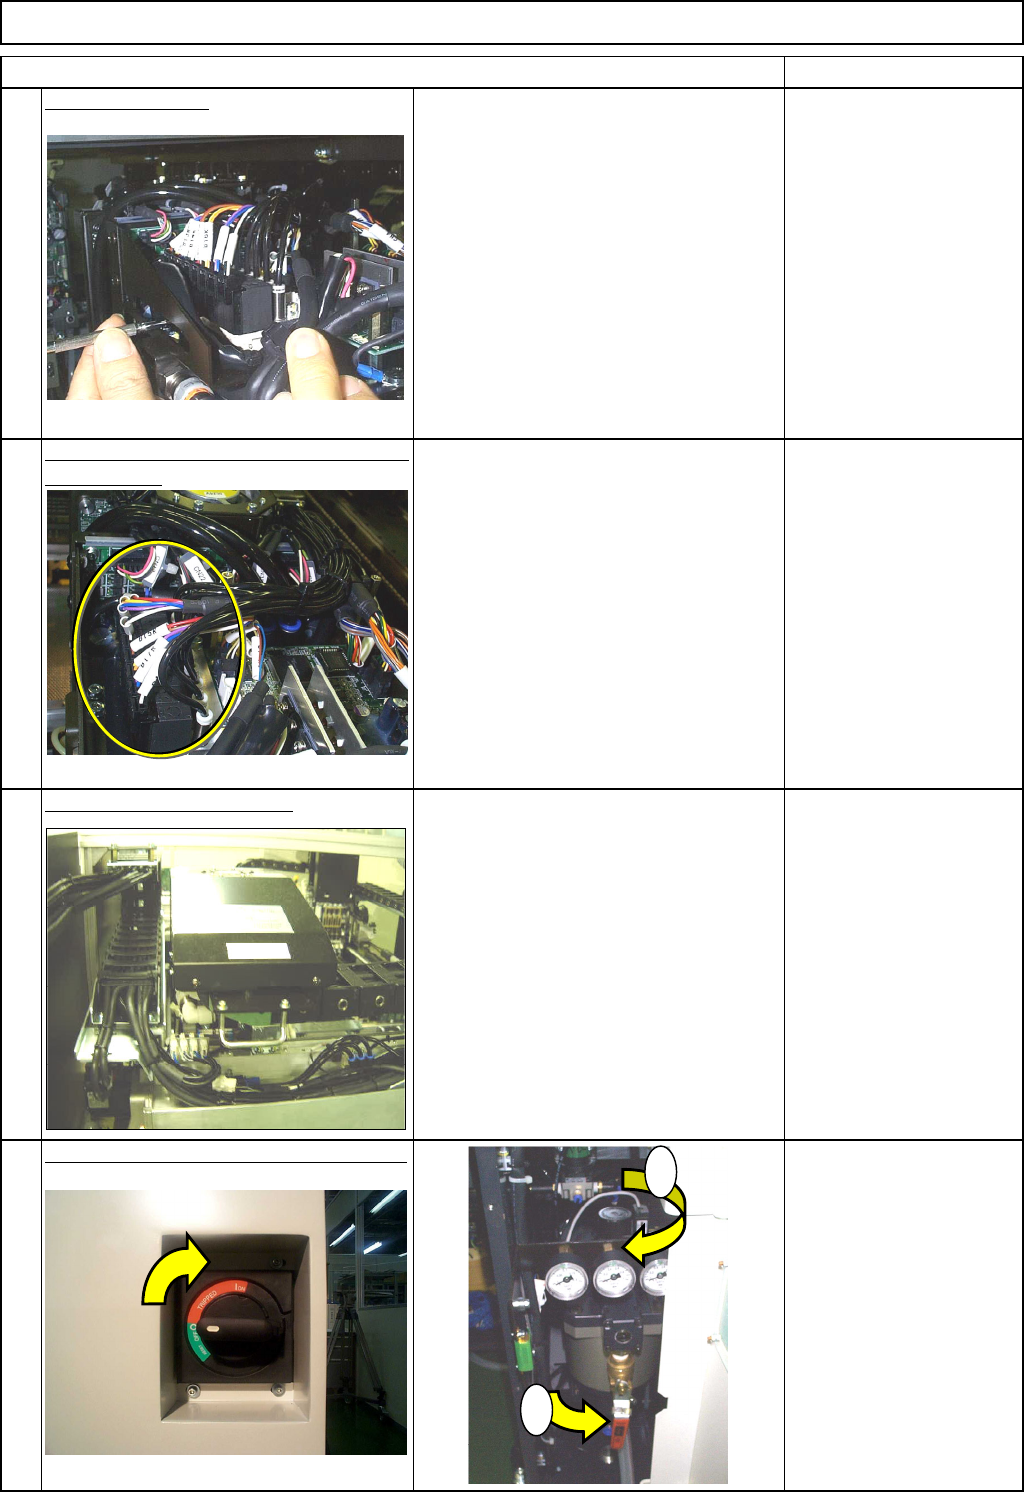
Fit the new valves.
1-000308
Precision screwdriver
Valve holding screws
2 pcs.
Connect the connectors and the air tubes
to the valves.
Put the head cover back on.
Phillips screwdriver #2
Screw M4 4 pcs.
Switch on the main power and air supply.
7
8
5
6
1
2
EJM8A-E-SMA050304-A01-00
Page 5-3-4-3
Machinery Part Replacement
This section describes the procedures for replacing the theta belt.
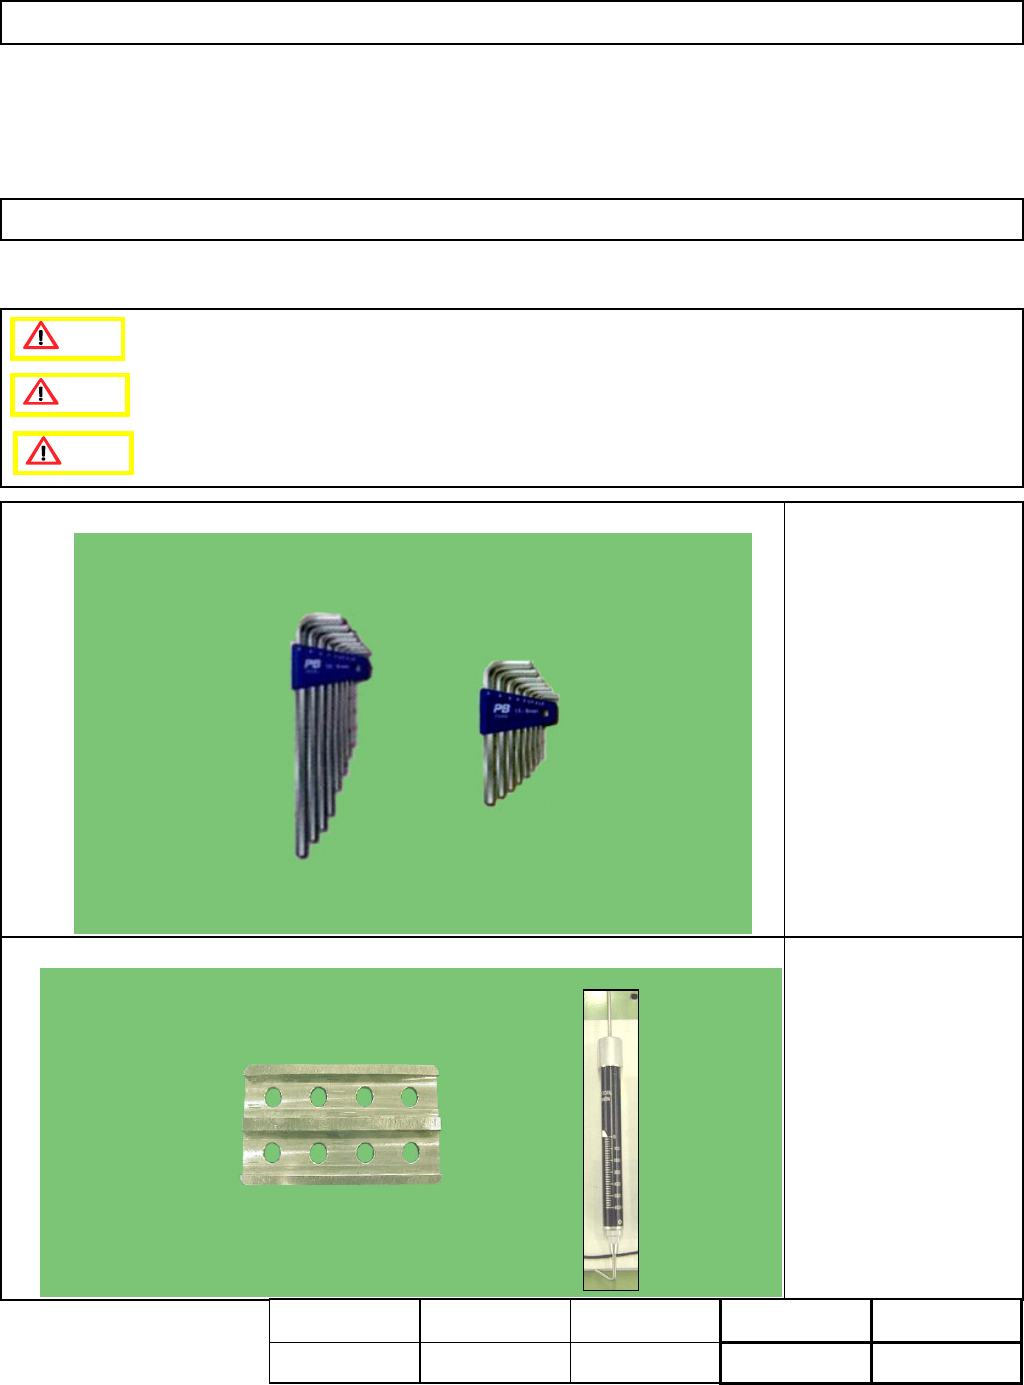
Tools
Allen key 1.5 mm
Allen key 3 mm
Allen key 4 mm
Jig
FM-1056
Theta Adjusting Jig
Tension gauge
L
ight Transfer-Head Assembly (8-nozzle type
)
5-3-5 Theta Belt Replacement
Caution
Dange
r
Warning
Assembly
A
d
j
ustment
85min.
Teaching
77min.
TotalTime Weightof
Part
Removal
Disassembl
y
60min.
222min.
9.1kgs
EJM8A-E-SMA050305-A01-00
Page5-3-5-1