CM602all_EJM8AESM_Service Manual.pdf - 第444页
Machinery Part Replacement Remarks Switch off the main power and air supply. Remove the head assembly. Refer to "Transfer Head Replacement." Section 5-3-1 Remove the vacuum sensor connector. Cut the cable ties.…

Machinery Part Replacement
This section describes the procedures for replacing the vacuum sensor.
・Tools
Precision screwdriver
Phillips screwdriver #1
Allen key 2.5 mm
Nipper
Cable ties
・Jig
None
5-3-10 Vacuum Sensor Replacement
L
ight Transfer-Head Assembly (8-nozzle type
)
Caution
Dange
r
Warning
Assembly
Adjustment
40min.
Teaching
min.
Total Time Weight of
Part
Removal
Disassembly
40min.
80min.
kgs
EJM8A-E-SMA050310-A01-00
Page 5-3-10-1
Machinery Part Replacement
Remarks
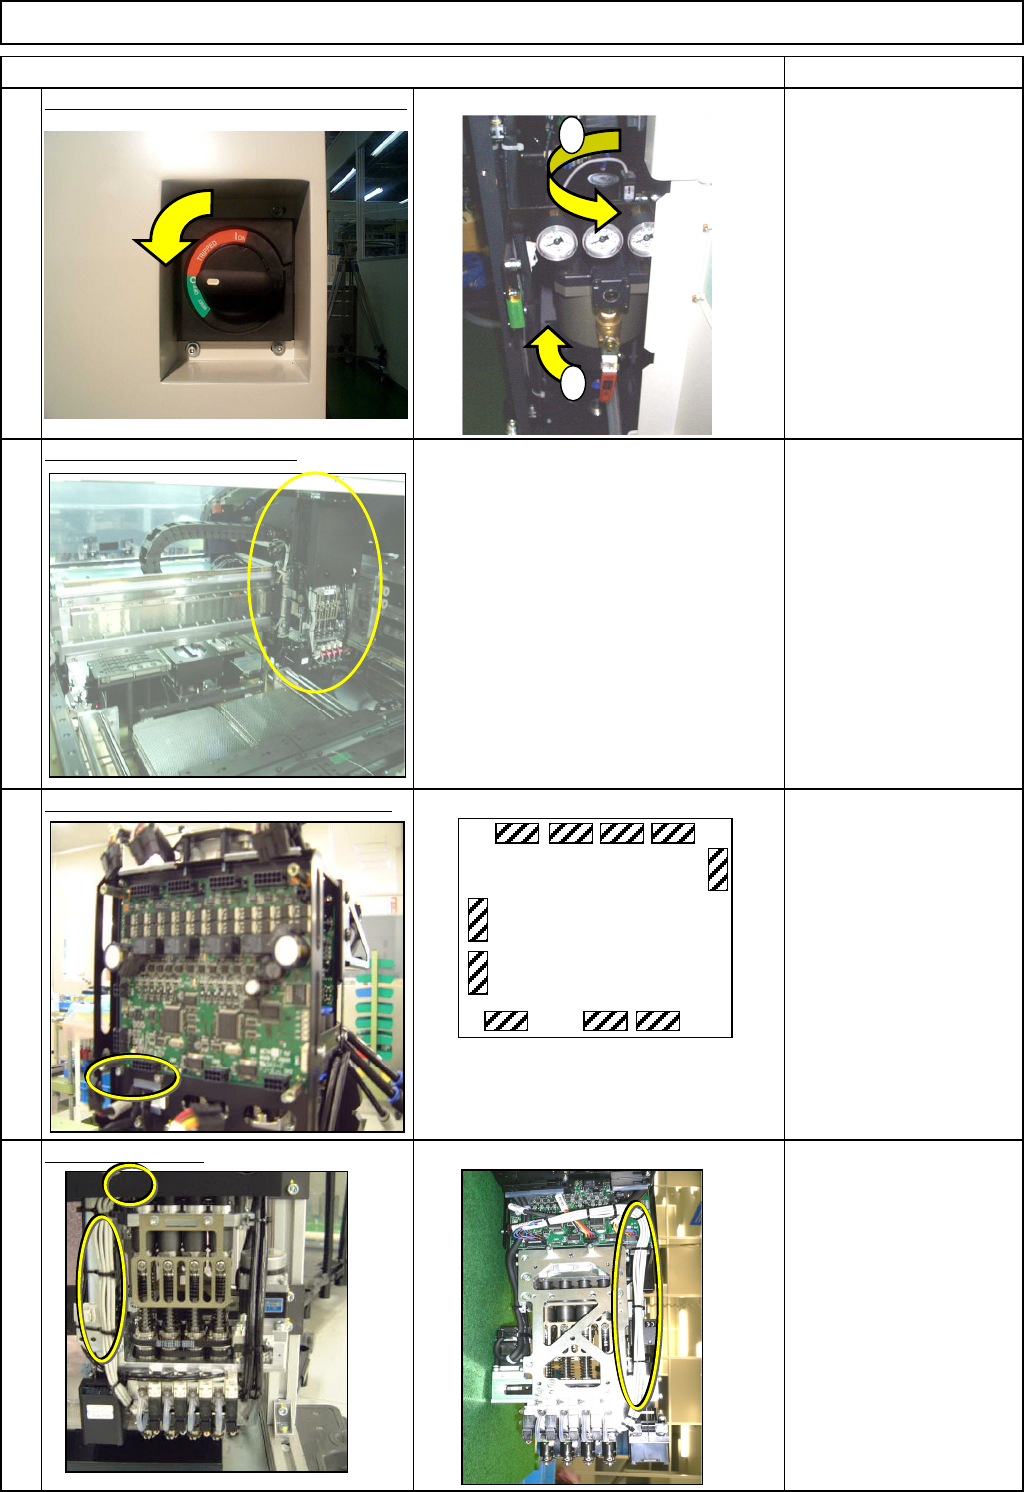
Switch off the main power and air supply.
Remove the head assembly.
Refer to "Transfer Head Replacement." Section 5-3-1
Remove the vacuum sensor connector.
Cut the cable ties. Rear side
Nipper
L
ight Transfer-Head Assembly (8-nozzle type
)
Item
1
2
3
4
CN1
CN2
CN3 CN4
CN5
CN12
CN10CN9
CN7
CN6
MC14CX
The same boards are installed at the
front and the rear sides of the head
assembly.
1
2
EJM8A-E-SMA050310-A01-00
Page 5-3-10-2
Machinery Part Replacement
Remarks
L
ight Transfer-Head Assembly (8-nozzle type
)
Item
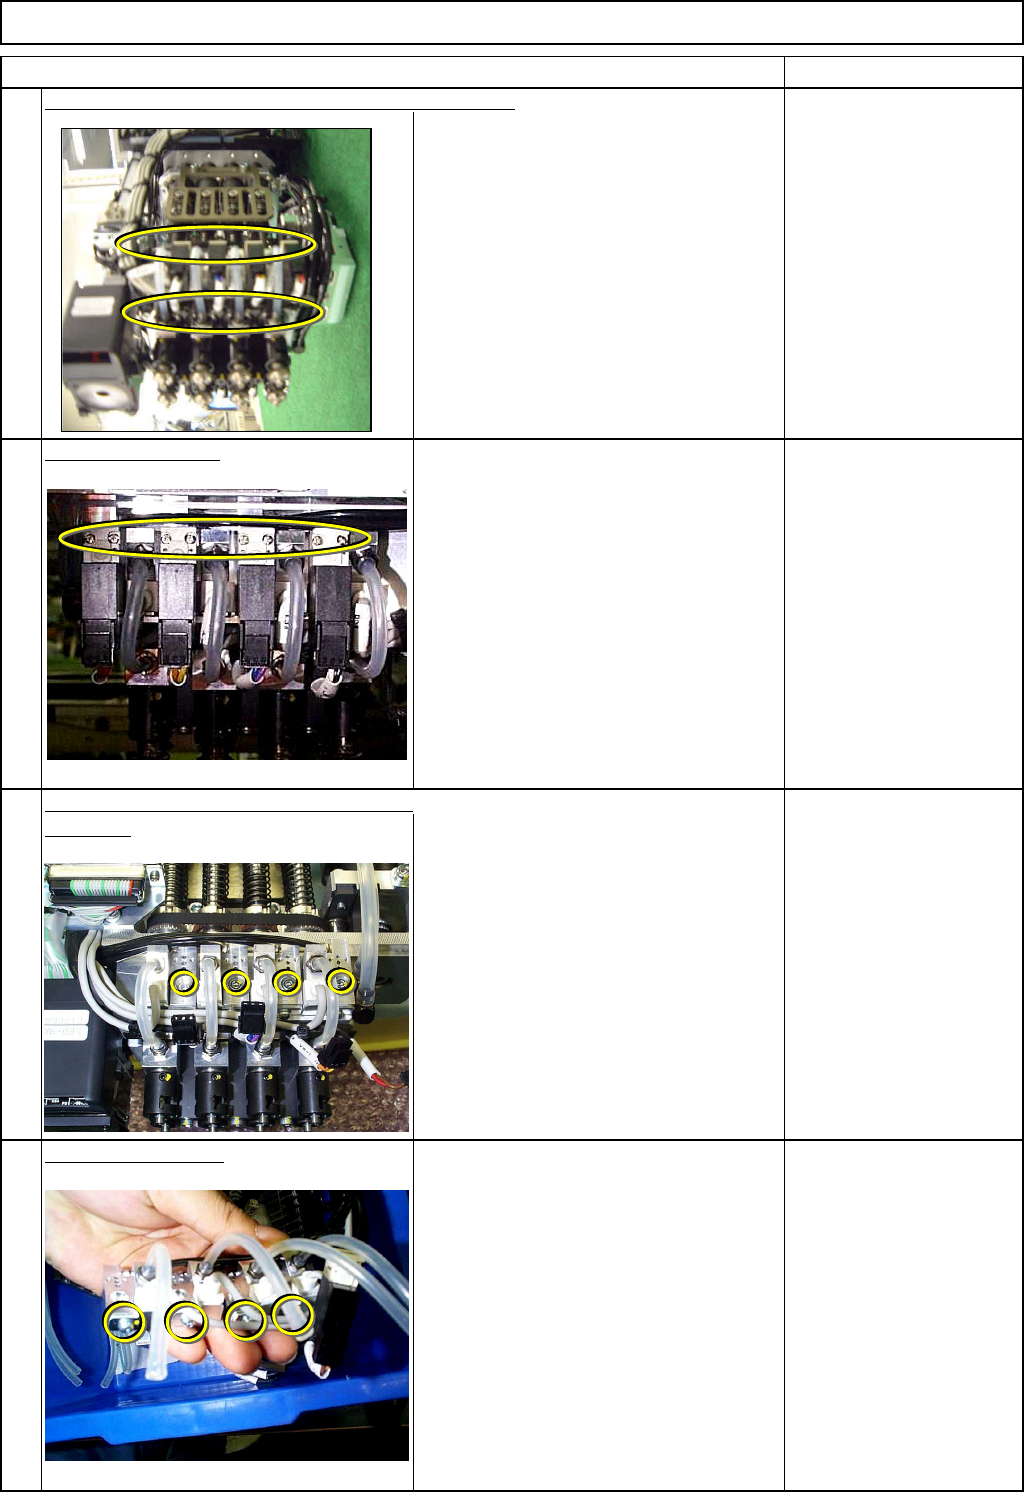
Remove the vacuum tubes and the valve connectors.
Both front and rear sides
Remove the valves.
Both front and rear sides Precision screwdriver
Valve holding screws
8 pcs.
Remove the vacuum sensor together with
the block. Both front and rear sides Allen key 2.5 mm
Screw M3 4 pcs.
Remove the sensor.
Both front and rear sides Phillips screwdriver #1
Screw M3 4 pcs.
5
8
6
7
EJM8A-E-SMA050310-A01-00
Page 5-3-10-3