CM602all_EJM8AESM_Service Manual.pdf - 第445页
Machinery Part Replacement Remarks L ight Transfer-Head Assembly (8-nozzle type ) Item Remove the vacuum tubes and the valve connectors. Both front and rear sides Remove the valves. Both front and rear sides Precision sc…
Machinery Part Replacement
Remarks
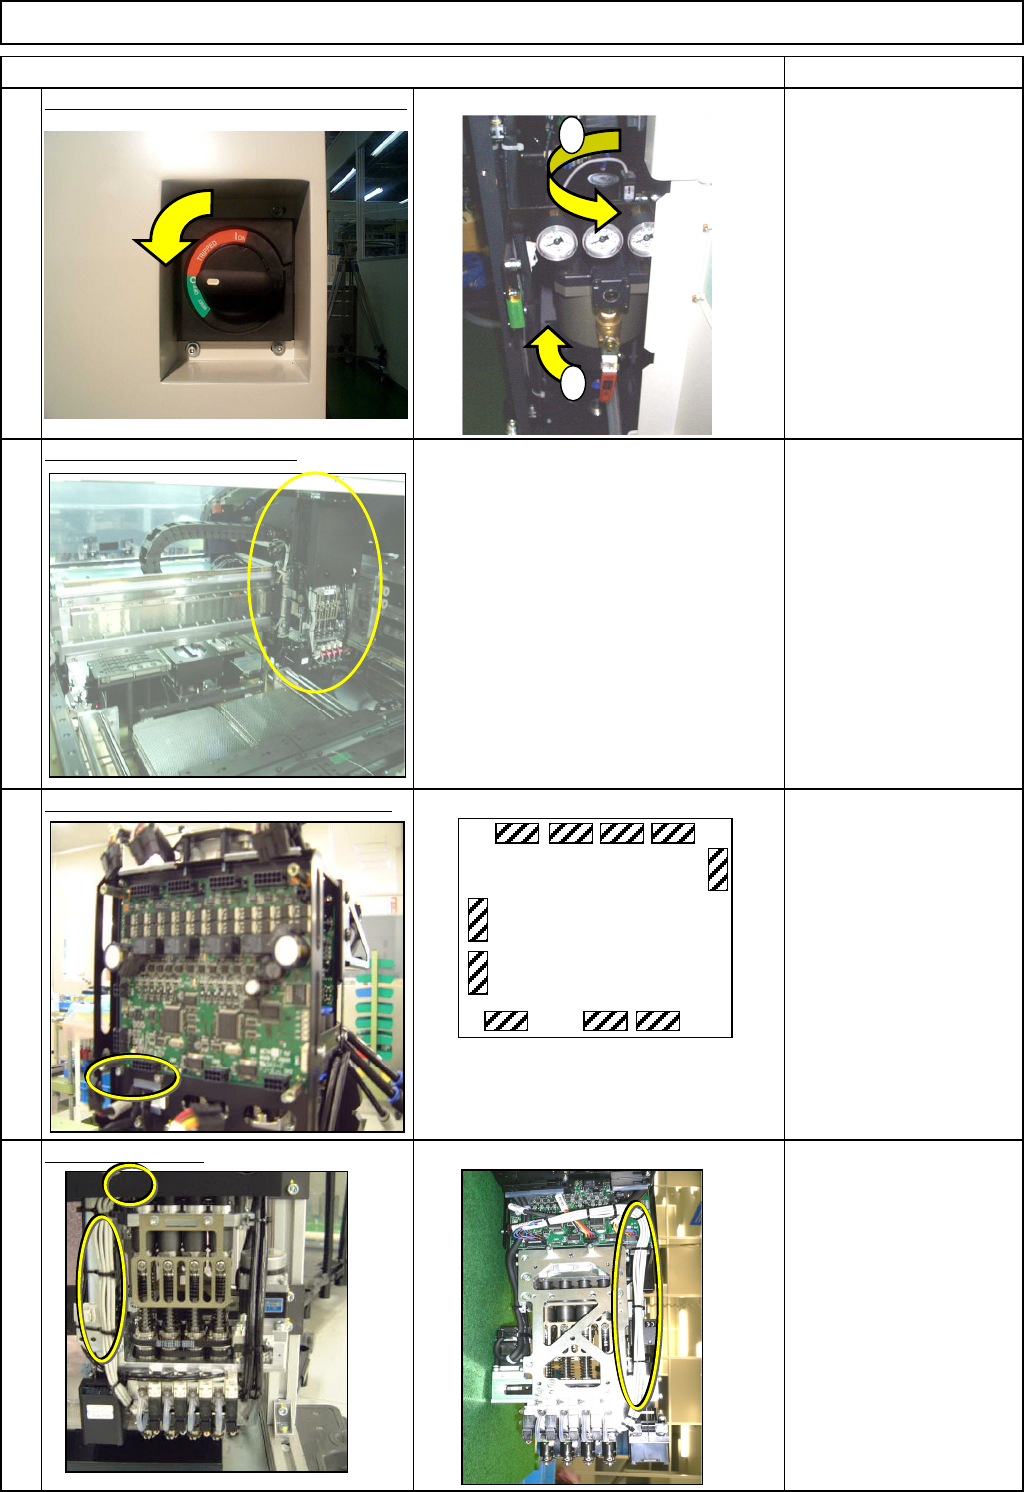
Switch off the main power and air supply.
Remove the head assembly.
Refer to "Transfer Head Replacement." Section 5-3-1
Remove the vacuum sensor connector.
Cut the cable ties. Rear side
Nipper
L
ight Transfer-Head Assembly (8-nozzle type
)
Item
1
2
3
4
CN1
CN2
CN3 CN4
CN5
CN12
CN10CN9
CN7
CN6
MC14CX
The same boards are installed at the
front and the rear sides of the head
assembly.
1
2
EJM8A-E-SMA050310-A01-00
Page 5-3-10-2
Machinery Part Replacement
Remarks
L
ight Transfer-Head Assembly (8-nozzle type
)
Item
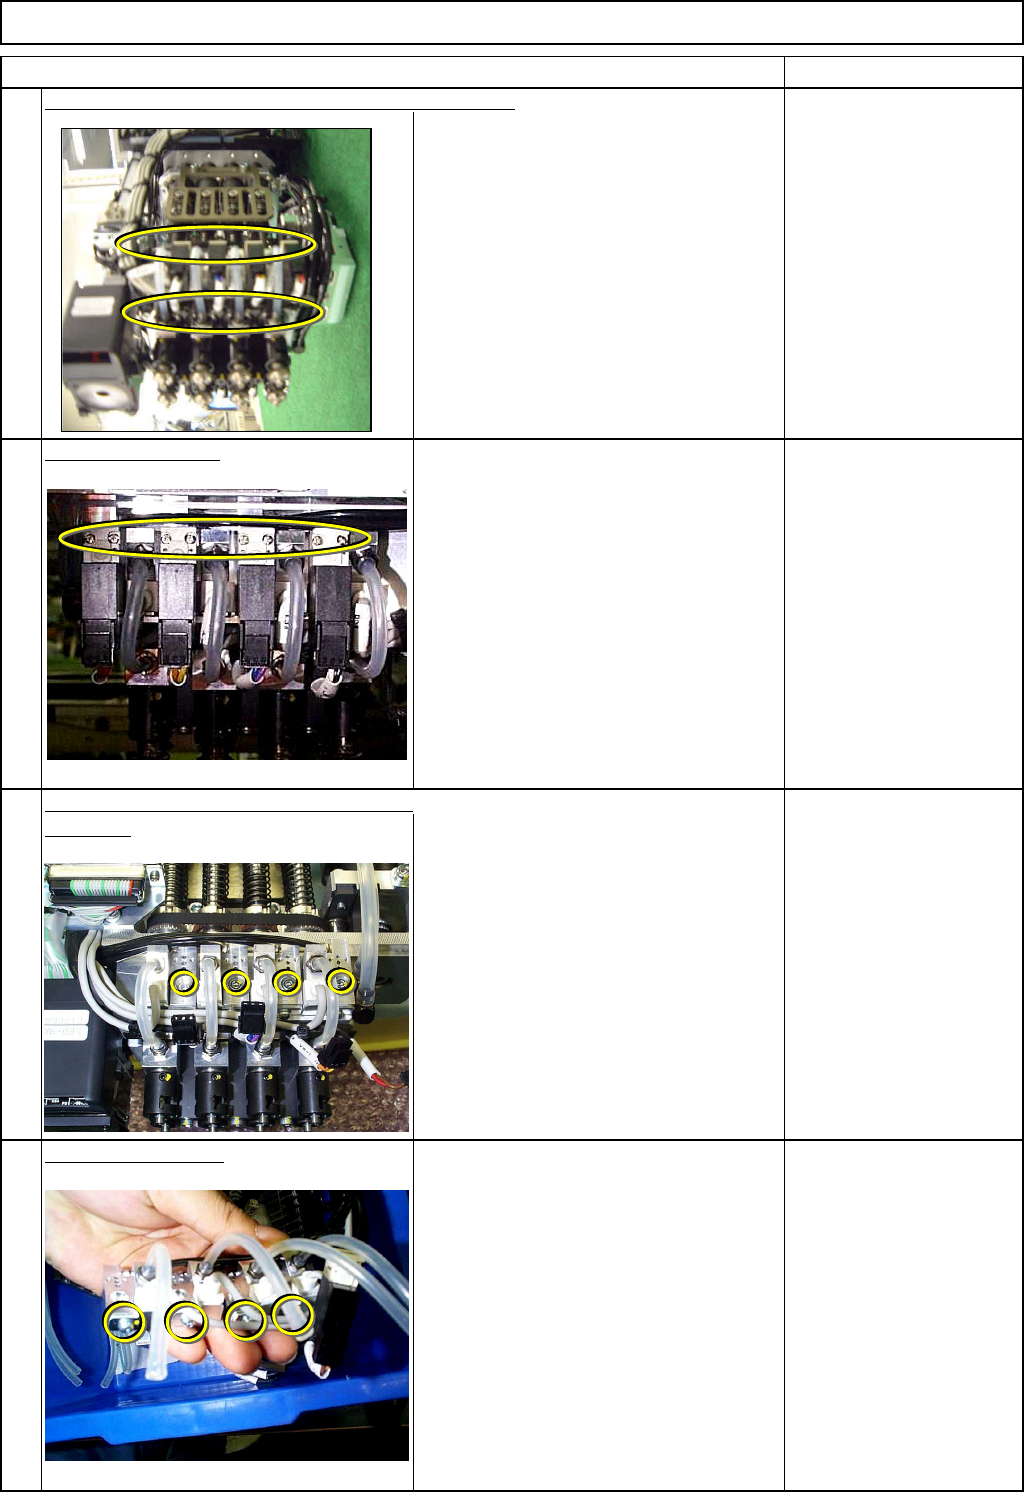
Remove the vacuum tubes and the valve connectors.
Both front and rear sides
Remove the valves.
Both front and rear sides Precision screwdriver
Valve holding screws
8 pcs.
Remove the vacuum sensor together with
the block. Both front and rear sides Allen key 2.5 mm
Screw M3 4 pcs.
Remove the sensor.
Both front and rear sides Phillips screwdriver #1
Screw M3 4 pcs.
5
8
6
7
EJM8A-E-SMA050310-A01-00
Page 5-3-10-3
Machinery Part Replacement
Remarks
L
ight Transfer-Head Assembly (8-nozzle type
)
Item
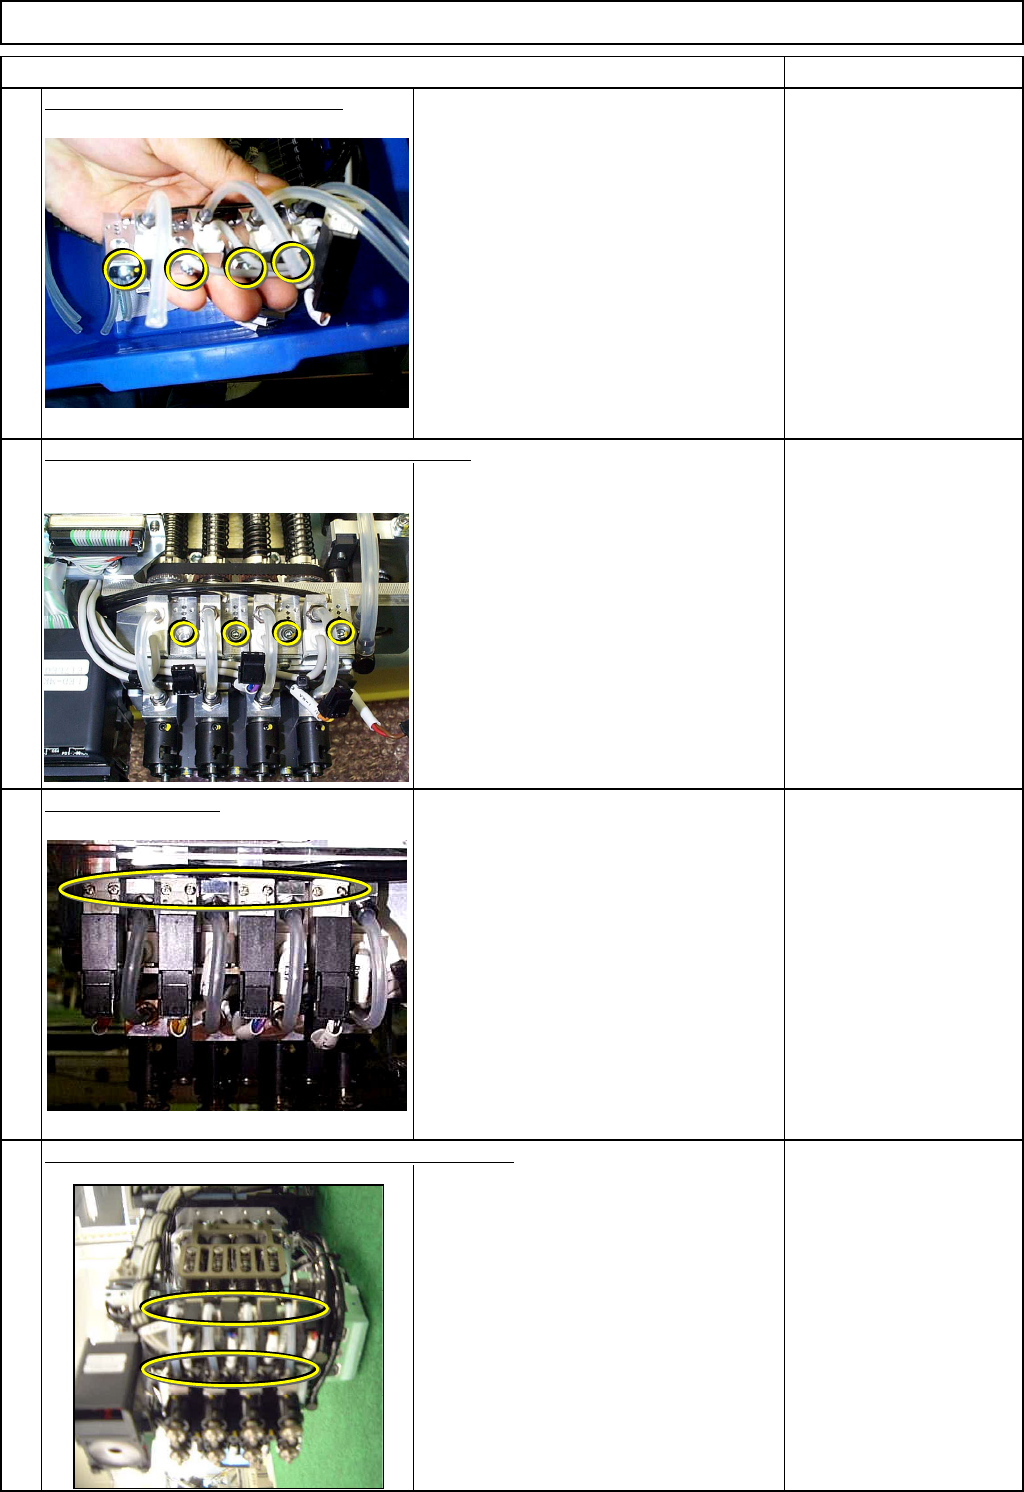
Fit the new sensor onto the block.
Both front and rear sides Phillips screwdriver #1
Screw M3 4 pcs.
Place the vacuum sensor along with the blacket.
Both front and rear sides
Allen key 2.5 mm
Screw M3 4 pcs.
Connect the valves.
Both front and rear sides Precision screwdriver
Valve holding screws
8 pcs.
Connect the vacuum tubes and the valve connectors.
Both front and rear sides
9
10
11
12
EJM8A-E-SMA050310-A01-00
Page 5-3-10-4