CM602all_EJM8AESM_Service Manual.pdf - 第466页
Machinery Part Replacement Remarks Transfer Head Assembly (8-nozzle type) Item Secure the cables with cable ties. Rear side Put the cable holding bracket back on. Allen key 3 mm Screw M4 1 pc. Connect the LED connector. …
Machinery Part Replacement
Remarks
Transfer Head Assembly (8-nozzle type)
Item
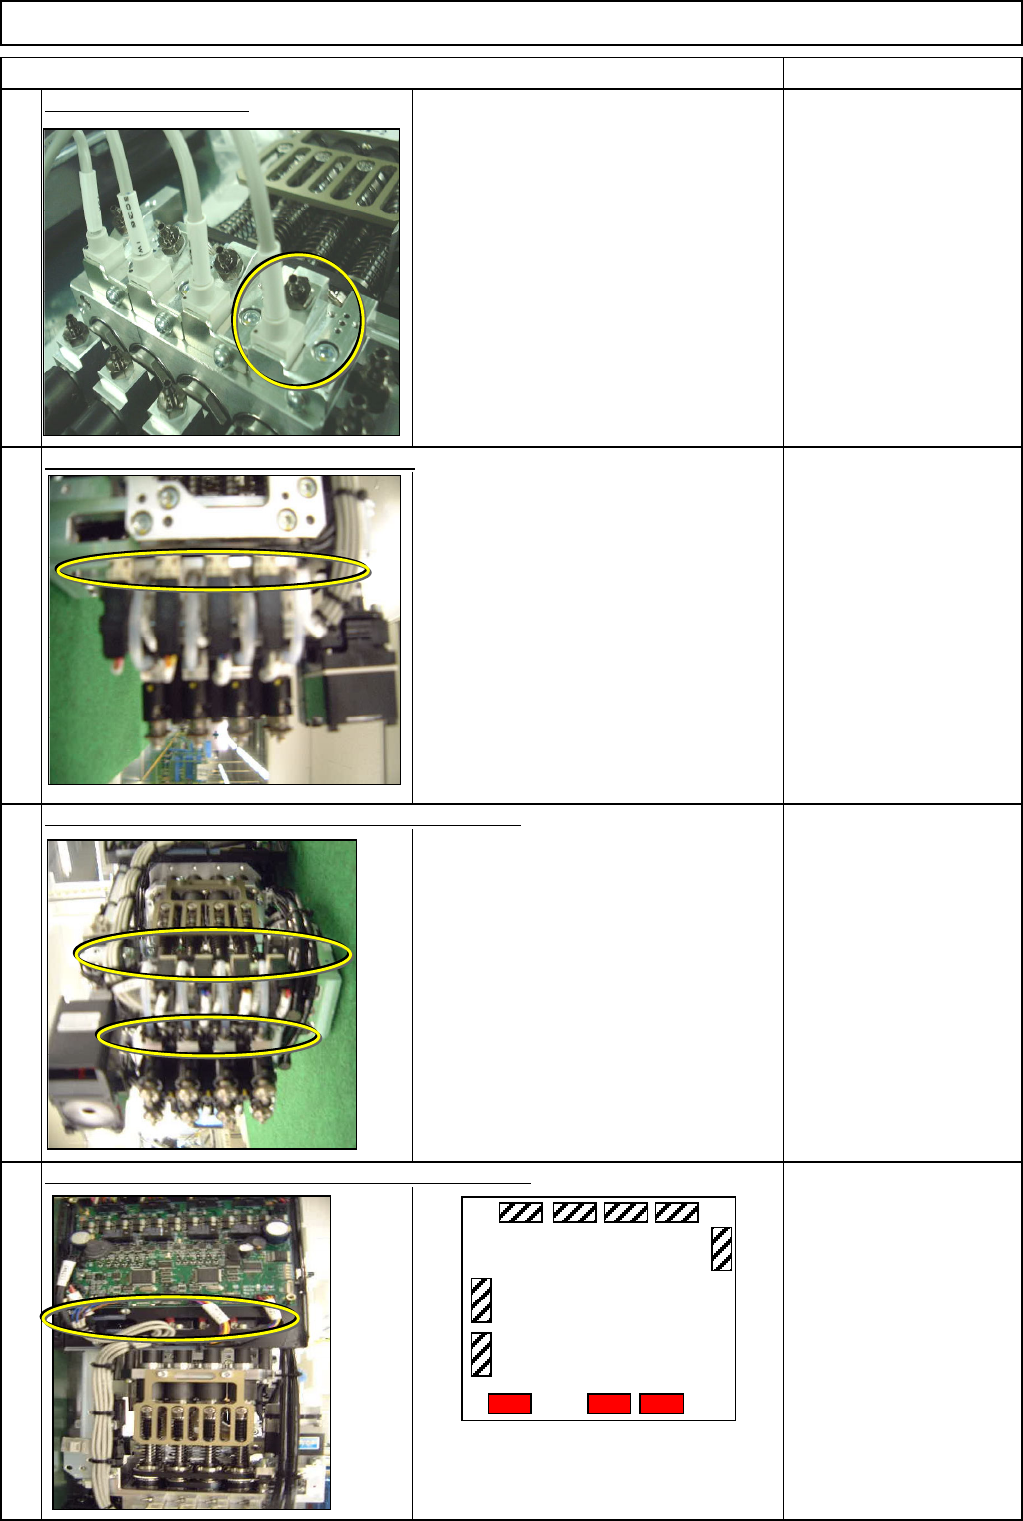
Fit the vacuum sensor.
Allen key 2.5 mm
Screw M3 8 pcs.
Connect the valves. (front and rear sides)
Phillips screwdriver #1
Valve holding screw
16 pcs.
17
20
18
Connect the vacuum tubes and the valve connectors.
Connect the valve and the vacuum sensor connectors.
19
CN1
CN2
CN3 CN4
CN5
CN12
CN10CN9
CN7
CN6
MC14CX
The same boards are installed at
the front and the rear sides
of the head assembly
EJM8A-E-SMA050313-A01-00
Page 5-3-13-6
Machinery Part Replacement
Remarks
Transfer Head Assembly (8-nozzle type)
Item
Secure the cables with cable ties. Rear side
Put the cable holding bracket back on.
Allen key 3 mm
Screw M4 1 pc.
Connect the LED connector.
Phillips screwdriver #1
Connector screw 2 pcs.
Connect the vacuum tubes. Secure them with cable ties.
Both front and rear sides.
Nipper
21
23
24
22
EJM8A-E-SMA050313-A01-00
Page 5-3-13-7
Machinery Part Replacement
Remarks
Transfer Head Assembly (8-nozzle type)
Item
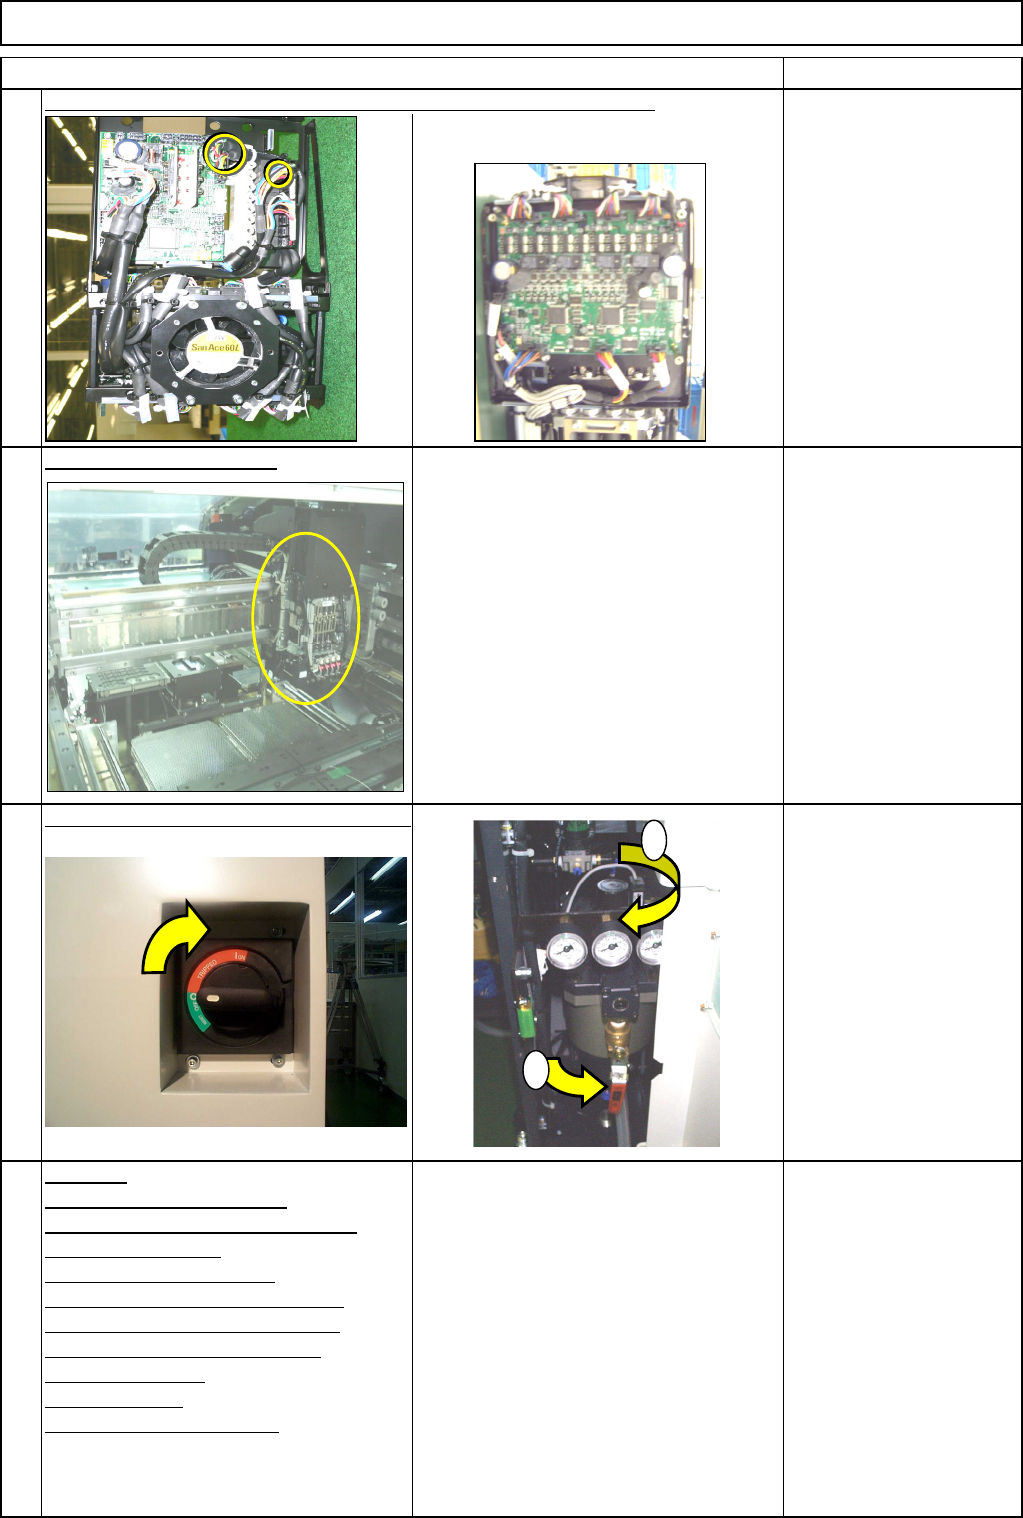
When placing the cable, be careful of
the cabling on the rear side.
Nipper
Cable ties
Install the head assembly.
1-000279
Refer to "Transfer Head Assembly."
Section 5-3-1
Switch on the main power and air supply.
カバー達
Teaching
Board Recognition Camera
--- X and Y-axis Origin Offset
Z-axis Origin Offset
Chip Recognition Camera
and Theta-axis Origin Offset
Determining the Mounting Height
and Positioning the Board
Mounting Position
Pickup Position
Nozzle Exchange Position
Section 4-2-2
Section 4-2-3
Section 4-2-4
Section 4-2-5
Section 4-2-7
Section 4-2-8
Section 4-2-9
27
28
25
26
Connect the theta motor connector. Secure the cable with cable ties.
1
2
EJM8A-E-SMA050313-A01-00
Page 5-3-13-8