CM602all_EJM8AESM_Service Manual.pdf - 第476页
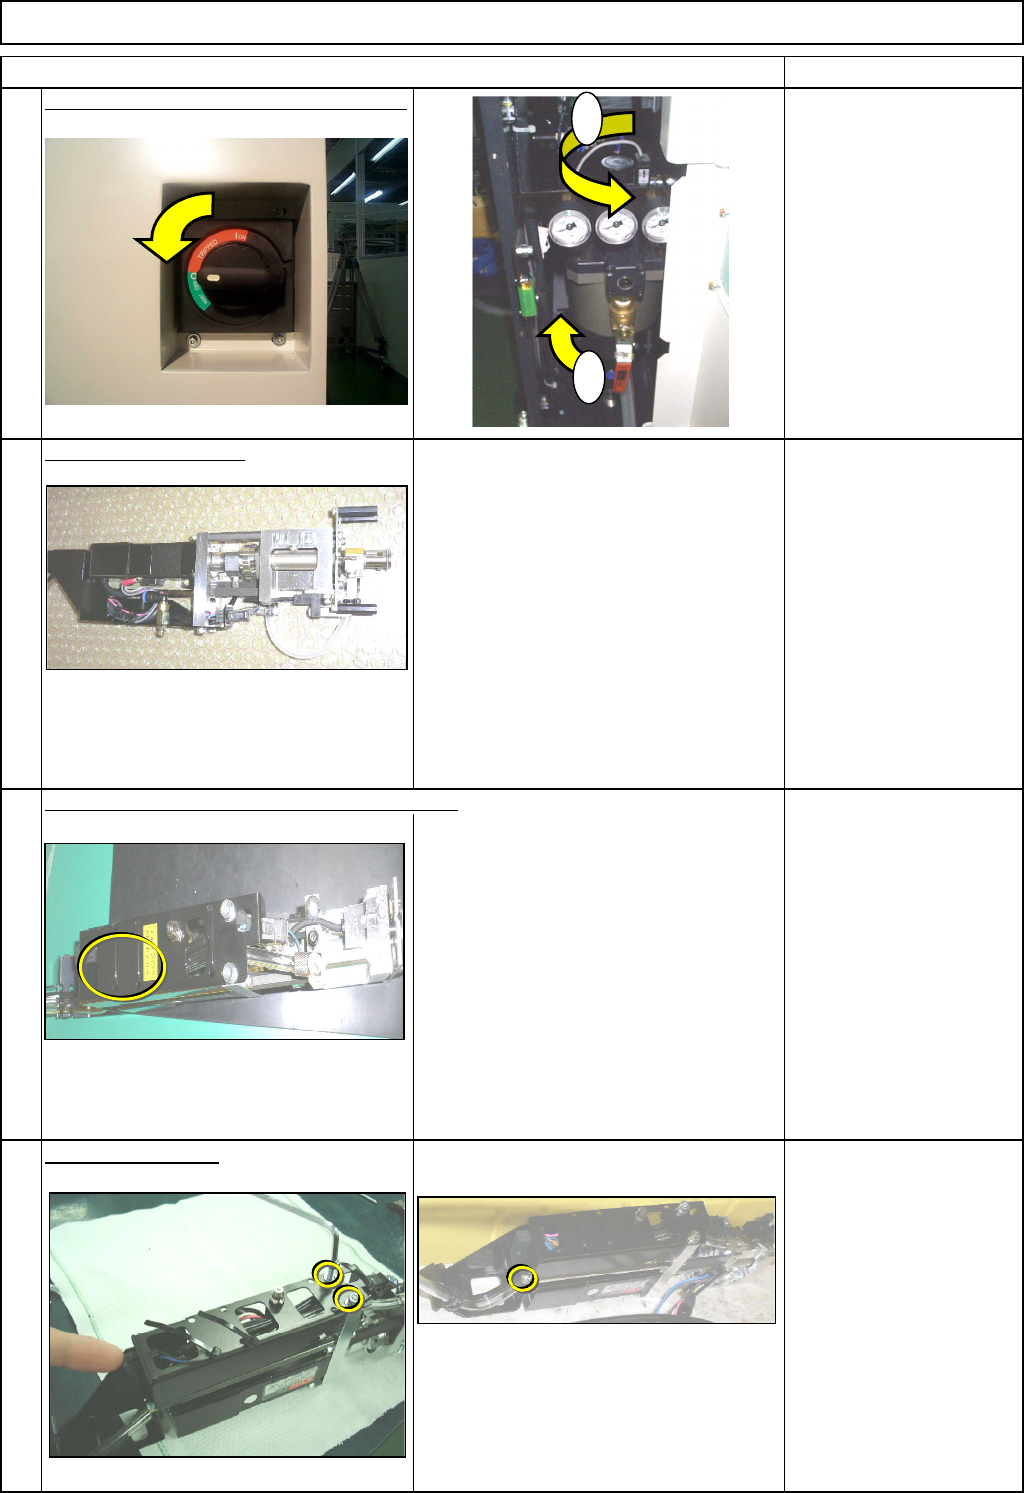
Machinery Part Replacement Remarks Item Light Transfer-Head Assembly (3-nozzle type) Loosen the coupling. 2-000078 Allen key 2.5 mm M3 x 12L 2 pcs. Remove the motor. 2-000191 000192 To take the standard procedures, go to…
Machinery Part Replacement
Remarks
Switch off the main power and air supply.
Remove the head unit.
2-000087
See "Head-Unit Replacement" Section 5-4-2
2-000081
Nipper
Remove the cover.
2-000091
Allen key 3 mm
M4 x 8L 3 pcs.
Item
2
1
Light Transfer-Head Assembly (3-nozzle type)
Cut off the cable tie. Disconnect the connector.
3
4
1
2
EJM8A-E-SMA050401-A01-00
Page 5-4-1-2
Machinery Part Replacement
Remarks
Item
Light Transfer-Head Assembly (3-nozzle type)
Loosen the coupling.
2-000078
Allen key 2.5 mm
M3 x 12L 2 pcs.
Remove the motor.
2-000191 000192
To take the standard procedures, go to
Step 11.
If four screws are loosened or if the plate
is out of position, it is necessary to align
the center. (Steps 7 to 9)
Allen key 2.5 mm
M3 x 10L 2 pcs.
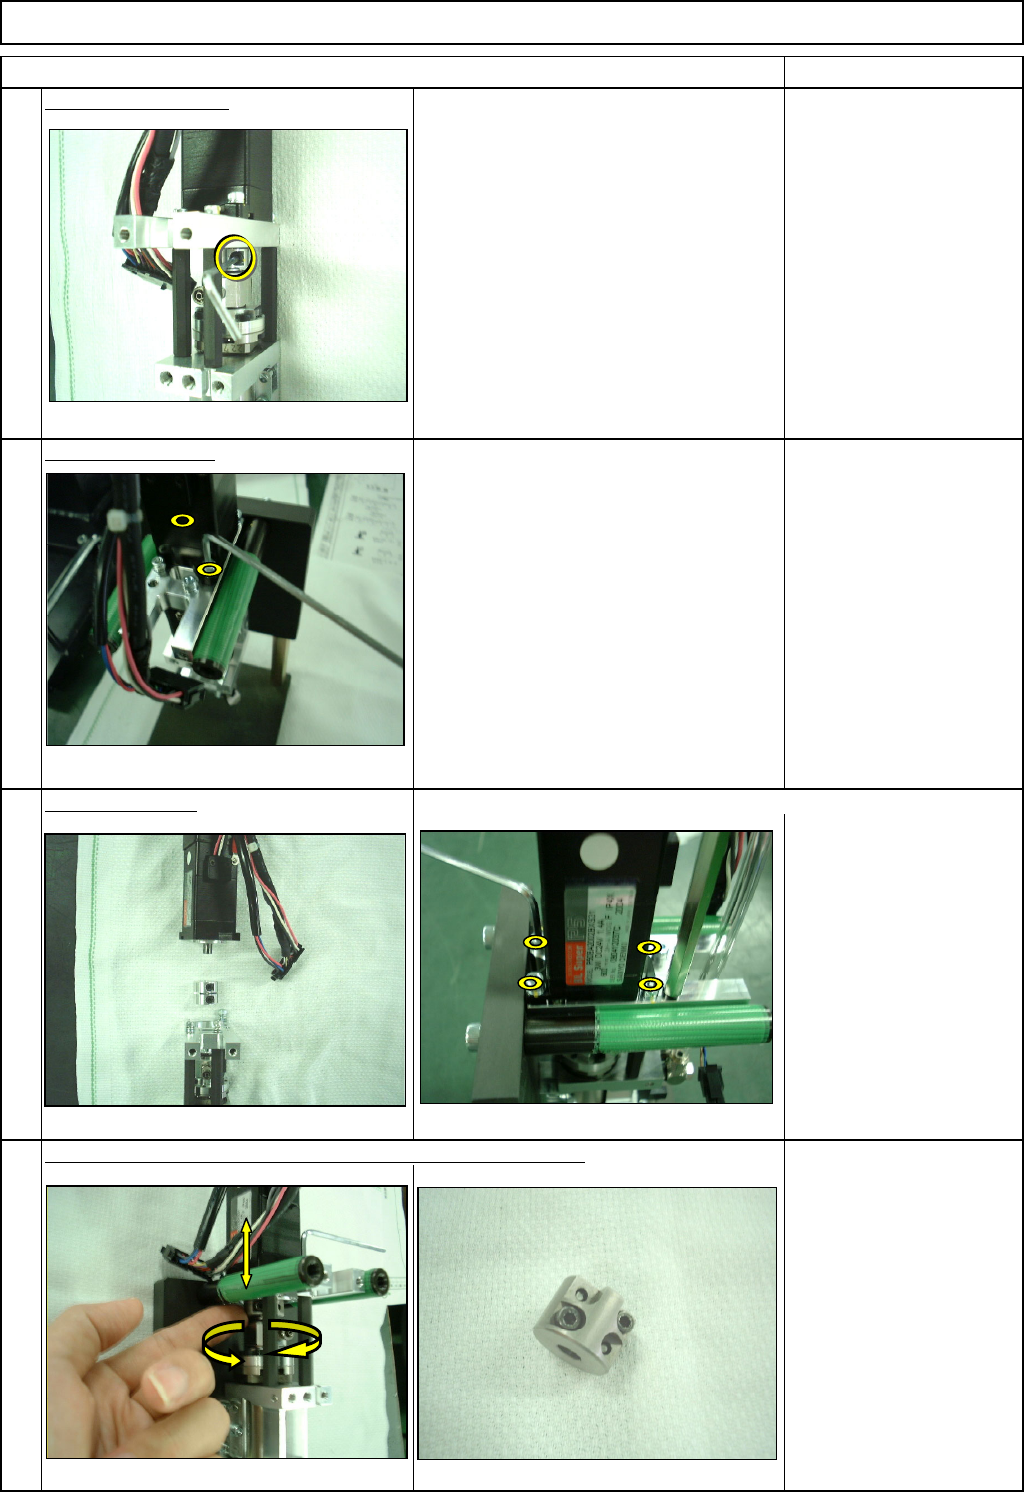
Center alignment
2-000068
Allen key 2.5 mm
M3 x 10L 4 pcs.
Find the point at which the jig moves smoothly. Fix the motor.
2-000072
Theta-center-alignment jig
Fit the plate onto the motor. Position the jig.
6
7
8
5
EJM8A-E-SMA050401-A01-00
Page 5-4-1-3
Machinery Part Replacement
Remarks
Item
Light Transfer-Head Assembly (3-nozzle type)
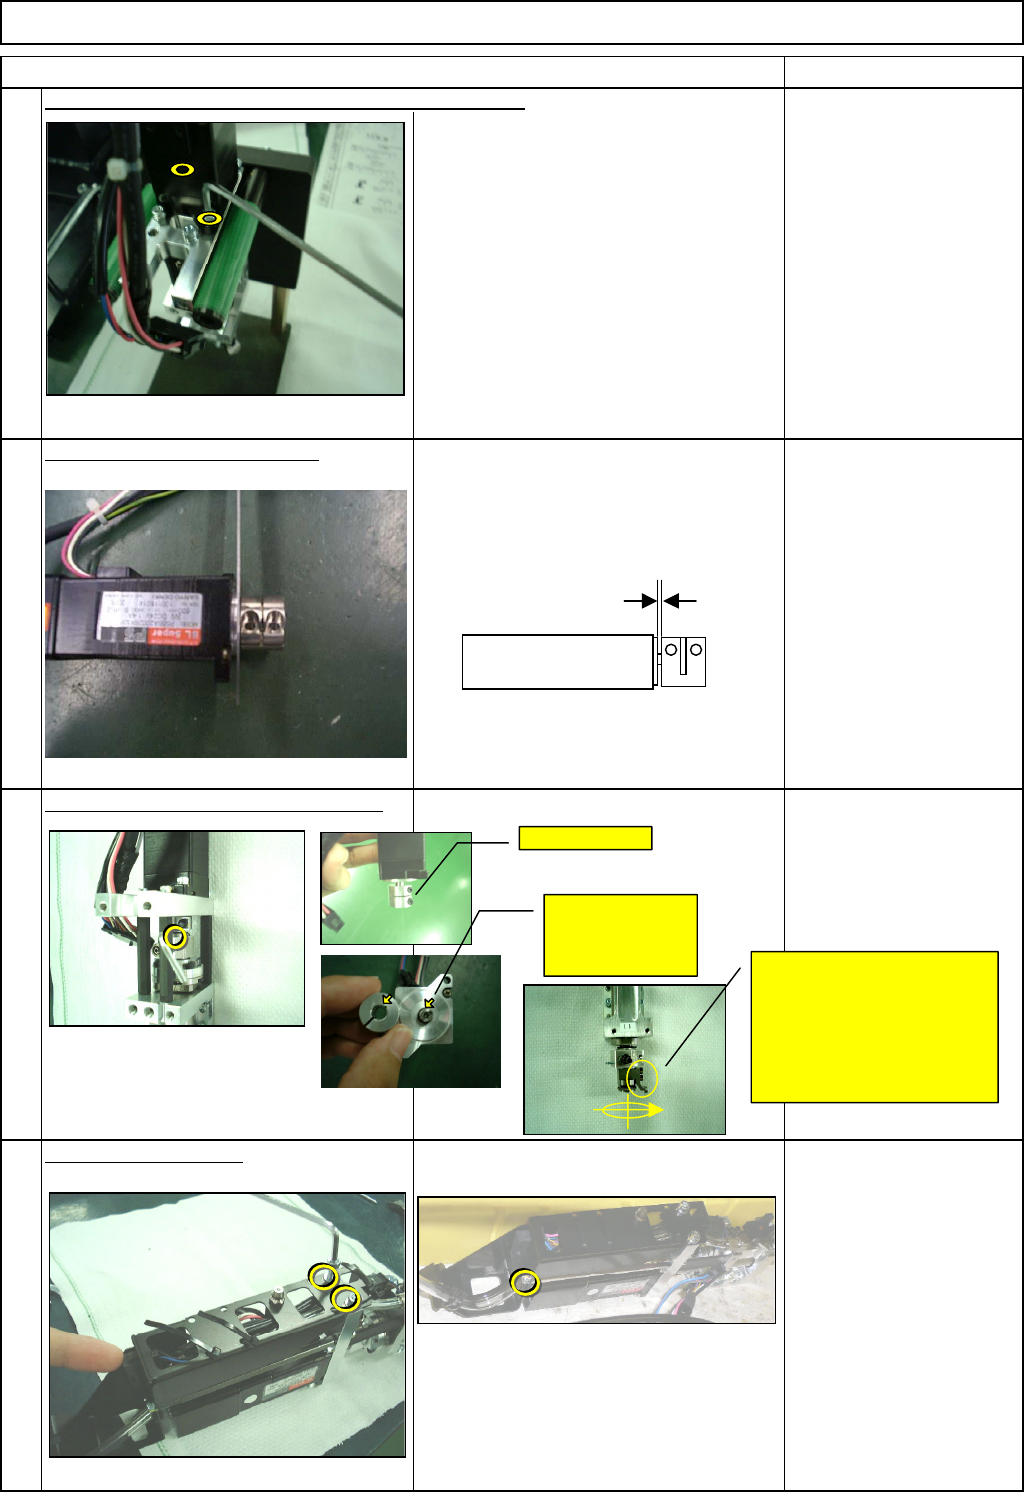
2-000069、000070
Do not remove the plate.
Allen key 2.5 mm
M3 x 10L 2 pcs.
Fit he coupling onto the motor.
Gap between the motor and the coupling
2-000074
Specifications: 0.5 mm
Feeler gauge
Install the motor. Tighten the coupling.
2-000064
Allen key 2.5 mm
M3 x 12L 2 pcs.
Put the cover back on.
Allen key 3 mm
M4 x 8L 3 pcs.
9
10
11
12
Remove the motor only. (Two screws) Remove the jig.
0.5 mm
• Screw at right
• Check the cut of
the coupling and the
origin.
• Turn the holder to the theta-
origin position (position at which
the nozzle guide is right when
seen from the front side), and
tighten the coupling.
EJM8A-E-SMA050401-A01-00
Page 5-4-1-4