CM602all_EJM8AESM_Service Manual.pdf - 第501页
Machinery Part Replacement Remarks Z Unit (3-nozzle type) Item Remove the earth cable and the connector. 5 Phillips screwdriver #2 Truss screw M4 1 pc. Cut off the cable tie. 取り直し Disconnect the camera and LED lamp conne…
Machinery Part Replacement
Remarks
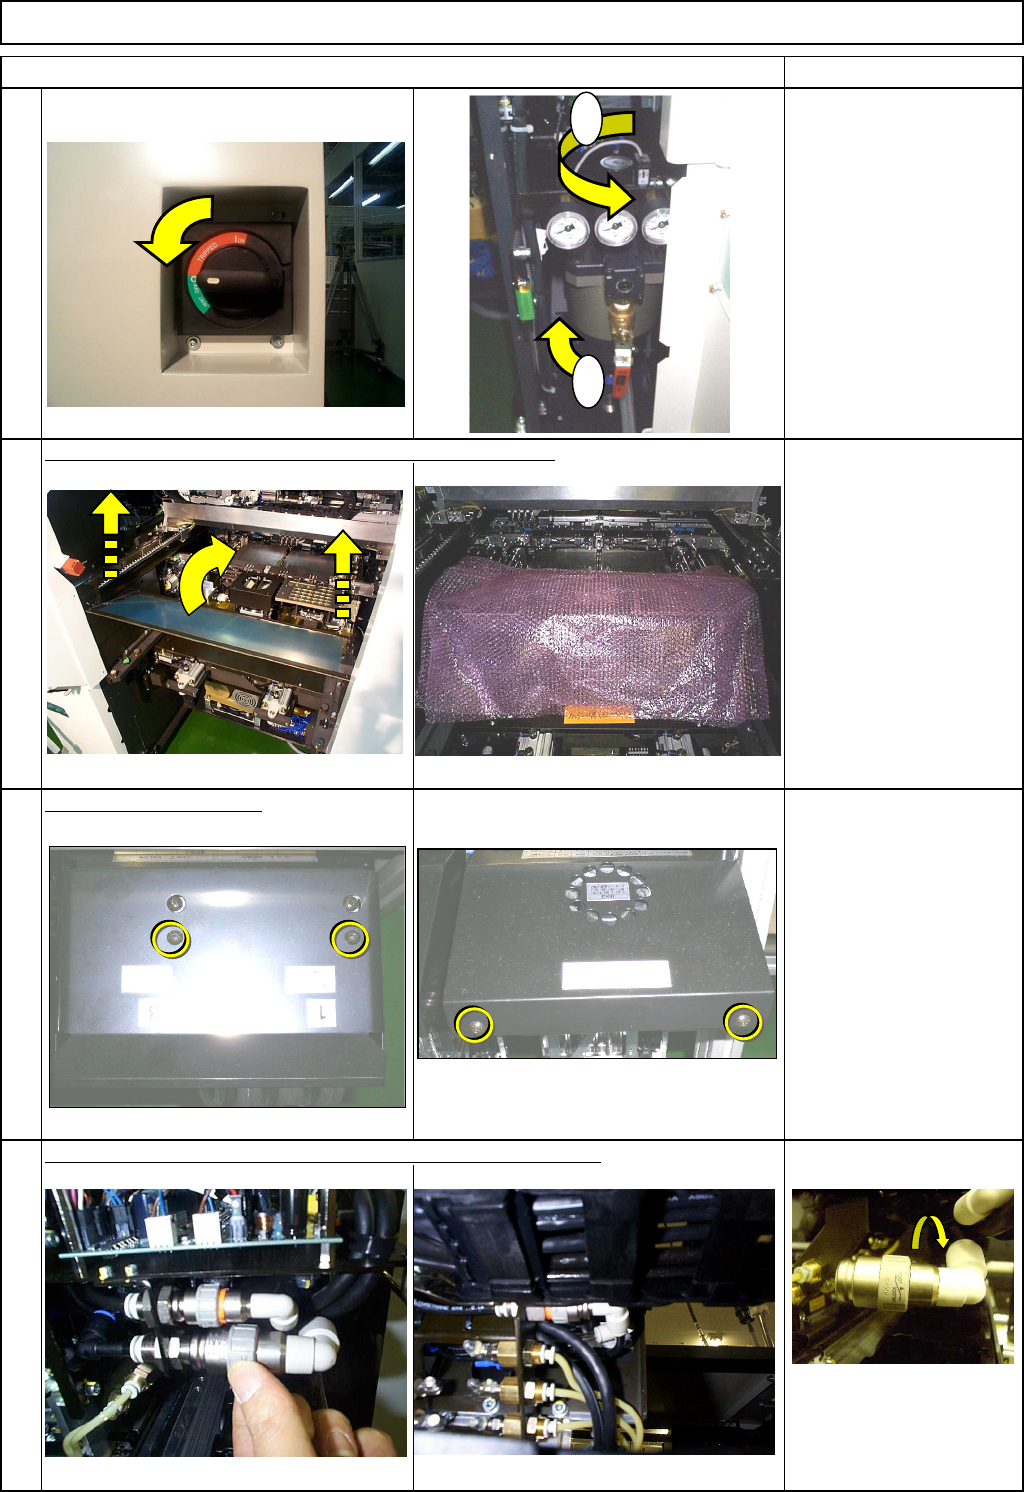
Switch off the power and the air supply.
Remove the feeder cover. Put bubble wrap over the table.
Phillips screwdriver #2
Screw M4 2 pcs.
Remove the head cover.
Phillips screwdriver #1
Phillips screwdriver #2
Screw M3 2 pcs.
Screw M4 2 pcs.
Remove the air, vacuum and electropneumatic regulator tubes.
1
2
3
4
Z Unit (3-nozzle type)
Item
1
2
EJM8A-E-SMA050502-A01-00
Page 5-5-2-2
Machinery Part Replacement
Remarks
Z Unit (3-nozzle type)
Item
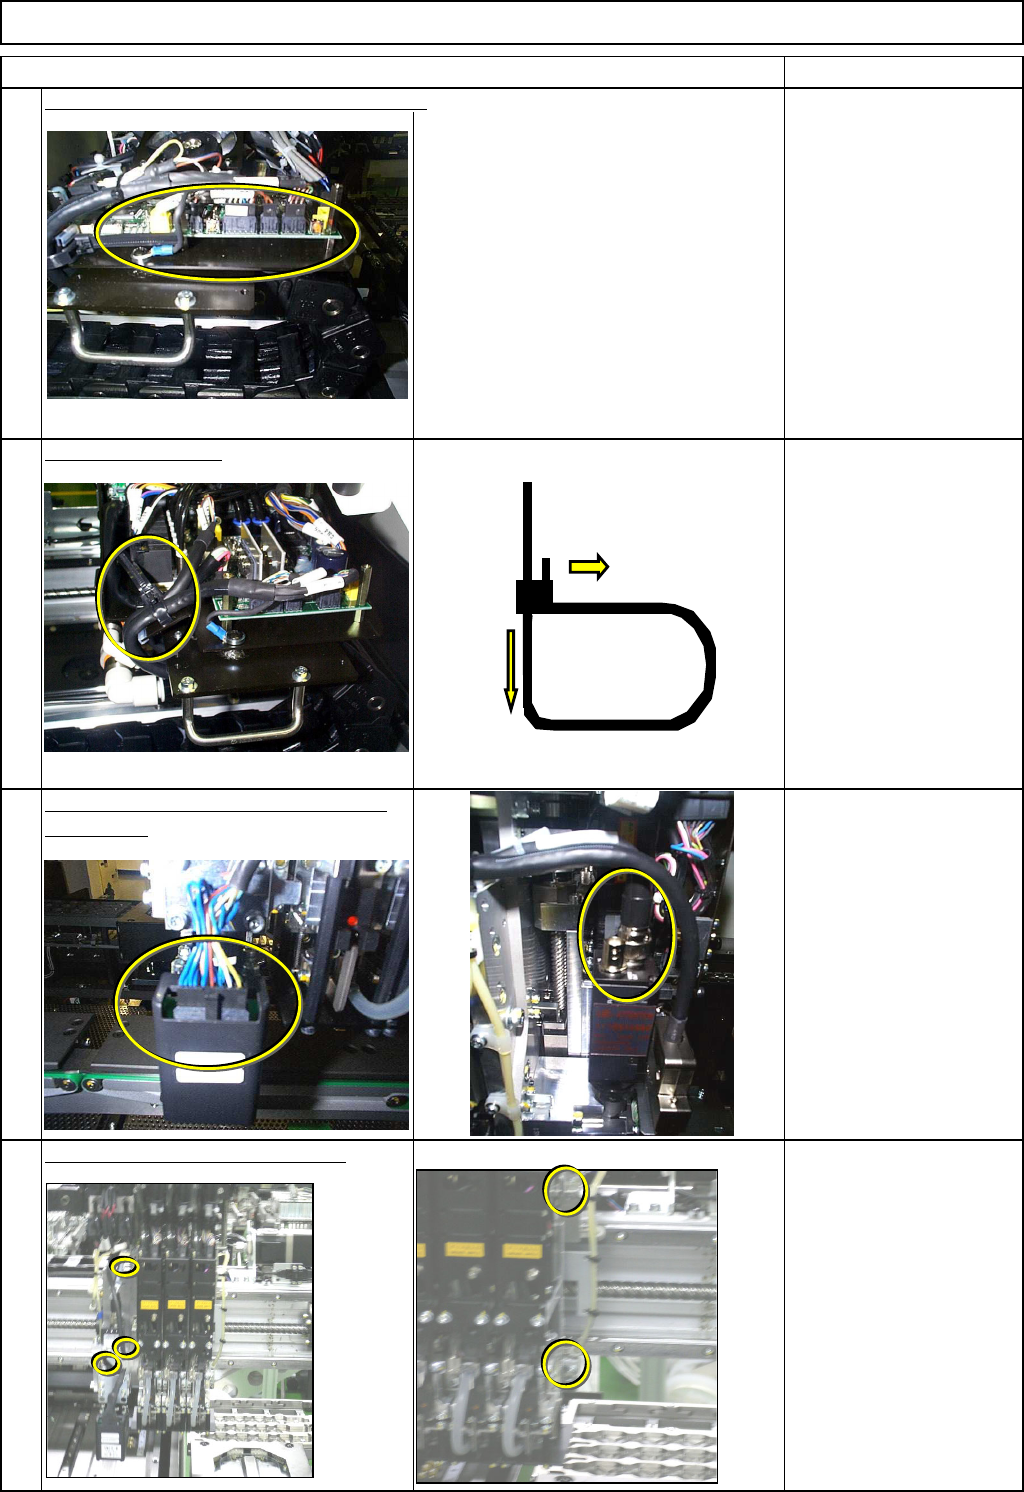
Remove the earth cable and the connector.
5
Phillips screwdriver #2
Truss screw M4 1 pc.
Cut off the cable tie.
取り直し
Disconnect the camera and LED lamp
connectors.
Remove the head-holding screws. Hold the head to avoid letting it fall.
Allen key 3 mm
Screw M4 5 pcs.
6
7
8
Put the pin down.
Pull it out.
EJM8A-E-SMA050502-A01-00
Page 5-5-2-3
Machinery Part Replacement
Remarks
Z Unit (3-nozzle type)
Item
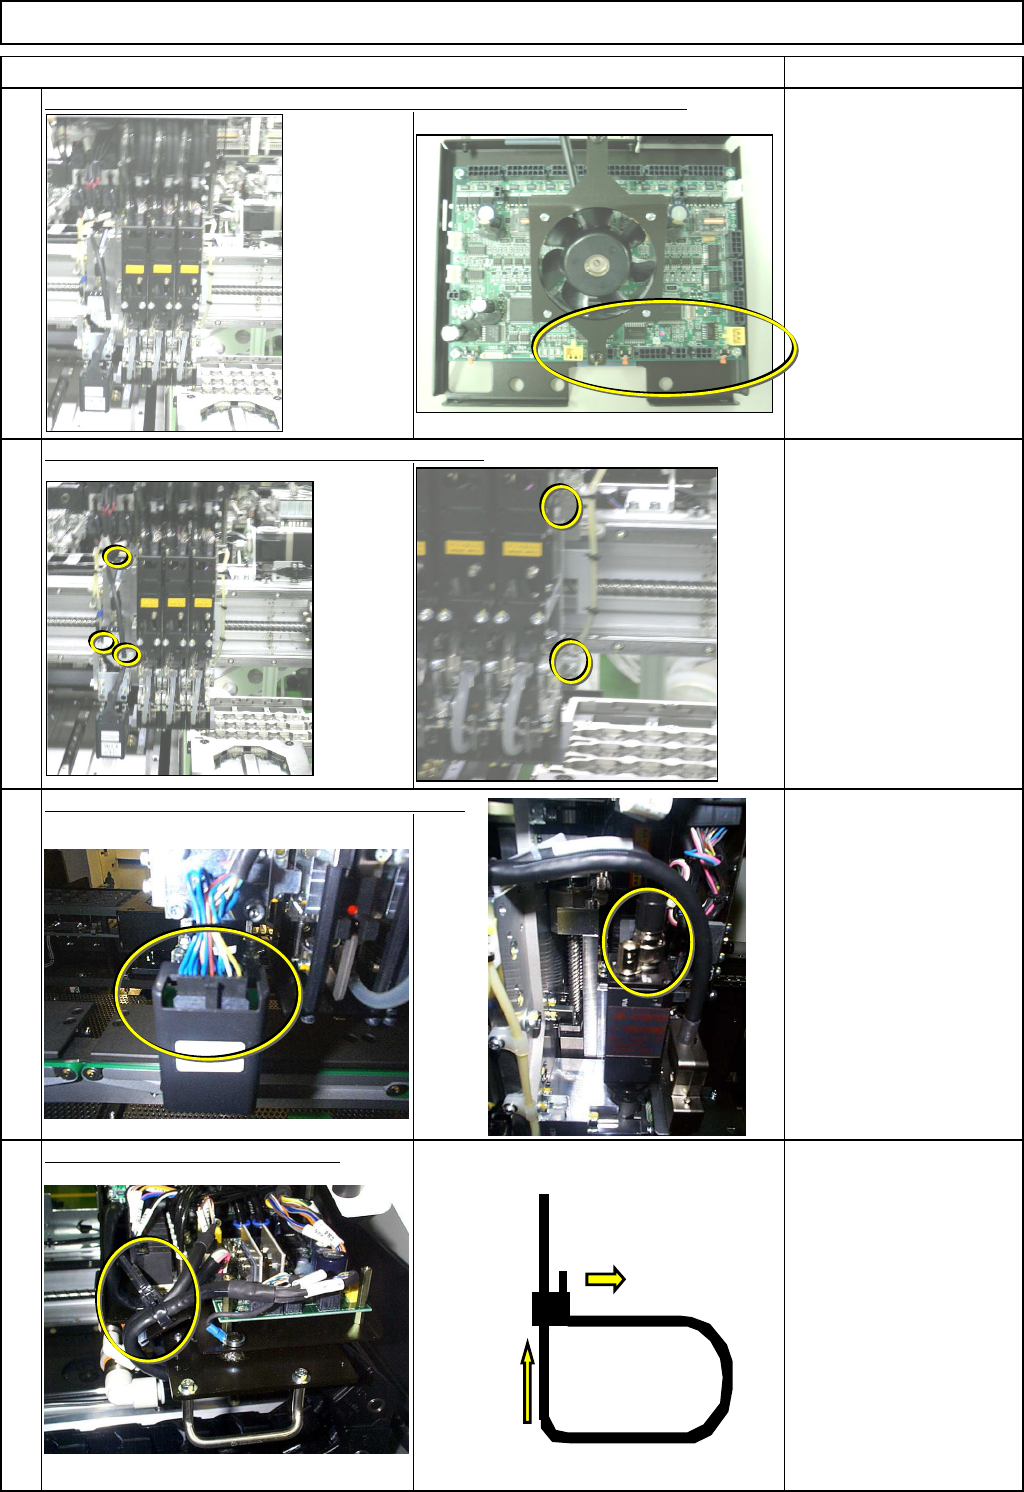
Check that the connectors and the tubes are connected to the new head.
Install the head. Tighten the head-holding screws.
Allen key 3 mm
Screw M4 5 pcs.
Connect the LED lamp and camera connectors.
Secure the cables with cable ties.
12
9
10
11
Put down the pin.
Insert it.
EJM8A-E-SMA050502-A01-00
Page 5-5-2-4