CM602all_EJM8AESM_Service Manual.pdf - 第573页
6 7 8 5 sensor connector. Allen key 2.5 mm Screw M3 4 pcs. Disconnect the cart installation check Remove the grease hose. Remarks Remove the side covers. Item Machinery Part Replacement Feeder Cart Installing Section Rem…
3
4
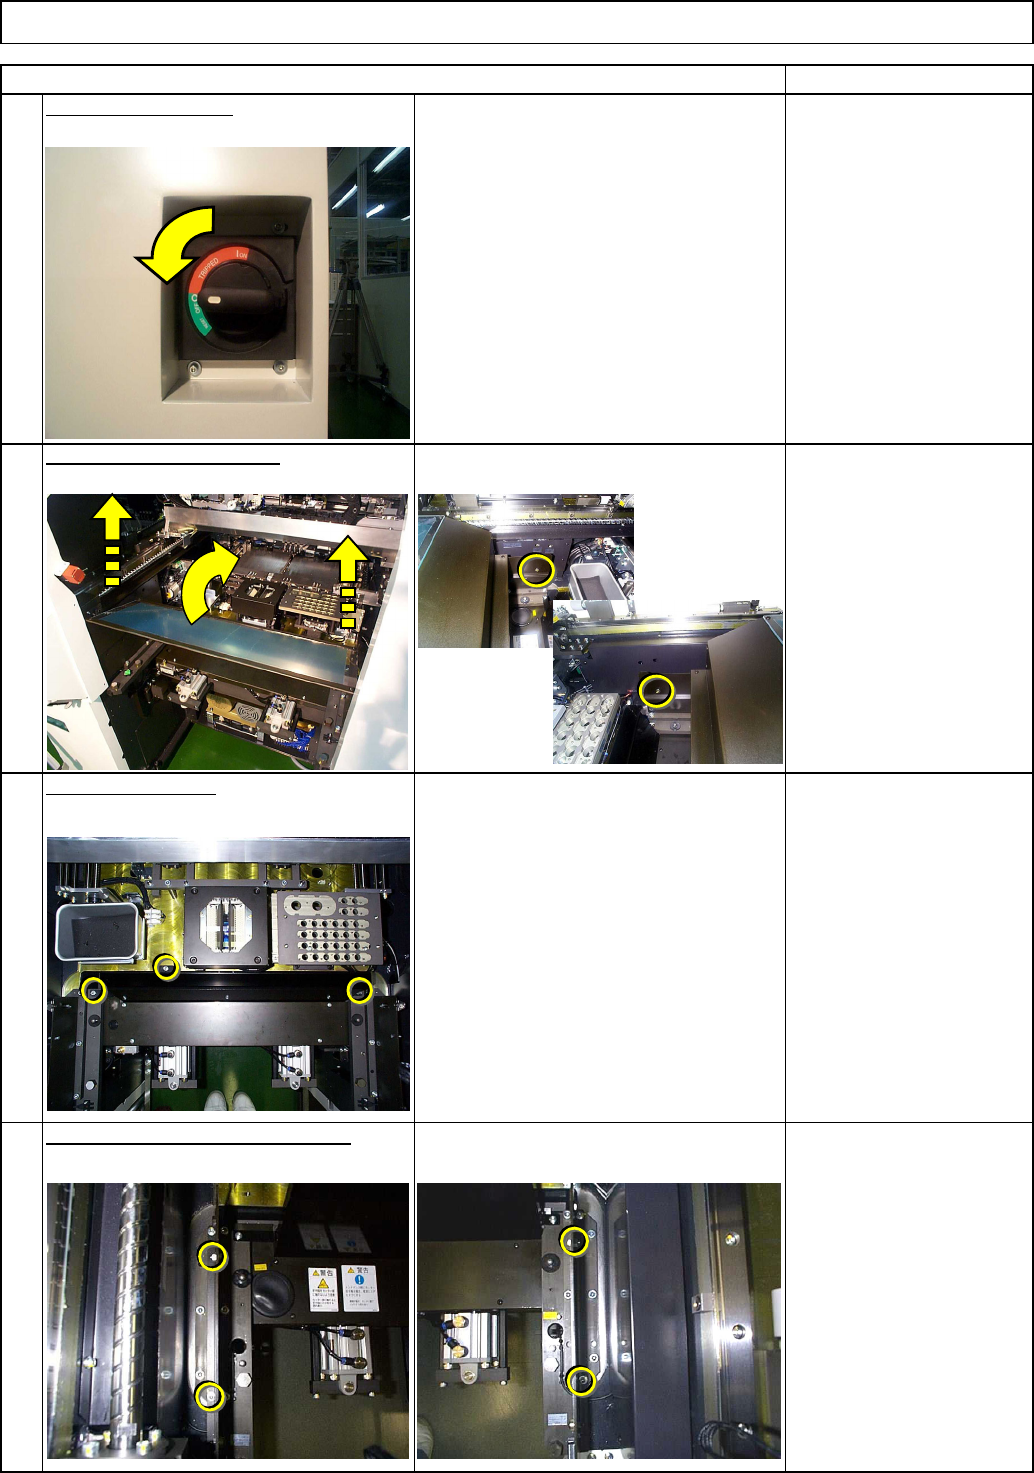
Remove the chute.
Remove the feeder cover bracket.
2
1
Remarks
Machinery Part Replacement Feeder Cart Installing Section
Switch off the power.
Remove the feeder cover.
Allen key 3 mm
Screw M4 x 10mm 3 pcs.
Thick washer 3 pcs.
Item
Phillips screwdriver #2
Screw M4 2 pcs.
Remove the left
and the right
screws. Raise
the feeder cover.
EJM8A-E-SMA050802-A01-00
Page 5-8-2-2
6
7
8
5
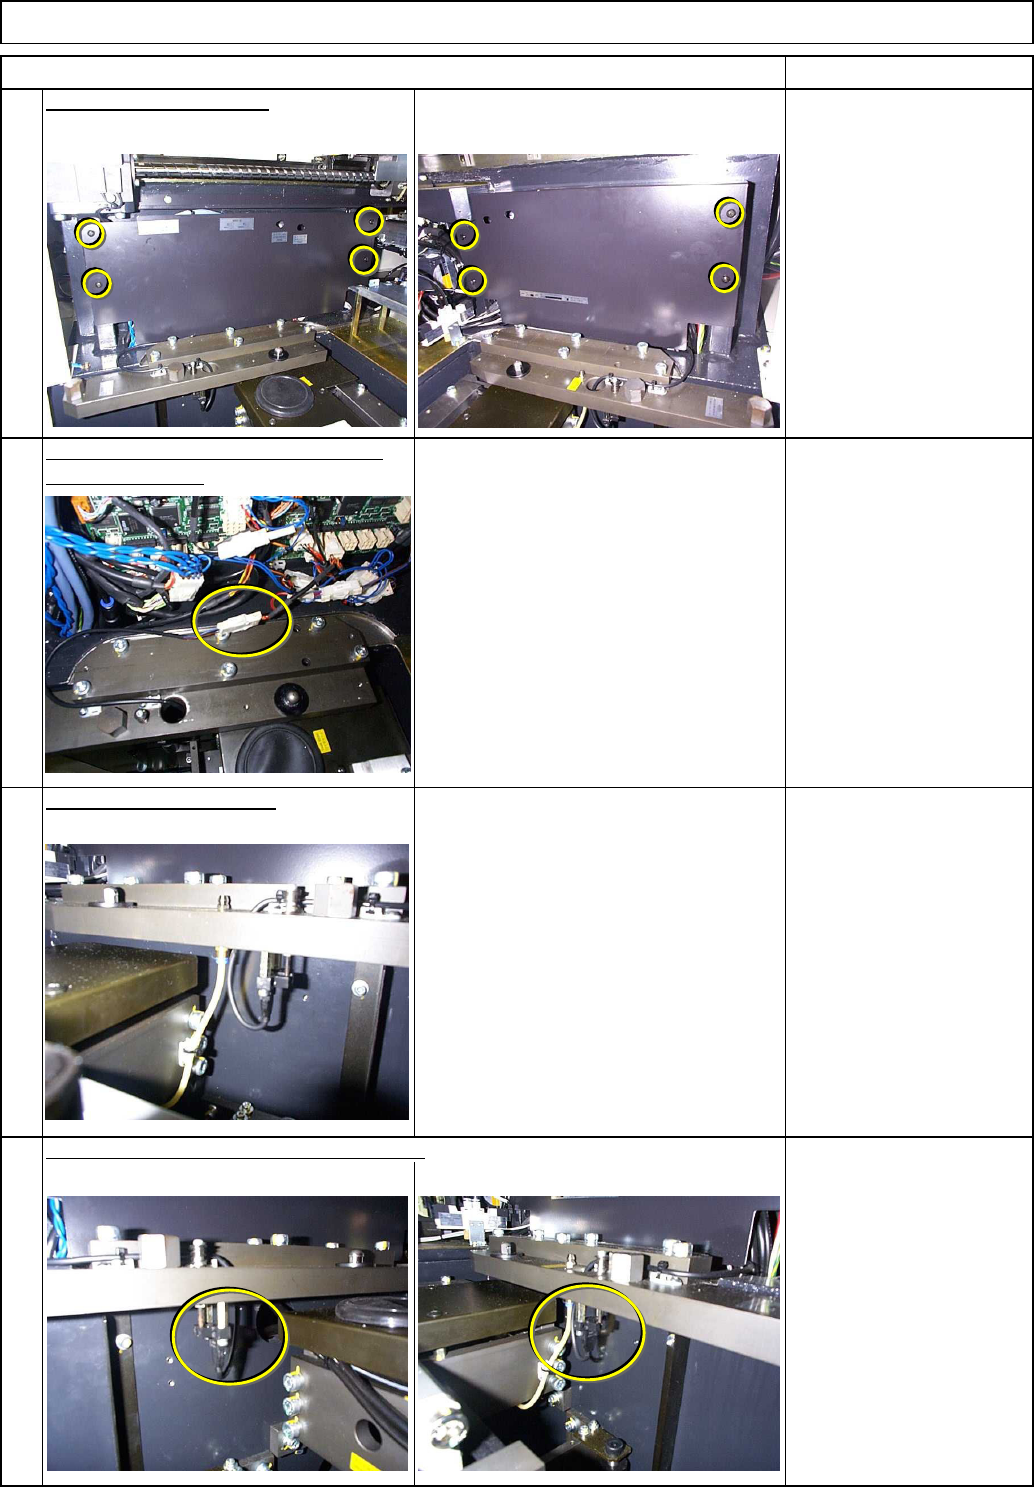
sensor connector.
Allen key 2.5 mm
Screw M3 4 pcs.
Disconnect the cart installation check
Remove the grease hose.
Remarks
Remove the side covers.
Item
Machinery Part Replacement Feeder Cart Installing Section
Remove the cart installation check sensor.
EJM8A-E-SMA050802-A01-00
Page 5-8-2-3

10
11
12
Allen key 3 mm
Iron plate
Magnetic stand
Dial gauge
Remove the cart positioning bracket.
Allen key 6 mm
Screw M8 x 30L 6 pcs.
Place a dial gauge on the iron plate.
Place the iron plate on the bottom of the head.
9
Cut off the cable tie.
Item Remarks
Machinery Part Replacement Feeder Cart Installing Section
Referring to the split pin, adjust the section below so that it is parallel
with the Y-axis. (There is a split pin on the left side only.)
Remove the sensor.
Nipper
S
p
lit
EJM8A-E-SMA050802-A01-00
Page 5-8-2-4