CM602all_EJM8AESM_Service Manual.pdf - 第604页
Machinery Part Replacement Remark Turn off the power and the air supply. Remove all the nozzles from the head. Move the front and the rear beams towards the front side. Put the cover on the secondary part. * Magnets are …
Machinery Part Replacement
• This section describes the procedures for replacing the 12-nozzle head.
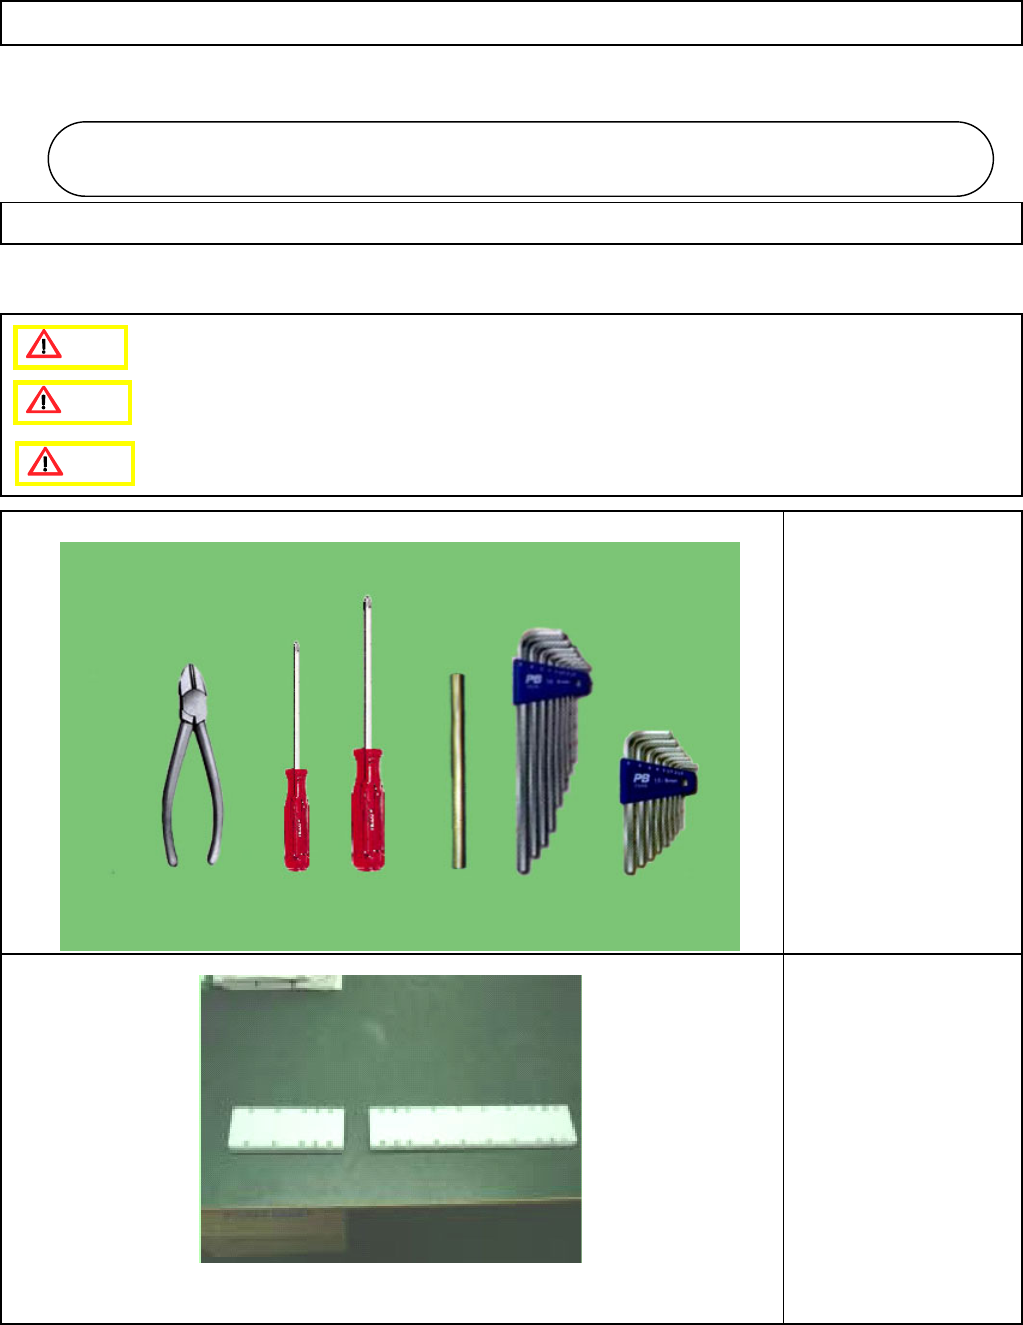
Tool
Phillips screwdriver #1
Phillips screwdriver #2
Allen key 5 mm
Pipe
Nippers
Jig
Cover (Large and Small)
12-Nozzle Head Unit
5-10-1 12-Nozzle Head Replacement Procedures
12-Nozzle Head Unit
5
-1
0
Caution
Danger
Warning
Preparation: Remove all the nozzles and the nozzle holders from the head.
[Caustion before Replacement] * Magnets are installed. To ensure safety, use the magnet
covers when working on the machine.
* The head driver firm versions for the old and the new heads
should be the same. If they are different, trouble may occur.
EJM8A-E-SMA051001-A01-00
Page 5-10-1-1
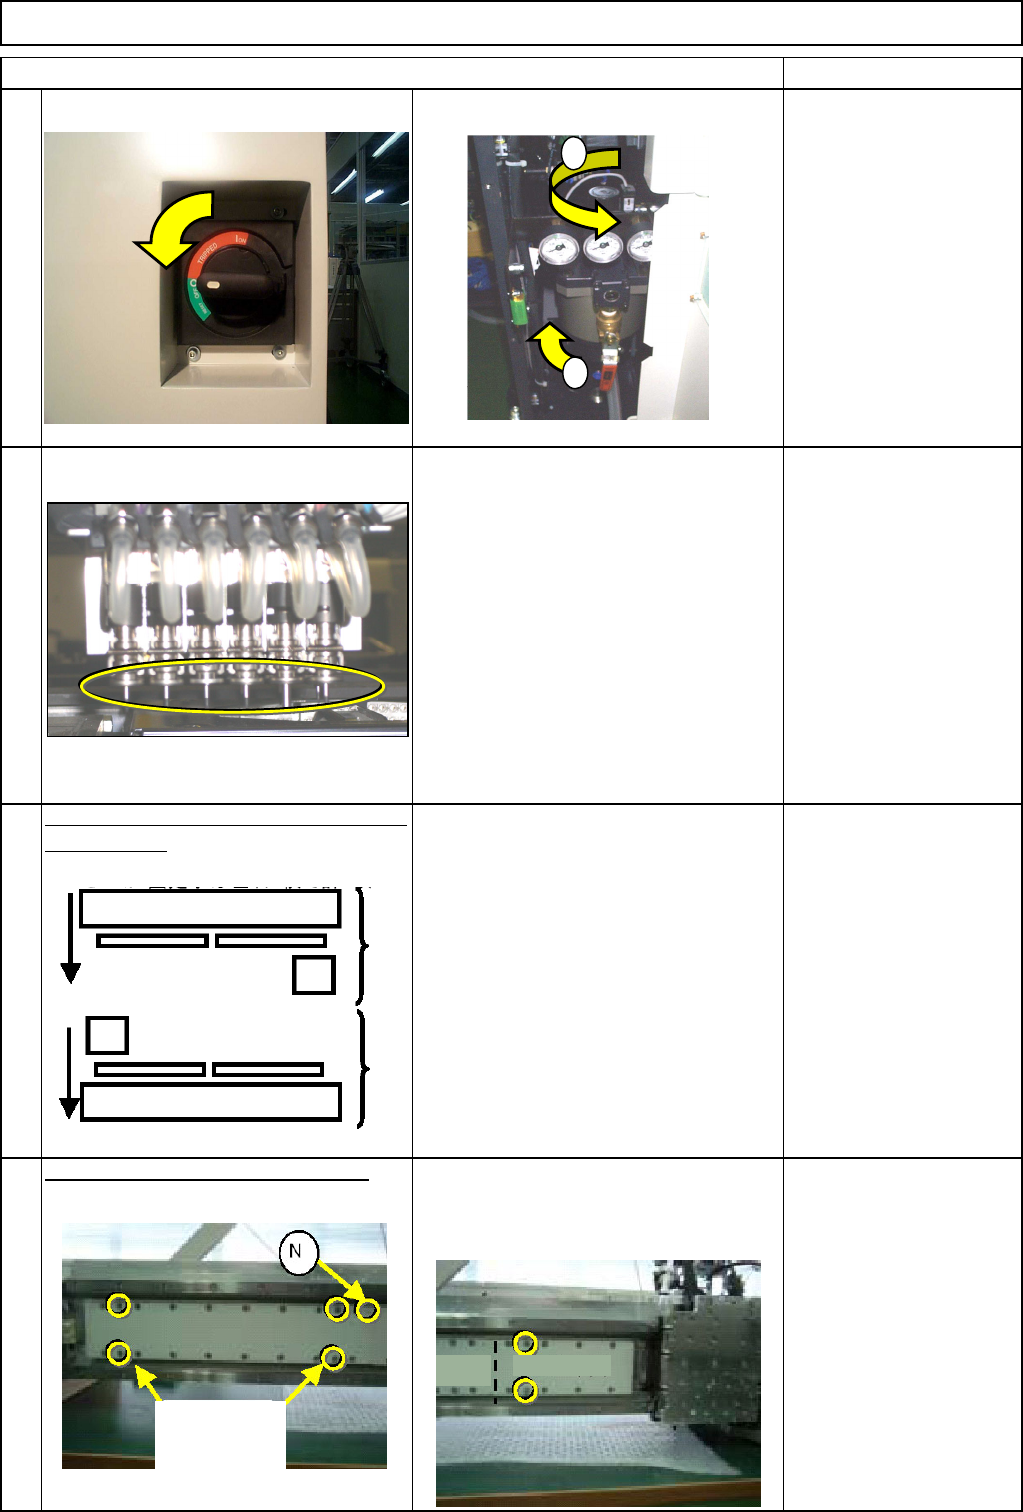
Machinery Part Replacement
Remark
Turn off the power and the air supply.
Remove all the nozzles from the head.
Move the front and the rear beams towards
the front side.
Put the cover on the secondary part.
* Magnets are installed. To ensure safety,
use the covers when working on the
machine.
Cover (Large) Bolts x 4
Cover (Small) Bolts x 2
* Non-magnetic Allen
keys
Item
1
2
3
4
12-Nozzle Head Unit
1
2
(Large) Cover (Small)
Bolts
accompanying
the machine
R
ea
r
Front
EJM8A-E-SMA051001-A01-00
Page 5-10-1-2
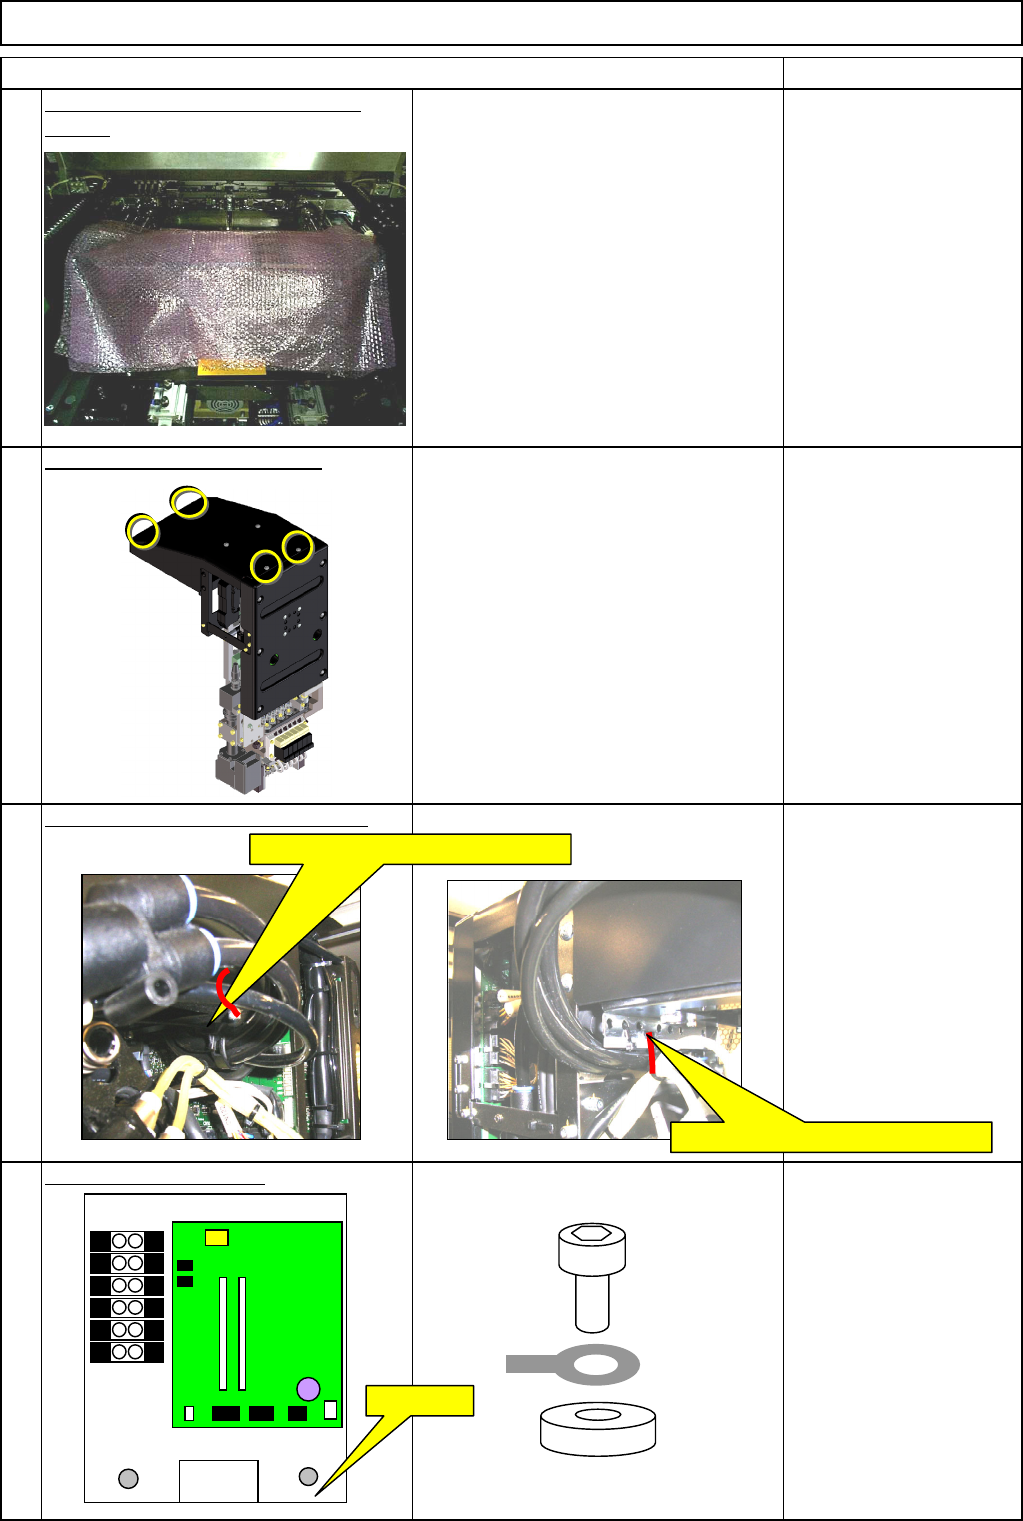
Machinery Part Replacement
Remark
Item
12-Nozzle Head Unit
Put bubble wrap on the line camera
sensor. To prevent the head from falling down. Bubble wrap
Remove the upper head cover.
Phillips screwdriver #2
M4 truss 4 pcs.
Remove the tube-securing cable tie.
Nippers
Remove the earth cable.
Thick washer
Screw M4 x 8L 1 pc.
8
7
6
5
Remove the AF and BR cable ties.
Remove the AR and BF cable ties.
FG⇒Earth
EJM8A-E-SMA051001-A01-00
Page 5-10-1-3