CM602all_EJM8AESM_Service Manual.pdf - 第622页
Machinery Part Replacement Remark Item 12-Nozzle Head Unit Remove the valves. (FWD side.) Loosen the holding bots and remove the valves. Precision screwdriver Remove the valves. (REAR side.) Remove the cover from under t…
Machinery Part Replacement
Remark
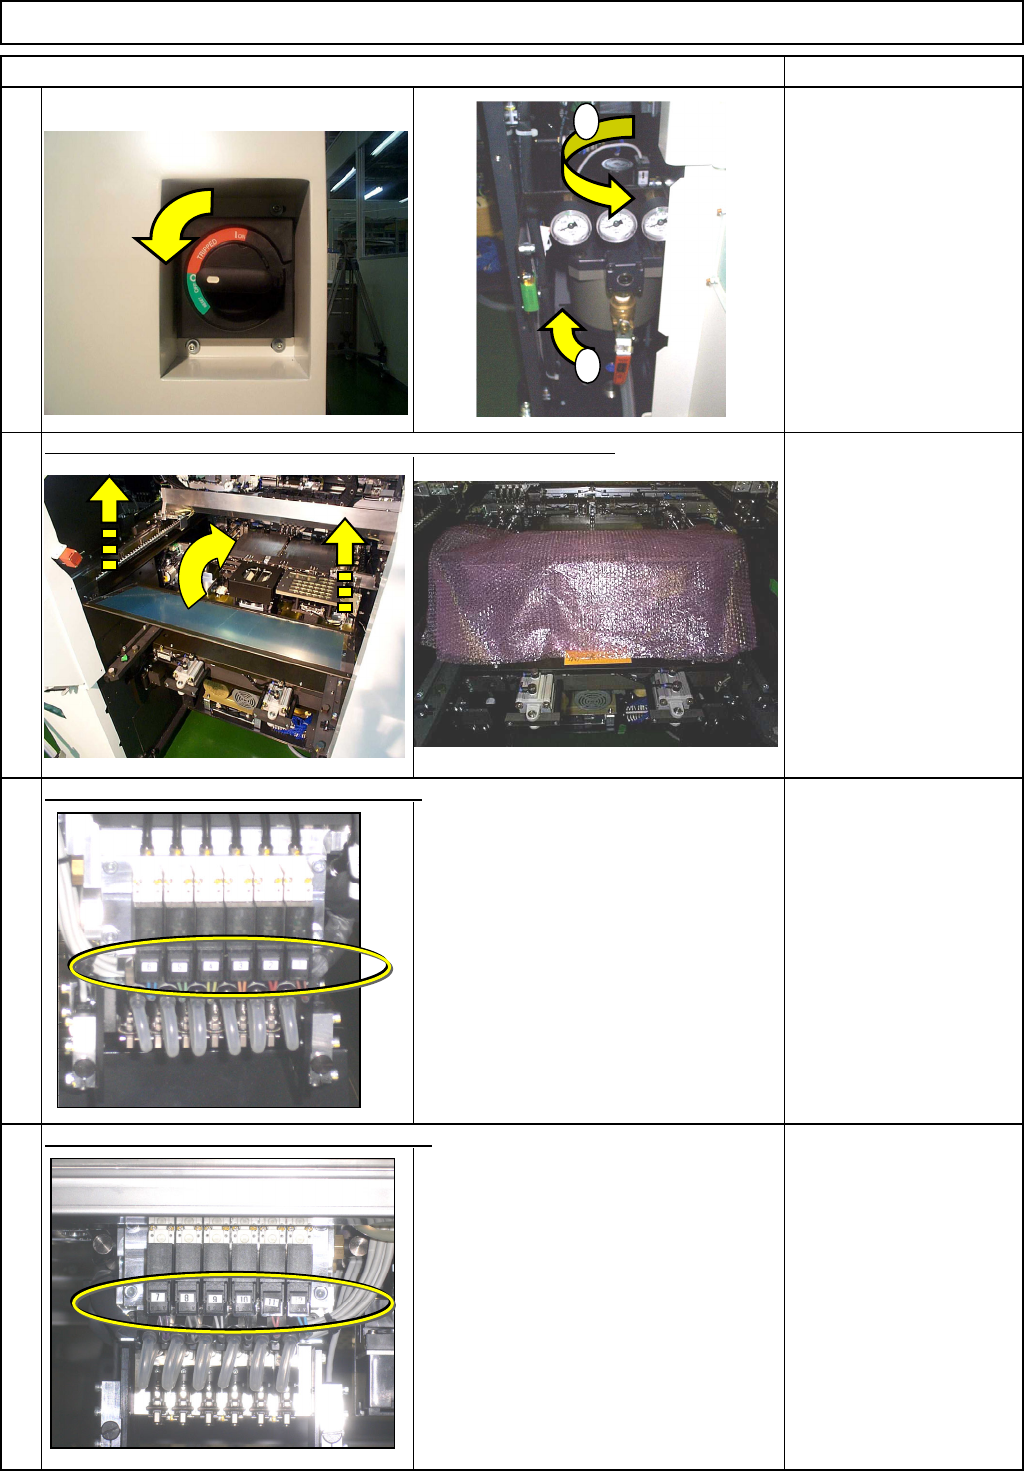
Turn off the power and air supply.
Phillips screwdriver #2
Bubble wrap
M4 screw 2 pcs.
Remove the valve connectors. (FWD side)
Air valve unit
* NP1 - 6 (A001)
Remove the valve connectors. (REAR side)
Air valve unit
* NP7 - 12 (A002)
3
4
1
Item
2
12-Nozzle Head Unit
Remove the feeder cover. Put bubble wrap over the body frame.
1
2
EJM8A-E-SMA051003-A01-00
Page 5-10-3-2
Machinery Part Replacement
Remark
Item
12-Nozzle Head Unit
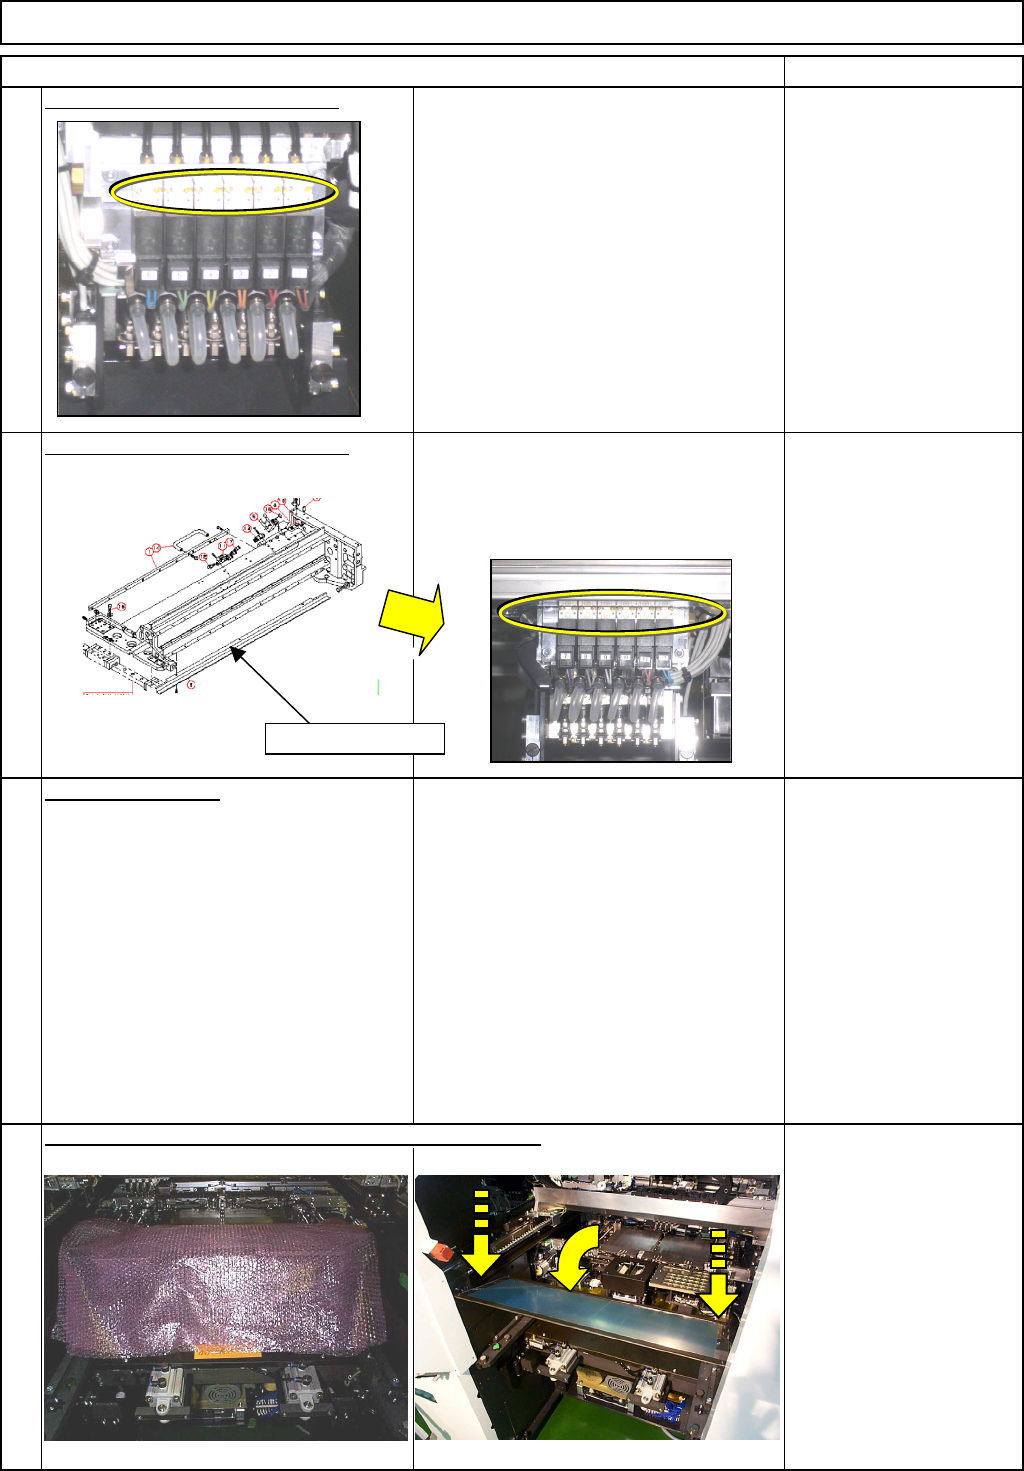
Remove the valves. (FWD side.)
Loosen the holding bots and remove the
valves.
Precision screwdriver
Remove the valves. (REAR side.)
Remove the cover from under the X-axis
beam. Loosen the valve bolts, and
remove the valves.
Precision screwdriver
Allen key
Replace the valves.
7
Take Steps 3 to 6 in reverse order.
<Caution>
Check the valve-installing section for
dust, dirt and foreign matter.
8
Phillips screwdriver #2
Bubble wrap
M4 screw 2 pcs.
Remove the bubble wrap. Put the feeder cover back on.
5
6
Remove the cover.
EJM8A-E-SMA051003-A01-00
Page 5-10-3-3
Machinery Part Replacement
Remark
Item
12-Nozzle Head Unit
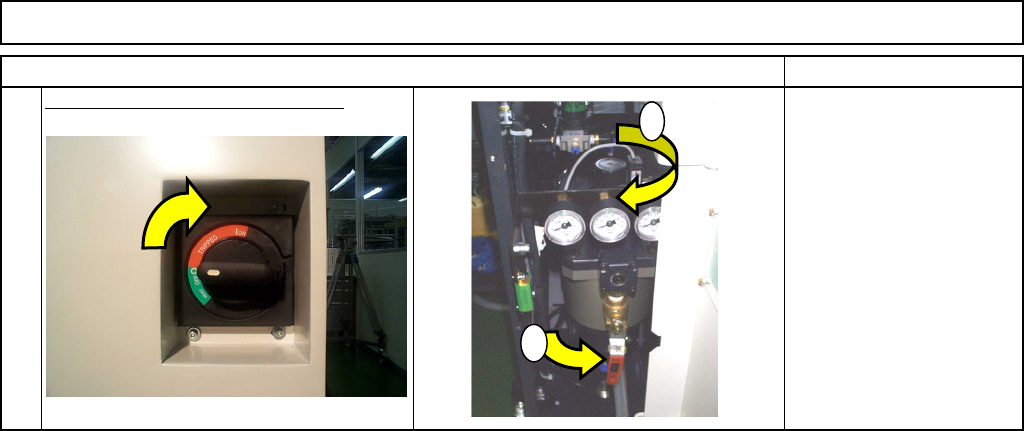
Turn on the power and air supply.
8
1
2
EJM8A-E-SMA051003-A01-00
Page 5-10-3-4