CM602all_EJM8AESM_Service Manual.pdf - 第630页
Machinery Part Replacement Remark Item 12-Nozzle Head Unit Install the belts. Install the long belts (1) and (2), and two s h o r t be l ts (3) . 1-000319 Fit the tension adjuster (B). 1-000314 M3×35L 2 pcs. 9 10 ( 1 ( 2…
Machinery Part Replacement
Remark
Item
12-Nozzle Head Unit
Removal of the
p
late
(
B
)
from the θ -axis housin
g
(
1
)
1-000319
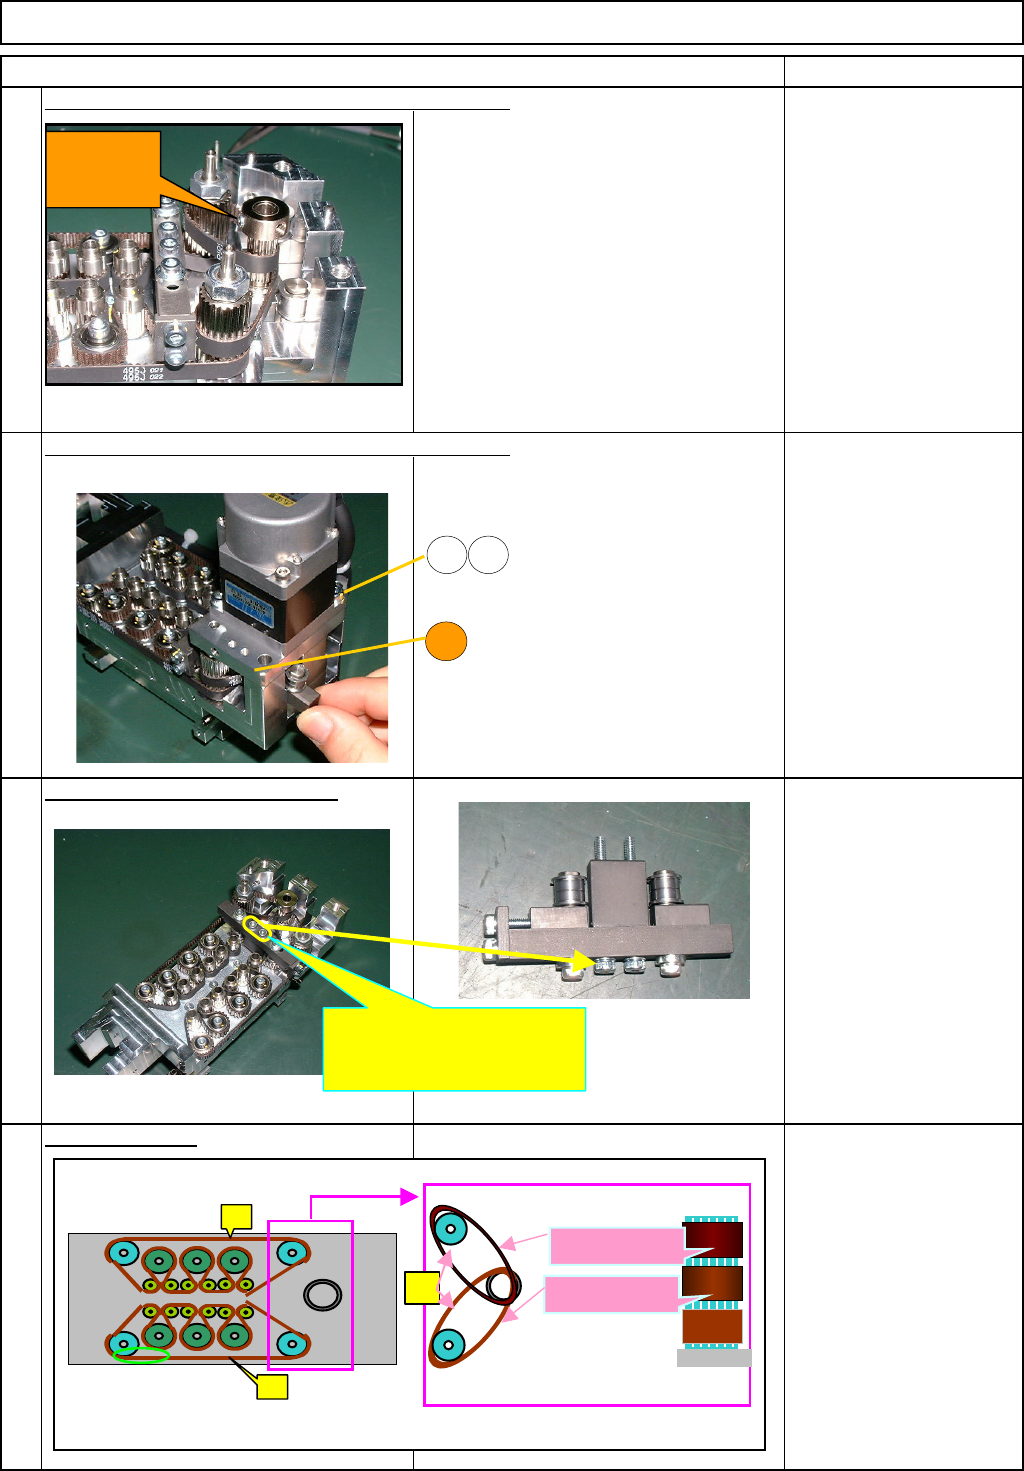
Before removing the plate (B), loosen the
hollowset (C). Hexagonal socket
setscrew M4 x 4L
2 pcs.
Removal of the
p
late
(
B
)
from the θ -axis housin
g
(
2
)
Remove the M5 x 16L bolts (1) and (2),
and the M5 washer. M5×16L 2 pcs.
Remove the tension adjuster (B).
M3×35L 2 pcs.
Remove the belt.
Remove the belts (1), (2) and (3).
7
5
6
8
1 2
B
Loosen the
hollowset
(C).
Loosen these bolts and remove
the tension adjuster (B).
(1)
(2)
(3)
Assembly procedures 2
(Upper level)
A
ssembly procedures 1
(Middle level)
EJM8A-E-SMA051005-A01-00
Page 5-10-5-3
Machinery Part Replacement
Remark
Item
12-Nozzle Head Unit
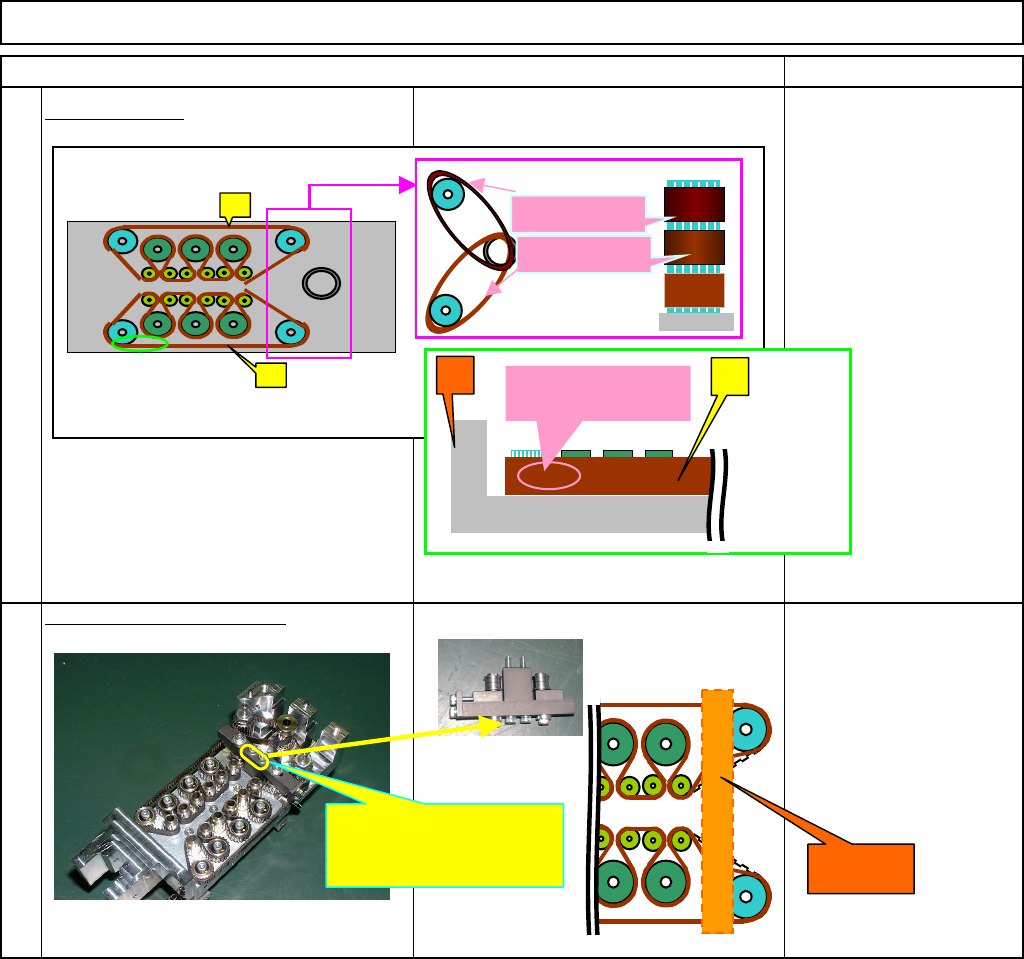
Install the belts.
Install the long belts (1) and (2), and two
s
h
o
r
t
be
l
ts
(3)
.
1-000319
Fit the tension adjuster (B).
1-000314
M3×35L 2 pcs.
9
10
(
1
(
2
Assembly procedures 2
(Upper level)
A
ssembly procedures 1
(Middle level)
AB
(3)
A
* The letters should
not be upside down.
Secure the tension adjuster
(B) with these bolts.
Bearing
EJM8A-E-SMA051005-A01-00
Page 5-10-5-4
Machinery Part Replacement
Remark
Item
12-Nozzle Head Unit
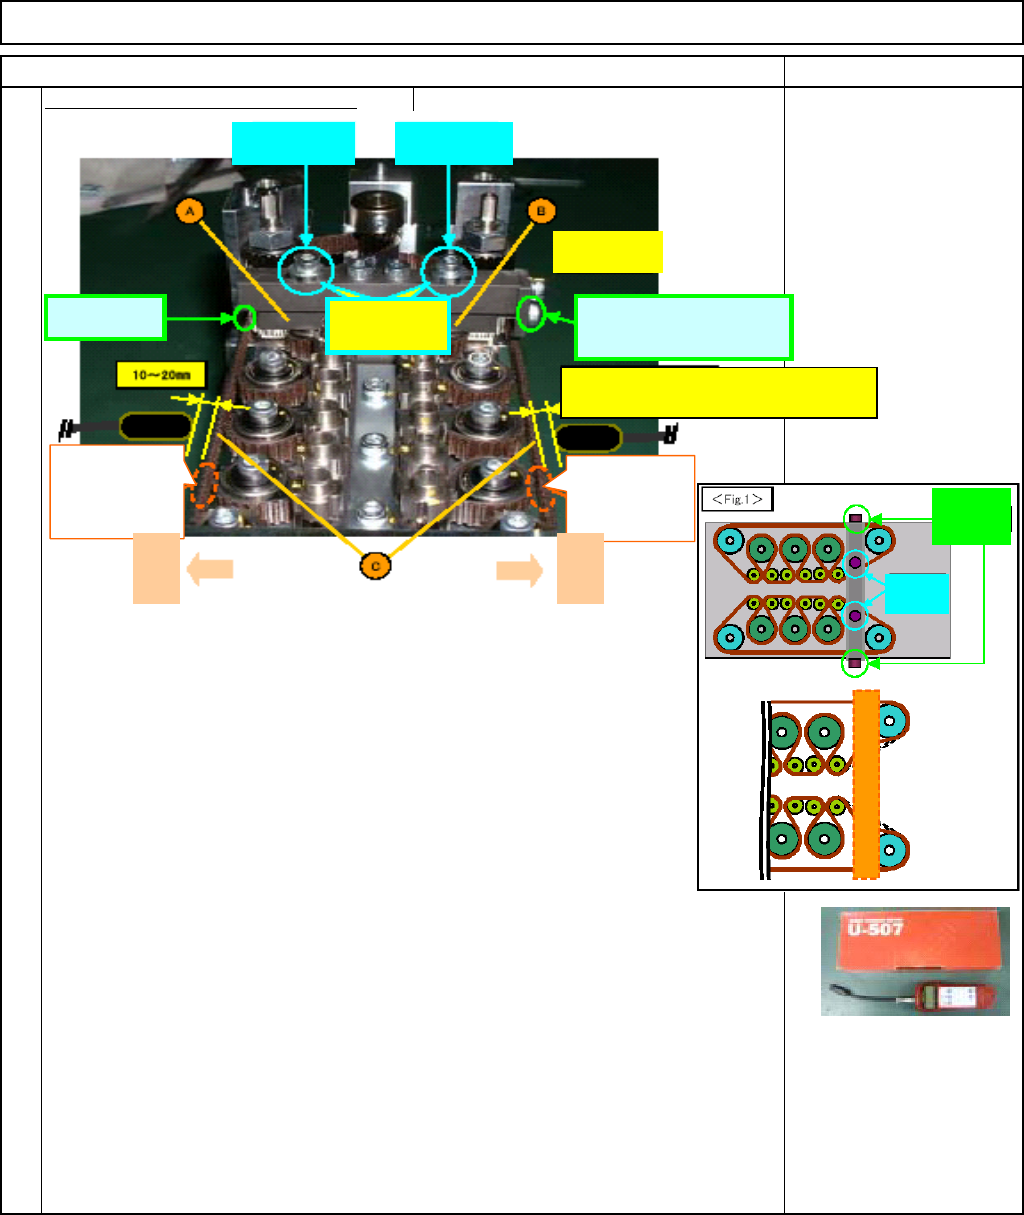
Adjust the tension of the long belts.
11
How to adjust the tension of the (long) belts (Two belts (Front and Rear))
1. Loosen the tension-adjuster-holding bolt.
2. Set the value of a ultrasonic measuring device. Prepare for measurement.
3. Put the measuring device close to the belt, and beat the belt. According
to the reading of the measuring device, adjust the belt tension with the
adjusting bolt.
Put a measuring device close to the belt (right angle against the belt,
10 - 20 mm away). Beat it with a ball-point wrench or similar tool that
does not damage the belt, and measure the tension.
* Tension should be 16N +/- 2N.
4. Re-adjust the tension after rotating the θ-motor manually.
Rotate the θ-axis motor manually (Rule: One rotation of the belt with
a 2-mm wrench), and beat the belt again. Adjust the tension if necessary.
5. Tighten the tension-adjuster-holding bolt.
6. To check the tension, re-measure it.
To check tightening the holding bolt did not change the tension, re-measure the tension
7. Repeat the procedures for the rear belt.
Rear holding
belt
Front holding
belt
Rear adjusting
bolt
Provisionally
tighten these
bolts
Provisionally
tighten this bolt
Beat the belt with
some tool that
does not damage
the belt.
Front adjusting bolt
(Used for tension
ad
j
ustment
)
Put a measuring device 10 - 20 mm approx. away
from the belt, and measure the tension.
Beat the belt with
some tool that
does not damage
the belt.
Front
For
adjusting
For
holding
Rear
EJM8A-E-SMA051005-A01-00
Page 5-10-5-5