CM602all_EJM8AESM_Service Manual.pdf - 第649页
Machinery Part Replacement Remark 12-Nozzle Head Unit Item Cut off the cable ties. When removing the tube, put a mark on the tubes so that they can put back in the same place. Nipper Magic marker Remove the cable and tub…
Machinery Part Replacement
Remark
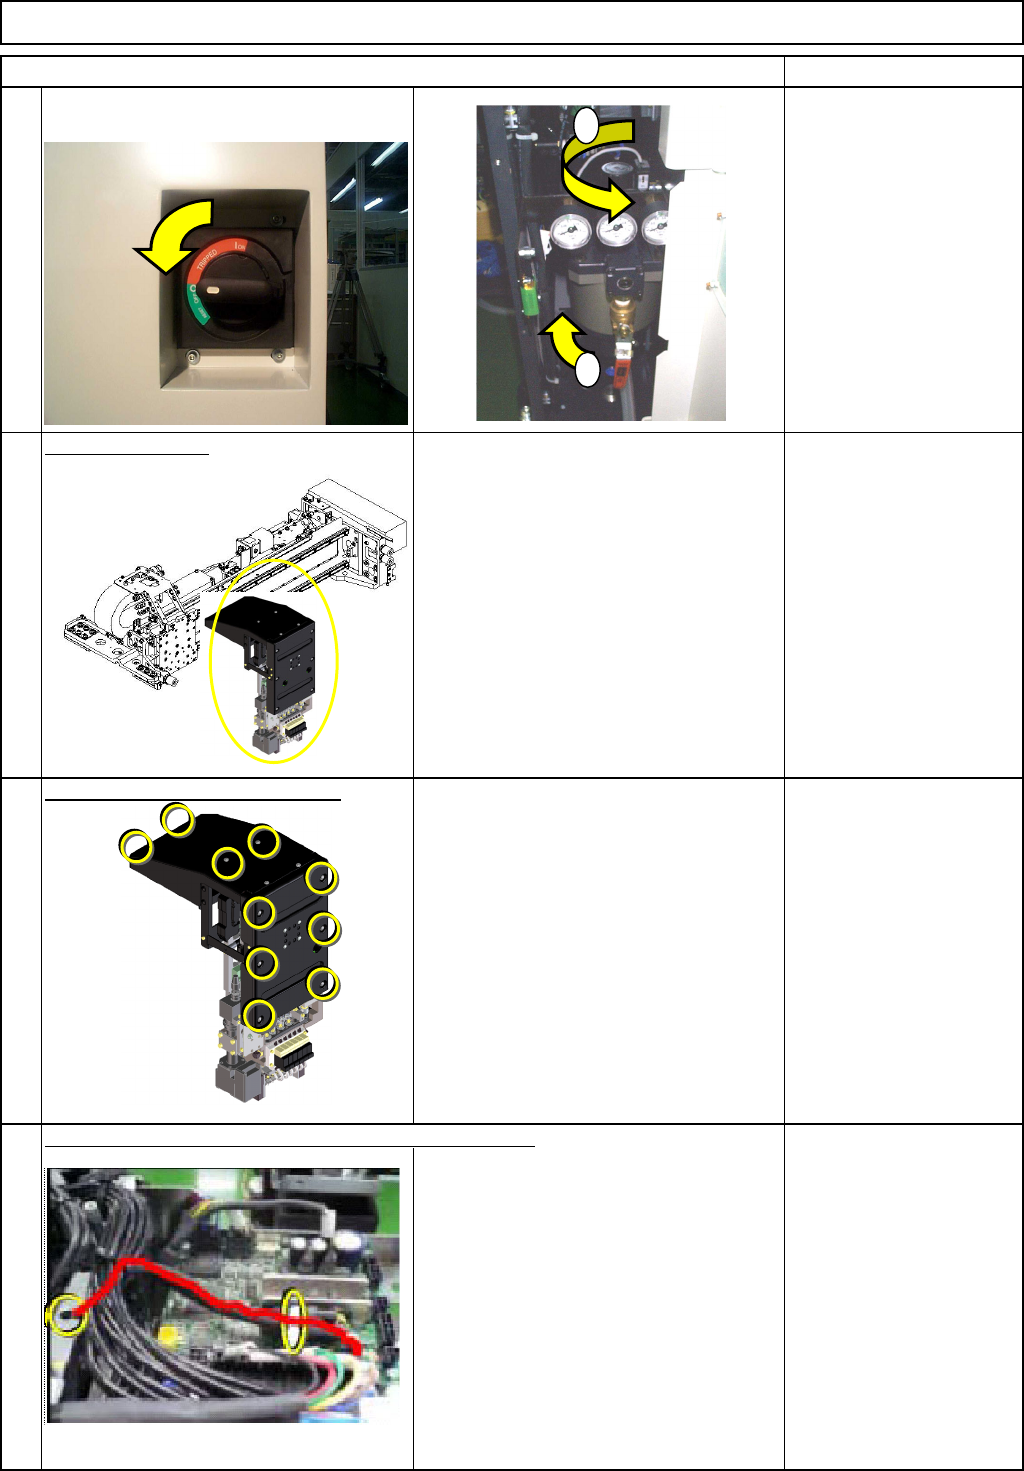
Turn off the power and air supply.
0.49MPa to
0.55MPa
Remove the head.
See "12-Nozzle-Head-Unit
Replacement."
Section 5-10-1
Remove the front and top covers.
Phillips screwdriver #2
M4 truss screw 10 pcs.
Disconnect the
θ-motor connector. Cut off the cable tie.
Nipper
12-Nozzle Head Unit
Item
2
1
3
4
1
2
EJM8A-E-SMA051008-A01-00
Page 5-10-8-2
Machinery Part Replacement
Remark
12-Nozzle Head Unit
Item
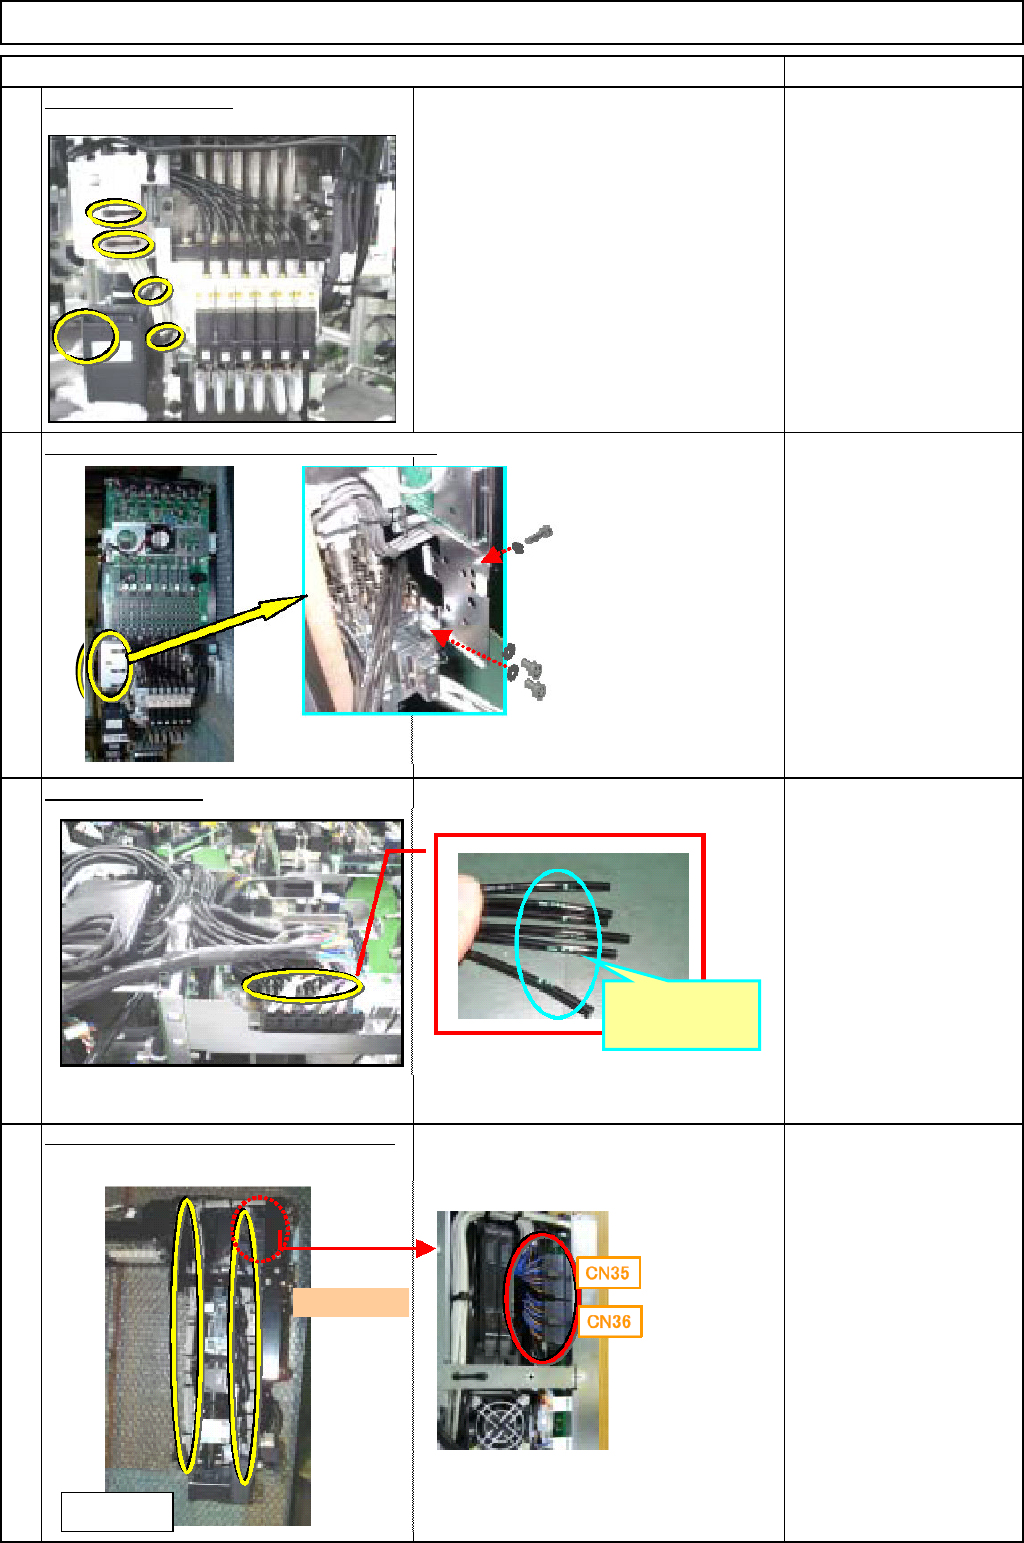
Cut off the cable ties.
When removing the tube, put a mark on
the tubes so that they can put back in the
same place.
Nipper
Magic marker
Remove the cable and tube holding bracket.
Allen key
M3 x 6L 3 pcs.
Remove the tube.
Magic marker
Remove the vacuum-sensor connector.
Cut off the cable tie.
Nipper
5
6
8
7
Put a mark
here.
<Left side>
Front
EJM8A-E-SMA051008-A01-00
Page 5-10-8-3
Machinery Part Replacement
Remark
12-Nozzle Head Unit
Item
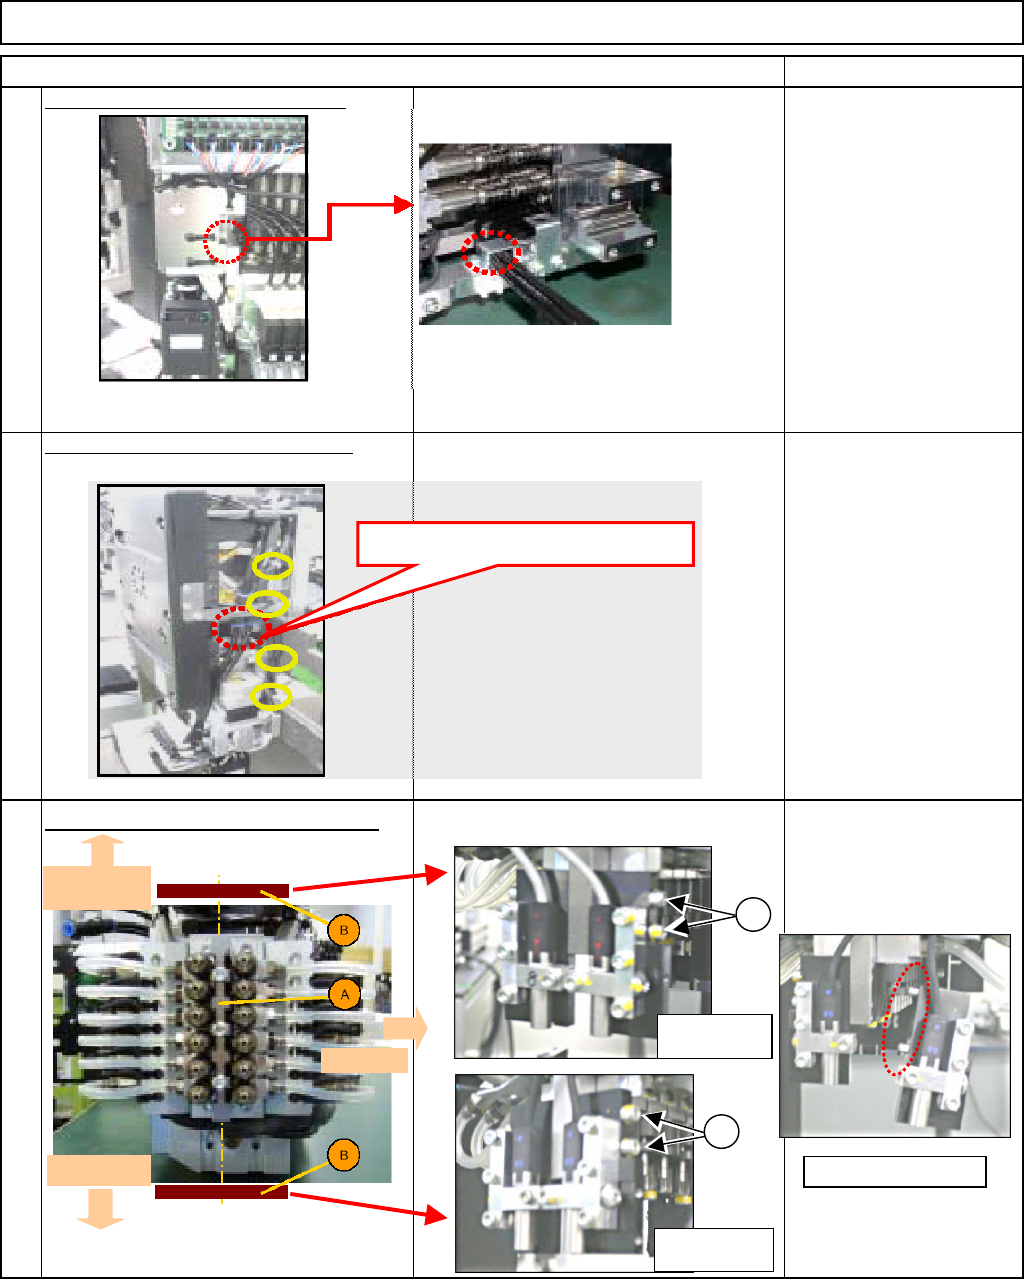
Remove the tube-holding bracket.
Allen key
M3 x 6L 2 pcs.
Cut off the cable tie for the
θ moto
r
cable. Remove the tube.
Nipper
Remove the component thickness sensor.
Loosen the cbolts. Remove the component
thickness sensor alon
g
with the
p
late.
Allen key
11
9
10
Remove the tube here.
Head-camera
side
θ
-motor side
Front side
1
1
Light-sensing
device
Light-emitting
device
Remove the pin.
EJM8A-E-SMA051008-A01-00
Page 5-10-8-4