CM602all_EJM8AESM_Service Manual.pdf - 第692页
Machinery Part Replacement Remarks Press [Pickup position]. Select the stage to teach. Check that: "XY" and "Z" are selected (highlighted). Check that "Check Posi L table" is selected. If &q…
Machinery Part Replacement
This section describes the procedures for teaching the pickup position.
Tools
None
Jig
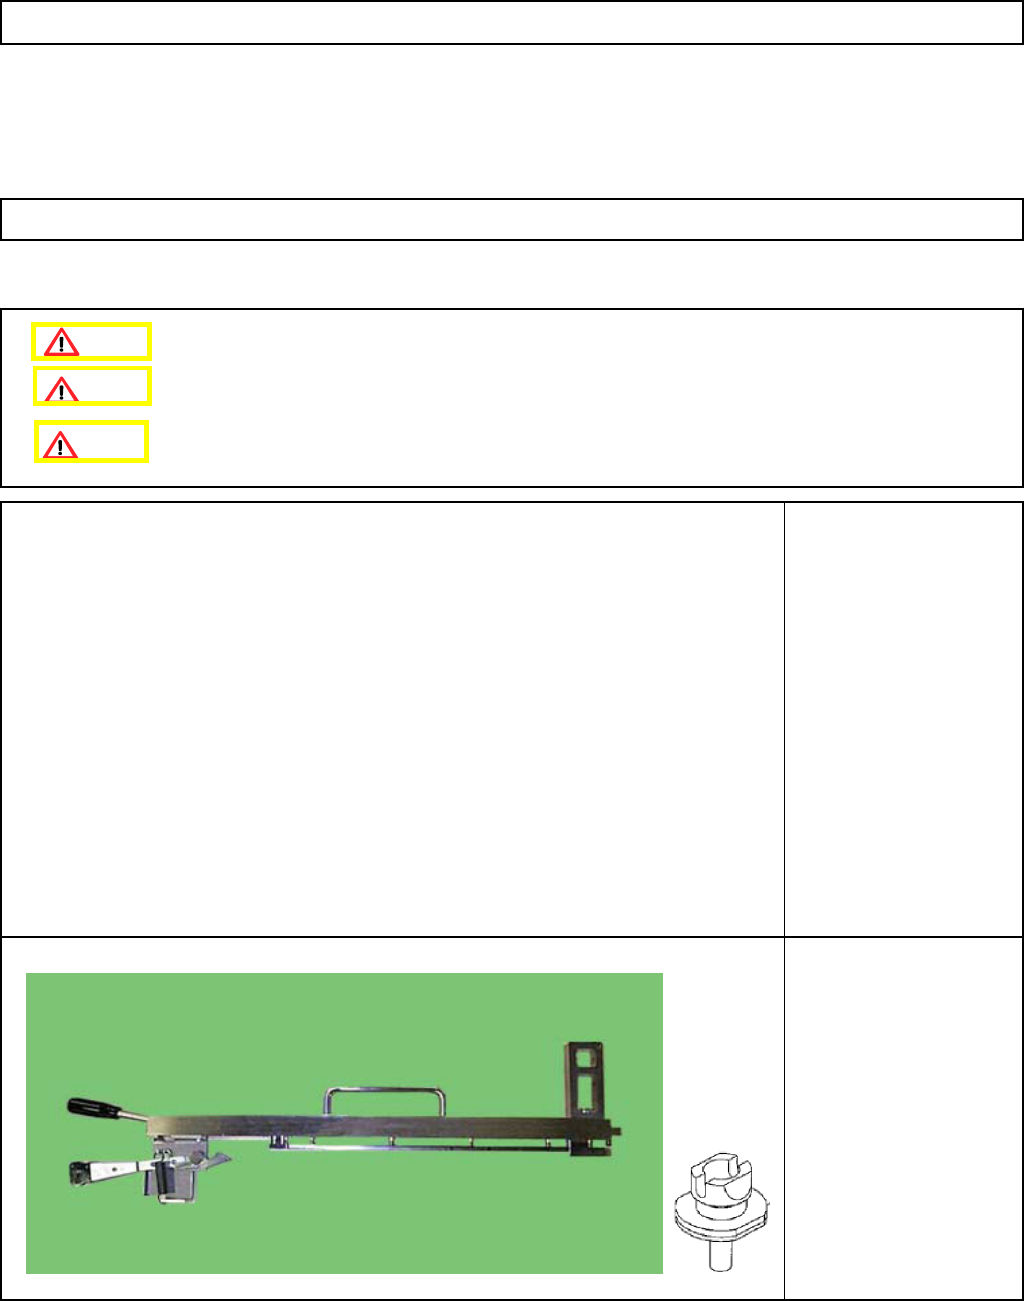
FM-1043
Nozzle Height Teaching
Jig
Nozzle 130S
Install the feeder change cart.
12-Nozzle Head Teaching
5-11-8 Pickup Position
Caution
Dange
r
Warning
EJM8A-E-SMA051108-A01-00
Page 5-11-8-1
Machinery Part Replacement
Remarks
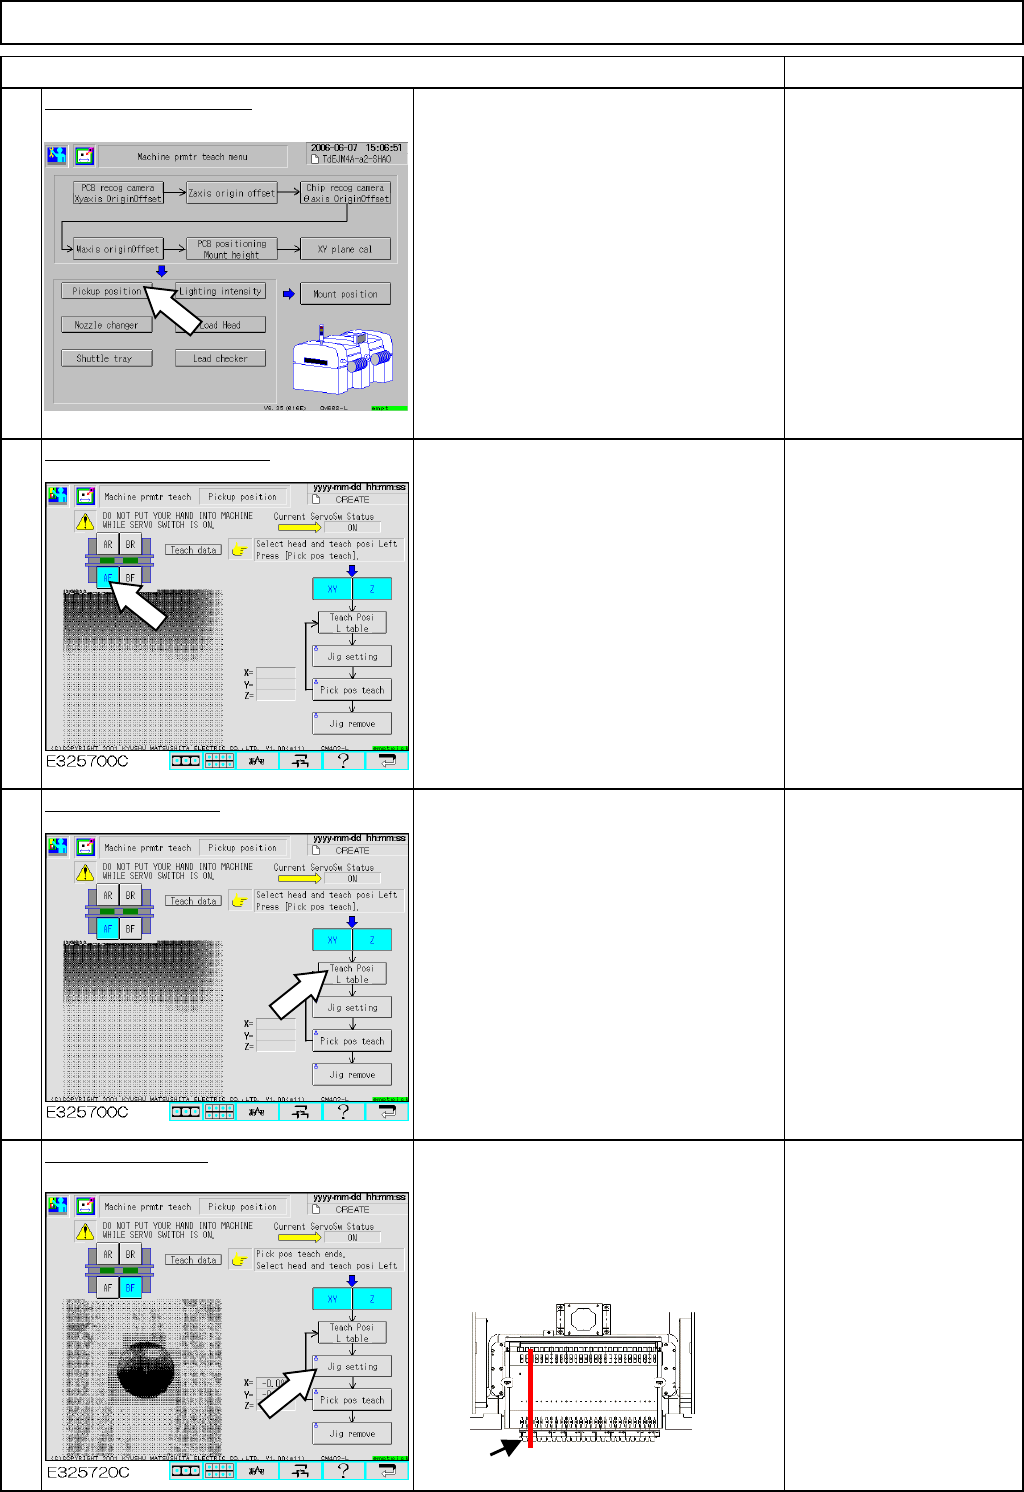
Press [Pickup position].
Select the stage to teach.
Check that:
"XY" and "Z" are selected
(highlighted).
Check that "Check Posi L
table" is selected.
If "Check Posi R table" is
selected, press that key to
change "R" to "L."
Select the left table.
Press [Jig setting].
• Put the 130S nozzle on the number 5
nozzle position of the head for the stage to
teach.
• Put the pickup-position-adjusting jig on the
number 2 position of the feeder change cart.
4
1
Item
2
12-Nozzle Head Teaching
3
Pickup-position-adjusting jig
EJM8A-E-SMA051108-A01-00
Page 5-11-8-2
Machinery Part Replacement
Remarks
Item
12-Nozzle Head Teaching
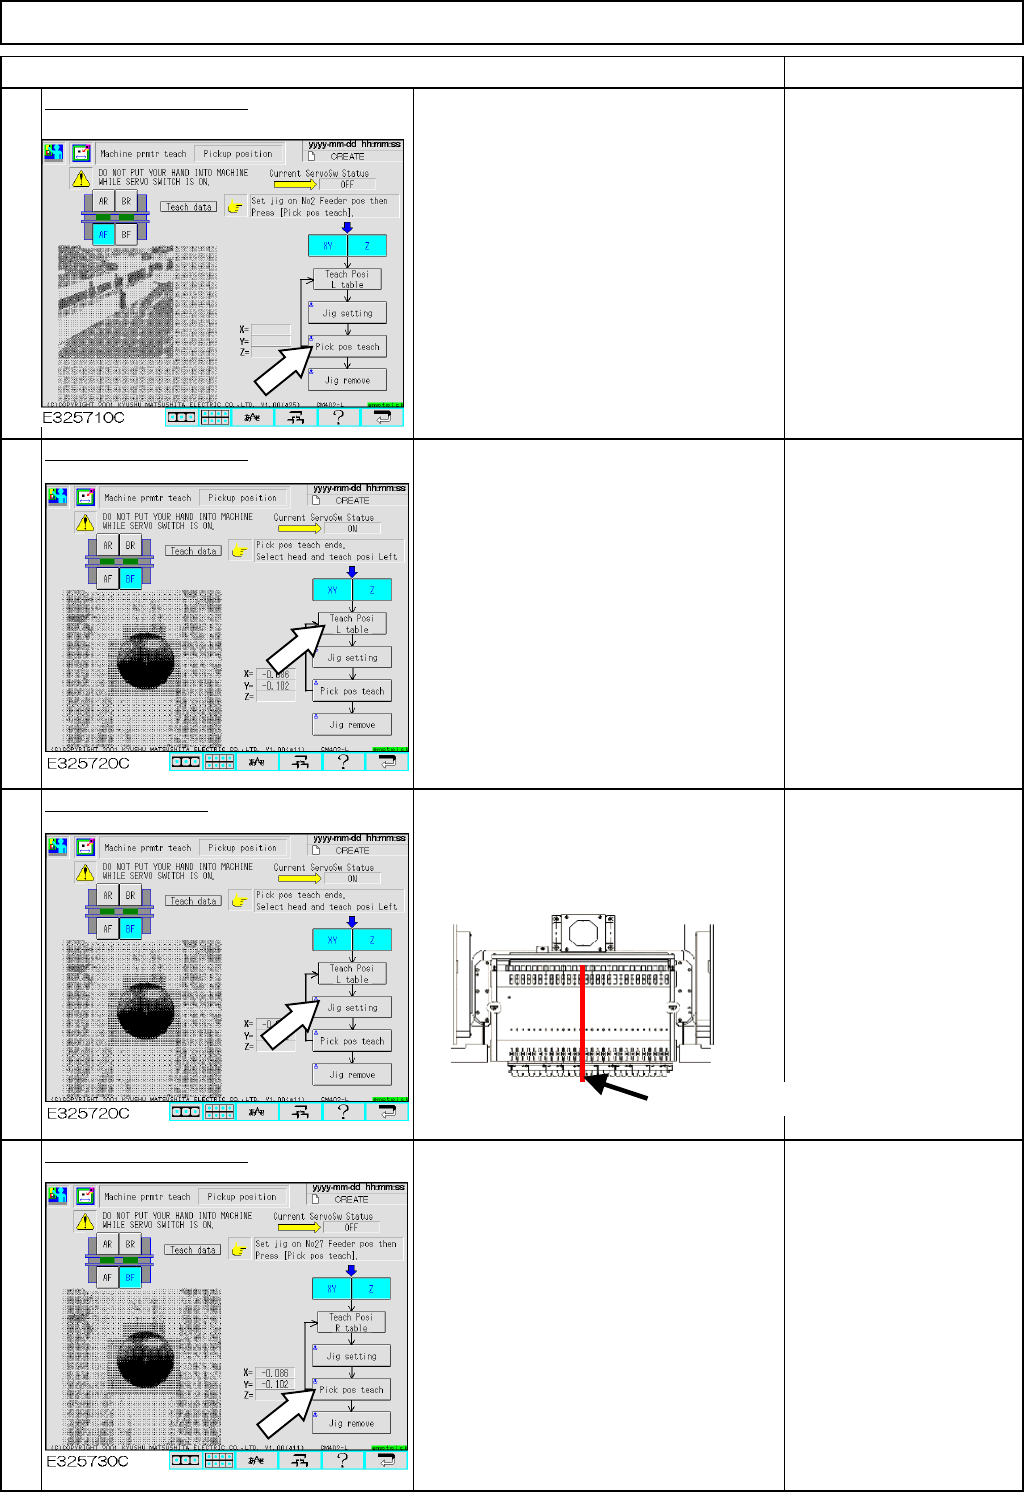
Press [Pick pos teach].
The board camera recognizes the 1-mm
hole of the pickup-position-adjusting jig
automatically. The 130S nozzle on the
number 5 nozzle position moves down to
the jig and measures the height of the
upper surface of the jig.
Select the center table.
Press [Jig setting].
Put the pickup-position-adjusting jig on
the number 14 position of the feeder
change cart.
Press [Pick pos teach].
The number 5 nozzle moves down to the
jig and measures the height of the upper
surface of the jig.
5
6
7
8
Pickup-position-adjusting jig
EJM8A-E-SMA051108-A01-00
Page 5-11-8-3