CM602all_EJM8AESM_Service Manual.pdf - 第751页
Slide the shutter. Place it on the bottom of the head holding bracket. Slide the shutter. Remove the nozzle changer. Tool/Spec./Installation Allen key 4 mm Screw M5 3 pcs. 6 5 Disconnect the cylinder air tube. Tool/Spec.…
2
1
Remove the feeder cover and the chute.
Switch OFF the main power and
air supply.
Optional Part and Accessory Replacement Nozzle Changer Unit (3-nozzle type)
Tool/Spec./Installation
Tool/Spec./Installation
Item Remark
4
3
Disconnect the nozzle changer
connectors.
Phillips screwdriver #2
Allen key 3 mm
Screw M4 2 pcs.
Screw M4 3 pcs.
Phillips screwdriver #2
Screw M4 4 pcs.
J1■35=Open,
J1■36=Closed
■=
AF - 2
AR - 4
BF - B
BR - D
Tool/Spec./Installation
Tool/Spec./Installation
Remove the right side cover.
EJM8A-E-SMA060203-A01-00
Page 6-2-3-2
Slide the shutter.
Place it on the bottom of the head
holding bracket.
Slide the shutter.
Remove the nozzle changer.
Tool/Spec./Installation
Allen key 4 mm
Screw M5 3 pcs.
6
5
Disconnect the cylinder air tube.
Tool/Spec./Installation
RemarkItem
Allen key 4 mm
Screw M5 3 pcs.
8
7
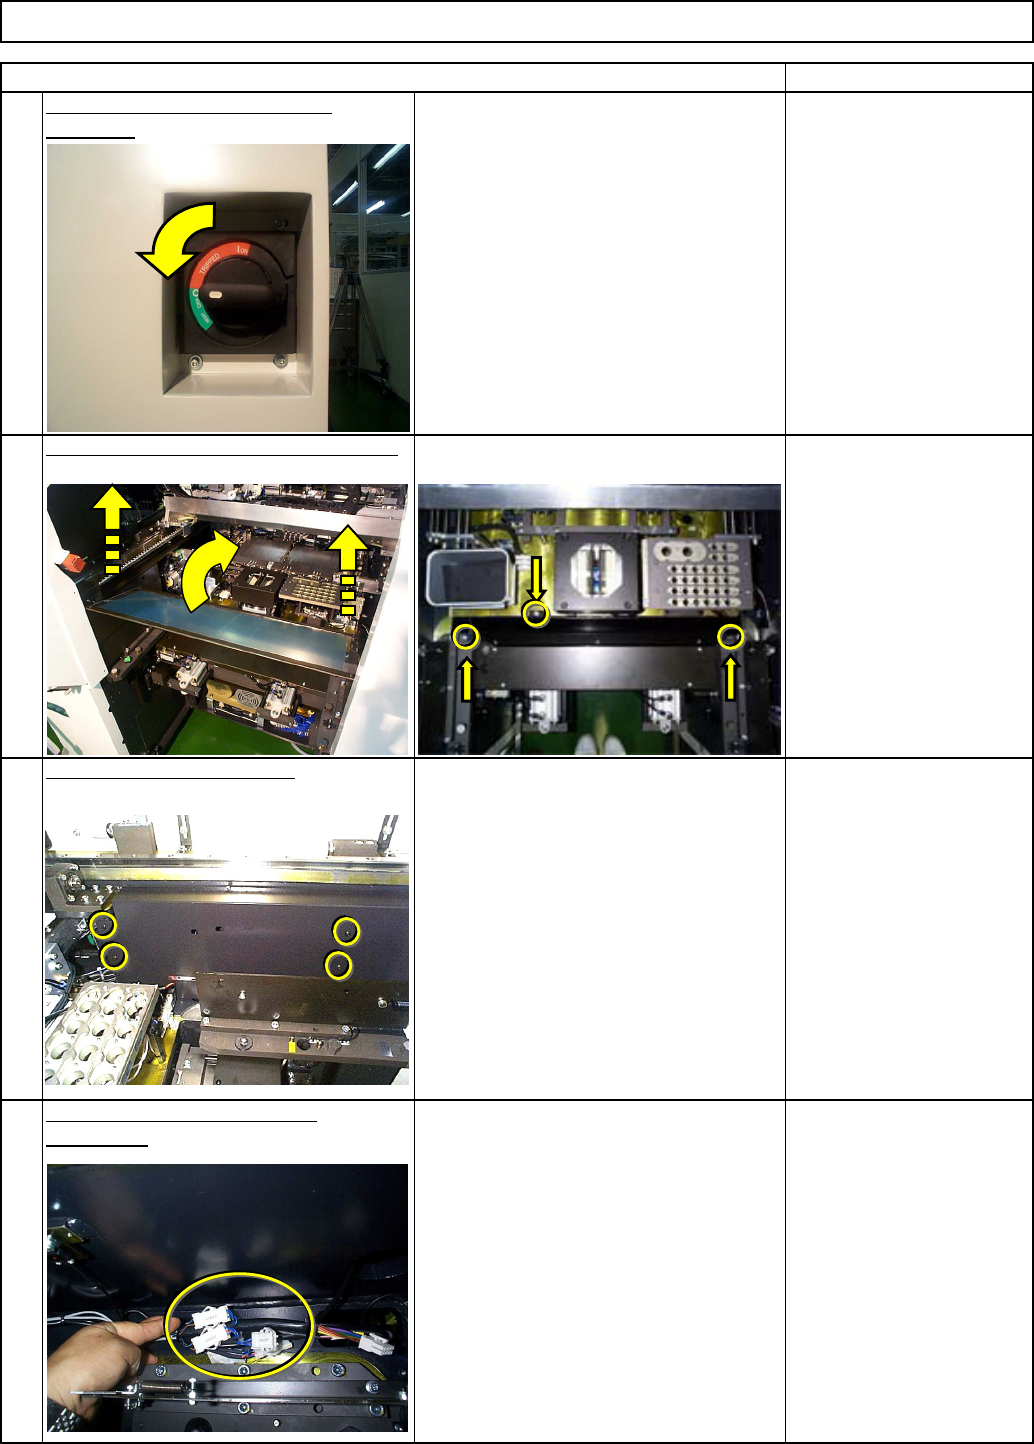
Install the nozzle changer.
Tool/Spec./Installation
Place the iron plate on the bottom of
Tool/Spec./Installation
the head.
Iron plate
Magnetic stand
Dial gauge
Screw M4
Nozzle Changer Unit (3-nozzle type)Optional Part and Accessory Replacement
EJM8A-E-SMA060203-A01-00
Page 6-2-3-3
Nozzle Changer Unit (3-nozzle type)Optional Part and Accessory Replacement
Item Remark
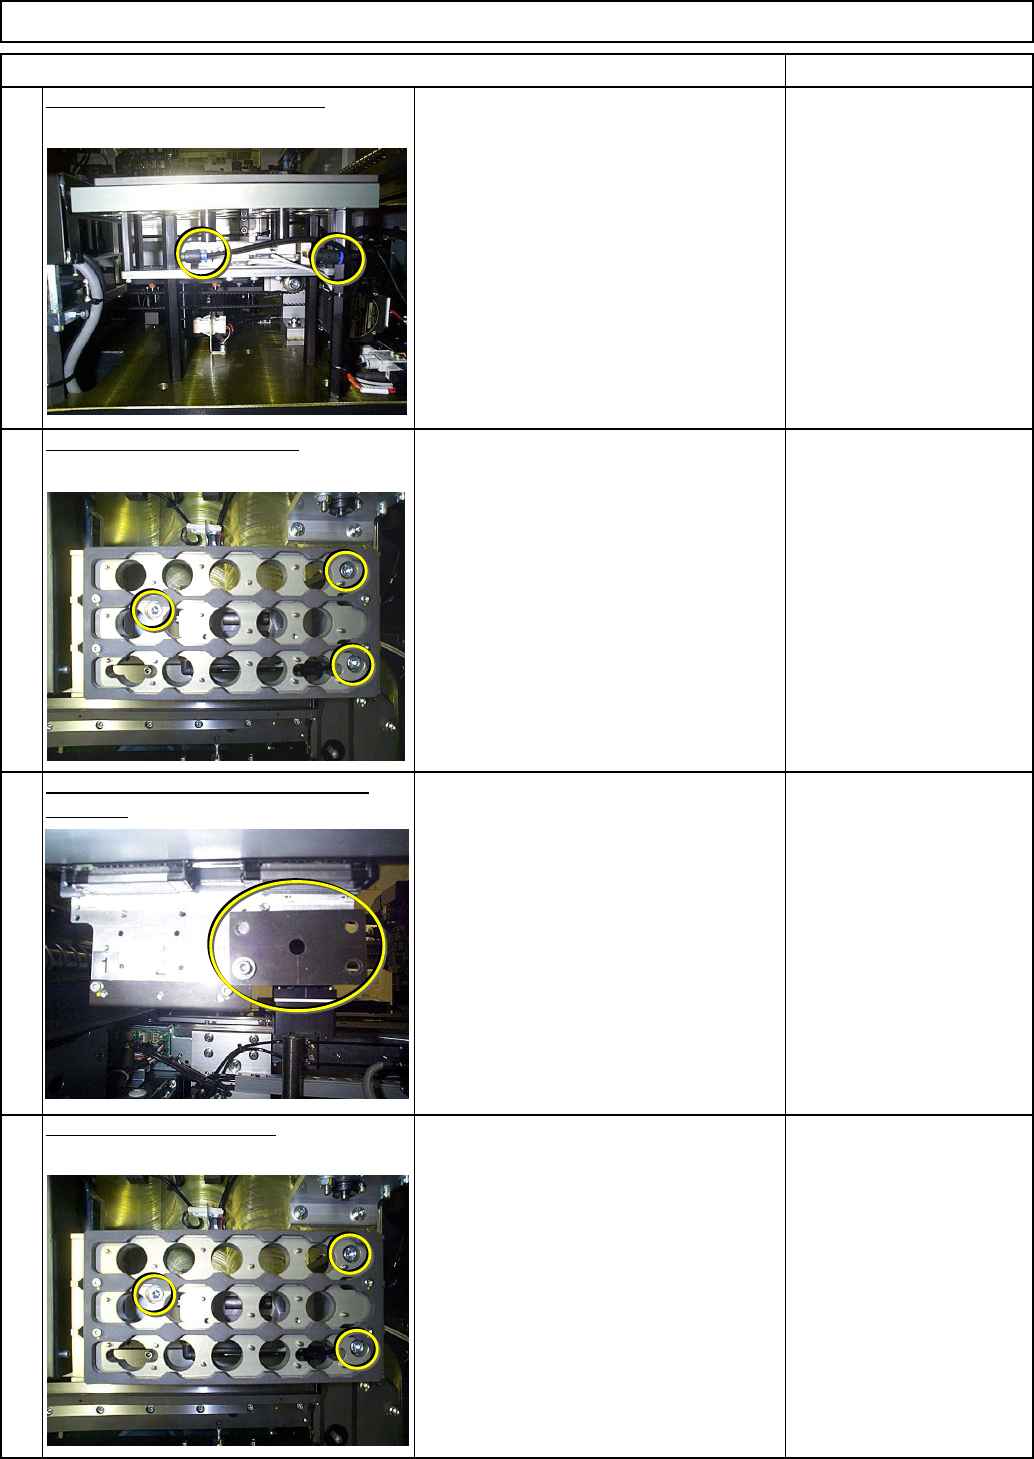
9
Adjust the nozzle changer so that
Tool/Spec./Installation
it is parallel.
Specifications:
Parallelism:
0.02 mm or less
Tool/Spec./Installation
Phillips screwdriver #2
Screw M4 4 pcs.
Tool/Spec./Installation
connectors.
Put the right side cover back on.
Tool/Spec./Installation
11
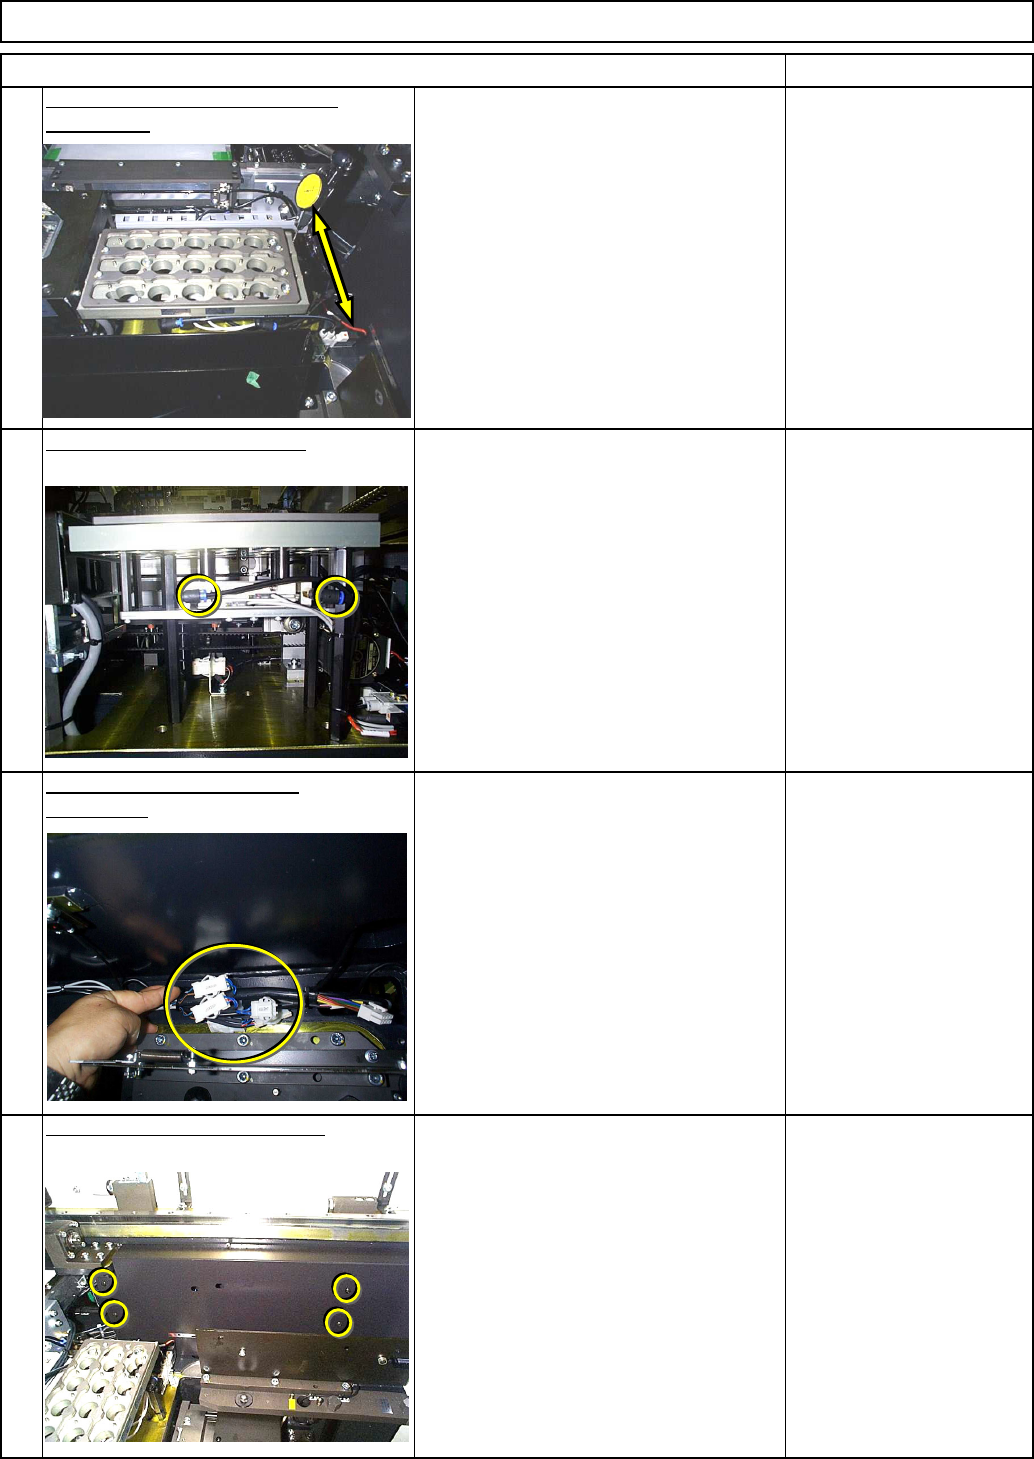
Connect the nozzle changer
10
Connect the cylinder air hose.
12
EJM8A-E-SMA060203-A01-00
Page 6-2-3-4