CM602all_EJM8AESM_Service Manual.pdf - 第789页
Remark Remove all the nozzles from the head. * When removing a nozzle, the ball spline shaft may be curved. Use the nozzle changer when removing a nozzle. When a nozzle changer is not mounted, hold the black holder by ha…
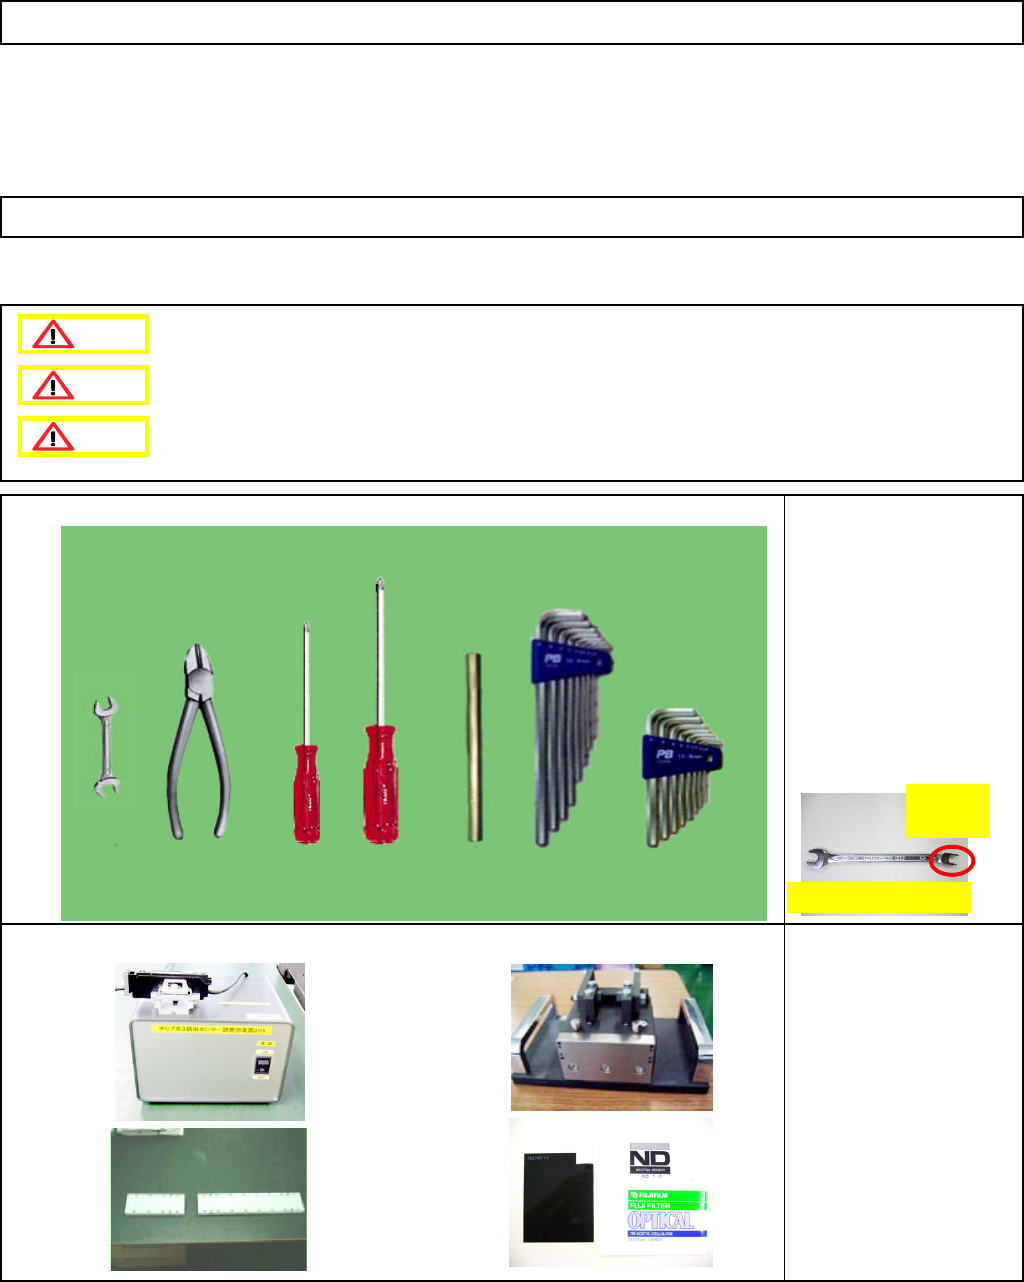
• Tools
Phillips screwdriver #1
Phillips screwdriver #2
Allen key Long/short
Pipe
Nipper
Wrench Size 6
Special wrench Size 6
Non-magnetic wrench set
• Jigs
Cover Large/Small
FM-1853(1)
Component-height-
detection-sensor-
adjusting power source
FM-1853(2)
Component-thickness-
sensor-light-axis-
adjusting jig
ND filter
N510013050AA
Component-Thickness-Measuring Unit
6-4-2 Component-Thickness-Sensor Replacement (12-Nozzle-Head Specifications)
Preparation: Remove all the nozzles and nozzle holders from the head.
[Caution before replacement] * Since there are magnets, great care must be taken
to ensure safety when working on the machine.
Option Part and Accessory Replacement
This section describes the procedures for replacing the component-thickness sensor (12-nozzle-head spec.).
Special wrench (Size 6)
H-shaped
cut
Dange
r
Warning
Caution
EJM8A-E-SMA060402-A01-01
Page 6-4-2-1
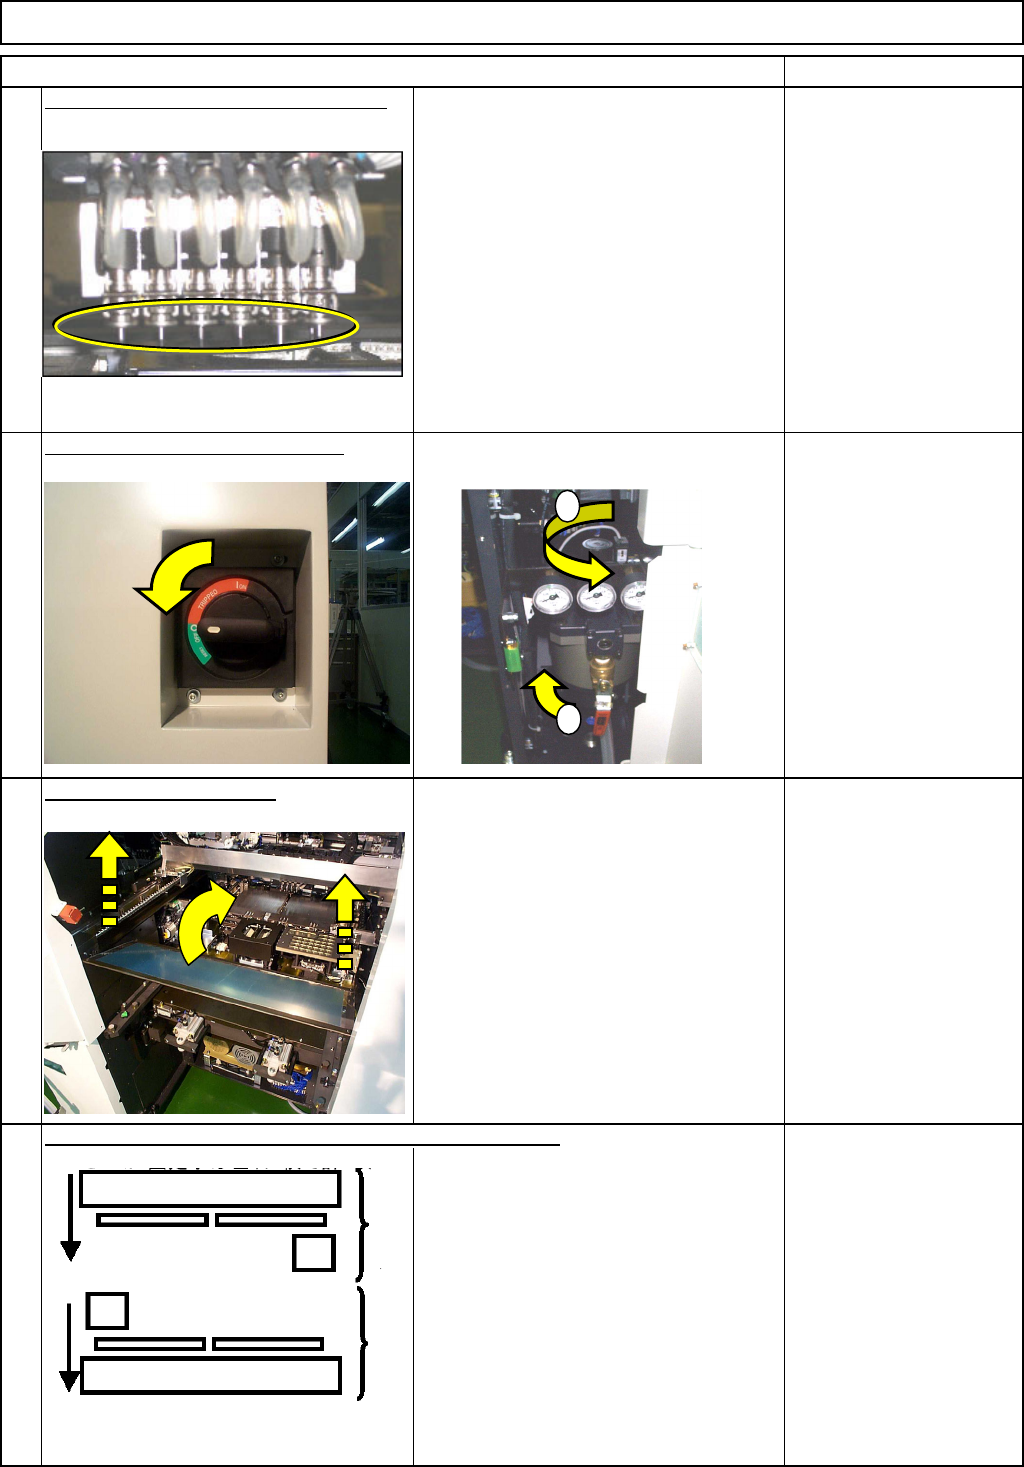
Remark
Remove all the nozzles from the head.
* When removing a nozzle, the ball
spline shaft may be curved. Use the
nozzle changer when removing a
nozzle.
When a nozzle changer is not
mounted, hold the black holder by
hand lightly (so as not to let the axis
descend), and pull the nozzle down
straight. If removing a nozzle without
holding the black holder, a Z-axis-
motor-overload error can occur.
* See Operation manual
5-5-2.
Turn off the air and power supply.
Remove the feeder cover.
3
Allen key 3 mm
Screw M4 4 pcs.
Move the beam whose head will be replaced towards you.
Component-Thickness-Measuring Unit
Option Part and Accessory Replacement
Item
1
2
4
1
2
Rear
Front
EJM8A-E-SMA060402-A01-01
Page 6-4-2-2
Remark
Component-Thickness-Measuring Unit
Option Part and Accessory Replacement
Item
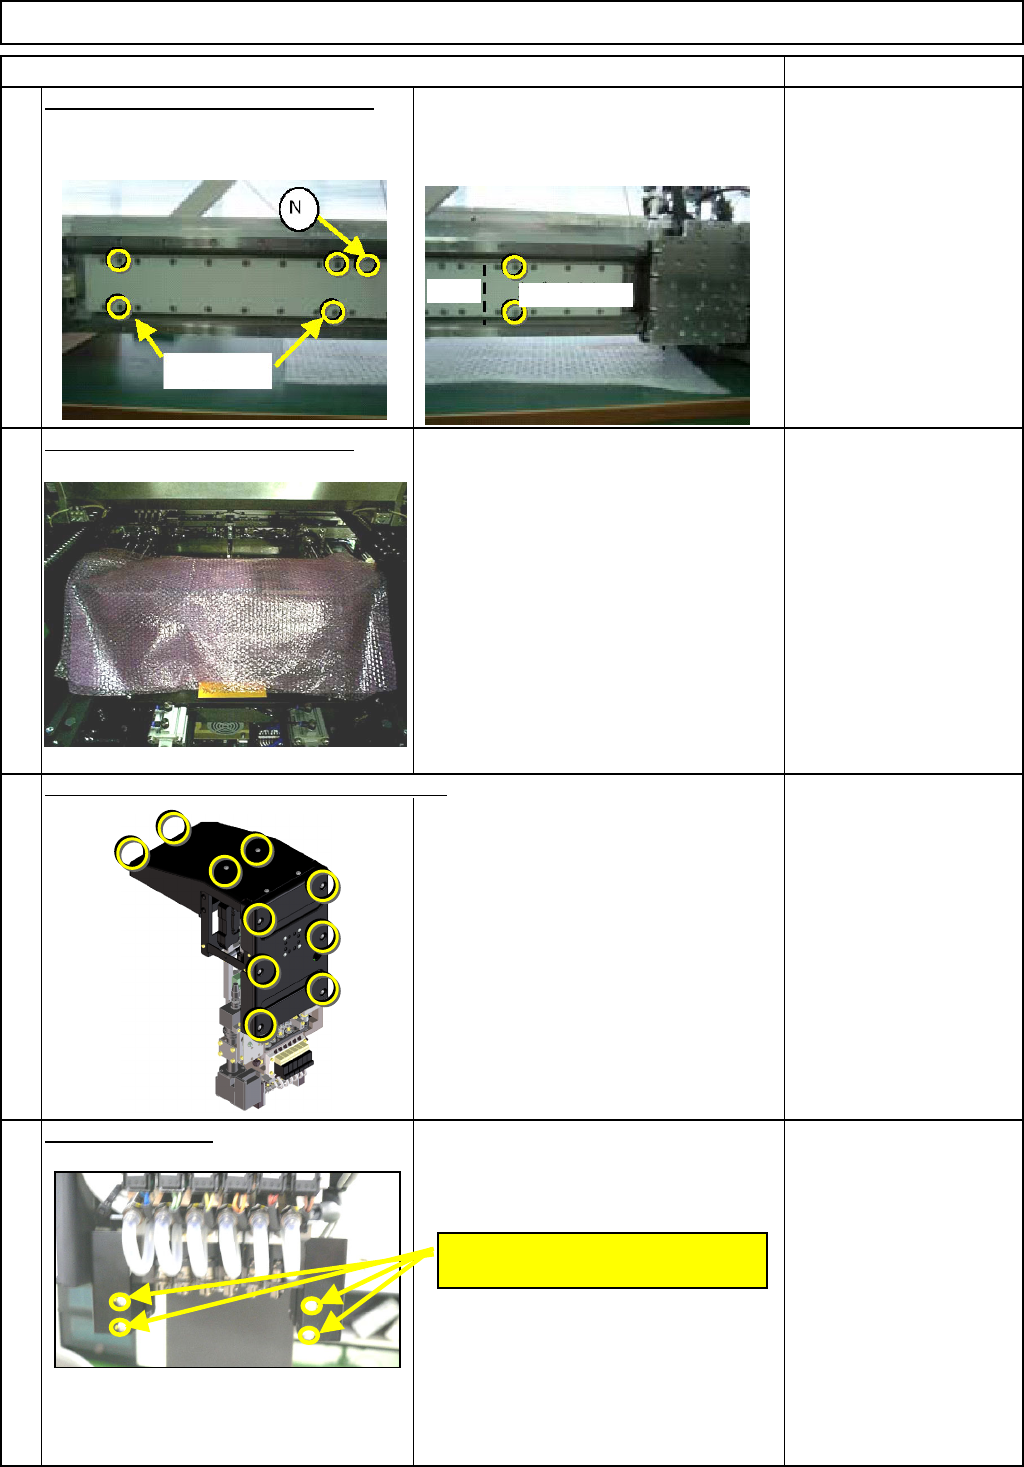
Put the covers
(
Lar
g
e
)
(
Small
)
on the
5
secondary part. * There are magnets. To ensure safety,
use the covers when working on the
machine.
Bolts that come with the
cover (Large): 4 pcs.
Bolts that come with the
cover (Small): 2 pcs.
* Non-magnetic Allen key
Put bubble wra
p
on the line sensor
To avoid losing bolts and the other parts
when they fall down accidentally.
Bubble wrap
7
Phillips screwdriver #2
Truss screw M4 10 pcs.
Remove the cover.
Remove the two "M2.6 x 4L" bolts from
each side: front and rear.
Phillips screwdriver #1
8
6
Remove the head cover and the upper cover.
M2.6 x 4L
(Two for each side: Front and Rear)
Bolts
Cover (Small)
(Large)
EJM8A-E-SMA060402-A01-01
Page 6-4-2-3