CM602all_EJM8AESM_Service Manual.pdf - 第791页
Remark Component-Thickness-Measuring Unit Option Part and Accessory Replacement Item Cut off the sensor-cable-holdin g cable Nippers 10 Nippers Nippers 9 11 Cut off the sensor-cable-holding cable ties. Cut off the sensor…
Remark
Component-Thickness-Measuring Unit
Option Part and Accessory Replacement
Item
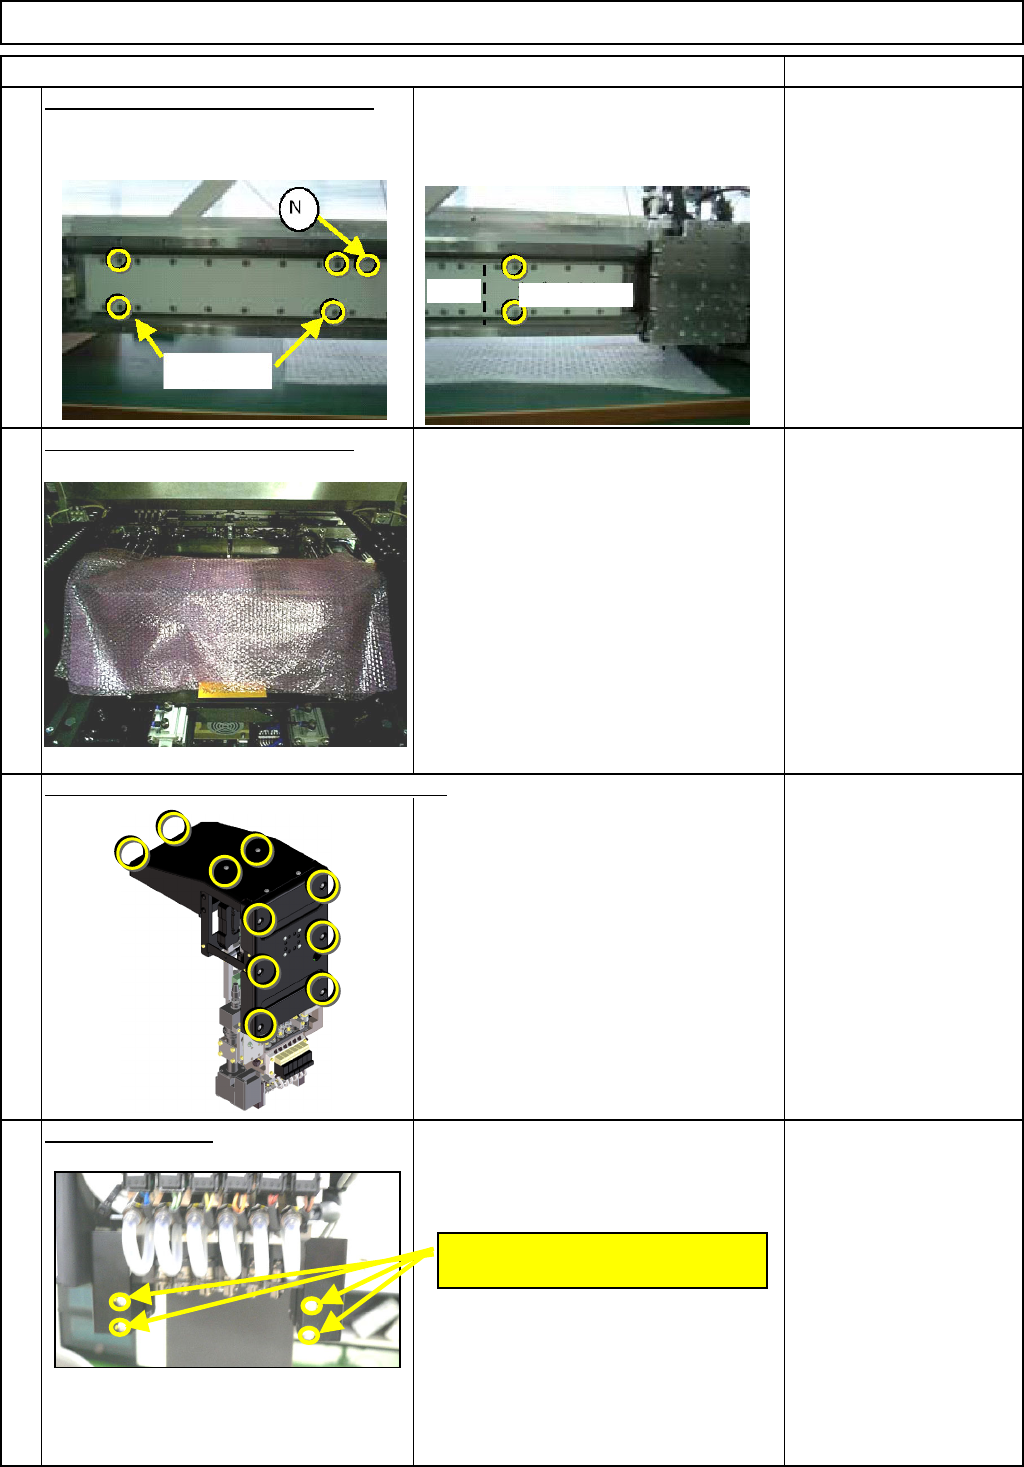
Put the covers
(
Lar
g
e
)
(
Small
)
on the
5
secondary part. * There are magnets. To ensure safety,
use the covers when working on the
machine.
Bolts that come with the
cover (Large): 4 pcs.
Bolts that come with the
cover (Small): 2 pcs.
* Non-magnetic Allen key
Put bubble wra
p
on the line sensor
To avoid losing bolts and the other parts
when they fall down accidentally.
Bubble wrap
7
Phillips screwdriver #2
Truss screw M4 10 pcs.
Remove the cover.
Remove the two "M2.6 x 4L" bolts from
each side: front and rear.
Phillips screwdriver #1
8
6
Remove the head cover and the upper cover.
M2.6 x 4L
(Two for each side: Front and Rear)
Bolts
Cover (Small)
(Large)
EJM8A-E-SMA060402-A01-01
Page 6-4-2-3
Remark
Component-Thickness-Measuring Unit
Option Part and Accessory Replacement
Item
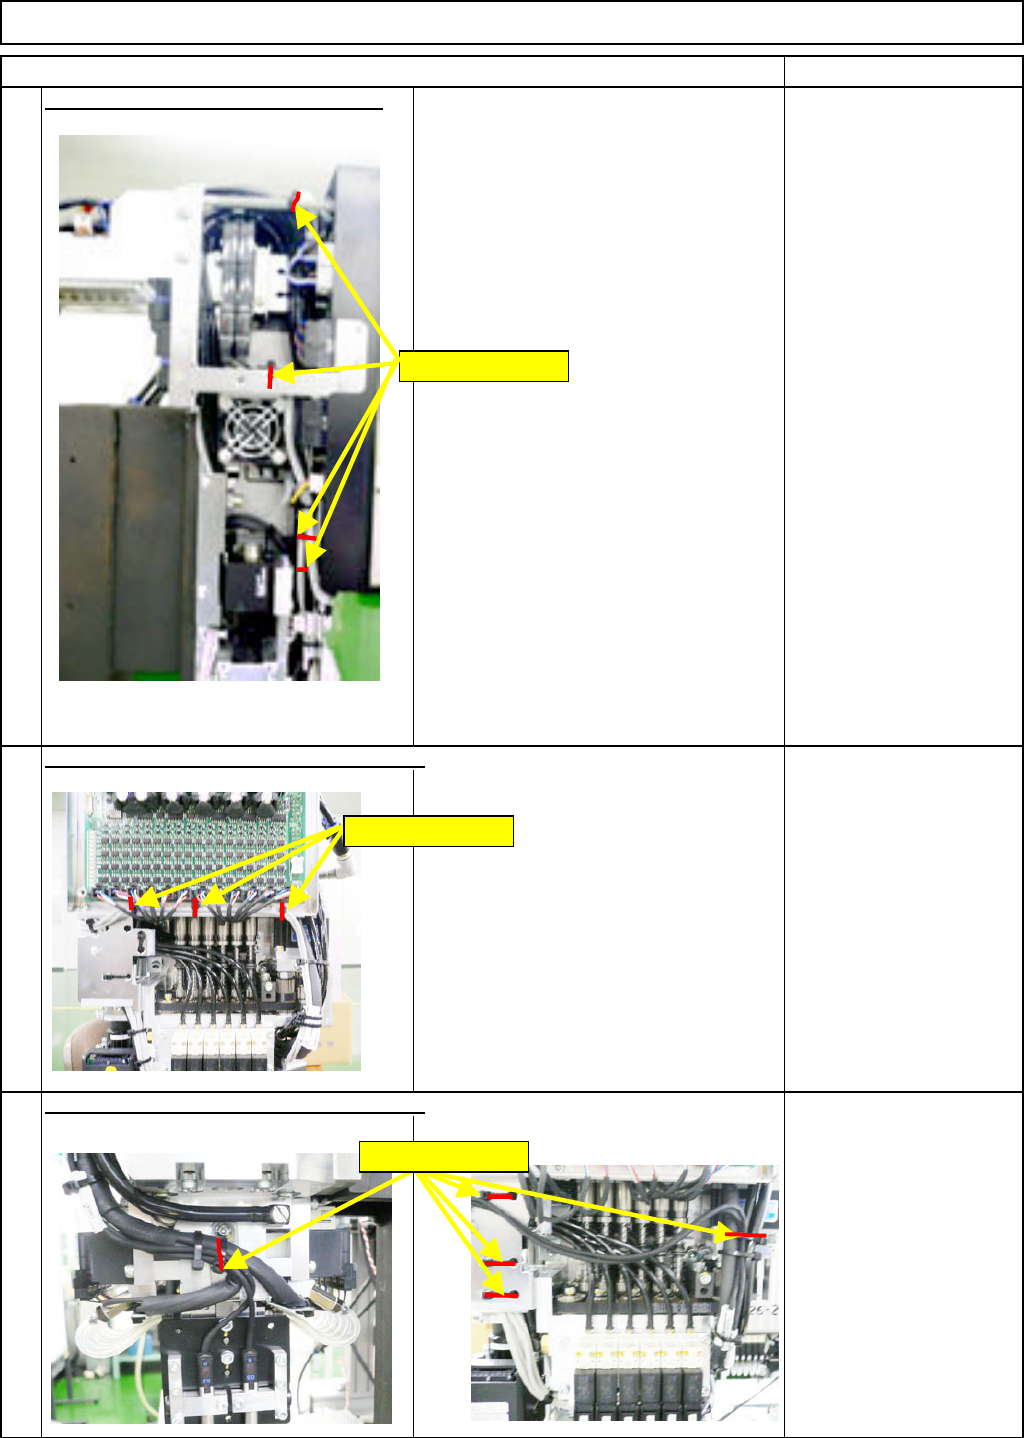
Cut off the sensor-cable-holdin
g
cable
Nippers
10
Nippers
Nippers
9
11
Cut off the sensor-cable-holding cable ties.
Cut off the sensor-cable-holding cable ties.
Holding cable ties
Holding cable ties
Holding cable ties
EJM8A-E-SMA060402-A01-01
Page 6-4-2-4
Remark
Component-Thickness-Measuring Unit
Option Part and Accessory Replacement
Item
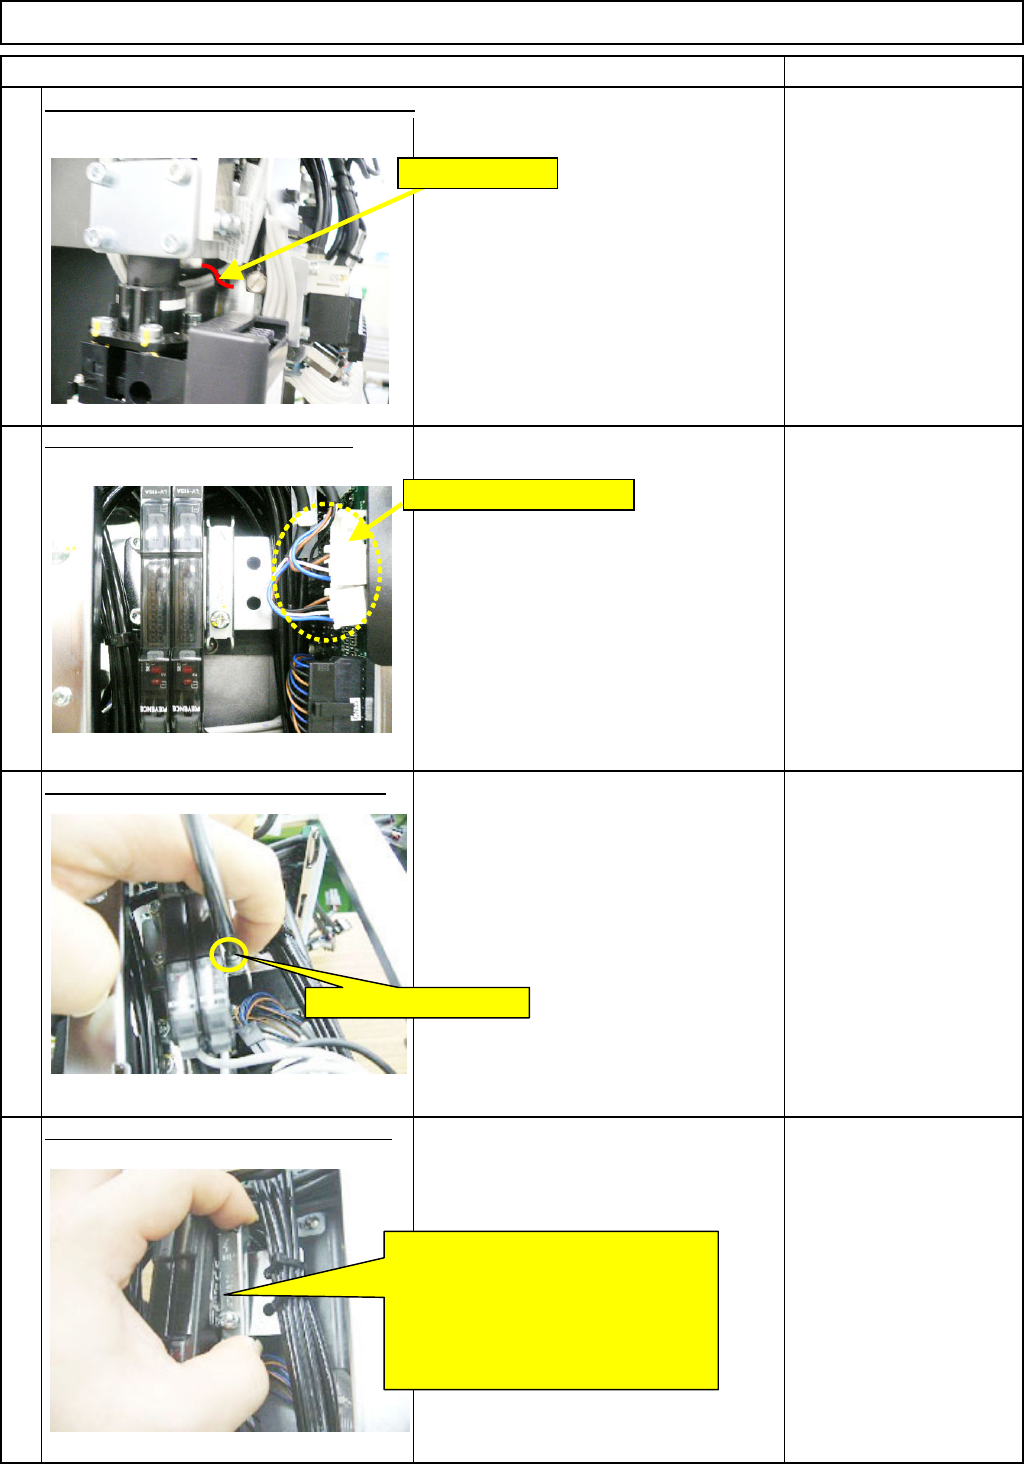
Nippers
Disconnect Connectors 39 and 40.
13
Remove the am
p
lifier-holdin
g
bolt.-
(
1
)
14
Phillips screwdriver #2
Screw M4
Remove the am
p
lifier-holdin
g
bolt. -
(
2
)
15
12
Cut off the sensor-cable-holding cable tie.
Remove CNs 39 and 40.
Loosen the holding bolt.
Move the bracket in the ↑ direction.
Pull the bolt-less end of the bracket
towards you to unlock that end.
Move the bracket in the ↓ direction
to unlock the bolt end of the bracket.
Remove the bracket.
Holding cable tie
EJM8A-E-SMA060402-A01-01
Page 6-4-2-5