CM602all_EJM8AESM_Service Manual.pdf - 第792页
Remark Component-Thickness-Measuring Unit Option Part and Accessory Replacement Item Nippers Disconnect Connectors 39 and 40. 13 Remove the am p lifier-holdin g bolt.- ( 1 ) 14 Phillips screwdriver #2 Screw M4 Remove the…
Remark
Component-Thickness-Measuring Unit
Option Part and Accessory Replacement
Item
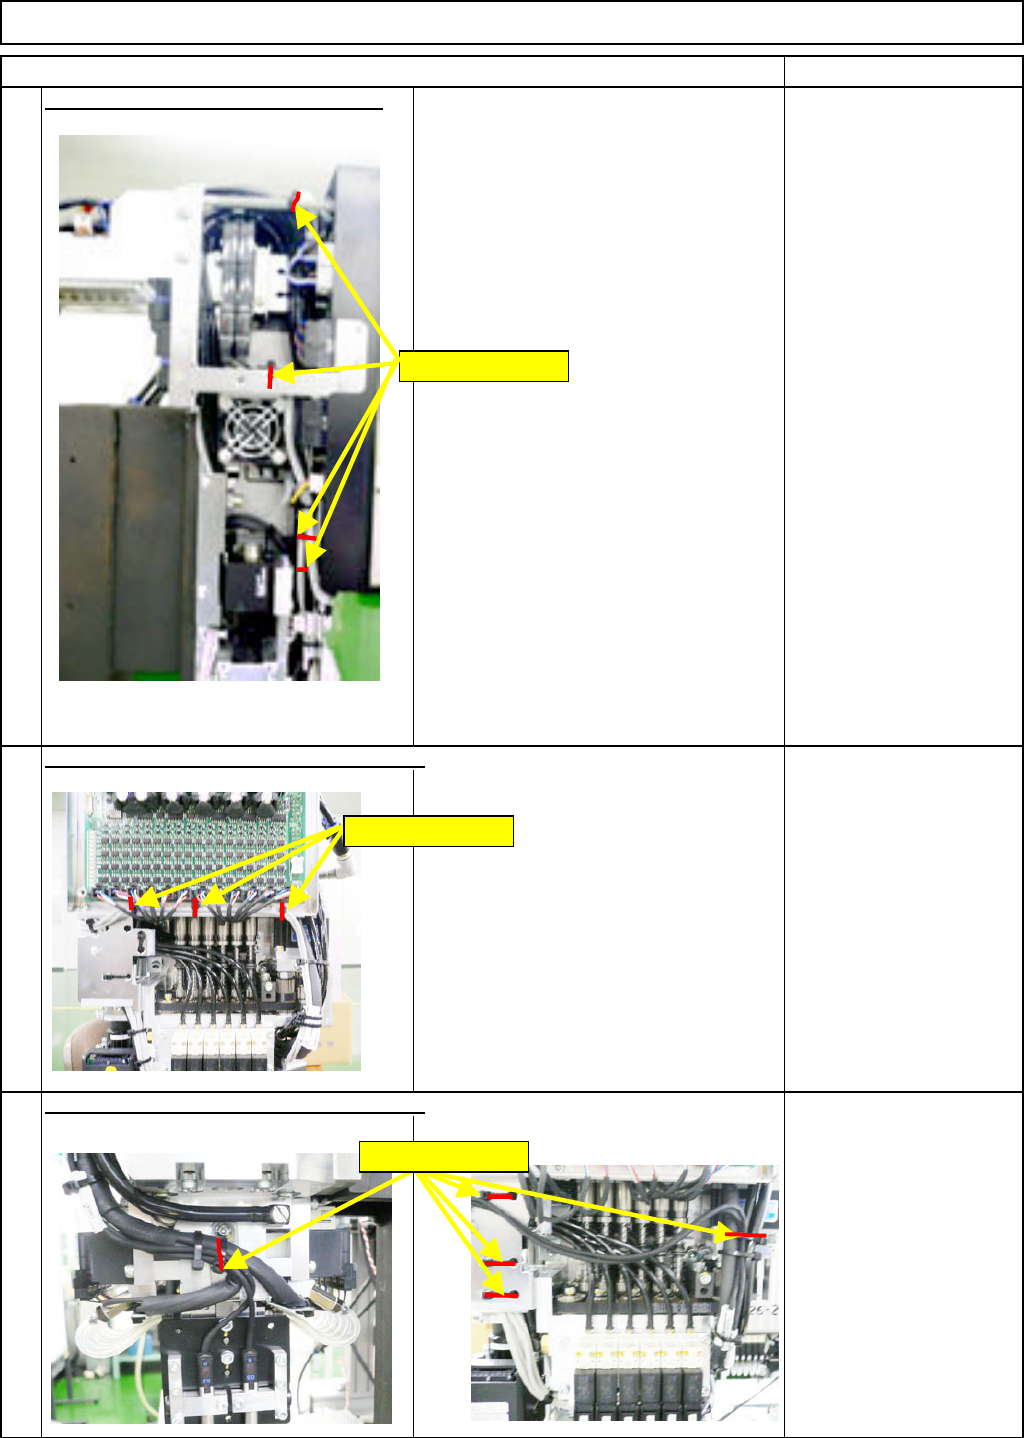
Cut off the sensor-cable-holdin
g
cable
Nippers
10
Nippers
Nippers
9
11
Cut off the sensor-cable-holding cable ties.
Cut off the sensor-cable-holding cable ties.
Holding cable ties
Holding cable ties
Holding cable ties
EJM8A-E-SMA060402-A01-01
Page 6-4-2-4
Remark
Component-Thickness-Measuring Unit
Option Part and Accessory Replacement
Item
Nippers
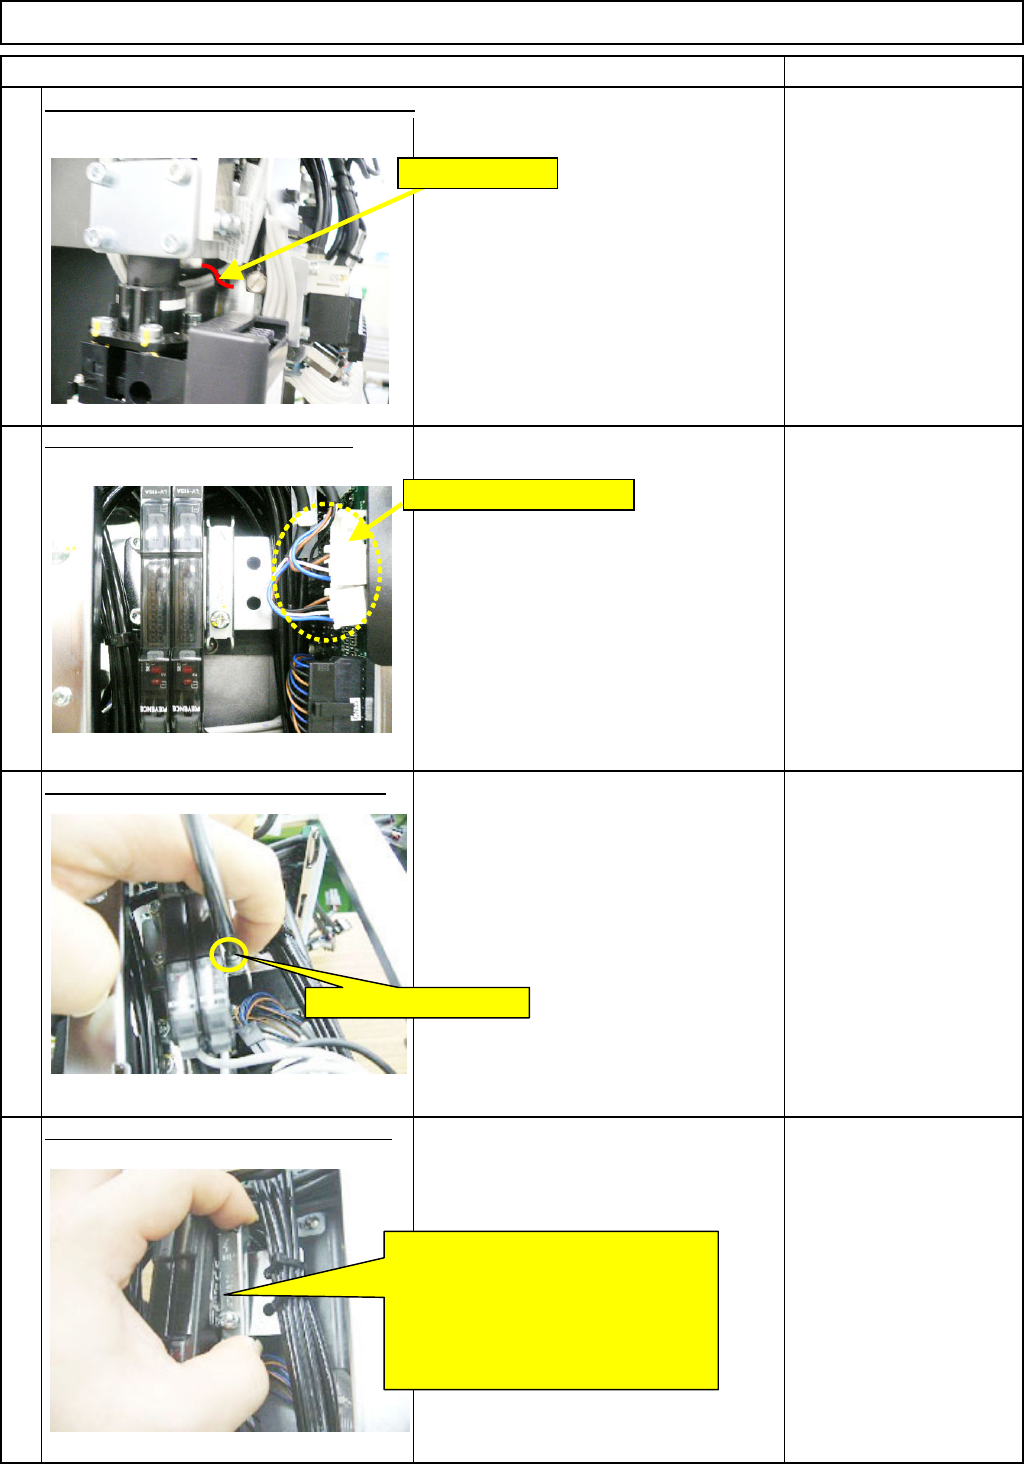
Disconnect Connectors 39 and 40.
13
Remove the am
p
lifier-holdin
g
bolt.-
(
1
)
14
Phillips screwdriver #2
Screw M4
Remove the am
p
lifier-holdin
g
bolt. -
(
2
)
15
12
Cut off the sensor-cable-holding cable tie.
Remove CNs 39 and 40.
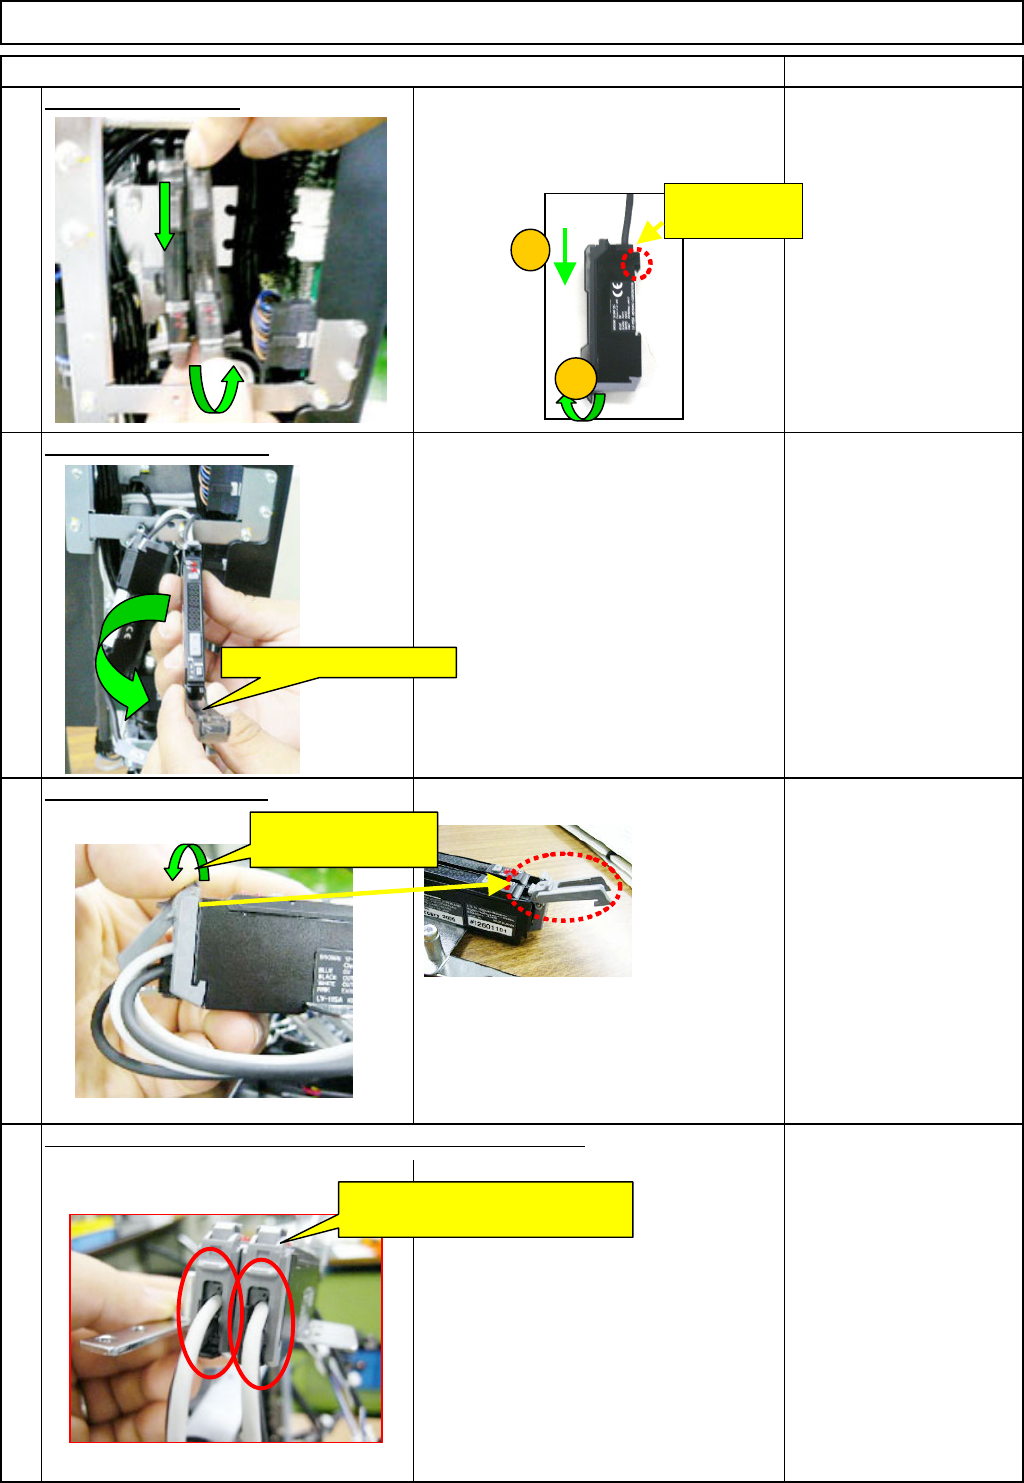
Loosen the holding bolt.
Move the bracket in the ↑ direction.
Pull the bolt-less end of the bracket
towards you to unlock that end.
Move the bracket in the ↓ direction
to unlock the bolt end of the bracket.
Remove the bracket.
Holding cable tie
EJM8A-E-SMA060402-A01-01
Page 6-4-2-5
Remark
Component-Thickness-Measuring Unit
Option Part and Accessory Replacement
Item
Remove the am
p
lifier.
Move the amplifier in the (1) and (2)
directions below, and remove the
amplifier.
O
p
en the am
p
lifier cover.
17
Open the connector lock.
19
16
18
Remove the sensor cables from the amplifier-connector lock.
Open the connector
lock.
Remove the sensor cables from
the amplifier-connector locks.
Open the amplifier cover.
1
2
This hook can
move.
EJM8A-E-SMA060402-A01-01
Page 6-4-2-6