CM602all_EJM8AESM_Service Manual.pdf - 第819页
• Tools Phillips screwdriver #2 Allen key Long/Short Nipper • Jigs FM-1962 (1) (2) Component-thickness- measuring-unit-optical- axis-adjusting jig (1. Component-height- detection-sensor- adjusting power box 2. Component-…
Option Part and Accessory Replacement
Component-Thickness-Measuring Unit
Remark
Item
16
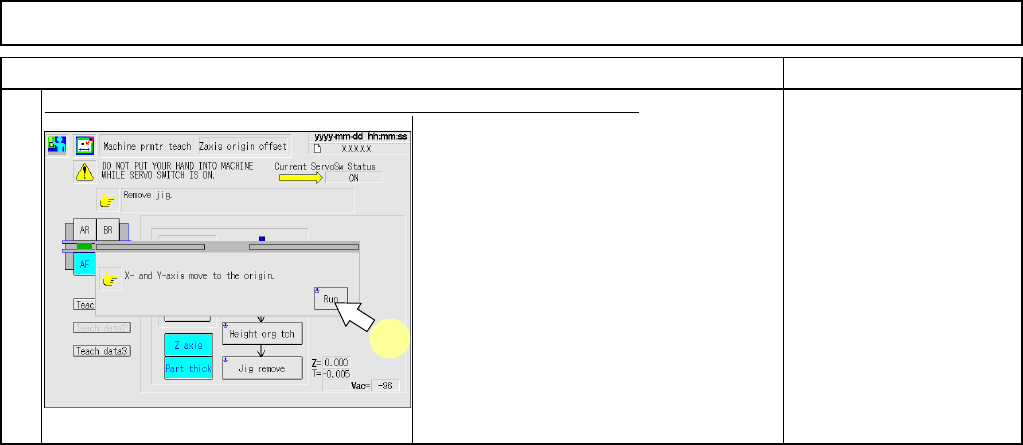
Press [UNLOCK] on the operation panel and [Run] simultaneously.
16
EJM8A-E-SMA060403-A01-00
Page 6-4-3-11
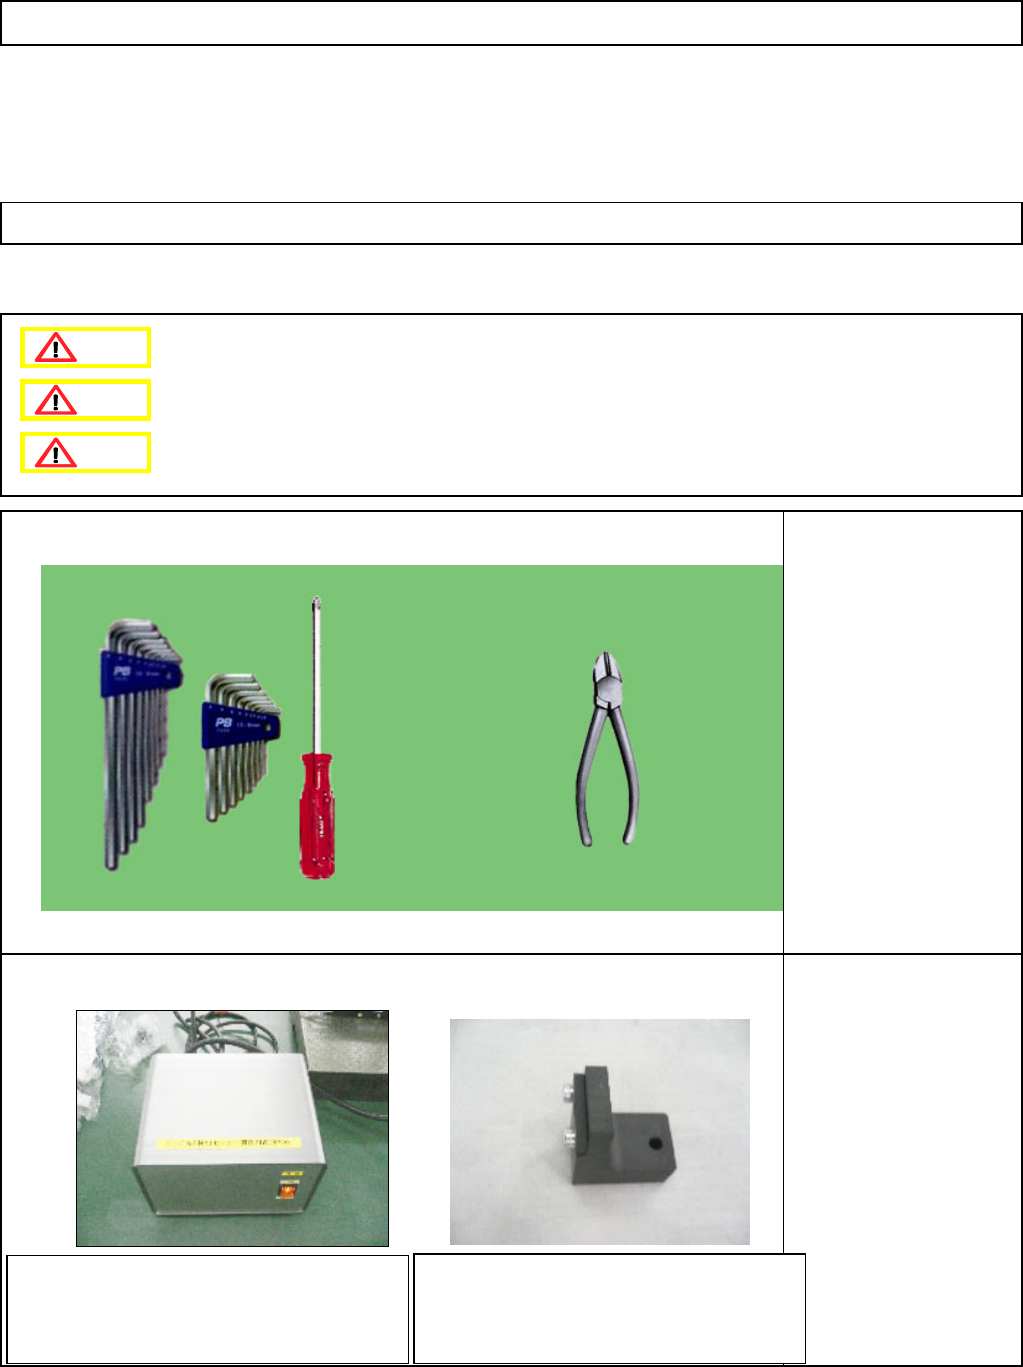
• Tools
Phillips screwdriver #2
Allen key Long/Short
Nipper
• Jigs
FM-1962 (1) (2)
Component-thickness-
measuring-unit-optical-
axis-adjusting jig
(1. Component-height-
detection-sensor-
adjusting power box
2. Component-thickness-
measuring-unit-light-axis-
adjusting jig)
Component-Thickness-Measuring Unit
6-4-4 Component-Thickness-Sensor-Amplifier Replacement (8-Nozzle-Head Spec.)
Option Part and Accessory Replacement
This section describes the procedures for replacing the component-thickness-sensor amplifier
(8-nozzle-head specifications).
FM-1962(1) Component-thickness-measuring-unit-
light-axis-adjusting jig
(1. Component-height-detection-sensor-adjusting
power box )
FM-1962(2) Component-thickness-measuring-unit-
light-axis-adjusting jig
(2. Component-thickness-measuring-unit-light-axis-
adjusting jig)
Danger
Warning
Caution
EJM8A-E-SMA060404-A01-00 Page 6-4-4-1
Remarks
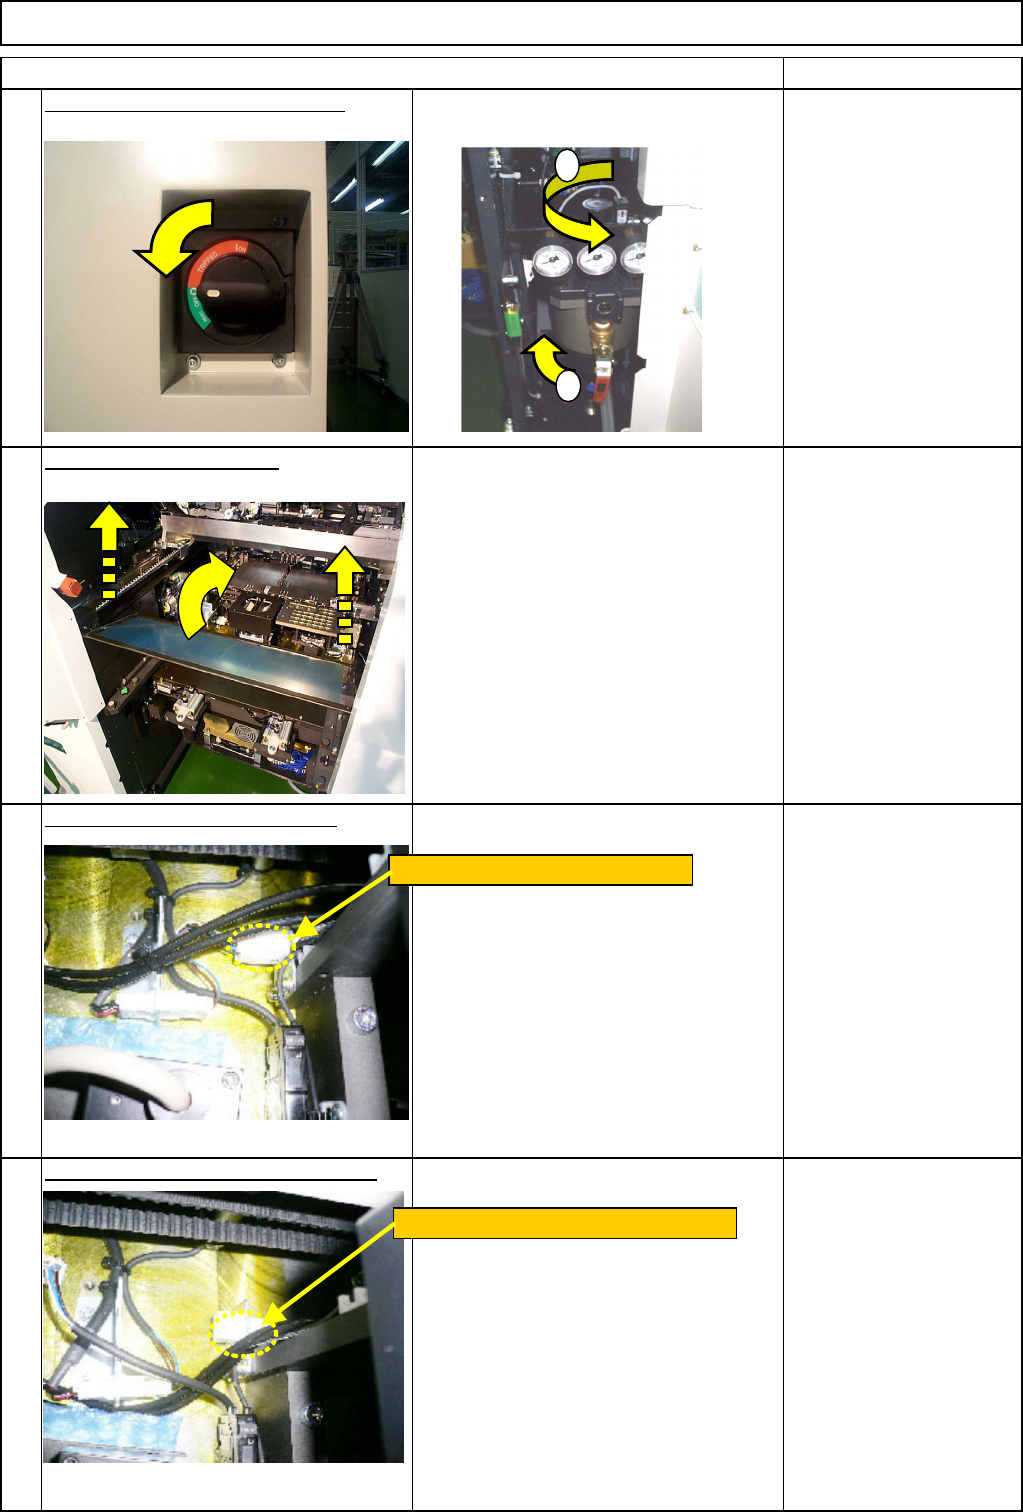
Turn off the air and power supply.
Remove the feeder cover.
Allen key 3 mm
Screw M4 4 pcs.
Remove the amplifier connector.
Remove the I/O link cable connector.
Component-Thickness-Measuring Unit
Item
1
2
3
4
Option Part and Accessory Replacement
1
2
Remove the amplifier connector.
Remove the I/O link cable connector.
EJM8A-E-SMA060404-A01-00
Page 6-4-4-2