CM602all_EJM8AESM_Service Manual.pdf - 第828页
Remarks Component-Thickness-Measuring Unit Item Option Part and Accessory Replacement Check the sensitivity. Amplifier level value: 2000 or more Put the FM-1962(2) component- thickness-sensor-light-axis-adjusting jig bet…
Remarks
Component-Thickness-Measuring Unit
Item
Option Part and Accessory Replacement
Set the output-1 threshold.
Press the "Manual" button until the value
becomes 1250.
Change the amplifier output type to "2."
Output-2 threshold setting
Press the "Manual" button until the value
becomes 2000.
Change the amplifier output type to "1."
32
29
30
31
Threshold
Switch the channel to "2."
Switch the channel to "1."
Threshold
EJM8A-E-SMA060404-A01-00
Page 6-4-4-9
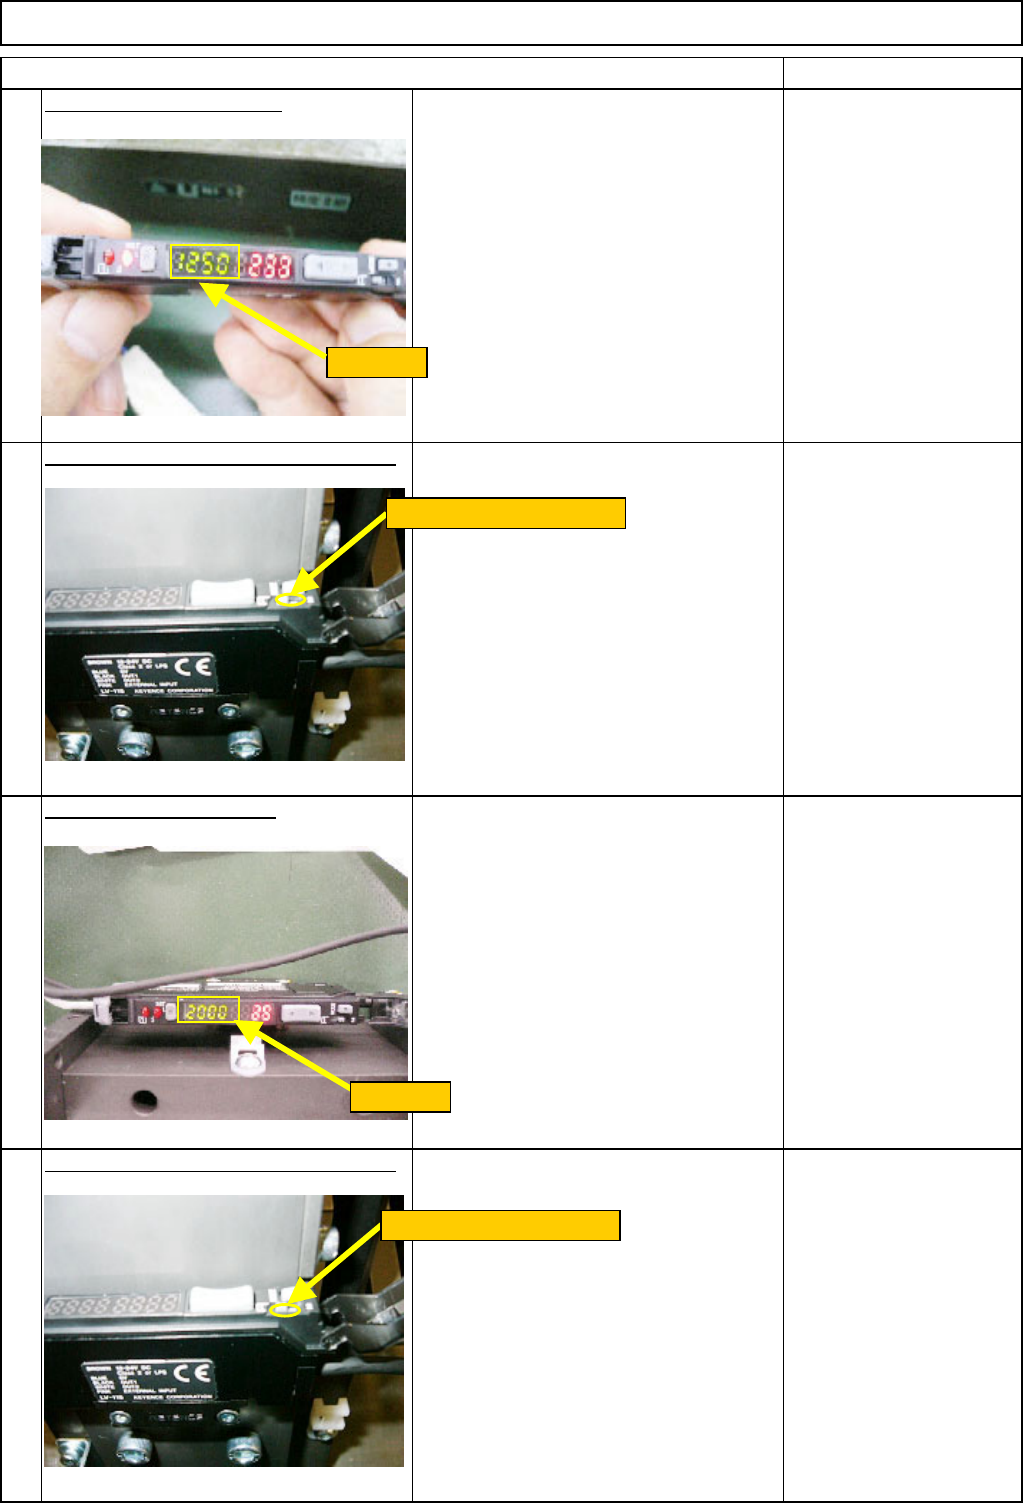
Remarks
Component-Thickness-Measuring Unit
Item
Option Part and Accessory Replacement
Check the sensitivity.
Amplifier level value: 2000 or more
Put the FM-1962(2) component-
thickness-sensor-light-axis-adjusting jig
between the sensors. With the light
reduced, check the amplifier level value
is 2000 or more.
* If the value is less than 2000, see 6-4-5
Component-Thickness-Sensor
Replacement.
FM-1962(2) Component-
thickness-sensor-light-
axis-adjusting jig (2.
Component-thickness-
measuring-unit-light-axis-
adjusting jig)
Set the amplifier key lock.
Press the "Manual" and "Mode" buttons
for some seconds at the same time.
Put the cover back on.
35
Phillips screwdriver #2
36
Allen key M6
M6 x 60L ( 2 pcs.)
34
33
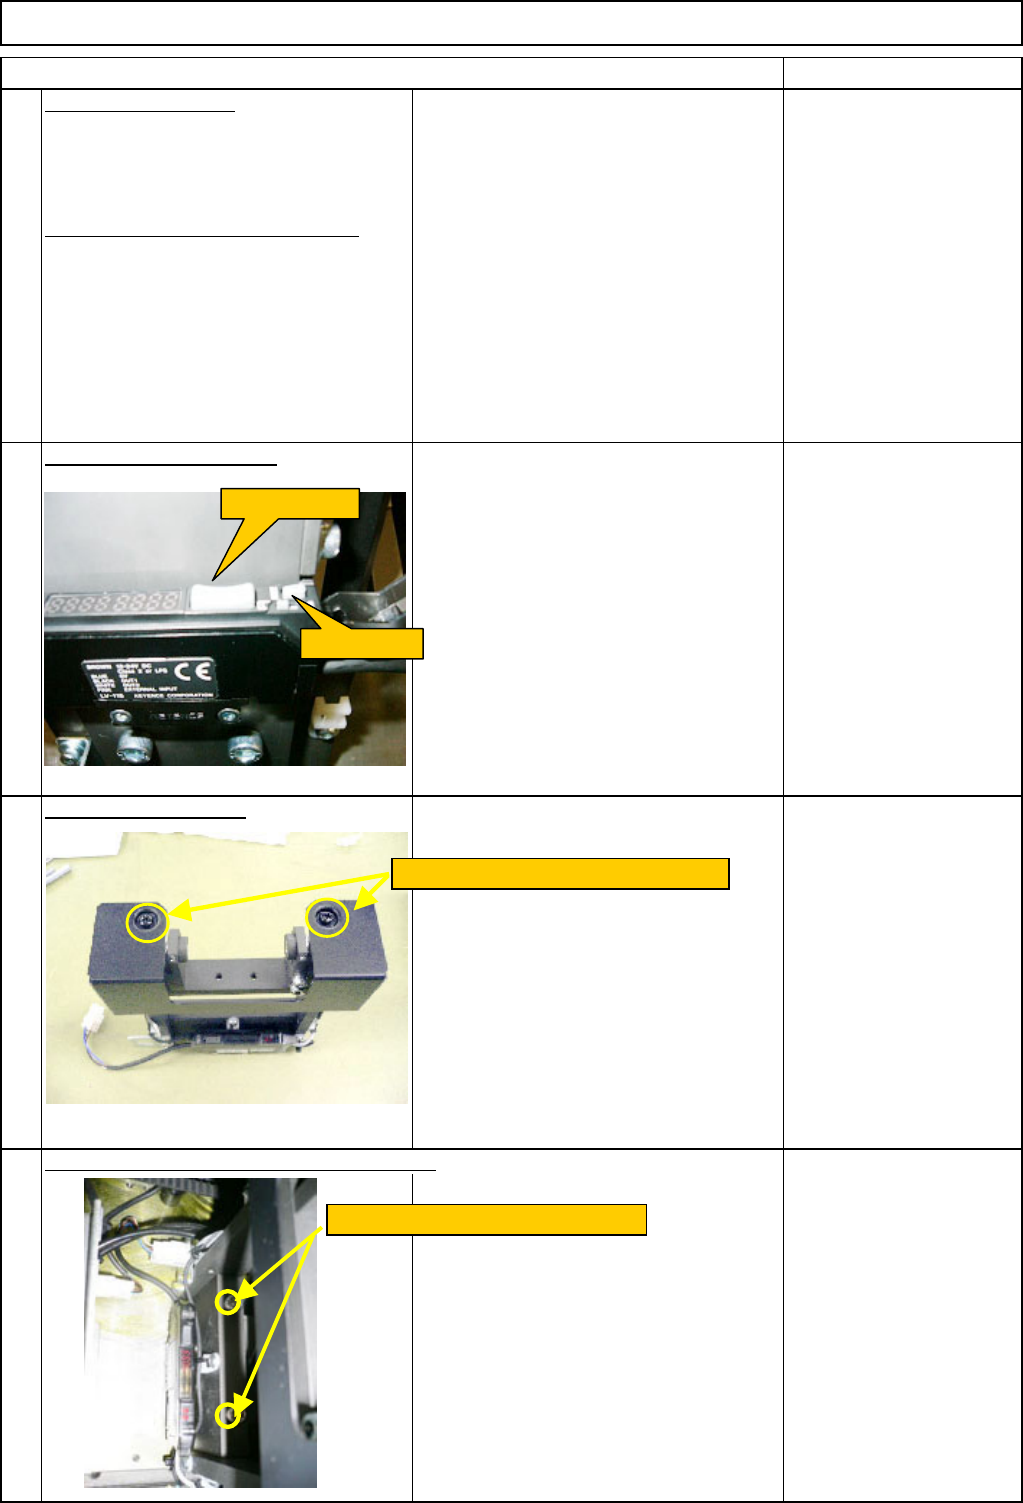
Install the component-thickness-sensor unit.
Manual button
Mode button
Install the cover with two M4 screws.
Install it with two M6 x 60L screws.
EJM8A-E-SMA060404-A01-00
Page 6-4-4-10

Remarks
Component-Thickness-Measuring Unit
Item
Option Part and Accessory Replacement
Connect the I/O link cable connector.
37
Connect the amplifier connector.
38
Put the feeder cover back on.
アンプレベル値:2000以上
Allen key 3 mm
Screw M4 4 pcs.
Turn on the power and air supply.
39
40
1
2
Connect the I/O link cable connector.
Connect the amplifier connector.
EJM8A-E-SMA060404-A01-00
Page 6-4-4-11