CM602all_EJM8AESM_Service Manual.pdf - 第90页
Select (7) Teach Posi L table. ⇒ Change it to "Teach Posi R table. " Select (6) Pickup pos teach. Select (5) Jig setting Set the jig on the PU No.2 . * Reason for setting on PU No.2 The recognition camera canno…
Installation Machine Installation
Item Remark
77
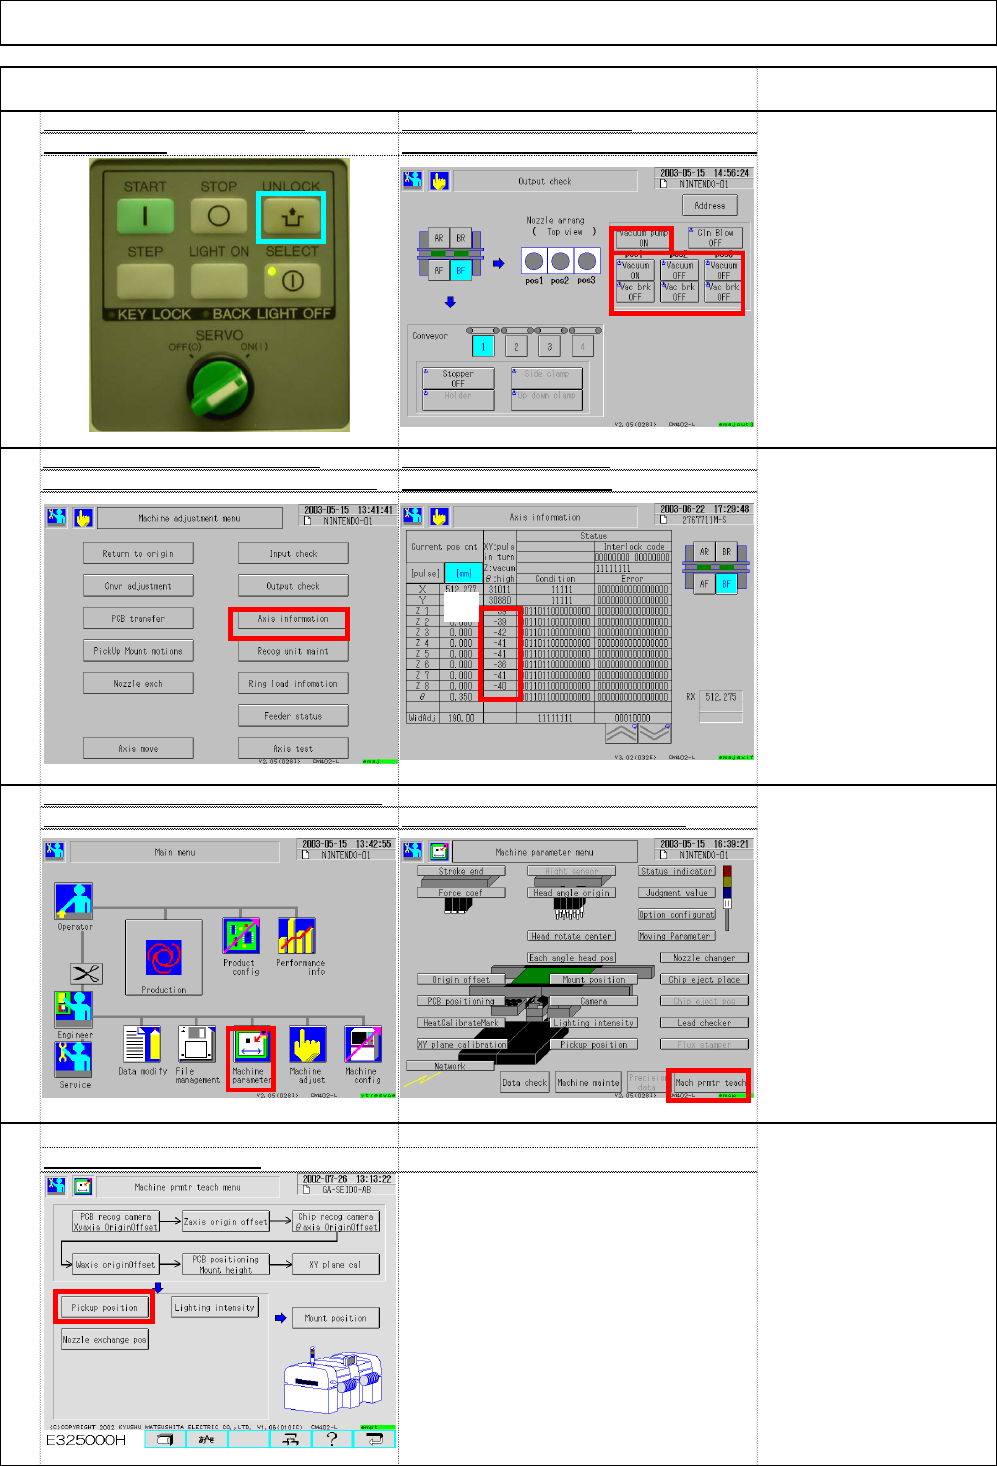
Multi-purpose vacuum pressur
e
Turn on the vacuum pump
check method: (1) Unlock + (2) Vacuum pump (3) Vacuu
m
* To change "Vacuum" to
"ON," press "Unlock" and
"Vacuum."
Turn on all vacuum pumps
and vacuums.
"Machine adjust." Select (4) Axis information
with (5) Axis information
* There should be no large
difference among vacuum
pressures.
(Normally, there is 1 to 2
difference.)
78
After turning on "Vacuum," go to the
Check vacuum pressure
80
79
Check with the pickup position alignme
n
jig. (Option) Select (1) Machine paramet
e
Select "Machine parameter teach
Select (3) Pickup position.
(1)
(4)
(5)
(1)
(2)
(3)
(3)
(2)
EJM8A-E-SMA020103-A01-00 Page 2-1-3-21
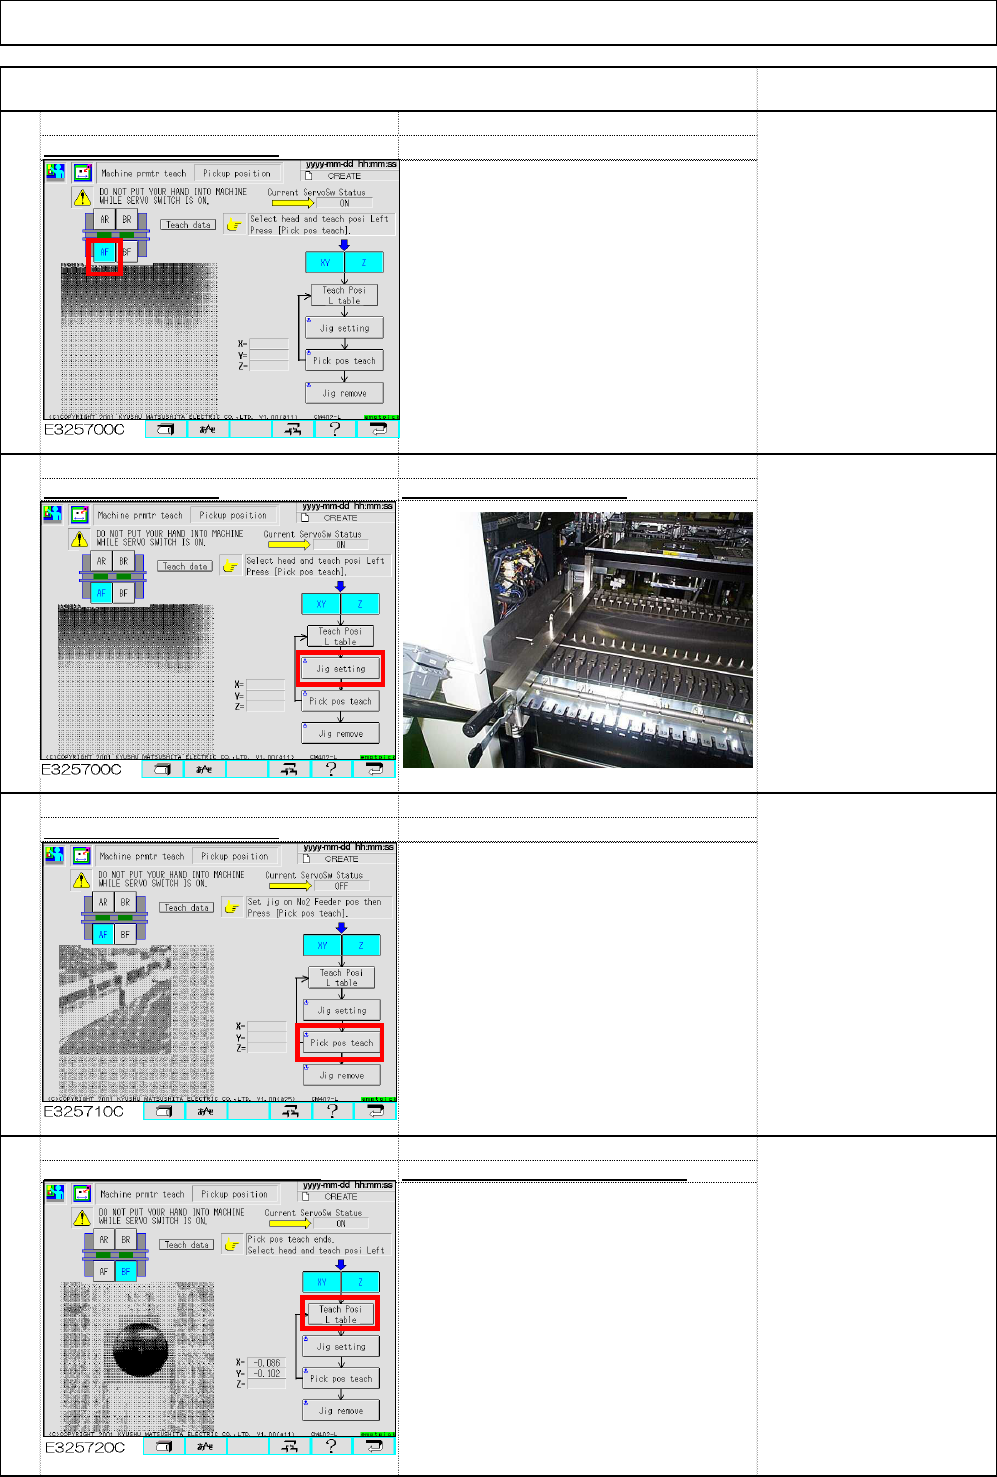
Select (7) Teach Posi L table. ⇒ Change it to "Teach Posi R table.
"
Select (6) Pickup pos teach.
Select (5) Jig setting Set the jig on the PU No.2
.
* Reason for setting on PU
No.2
The recognition camera
cannot move to PU No.1.
Select the desired stage. (4)
82
83
84
Installation Machine Installation
Item Remark
81
(4)
(5)
(6)
(7)
EJM8A-E-SMA020103-A01-00 Page 2-1-3-22
88
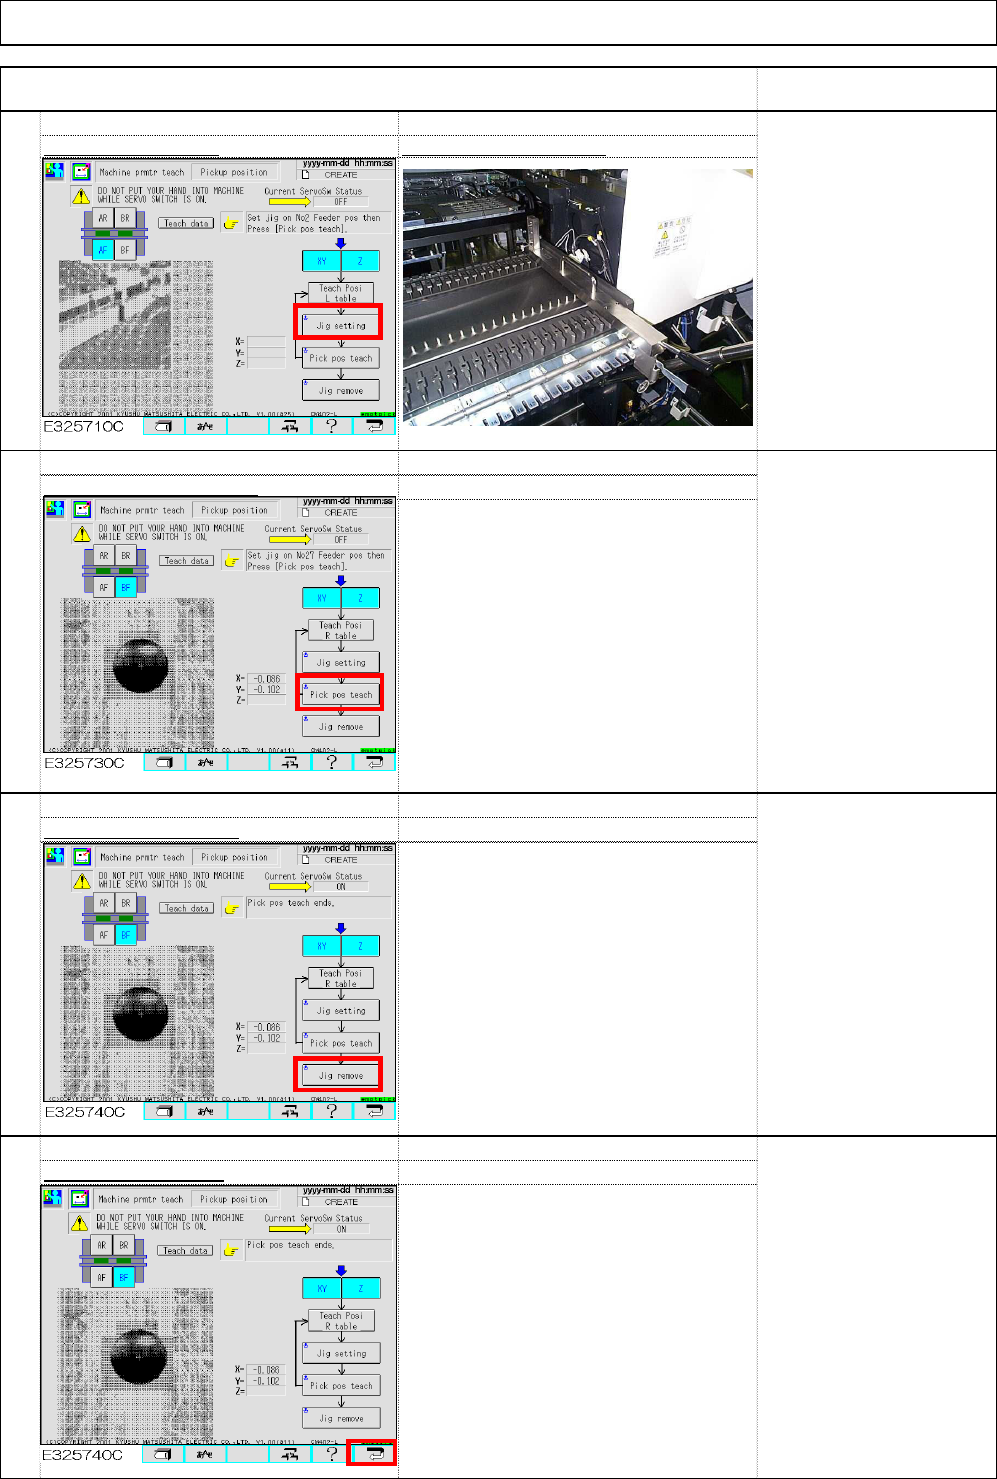
Press (11) return key.
87
Select (10) Jig remove.
86
Select (9) Pick pos teach.
Machine Installation
Item Remark
85
Select (8) Jig setting Set the jig on PU No.27
.
* The camera is installed
right to the head; it can be
positioned on the rightmost
position PU No. 27 when
the right table is taught.
Installation
(8)
(9)
(10)
(11)
EJM8A-E-SMA020103-A01-00 Page 2-1-3-23